
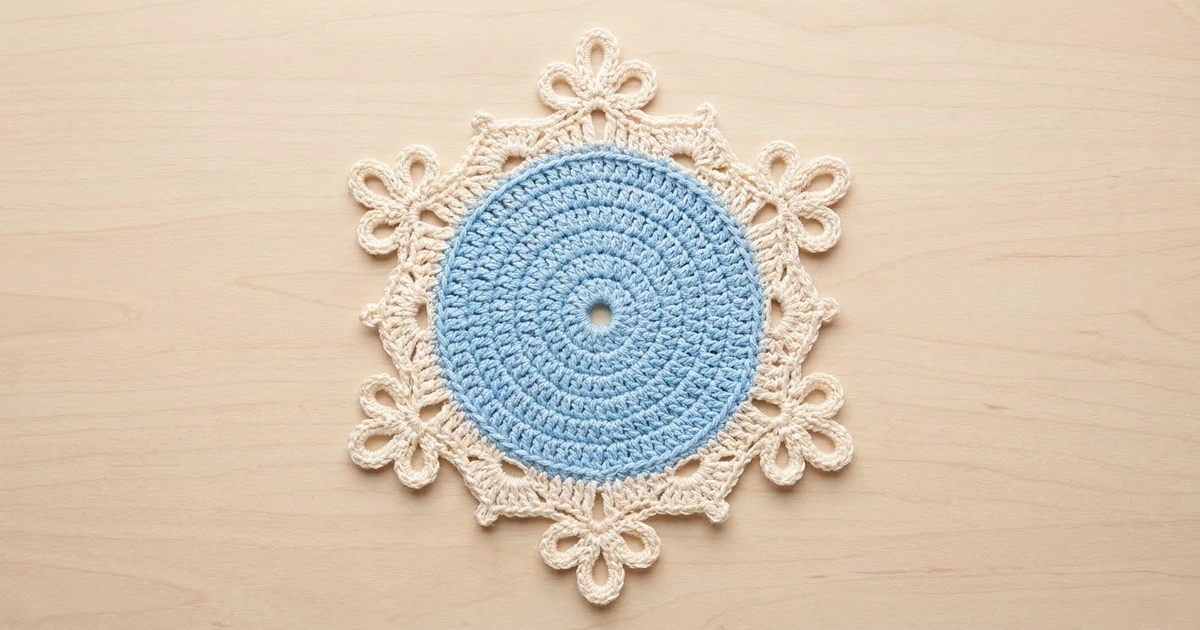
This snowflake coaster has a soft, solid center and a lacy edge. The middle is a smooth light-blue disc worked in double crochet rounds. Around it, a cream edging forms six points, and each point ends in a three-loop trefoil that looks like a frosty crystal.
The colors are simple: icy light blue for the center and warm cream for the snowflake edge. The style is cozy and wintery but still practical. The solid center gives a mug a flat surface to stand on, and the lace keeps the outline light.
The pattern uses US crochet terms. The finished coaster measures 6 in (15.2 cm) from point to point and 5 in (12.7 cm) from valley to valley. The blue center is 3.5 in (8.9 cm) across.
The construction is simple. You work five blue rounds in the round (four increasing double crochet rounds and one single crochet trim round). Then you work two cream rounds: a round of chain arches, followed by a shaping round that builds the six points, the trefoils and the valley picots. It’s all one piece, with no sewing and no joining.
Finished Size and Construction
- Finished size: 6 in (15.2 cm) point to point; 5 in (12.7 cm) valley to valley
- Skill level: Easy–Intermediate
- Terminology: US crochet terms
- Yarn weight: DK / light worsted (category 3), cotton or cotton blend
- Hook: 4.0 mm (G-6)
- Number of pieces: 1
- Layout: Single motif, worked in the round
- Piece size (blue center): 3.5 in (8.9 cm) diameter
- Size before border (after Rnd 4): 3.25 in (8.3 cm) diameter
- Border depth: 1.25 in (3.2 cm) at each point; 0.75 in (1.9 cm) at each valley
Materials
Yarn: Use a smooth, mercerized or matte cotton in DK weight. Cotton soaks up drips, handles warm mugs and holds the shape of the lace well. Avoid fuzzy or very splitty yarns, because the trefoil loops need clear stitch definition.
- Color A – Light Blue: 10 g, about 23 m (25 yd)
- Color B – Cream: 8 g, about 18 m (20 yd)
These quantities are for one coaster and include a safety margin of roughly 20%. A standard 50 g ball of each color will make about four to five coasters.
Tools:
– 4.0 mm (G-6) crochet hook
– Tapestry needle
– Scissors
– 2 locking stitch markers
– Ruler or measuring tape
– Blocking mat and rustproof pins
– Spray bottle with water
Abbreviations (US Terms)
- ch – chain
- sl st – slip stitch
- sc – single crochet
- hdc – half double crochet
- dc – double crochet
- st(s) – stitch(es)
- sp – space
- sk – skip
- rnd – round
- MR – magic ring
Special stitches:
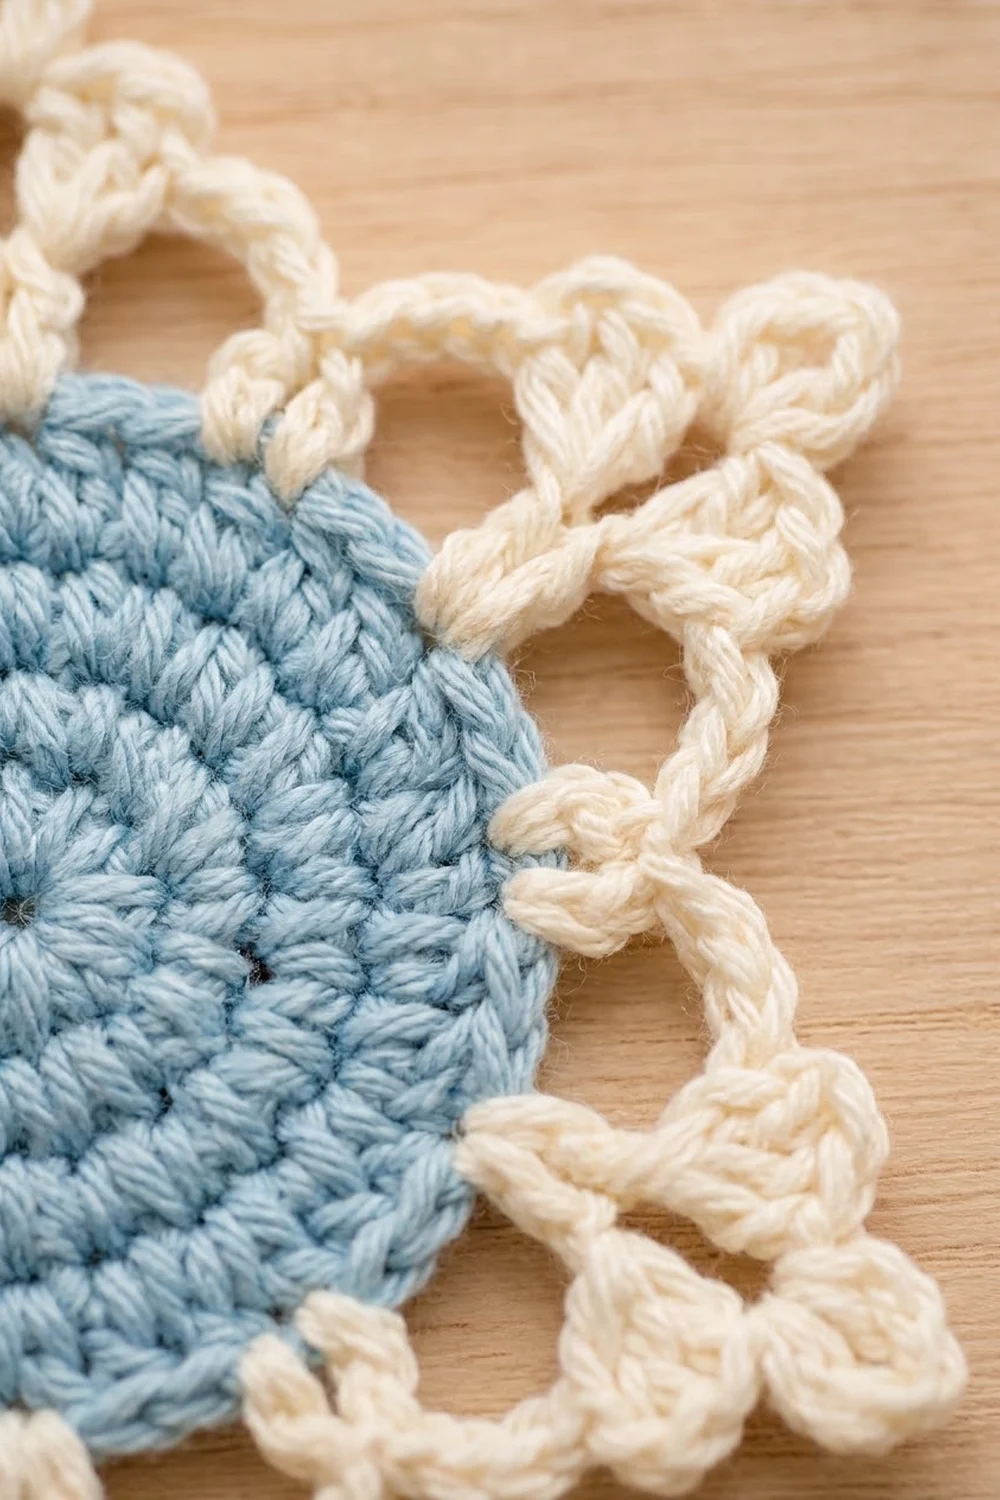
Trefoil: Ch 3 for the stem. Ch 5, sl st in the top ch of the stem (on the first petal, this is the 6th ch from your hook). Repeat from * to * 2 more times, so that 3 petal loops come out of the same stem chain. Then sl st in each of the remaining 2 stem chains to return to the base. The finished trefoil has three teardrop loops on a short stem.
Valley Picot: Ch 4, sl st in the 4th ch from hook. This makes a small closed loop.
Gauge and Checkpoints
Gauge isn’t critical for a coaster, but it decides whether your lace points open out or curl up. Make one coaster first and check it at each stage below before you start a batch.
Gauge: Rnds 1–4 = 3.25 in (8.3 cm) in diameter.
Checkpoints:
– After Rnd 1: 1 in (2.5 cm)
– After Rnd 2: 1.75 in (4.4 cm)
– After Rnd 3: 2.5 in (6.4 cm)
– After Rnd 4: 3.25 in (8.3 cm)
– After Rnd 5: 3.5 in (8.9 cm)
– After Rnd 7: 6 in (15.2 cm) point to point and 5 in (12.7 cm) valley to valley
If your circle is too big (more than 0.25 in / 0.6 cm over at Rnd 4), go down to a 3.75 mm hook. If it’s too small, go up to a 4.5 mm hook. Also check that the circle lies flat. If it cups, your increases are too tight, so go up a hook size. If it ruffles, go down one.
Pattern
Blue Center (Color A)
Rnd 1: Make a MR. Ch 3 (counts as dc here and throughout), work 11 dc in the ring. Pull the ring tight and join with a sl st to the top of the beginning ch-3. (12 sts)
Rnd 2: Ch 3, dc in the same st, 2 dc in each st around. Join with a sl st to the top of ch-3. (24 sts)
Rnd 3: Ch 3, dc in the same st, dc in the next st, 2 dc in the next st, dc in the next st; repeat from * to * around. Join. (36 sts)
Rnd 4: Ch 3, dc in the same st, dc in the next 2 sts, 2 dc in the next st, dc in the next 2 sts; repeat from * to * around. Join. (48 sts)
Checkpoint: the circle should measure 3.25 in (8.3 cm) and lie flat.
Rnd 5 (trim round): Ch 1 (doesn’t count as a st). Sc in the next 7 sts, 2 sc in the next st; repeat from * to * 6 times. Join with a sl st to the first sc. (48 + 6 = 54 sts)
This sc round gives the clean rolled edge shown on the blue disc. The 6 extra stitches split the round into 6 equal sections of 9 sts, one for each snowflake point. Fasten off Color A and weave in the ends.
Checkpoint: 3.5 in (8.9 cm) across.
Snowflake Border (Color B)
Border gauge: One ch-4 arch in Rnd 6 covers 3 sts of Rnd 5 and is about 0.6 in (1.5 cm) long along the edge. The finished border adds 1.25 in (3.2 cm) at each point and 0.75 in (1.9 cm) at each valley.
Rnd 6 (arch round): With the right side facing, join Color B with a sc in any sc of Rnd 5. Place a marker in this sc as the start of section 1. Ch 4, sk 2 sts, sc in the next st; repeat from * to * around, but on the final repeat, work ch 4, sk 2 sts, then join with a sl st to the first sc instead of working a sc. (18 sc, 18 ch-4 sps)
The math: 54 sts ÷ 3 sts per arch = 18 arches. With 6 sections of 9 sts each, each section has exactly 3 arches. Call them sp A, sp B and sp C. Sp B, the middle arch, will hold the point.
Rnd 7 (points round): Sl st in the first ch-4 sp (sp A of section 1). Then work each section like this:
- In sp A: sc, hdc, 2 dc
- In sp B: 2 dc, Trefoil, 2 dc
- In sp C: 2 dc, hdc, sc
- Valley Picot
Repeat for all 6 sections. Because you started with a sl st in sp A, work the “sc” of the first sp A into that same space. After the 6th Valley Picot, join with a sl st to the first sc. Fasten off.
Count per section: 4 sts in sp A + 4 sts in sp B + 4 sts in sp C = 12 sts, plus 1 Trefoil and 1 Valley Picot.
Round total: 72 sts, 6 Trefoils, 6 Valley Picots.
Why the math works: Each section goes from short (sc, hdc) to tall (dc) and back to short (hdc, sc). This builds a pointed wedge, and the trefoil sits at the tallest spot. The 6 equal sections of 9 sts from Rnd 5 make sure the 6 points are evenly spaced. The valley picot sits right above the Rnd 6 sc between sections, so it marks the dip between points.
Checkpoint: before blocking, the piece should measure about 5.75–6 in (14.6–15.2 cm) point to point.
Weave in all ends on the wrong side. Hide the cream tails inside the stitches of Rnd 7 so they don’t show through the open arches.
Final Blocking
Blocking turns the trefoils into crisp, even crystals.
- Lightly spray the coaster with water until it’s evenly damp but not dripping.
- Lay it right side up on your blocking mat.
- Gently press the blue center flat with your palm and check that it measures 3.5 in (8.9 cm).
- Pin the 6 trefoil stems so they point straight out from the center, 6 in (15.2 cm) apart across the coaster.
- Pin each of the 3 petals open: one straight out and two angled to the sides.
- Pin each Valley Picot so the valleys measure 5 in (12.7 cm) across.
- Use your ruler to check that all 6 points are the same distance from the center, about 3 in (7.6 cm).
- Let it dry completely, which usually takes 4–6 hours. For a firmer finish, mist with spray starch before it dries.
Final Quality-Control Checklist
- Blue center measures 3.5 in (8.9 cm) and lies flat
- Rnd 5 has 54 sc, with 9 sts in each section
- Rnd 6 has 18 even ch-4 arches
- 6 points, each with a 3-petal Trefoil
- 6 Valley Picots, one between each pair of points
- Point to point: 6 in (15.2 cm)
- Valley to valley: 5 in (12.7 cm)
- All points are the same length, with petals pinned open
- No loose ends visible through the lace
- The coaster sits flat with no curling at the points
Troubleshooting
The center cups like a bowl. Your increases are too tight. Go up a hook size, or loosen the top loops of your dc.
The center ruffles. Your stitches are too loose for the increase rate. Go down a hook size.
The points curl upward. The ch-4 arches in Rnd 6 are too tight. Make looser chains, or chain 5 instead of 4 and keep the Rnd 7 stitch counts the same.
The petals are different sizes. Make sure every petal goes back into the same top stem chain, and pull each ch-5 to the same height before you sl st.
I have too many or too few arches in Rnd 6. Recount Rnd 5. It must have exactly 54 sts, because 54 ÷ 3 = 18 arches.
The points are uneven after blocking. Wet the coaster again and re-pin, measuring each point from the center.
The cream yarn shows gaps at the blue edge. Work the Rnd 6 sc through both loops of the Rnd 5 sc, and keep the tension firm.
Care
Hand wash in cool water with mild soap. Press out the water in a towel, then lay the coaster flat and reshape the points while it dries. Don’t tumble dry.
Final Notes
This pattern uses a clear measurement chain. The blue circle grows from 1 in (2.5 cm) to 3.25 in (8.3 cm) over four dc rounds. The sc trim brings it to 3.5 in (8.9 cm) and sets up 54 sts in 6 sections of 9. The arch round turns those into 18 arches, 3 per section. The points round builds 6 wedges topped with trefoils, which gives a finished size of 6 in (15.2 cm) point to point and 5 in (12.7 cm) across the valleys. If you check each stage as you go, every coaster in your set will match.
Happy crocheting!