

The Frosted Teardrop Garland is a row of six lacy, cornflower-blue teardrops hung from a matching crocheted cord. A natural wooden bead sits right above each point. It looks crisp and wintery in a sunny window, but the single blue works all year.
Each teardrop has a small center ring, sixteen radiating spokes, a soft chain-loop mesh, a mesh point at the top, and a scalloped shell edge all the way around. The look is light and airy, like a vintage doily pulled into a drop shape.
This pattern uses US crochet terms. Each finished teardrop measures 3 in (7.6 cm) wide and 3.75 in (9.5 cm) tall, plus a 0.5 in (1.3 cm) hanging loop. The cord is 60 in (152.4 cm) long, and the decorated section spans 33 in (83.8 cm).
You work the round center first, add three short rows to form the point, then finish with a two-round scalloped border. Six identical motifs are threaded through beads and hung on a slip stitch cord.
Finished Size and Construction
- Finished garland: 60 in (152.4 cm) cord; motifs span 33 in (83.8 cm)
- Skill level: Easy-Intermediate
- Terminology: US crochet terms
- Yarn weight: Super fine / fingering (#1) cotton
- Hook: 2.5 mm
- Number of pieces: 6 teardrop motifs + 1 cord + 6 beads
- Layout: 1 row of 6 motifs, 6 in (15.2 cm) center to center
- Piece size: 3 in (7.6 cm) wide x 3.75 in (9.5 cm) tall
- Size before border: 2.25 in (5.7 cm) wide x 3 in (7.6 cm) tall
- Border depth: 0.375 in (1.0 cm) on every edge
Materials
Choose a smooth mercerized cotton in fingering weight. It gives crisp stitch definition and a slight sheen, and it holds a blocked shape well. Avoid fuzzy or very stretchy fibers, which blur the spokes and let the loops sag.
- Cornflower blue: 30 g, about 110 m (6 motifs at about 3 g / 12 m each, plus the cord at about 6 g / 25 m)
This quantity includes a margin for your test motif, weaving in ends, and any ripping back.
Tools and notions:
- 2.5 mm crochet hook
- 6 natural wooden beads, 5/8 in (1.6 cm), with holes at least 3/16 in (0.5 cm) wide
- Tapestry needle
- 1 stitch marker
- Rust-proof pins and a blocking mat
- Scissors and a tape measure
- Spray starch (optional)
- A short length of sewing thread to use as a bead threader
Abbreviations (US Terms)
- ch = chain
- sl st = slip stitch
- sc = single crochet
- hdc = half double crochet
- dc = double crochet
- sp = space
- rnd = round
- rep = repeat
- st(s) = stitch(es)
Special stitch: Scallop = (sc, hdc, 3 dc, hdc, sc) all in the same ch-5 loop. One scallop has 7 sts.
Joining trick: ch 2, dc in first sc = closes a round of ch-5 loops. The ch 2 + dc takes the place of the last ch-5 loop and leaves your hook in the middle of that loop.
Gauge and Checkpoints
Make one complete teardrop first and measure it before you make the rest. Lace stretches, so measure each stage lying flat and unstretched.
Gauge: Rnds 1-4 = 2.25 in (5.7 cm) across.
Checkpoints:
- After Rnd 1: 0.5 in (1.3 cm) across
- After Rnd 2: 1.25 in (3.2 cm) across
- After Rnd 3: 1.75 in (4.4 cm) across
- After Rnd 4: 2.25 in (5.7 cm) across
- After Tip Rows: 2.25 in (5.7 cm) wide x 3 in (7.6 cm) tall
- After Border: 3 in (7.6 cm) wide x 3.75 in (9.5 cm) tall
If your piece is too big, go down 0.25 mm in hook size. If it is too small, go up 0.25 mm. Fix any difference of 0.25 in (0.6 cm) or more at Rnd 4, because the border will make it bigger by the end.
If the center cups or ruffles, check Rnd 2 first. That round sets the spoke spacing for everything after it.
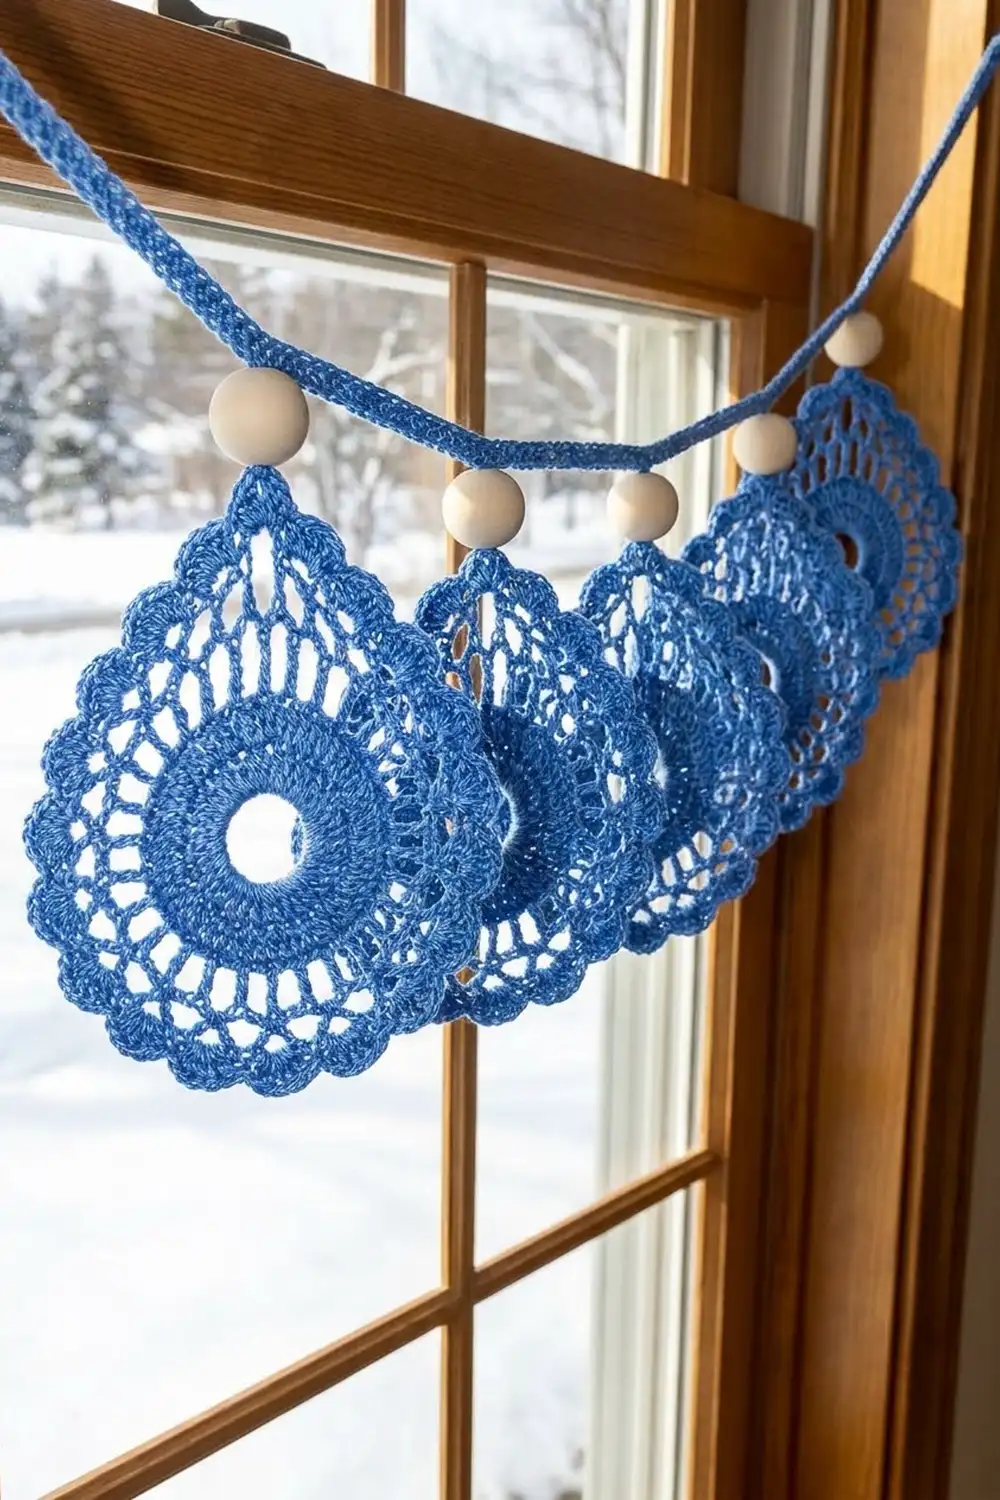
Teardrop Motif
Make 6. Each motif is worked in one piece, and you don’t fasten off until the hanging loop is done.
Center
Rnd 1: Make a magic ring. Ch 3 (counts as dc), 15 dc in ring. Pull the ring closed and sl st to top of ch-3. (16 dc)
Rnd 2: Ch 5 (counts as dc + ch 2), dc in next dc, ch 2; rep from * 14 more times. Sl st to 3rd ch of beginning ch-5. (16 dc spokes, 16 ch-2 sps)
Check: 1.25 in (3.2 cm) across, with sixteen evenly spaced spokes.
Rnd 3: Sl st in first ch-2 sp, ch 1, sc in same sp, ch 4, sc in next ch-2 sp; rep from * 14 more times, ch 4, sl st to first sc. (16 sc, 16 ch-4 loops)
Rnd 4: Sl st in first 2 ch of next ch-4 loop, ch 1, sc in same loop, ch 5, sc in next ch-4 loop; rep from * 14 more times, ch 2, dc in first sc. (16 sc, 16 ch-5 loops, with the last loop formed by the ch 2 + dc)
Your hook is now in the middle of the last loop. Number the Rnd 4 loops: the loop your hook is in is loop 16. Going on in the same direction, the next loops are loop 1, loop 2, loop 3, and so on around to loop 15. Put a marker in loop 1. It becomes the top center of the teardrop.
Check: 2.25 in (5.7 cm) across.
Tip Rows
The point is built in three short rows over loops 16, 1, and 2. Each row has one less loop than the row before, so the mesh narrows to a centered point.
Tip Row 1: Ch 5, sc in loop 1, ch 5, sc in loop 2, turn. (2 ch-5 loops)
Tip Row 2: Sl st in first 3 ch of first ch-5 loop, ch 1, sc in same loop, ch 5, sc in next ch-5 loop, turn. (1 ch-5 loop)
Tip Row 3: Sl st in first 3 ch of the ch-5 loop, ch 1, sc in same loop. Do not turn. (1 sc at the apex)
The apex sc sits directly above the sc in loop 1, so the point is centered. Do not fasten off.
Check: 2.25 in (5.7 cm) wide x 3 in (7.6 cm) tall. Loops 3-15 (13 loops) are still free around the rounded part.
Border
The border is worked on each motif in two rounds. Round 1 turns the edge into one even ring of loops. Round 2 puts a scallop in every loop.
Border gauge: each scallop covers about 0.5 in (1.3 cm), so you get 2 scallops per 1 in (2.5 cm) of edge. The full border adds 0.375 in (1.0 cm) on every edge.
Border Rnd 1: Start at the apex and keep going in the same direction:
- Right tip side: Ch 5, sc in first sc of Tip Row 2; ch 5, sc in last sc of Tip Row 1 (the sc in loop 2); ch 5, sc in loop 3. (3 loops)
- Rounded edge: Ch 5, sc in next free loop; rep from * 11 more times, ending with sc in loop 15. (12 loops)
- Left tip side: Ch 5, sc in top of the dc that sits in loop 16; ch 5, sc in last sc of Tip Row 2; ch 5, sl st in apex sc. (3 loops)
Total: 18 ch-5 loops (3 + 12 + 3)
Border Rnd 2: Sl st in first ch-5 loop, ch 1, work 1 Scallop in each ch-5 loop around. Sl st in apex sc. (18 scallops, 126 sts)
- Right tip side: 3 scallops = 21 sts
- Rounded edge: 12 scallops = 84 sts
- Left tip side: 3 scallops = 21 sts
- Check: 21 + 84 + 21 = 126 sts = 18 scallops x 7 sts
Hanging loop: Ch 8, sl st in the same apex sc. Fasten off, leaving a 6 in (15.2 cm) tail for tacking the motif to the cord.
Why the math works: Border Rnd 1 needs one loop between every pair of anchors around the edge. The 13 free loops on the rounded part leave 12 gaps between them. Each tip side has 3 anchors below the apex (the end of Tip Row 2, the end of Tip Row 1, and the first free Rnd 4 loop), so each side gets 3 loops. That makes 3 + 12 + 3 = 18. Seven stitches fill a ch-5 arch and lift a rounded peak without ruffling. The 12 rounded-edge scallops split 6 and 6, so the bottom center falls on an sc anchor and the teardrop stays mirror-symmetrical.
Cord
Leaving a 6 in (15.2 cm) tail, chain loosely until the chain measures 60 in (152.4 cm) unstretched. Sl st in the back bump of the 2nd ch from hook and in each ch across. Fasten off.
The slip stitch row firms the chain into a round cord that barely stretches under the motifs. Tie a small overhand loop at each end to hang it. If the slip stitches pull the cord shorter than 60 in (152.4 cm), rip back and redo that row with a hook one size larger.
Make All Pieces
- Cornflower blue teardrop motifs: 6
- Cornflower blue cord: 1, 60 in (152.4 cm)
- Wooden beads: 6, 5/8 in (1.6 cm)
Block all 6 motifs (see Final Blocking) before you string them. Flat motifs hang much straighter.
Layout grid (distance from the left end of the cord to each motif center):
ROW 1: BLUE BLUE BLUE BLUE BLUE BLUE
BEADS: BEAD BEAD BEAD BEAD BEAD BEAD

M1 = 15 in (38.1 cm)
M2 = 21 in (53.3 cm)
M3 = 27 in (68.6 cm)
M4 = 33 in (83.8 cm)
M5 = 39 in (99.1 cm)
M6 = 45 in (114.3 cm)
Motif centers are 6 in (15.2 cm) apart. The motifs are 3 in (7.6 cm) wide, so that leaves a 3 in (7.6 cm) gap between neighboring edges. The decorated span is 5 x 6 in = 30 in (76.2 cm) between the outer centers, plus half a motif at each end, for 33 in (83.8 cm). That leaves 13.5 in (34.3 cm) of plain cord past each outer motif.
Joining
The motifs are joined to the cord, not to each other. Each one hangs from its own bead.
Method:
- Fold a short length of sewing thread in half and push the fold through a bead.
- Catch the motif’s ch-8 hanging loop in the fold and pull it up through the bead. The bead now rests on the apex.
- Push the cord end through the part of the hanging loop that sticks out above the bead. Use your hook to guide it.
- Slide the motif along the cord to its spot on the layout grid.
- Repeat for all 6 motifs, in order from M1 to M6.
Stitch-to-stitch logic: The hanging loop is worked into the apex sc, which is centered above loop 1 and the center ring. That way the cord pulls straight down the motif’s center line, and each teardrop hangs straight.
Tension and securing: Thread the 6 in (15.2 cm) tail onto a tapestry needle. Make 2-3 small stitches through the cord where the hanging loop crosses it. Keep them snug but not tight, so the motif stops sliding without the cord puckering. Weave the tail back down through the bead and into the motif.
Size checkpoint: Lay the garland flat. Every pair of neighboring motifs should be 6 in (15.2 cm) apart, center to center. From the left edge of M1 to the right edge of M6 should be 33 in (83.8 cm).
Final Blocking
- Soak all 6 motifs in cool water for 10 minutes.
- Roll them in a towel and press out the water. Do not wring.
- Pin the apex first, then the bottom center, then the widest point on each side, at 3 in (7.6 cm) wide x 3.75 in (9.5 cm) tall.
- Pin the center of every scallop so the edge is even.
- Use your fingertips to straighten the 16 spokes so they radiate evenly.
- Spray lightly with starch if you want crisper motifs.
- Let them dry completely, for at least 12 hours.
- After joining, hang the garland and steam the cord lightly from a distance if it twists.
Final Quality-Control Checklist
- Every motif has 16 spokes, 18 scallops, and 1 ch-8 hanging loop.
- Every motif measures 3 in x 3.75 in (7.6 cm x 9.5 cm).
- Every point is centered above the center ring.
- The bottom center of each motif falls between two scallops.
- Every bead rests snugly on the apex of its motif.
- The cord is 60 in (152.4 cm) long.
- Motif centers are 6 in (15.2 cm) apart.
- All tails are woven in and trimmed.
Troubleshooting
The center cups. Your Rnd 1 dc are too tight. Pull up taller loops, or go up 0.25 mm in hook size.
The center ruffles. The ch-2 spaces in Rnd 2 are too loose. Chain more tightly.
The point leans to one side. Check the tip rows. Tip Row 1 must start in loop 16 and end in loop 2, with its middle sc in loop 1.
The border ruffles. The Border Rnd 1 loops are too short for 7 sts. Chain more loosely, or use (sc, hdc, 2 dc, hdc, sc) for each scallop.
The border pulls in. The loops are too long. Chain more tightly or use a smaller hook.
Motifs twist on the cord. Add another tacking stitch, and check that each bead is pulled all the way down onto the apex.
Care
Hand wash in cool water with mild soap, then lay flat to dry, pinning back into shape if needed. If the wooden beads are unsealed, keep them out of the water.
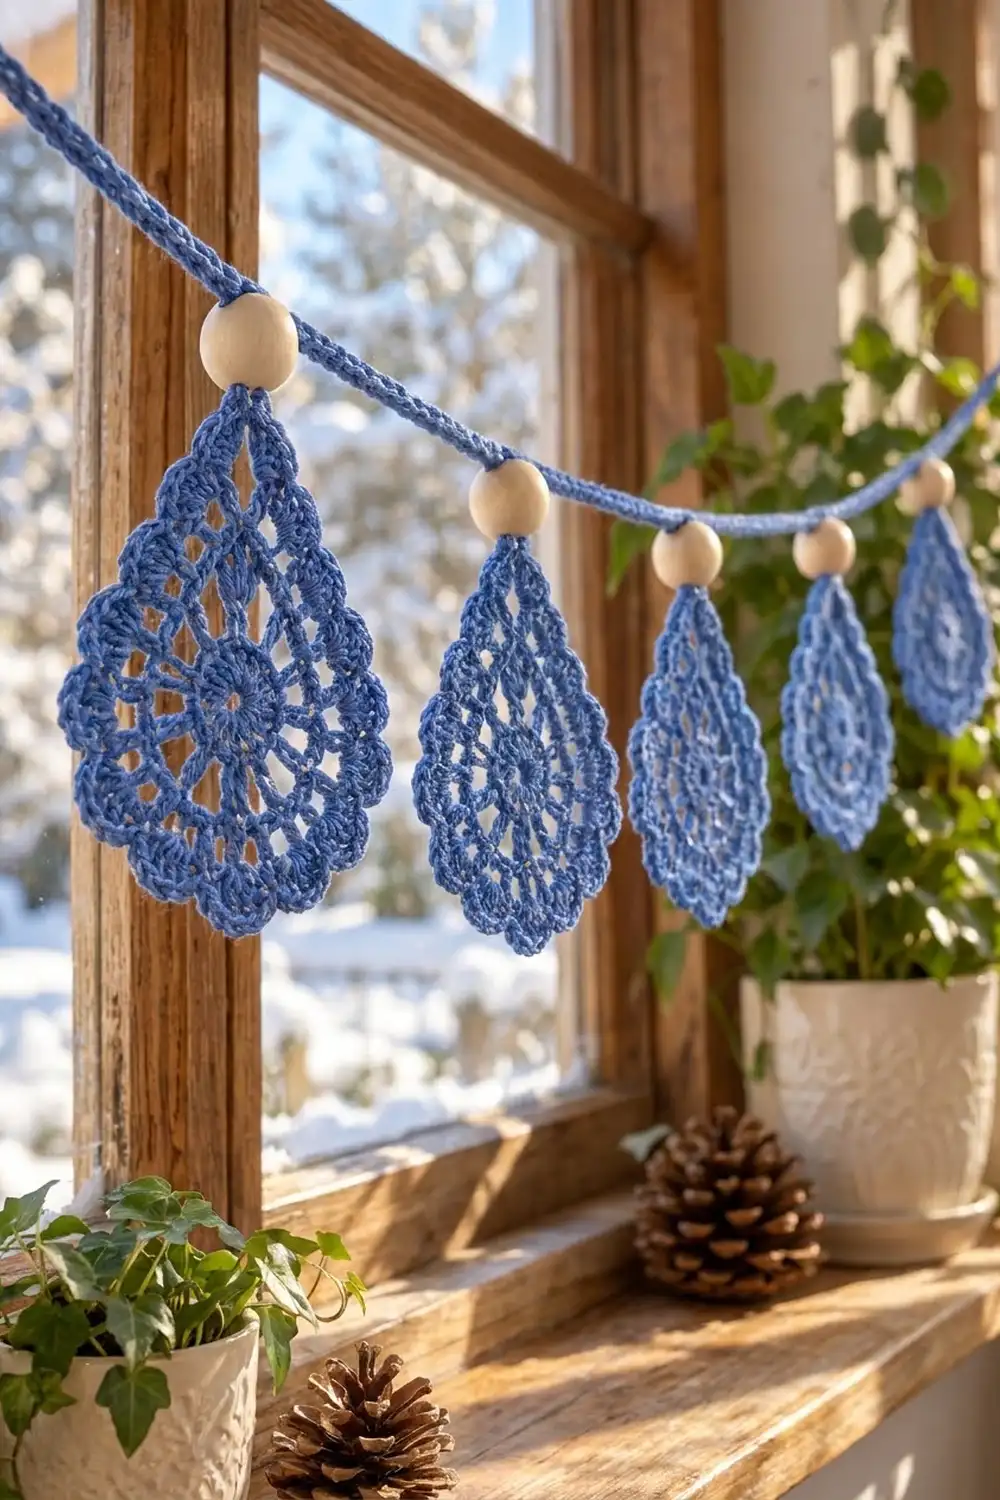
Final Notes
The measurement chain is short. Rnd 4 makes a 2.25 in (5.7 cm) circle. The tip rows stretch it to 2.25 in x 3 in (5.7 cm x 7.6 cm). The two-round border adds 0.375 in (1.0 cm) on every edge, for a finished teardrop of 3 in x 3.75 in (7.6 cm x 9.5 cm). Six motifs set 6 in (15.2 cm) apart, center to center, span 33 in (83.8 cm) on a 60 in (152.4 cm) cord.
If your Rnd 4 checkpoint is right, everything after it will fall into place.
Happy crocheting!