

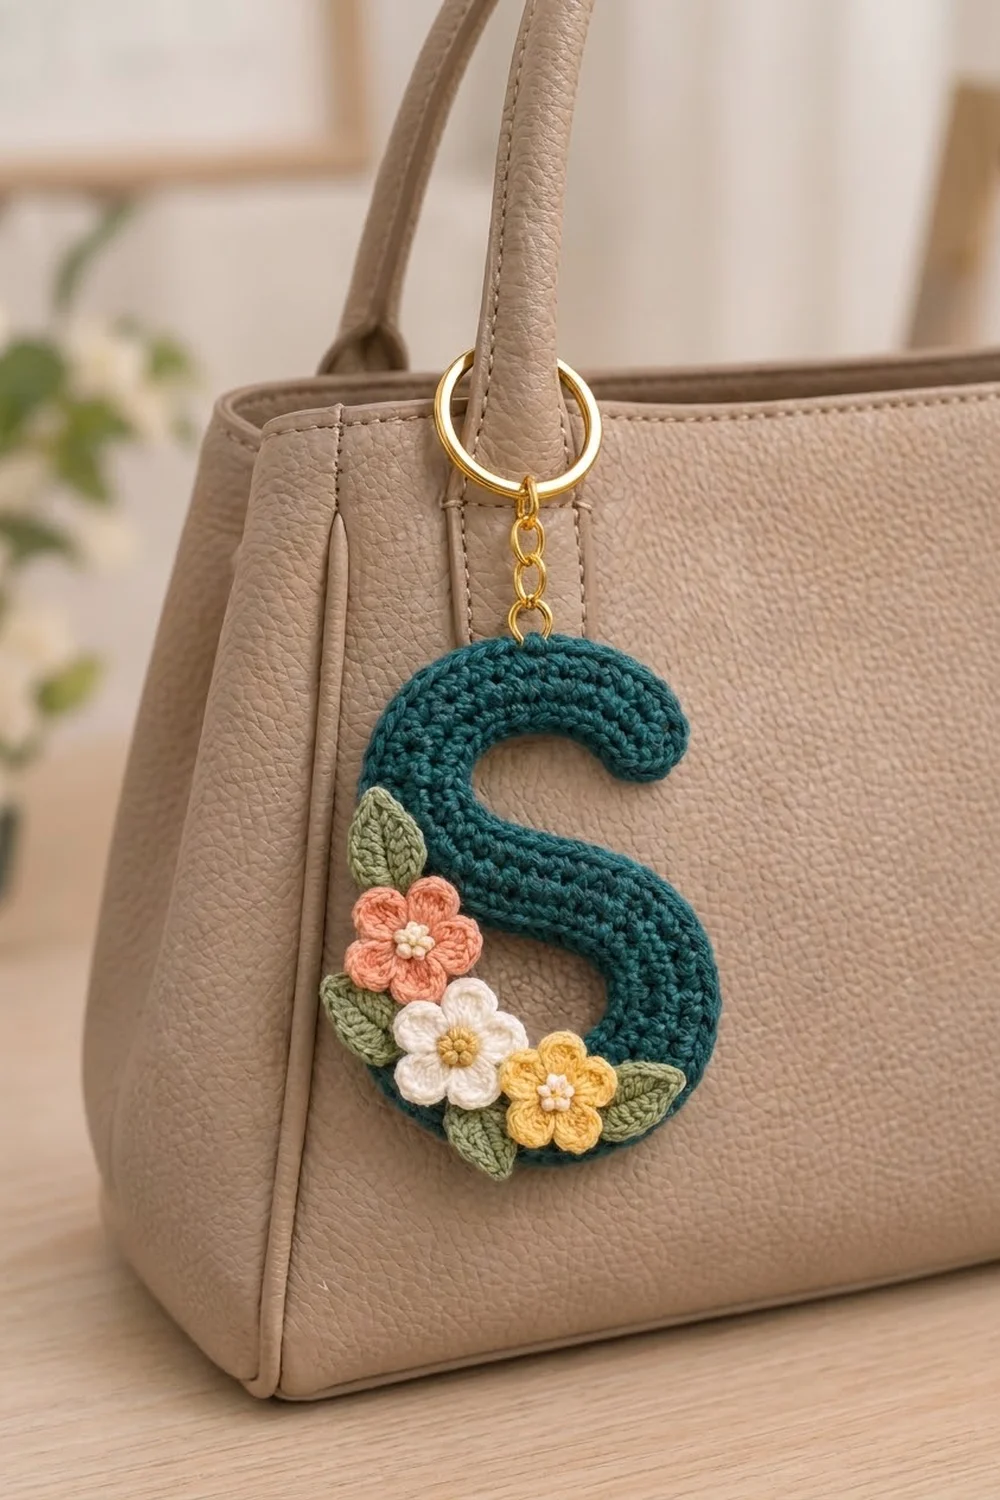
This little keychain is a capital letter S in deep teal cotton, finished with a small spray of flowers and leaves. It clips onto a bag handle, a set of keys or a pencil case, and makes a quick personal gift.
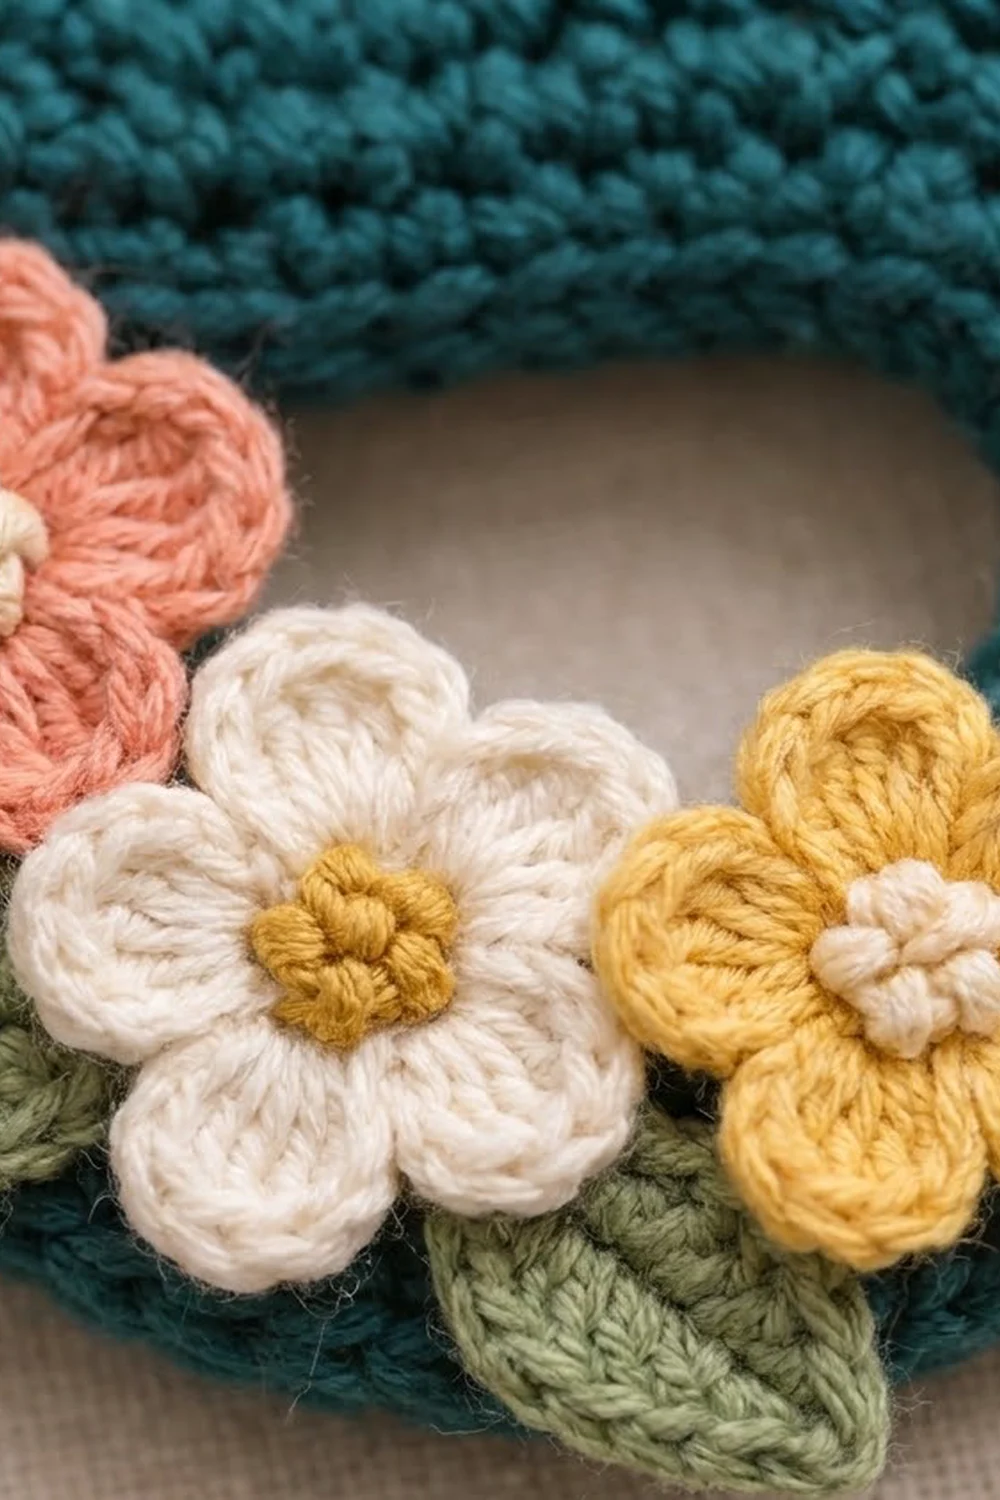
The palette is soft and garden-like. A dark teal letter sits behind three five-petal flowers in coral pink, cream and mustard yellow, each with a contrasting knotted center, and three sage green leaves fill in around them. The S is worked in dense single crochet, so it holds its shape and the stitch lines follow the curves of the letter.
The finished keychain measures about 4 in (10.2 cm) tall and 3 in (7.6 cm) wide, with a stroke about 1 in (2.5 cm) wide. The pattern uses US crochet terms throughout.
The letter is one flat piece, worked in rounds around a single foundation chain. Increases on the outer curves and decreases on the inner curves make the strip bend into an S. A two-round edge finishes it, and then the flowers and leaves are sewn on and the hardware is added.
Finished Size and Construction
- Finished size: 4 in (10.2 cm) tall x 3 in (7.6 cm) wide
- Skill level: Easy to intermediate
- Terminology: US crochet terms
- Yarn weight: DK / light worsted (#3), cotton or cotton blend
- Hook: 2.75 mm (US C-2)
- Number of pieces: 1 letter body plus 3 flowers and 3 leaves sewn on as appliqués
- Layout: one S letter with the flowers in a diagonal cluster over the lower left curve
- Letter size before the edge: about 3.5 in (8.9 cm) tall x 2.5 in (6.4 cm) wide, stroke 1/2 in (1.3 cm)
- Edge depth: about 1/4 in (0.6 cm) on every edge
Materials
Use a smooth, mercerized cotton. It gives crisp stitches, does not fuzz on a keychain that gets handled a lot, and blocks well into curves.
- Color A, deep teal: 8 g / 20 m (letter body)
- Color B, coral pink: 2 g / 5 m (1 flower)
- Color C, cream: 3 g / 7.5 m (1 flower plus 2 flower centers)
- Color D, mustard yellow: 2 g / 5 m (1 flower plus 1 flower center)
- Color E, sage green: 2 g / 5 m (3 leaves)
Tools:
- 2.75 mm (US C-2) crochet hook
- Tapestry needle and a sharp embroidery needle
- 1 in (2.5 cm) gold split key ring with a short chain and a 1/4 in (0.6 cm) jump ring
- Two pairs of small pliers for the jump ring
- Stitch markers (2)
- Blocking mat, rustproof pins and a spray bottle
All quantities include a small margin for swatching and weaving in ends.
Abbreviations (US Terms)
- ch – chain
- sl st – slip stitch
- sc – single crochet
- hdc – half double crochet
- dc – double crochet
- sc2tog – single crochet 2 together
- MR – magic ring
- st(s) – stitch(es)
- rnd(s) – round(s)
Special stitch – sc2tog: (Insert hook in next st, yarn over, pull up a loop) twice, yarn over and pull through all 3 loops on hook. 2 sts become 1.
Special stitch – French knot: Bring the needle up, wrap the yarn twice around the needle, then insert it back down right next to where it came up and pull through gently.
Gauge and Checkpoints
Gauge: 22 sc and 24 rows = 4 in (10.2 cm) in sc with Color A, or 5.5 sts and 6 rows per 1 in (2.5 cm).
Make the letter body first, before the appliqués. It is small and shows quickly whether your tension is right.
Checkpoints:
- Foundation chain: 36 working chains measure about 6.5 in (16.5 cm) unstretched.
- After Rnd 1: a straight strip about 3/8 in (1.0 cm) wide.
- After Rnd 2: the strip is 1/2 in (1.3 cm) wide and already curls into an S. Pinned flat, it measures about 3.5 in (8.9 cm) x 2.5 in (6.4 cm).
- After the edge: 4 in (10.2 cm) x 3 in (7.6 cm), stroke 1 in (2.5 cm).
If the letter is too big: go down 0.25 mm in hook size, or crochet a little tighter. If it is too small: go up 0.25 mm. Do not change the stitch counts, because the curves depend on them.
Letter Body
The rounds go around both sides of one foundation chain. To keep track of the shaping, the 36 working chains are split into three sections of 12: Section A (upper curve), Section B (middle diagonal) and Section C (lower curve). The stitches worked into the first chain make the top cap (the top right terminal), and the stitches in the last chain make the bottom cap (the bottom left terminal).
Side 1 is the first side you work along. It becomes the outer edge of the upper curve and the inner edge of the lower curve. Side 2 is the opposite.
With Color A, ch 37.
Rnd 1: Sc in 2nd ch from hook (top cap, side 1), sc in next 11 ch (A1), sc in next 12 ch (B1), sc in next 11 ch (C1), 3 sc in last ch (bottom cap). Rotate and work along the opposite side of the foundation chain: sc in next 11 ch (C2), sc in next 12 ch (B2), sc in next 11 ch (A2), 2 sc in the same ch as the first sc (top cap, side 2). Join with sl st to first sc. (74 sts)
Rnd 1 count: 1 + 11 + 12 + 11 + 3 + 11 + 12 + 11 + 2 = 74.
Place a marker in the first st of Rnd 1, and a second marker in the center st of the bottom cap.
Rnd 2: Ch 1 (does not count as a st throughout).
- Top cap side 1: 2 sc in first st (2).
- A1, outer curve: sc in next st, (2 sc in next st, sc in next st) 4 times, sc in next 2 sts (15).
- B1, straight: sc in next 12 sts (12).
- C1, inner curve: sc in next 2 sts, sc2tog, sc in next 3 sts, sc2tog, sc in next 2 sts (9).
- Bottom cap: 2 sc in each of next 3 sts (6).
- C2, outer curve: work as A1 (15).
- B2, straight: sc in next 12 sts (12).
- A2, inner curve: work as C1 (9).
- Top cap side 2: 2 sc in each of last 2 sts (4).
Join with sl st to first sc. (84 sts)
Rnd 2 count: 2 + 15 + 12 + 9 + 6 + 15 + 12 + 9 + 4 = 84. That is 74 sts plus 6 at the caps and 8 on the outer curves, minus 4 on the inner curves.
At this point the strip should bend into an S on its own. If it reads backwards, flip it over. Choose one face as the right side and keep it.
Edge (Border)
The two edge rounds keep shaping the curves and give the letter its rounded, defined rim.
Edge gauge: 5.5 sc per 1 in (2.5 cm) along the edge. Rnd 3 has 96 sts, which is about 17.4 in (44.2 cm) of perimeter. That matches the outline of a 4 in x 3 in (10.2 cm x 7.6 cm) S with a 1 in (2.5 cm) stroke.
Rnd 3: Ch 1.
- Top cap side 1: 2 sc in first st, sc in next st (3).
- A1, outer curve: (sc in next 2 sts, 2 sc in next st) 5 times (20).
- B1, straight: sc in next 12 sts (12).
- C1, inner curve: sc in next st, sc2tog, sc in next 3 sts, sc2tog, sc in next st (7).
- Bottom cap: (sc in next st, 2 sc in next st) 3 times (9).
- C2, outer curve: work as A1 (20).
- B2, straight: sc in next 12 sts (12).
- A2, inner curve: work as C1 (7).
- Top cap side 2: (2 sc in next st, sc in next st) 2 times (6).
Join with sl st to first sc. (96 sts)
Rnd 3 count: 3 + 20 + 12 + 7 + 9 + 20 + 12 + 7 + 6 = 96. That is 84 sts plus 6 at the caps and 10 on the outer curves, minus 4 on the inner curves.
Rnd 4: Sl st in each st around, keeping the sl sts loose enough to match the sc edge. (96 sl sts) Fasten off with an invisible join and weave in the ends.
Why the math works: Each cap is a half circle. It grows by 3 sts per round (3, 6, 9), which is the same rate as a flat circle growing by 6 sts per round. The outer curves gain 4 and then 5 sts, because their edge gets longer as the stroke gets wider. The inner curves lose 2 sts per round because their edge gets shorter. The straight middle stays at 12 sts on each side. Every round adds 1/6 in (0.4 cm) of stroke width on each side, which takes the 1/2 in (1.3 cm) stroke after Rnd 2 to the finished 1 in (2.5 cm).
Flowers (Make 3)
Make 1 flower each in Color B, Color C and Color D.
Rnd 1: MR, 10 sc in ring, pull the ring closed, join with sl st to first sc. (10 sts)
Rnd 2: ((Hdc, 2 dc, hdc) in next st, sl st in next st) 5 times. (5 petals: 20 petal sts + 5 sl sts)
Fasten off, leaving an 8 in (20.3 cm) tail for sewing. Each flower measures about 1 in (2.5 cm) across.
Centers: Use a 12 in (30.5 cm) length of contrast yarn. Work 5 French knots close together over the MR:
- Coral flower: Color C (cream)
- Cream flower: Color D (mustard)
- Mustard flower: Color C (cream)
Leaves (Make 3)
With Color E, ch 6.
Rnd 1: Sc in 2nd ch from hook, hdc in next ch, dc in next ch, hdc in next ch, sc in last ch (5 sts). Ch 1 for the tip. Working along the opposite side of the chain: sc in next ch, hdc in next ch, dc in next ch, hdc in next ch, sc in last ch (5 sts). Sl st to first sc. (10 sts + 1 tip ch)
Fasten off, leaving a 6 in (15.2 cm) tail. Each leaf measures about 3/4 in (1.9 cm) long x 3/8 in (1.0 cm) wide. The foundation chain makes a natural center vein.
Assembly
Lay the letter right side up with the top cap at the upper right.
- Leaves first. Pin one leaf pointing up and left on the left edge of the middle diagonal. Pin one pointing down and left at the outer edge of the bottom terminal, and one pointing right along the bottom edge of the lower curve. Each leaf should stick out past the edge by about 1/4 in (0.6 cm).
- Flowers. Place the coral flower on the left edge just below the upper leaf. Place the cream flower below it, over the bottom terminal, and the mustard flower to its right on the lower curve. Overlap each one slightly with its neighbor so they form a diagonal cluster and cover the base of each leaf.
- Sew. With the tails and the tapestry needle, sew each leaf along its center vein. Sew each flower around Rnd 1, going only into the front layer of the letter stitches so nothing shows on the back. Weave in all ends.
- Hardware. Find the center of A1 on the outer edge, which is sts 13–14 of Rnd 3. Open the jump ring with two pliers and push it through both Rnd 3 and Rnd 2 at that point, so it holds two rounds deep. Thread on the end link of the chain and close the jump ring fully.
Final Blocking
- Mist the letter with water until it is damp. Do not soak it.
- Pin the letter on the mat to 4 in (10.2 cm) x 3 in (7.6 cm). Pin at the tops of both curves, both caps and the middle diagonal.
- Run a finger along the stroke to even it to 1 in (2.5 cm) wide all the way around.
- Ease the appliqués flat, then spray them lightly.
- Leave to dry completely, about 6–8 hours, before unpinning.
Final Quality-Control Checklist
- Stitch counts: 74, 84, 96 and 96 sl sts.
- Letter is 4 in (10.2 cm) x 3 in (7.6 cm), stroke 1 in (2.5 cm).
- The S reads correctly from the right side.
- Curves lie flat with no ruffling or cupping.
- Five even petals on each flower, with 5 neat knots at each center.
- Leaves stick out past the edge and do not hang loose.
- Jump ring closed with no gap, anchored two rounds deep.
- All ends woven in on the back.
Troubleshooting
- Outer curve ruffles: the increases are too close together, or your tension is loose. Check A1 and C2 against the counts.
- Inner curve puckers: the sc2tog are too tight. Work them more loosely, or check you did not add an extra decrease.
- Letter reads as a backwards S: flip it over and use the other side as the right side.
- Edge looks wavy: the Rnd 4 sl sts are too tight or too loose. Redo it with tension that matches Rnd 3.
- Petals look floppy: go down one hook size for the flowers only.
- Ring tears out: reattach it through both Rnd 2 and Rnd 3, not the sl st edge alone.
Care
Hand wash cold, press out the water in a towel and dry flat, reshaping while damp. Remove the metal hardware first if you want to keep the cotton from staining.
Final Notes
The measurement chain is short and easy to check. A 36-chain foundation of about 6.5 in (16.5 cm) becomes a 74-stitch strip in Rnd 1. In Rnd 2 it grows to 84 stitches and curls into a 3.5 in x 2.5 in (8.9 cm x 6.4 cm) S. The 96-stitch edge brings it to a finished 4 in x 3 in (10.2 cm x 7.6 cm), with a 1 in (2.5 cm) stroke. If you check each of those numbers as you go, the curves will block flat and the flowers will sit neatly in place.
Happy crocheting!