

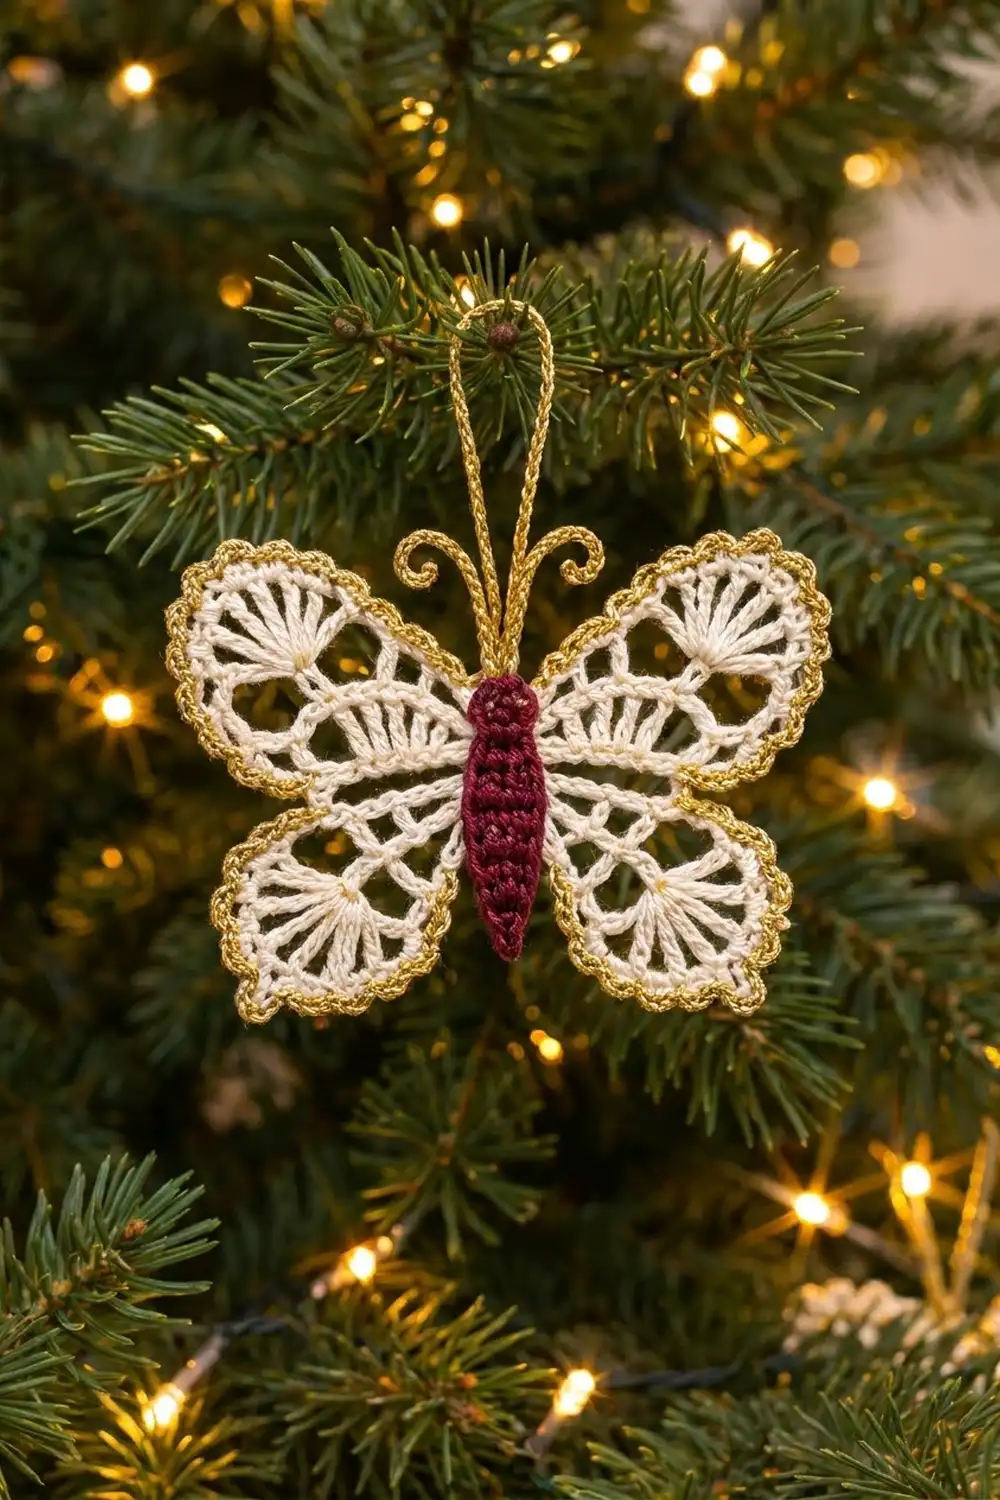
This little butterfly has cream lace wings with a gold edge, set against a deep burgundy body. Each wing opens out from a small ring like a fan. There are double crochet spokes, then open chain loops, then soft scallops, and a gold picot edging outlines every curve.
The colors are classic holiday ones: cream, metallic gold and burgundy. The ornament looks good on a tree, tied to a gift or hung in a window. It is light and dainty, but sturdy enough to hang straight.
The pattern uses US crochet terms. The finished butterfly is 4 in (10.2 cm) wide and 3 in (7.6 cm) tall, not counting the hanging loop.
Construction overview: You crochet the body in the round, add gold antennae, and make two large and two small fan-shaped wings in rows. Each wing gets a gold picot edge. Then you sew the wings to the body and add a gold hanging loop.
Finished Size and Construction
- Finished size: 4 in (10.2 cm) wide x 3 in (7.6 cm) tall, not counting the loop
- Skill level: Intermediate
- Terminology: US crochet terms
- Yarn weight: Size 3 crochet thread (Lace, weight 0)
- Hook: 2.0 mm (US 4 steel)
- Number of pieces: 1 body, 4 wings (2 upper, 2 lower), 2 antennae and 1 hanging loop, assembled into one ornament
- Layout: One upper wing and one lower wing on each side of the body, mirror-image
- Upper wing size: 1.75 in (4.4 cm) from ring to edge, edging included
- Lower wing size: 1.25 in (3.2 cm) from ring to edge, edging included
- Size before edging: upper wing 1.6 in (4.1 cm), lower wing 1.1 in (2.8 cm)
- Edging depth: about 0.125 in (0.3 cm)
- Body: 2 in (5.1 cm) long x 0.5 in (1.3 cm) wide
Materials
Use smooth mercerized cotton thread in size 3. It shows the lace clearly and holds its shape after blocking. For the gold, choose a metallic thread or a cotton-metallic blend of the same thickness. A very fine metallic thread will make the edging pull and ruffle.
- Cream (wings): 6 g, about 16 m
- Gold (edging, antennae, loop): 3 g, about 8 m
- Burgundy (body): 2 g, about 5 m
These amounts include a safety margin of about 25%.
Tools:
– 2.0 mm (US 4 steel) crochet hook
– Tapestry needle with a small eye
– A small pinch of fiberfill (or cream thread scraps) for the body
– Rustproof pins and a foam blocking board
– Spray bottle, or a light fabric stiffener (optional)
– Scissors
Abbreviations (US Terms)
- ch – chain
- sl st – slip stitch
- sc – single crochet
- hdc – half double crochet
- dc – double crochet
- sc2tog – single crochet 2 together
- BLO – back loop only
- sp – space
- st(s) – stitch(es)
- RS – right side
Special stitches:
– Picot: Ch 3, then sl st into the 3rd ch from the hook.
– Scallop: (sc, hdc, 3 dc, hdc, sc) all worked into the same ch-4 loop. This makes 7 sts.
Gauge and Checkpoints
Body gauge: 9 sc and 9 rounds = 1 in (2.5 cm) in sc worked in the round.
Gold chain gauge: 12 ch = 1 in (2.5 cm).
Make one upper wing first, before anything else, and check it against these measurements. Measure each one from the center of the ring straight out to the edge:
- After Row 1: 0.5 in (1.3 cm)
- After Row 2: 0.9 in (2.3 cm)
- After Row 3: 1.3 in (3.3 cm)
- After Row 4: 1.6 in (4.1 cm)
- After the gold edging: 1.75 in (4.4 cm)
If your wing is too big: go down to a 1.75 mm hook. If it is too small: go up to a 2.25 mm hook. A difference of 0.1 in (0.3 cm) per wing adds up to 0.2 in (0.5 cm) across the full wingspan. Check the body gauge separately, because tight sc in the round often works up smaller than lace.
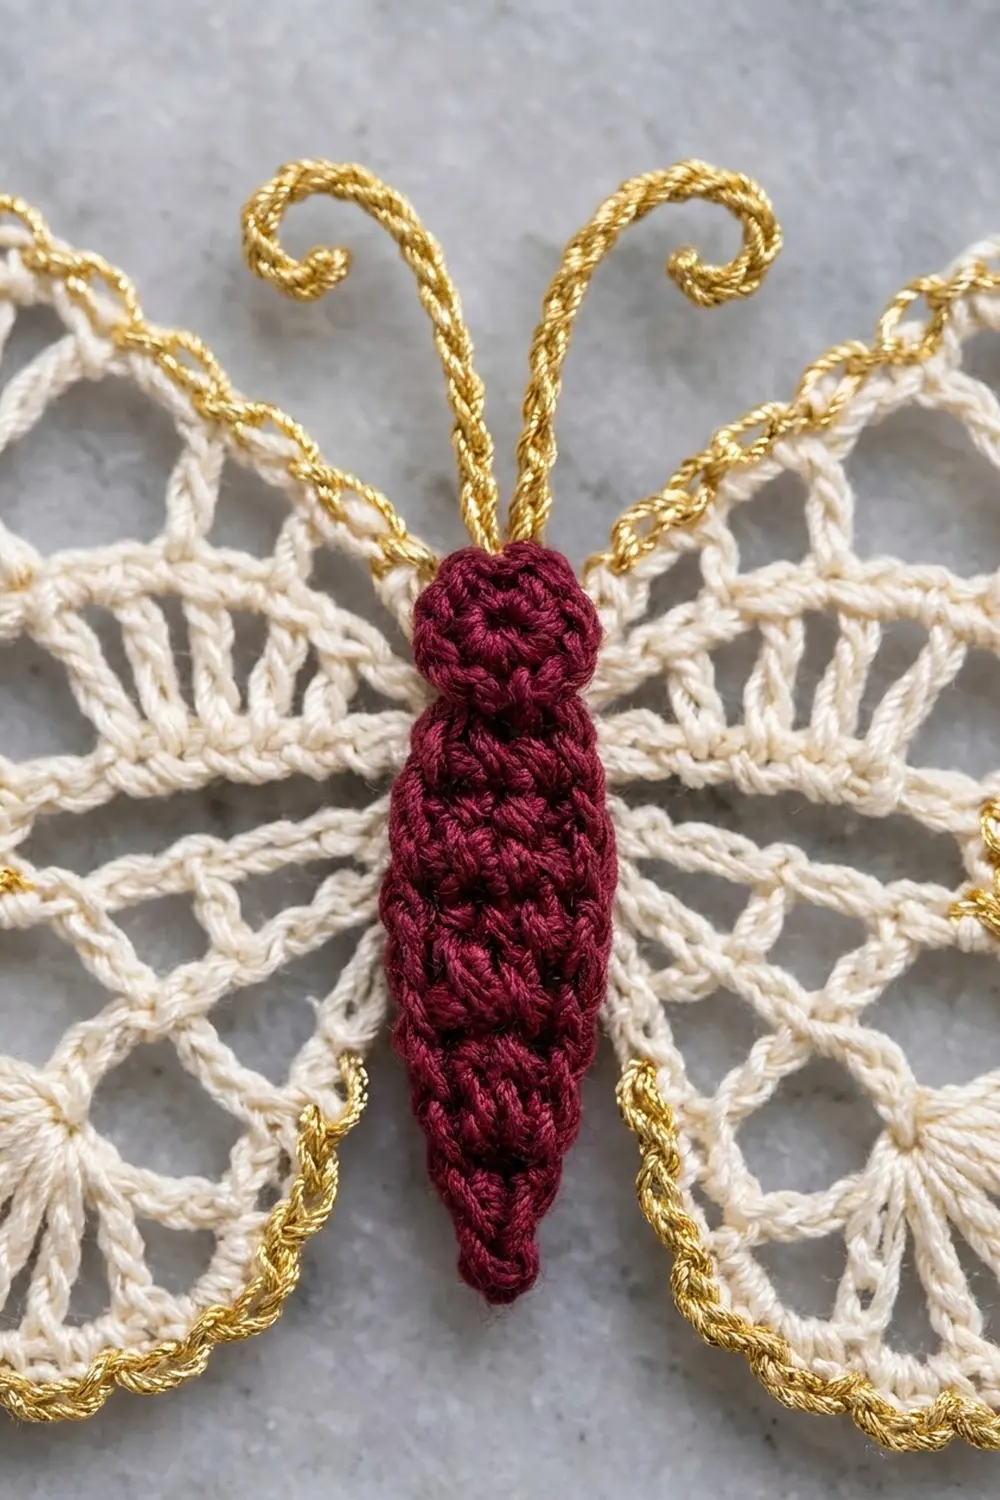
Body (Burgundy)
The body is worked in a continuous spiral. Mark the first stitch of each round.
Head:
– Rnd 1: Magic ring, 6 sc into the ring. (6 sts)
– Rnd 2: 2 sc in each st. (12 sts)
– Rnds 3–4: Sc in each st. (12 sts)
– Rnd 5: Sc2tog 6 times. (6 sts)
Checkpoint: the head is a firm ball about 0.4 in (1.0 cm) across.
Abdomen:
– Rnd 6: 2 sc in each st. (12 sts)
– Rnd 7: Sc in each st. (12 sts)
– Rnd 8: Working in BLO, sc in each st. (12 sts)
– Rnds 9–10: Sc in each st. (12 sts)
– Rnd 11: Working in BLO, sc in each st. (12 sts)
– Rnd 12: Sc in each st. (12 sts)
Put a very small amount of stuffing into the head and the upper abdomen now. You want the body plump but still flat enough to lie against the wings.
- Rnd 13: [Sc in next 2 sts, sc2tog] 3 times. (9 sts)
- Rnd 14: Working in BLO, sc in each st. (9 sts)
- Rnd 15: Sc in each st. (9 sts)
- Rnd 16: [Sc in next st, sc2tog] 3 times. (6 sts)
- Rnd 17: Sc in each st. (6 sts)
- Rnd 18: Sc2tog 3 times. (3 sts)
Fasten off, leaving a 6 in (15.2 cm) tail. Thread the tail through the last 3 sts, pull tight to make a point, and weave it in.
The BLO rounds (8, 11 and 14) leave the ridges that divide the abdomen into segments. The decreases on Rounds 13, 16 and 18 make the taper.
Checkpoint: the body is 2 in (5.1 cm) long and 0.5 in (1.3 cm) wide when pressed flat.
Antennae (Gold, make 2)
- Join gold with a sl st to one side of the top of the head, between Rounds 2 and 3.
- Ch 13.
- Working back along the chain: 2 sc in the 2nd ch from the hook, then 2 sc in each of the next 2 ch. These 6 sc make the curl.
- Sl st in each of the remaining 10 ch.
- Sl st into the head next to your starting point. Fasten off.
Make the second antenna on the other side of the head, about 0.2 in (0.5 cm) away from the first.
Checkpoint: each antenna is about 1 in (2.5 cm) long. Twist the curls outward with your fingers.
Upper Wing (Cream, make 2)
The wing is symmetrical, so both upper wings are made the same way. You mirror them when you sew them on.
- Foundation: Ch 5, sl st into the first ch to form a ring.
- Row 1 (RS): Ch 3 (counts as dc), 10 dc into the ring. Turn. (11 dc)
- Row 2: Ch 4 (counts as dc + ch 1), [dc in next dc, ch 1] 9 times, dc in the top of the turning ch. Turn. (11 dc, 10 ch-1 sps)
- Row 3: Ch 1, sc in the first dc, [ch 4, skip the ch-1 sp, sc in next dc] 10 times. Your last sc goes into the 3rd ch of the turning ch-4. Turn. (11 sc, 10 ch-4 loops)
- Row 4: Ch 1, work 1 scallop into each ch-4 loop. (10 scallops, 70 sts)
Fasten off and weave in the ends.
Row 1 makes the solid fan of dc at the base. Row 2 spreads the dc into open spokes. Row 3 adds the chain loops, and Row 4 turns each loop into a rounded scallop.
Lower Wing (Cream, make 2)
- Foundation: Ch 5, sl st into the first ch to form a ring.
- Row 1 (RS): Ch 3 (counts as dc), 8 dc into the ring. Turn. (9 dc)
- Row 2: Ch 1, sc in the first dc, [ch 4, sc in next dc] 8 times. Your last sc goes into the top of the turning ch. Turn. (9 sc, 8 ch-4 loops)
- Row 3: Ch 1, work 1 scallop into each ch-4 loop. (8 scallops, 56 sts)
Fasten off and weave in the ends.
Checkpoints: 0.5 in (1.3 cm) after Row 1, 0.85 in (2.2 cm) after Row 2, and 1.1 in (2.8 cm) after Row 3.
Gold Picot Border (all 4 wings)
Border gauge: 9 sc = 1 in (2.5 cm) along the edge.
The border goes up one straight side of the wing, around the curved edge and down the other straight side. Leave the ring end bare, because it will be hidden against the body.
Upper wing:
With the RS facing, join gold at the base of Row 1 on the right-hand side.
1. Side A: 2 sc in the end of Row 1, 2 sc in the end of Row 2, 1 sc in the end of Row 3. (5 sc)
2. Curved edge: For each of the 10 scallops, sc in the next 4 sts, picot, sc in the next 3 sts. (70 sc, 10 picots)
3. Side B: 1 sc in the end of Row 3, 2 sc in the end of Row 2, 2 sc in the end of Row 1. (5 sc)
Total: 80 sc and 10 picots. Fasten off.
Lower wing:
Join the same way.
1. Side A: 2 sc in the end of Row 1, 1 sc in the end of Row 2. (3 sc)
2. Curved edge: For each of the 8 scallops, sc in the next 4 sts, picot, sc in the next 3 sts. (56 sc, 8 picots)
3. Side B: 1 sc in the end of Row 2, 2 sc in the end of Row 1. (3 sc)
Total: 62 sc and 8 picots. Fasten off.
Why the math works:
– On the curved edge there is exactly one sc for each scallop stitch (7 per scallop). The edging follows the curve the scallops already have, without adding or pulling in.
– A dc row end is about two sc tall, so it gets 2 sc. An sc row end gets 1 sc. This keeps the straight sides flat.
– In each scallop, the 4th sc sits on top of the center dc, which is the highest point. The picot therefore lands right at the tip of each scallop.
Checkpoint: the edged upper wing measures 1.75 in (4.4 cm) and the edged lower wing measures 1.25 in (3.2 cm).
Assembly and Hanging Loop
- Lay the body flat with the RS facing up.
- Upper wings: Place one upper wing on each side so the ring touches the body between Rounds 6 and 10. Tilt the fan up and outward at about 30 degrees above horizontal. With cream thread, sew the ring firmly to the side of the body, and tack the first 0.25 in (0.6 cm) of each straight side.
- Lower wings: Place one on each side with the ring between Rounds 11 and 15, angled down and outward. Let the top straight edge tuck about 0.1 in (0.3 cm) under the upper wing, and tack them together at that point.
- Hanging loop: Using gold, ch 48 to make a chain 4 in (10.2 cm) long. Fold it in half and sew both ends to the back of the head. This gives a loop about 2 in (5.1 cm) tall.
Checkpoint: the wingspan measures 1.75 in + 0.5 in + 1.75 in = 4 in (10.2 cm).
Final Blocking
- Mist the ornament lightly until it is damp but not dripping. If you want the ornament stiffer, brush on a diluted fabric stiffener instead.
- Pin the body straight down the center of the board.
- Pin each wing at its widest point. Check that the wingspan is 4 in (10.2 cm) and the height is 3 in (7.6 cm).
- Pin out every gold picot so it points straight out from the edge.
- Open each ch-4 loop and dc spoke with a pin tip so the lace shows clearly.
- Re-curl the antennae and pin them in place.
- Let it dry completely, at least 6 hours, before unpinning.
Final Quality-Control Checklist
- [ ] The body is 2 in (5.1 cm) long with three visible ridges and a pointed tip.
- [ ] Both antennae curl outward and are the same length.
- [ ] The upper wings have 10 scallops each and the lower wings have 8.
- [ ] Every scallop has one picot at its center.
- [ ] Mirror-image wings are the same size, within 0.1 in (0.3 cm).
- [ ] The finished butterfly measures 4 in (10.2 cm) wide x 3 in (7.6 cm) tall.
- [ ] The hanging loop is centered and holds the ornament level.
- [ ] All ends are woven in and none show on the front.
Troubleshooting
- Wing cups or curls: Your Row 1 dc are too tight. Loosen the ring or go up a hook size.
- Gold edging ruffles: Your metallic thread is thicker than the cream. Use a 1.75 mm hook for the border only.
- Gold edging pulls in: Work the side row ends a little more loosely. Do not skip stitches on the curved edge.
- Body is too floppy: Add a little more stuffing before Round 13, or tighten your sc.
- Butterfly hangs crooked: Move the loop to the exact center of the head, then re-block the wings evenly.
- Picots disappear: Pin each picot out separately while the piece dries.
Care
Hand wash in cool water with a mild soap, press out the water with a towel and pin the ornament flat to dry. Store it flat between tissue paper so the wings keep their shape.
Final Notes
Every measurement in this pattern builds on the one before it:
– Body gauge of 9 sc per inch gives a 2 in (5.1 cm) body.
– Upper wings grow from 0.5 in (1.3 cm) to 1.6 in (4.1 cm). With the 0.125 in (0.3 cm) gold border they reach 1.75 in (4.4 cm).
– Lower wings grow to 1.1 in (2.8 cm), and 1.25 in (3.2 cm) with the border.
– Two upper wings plus the body give a 4 in (10.2 cm) wingspan.
If you check each stage as you go, the finished butterfly will come out at the right size.
Happy crocheting!