

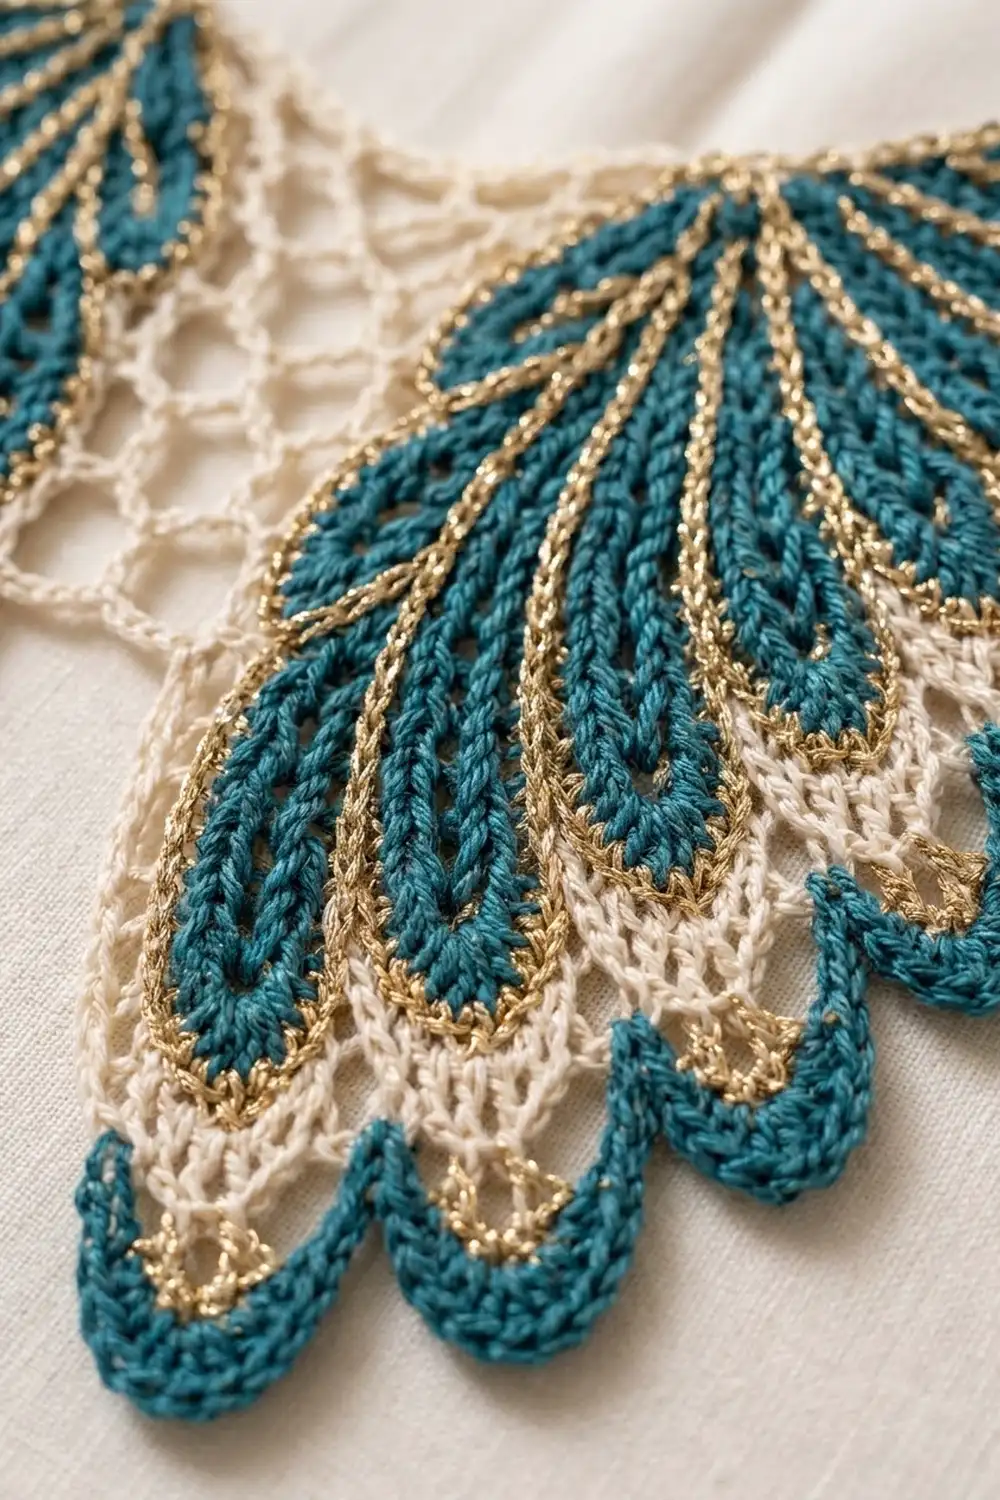
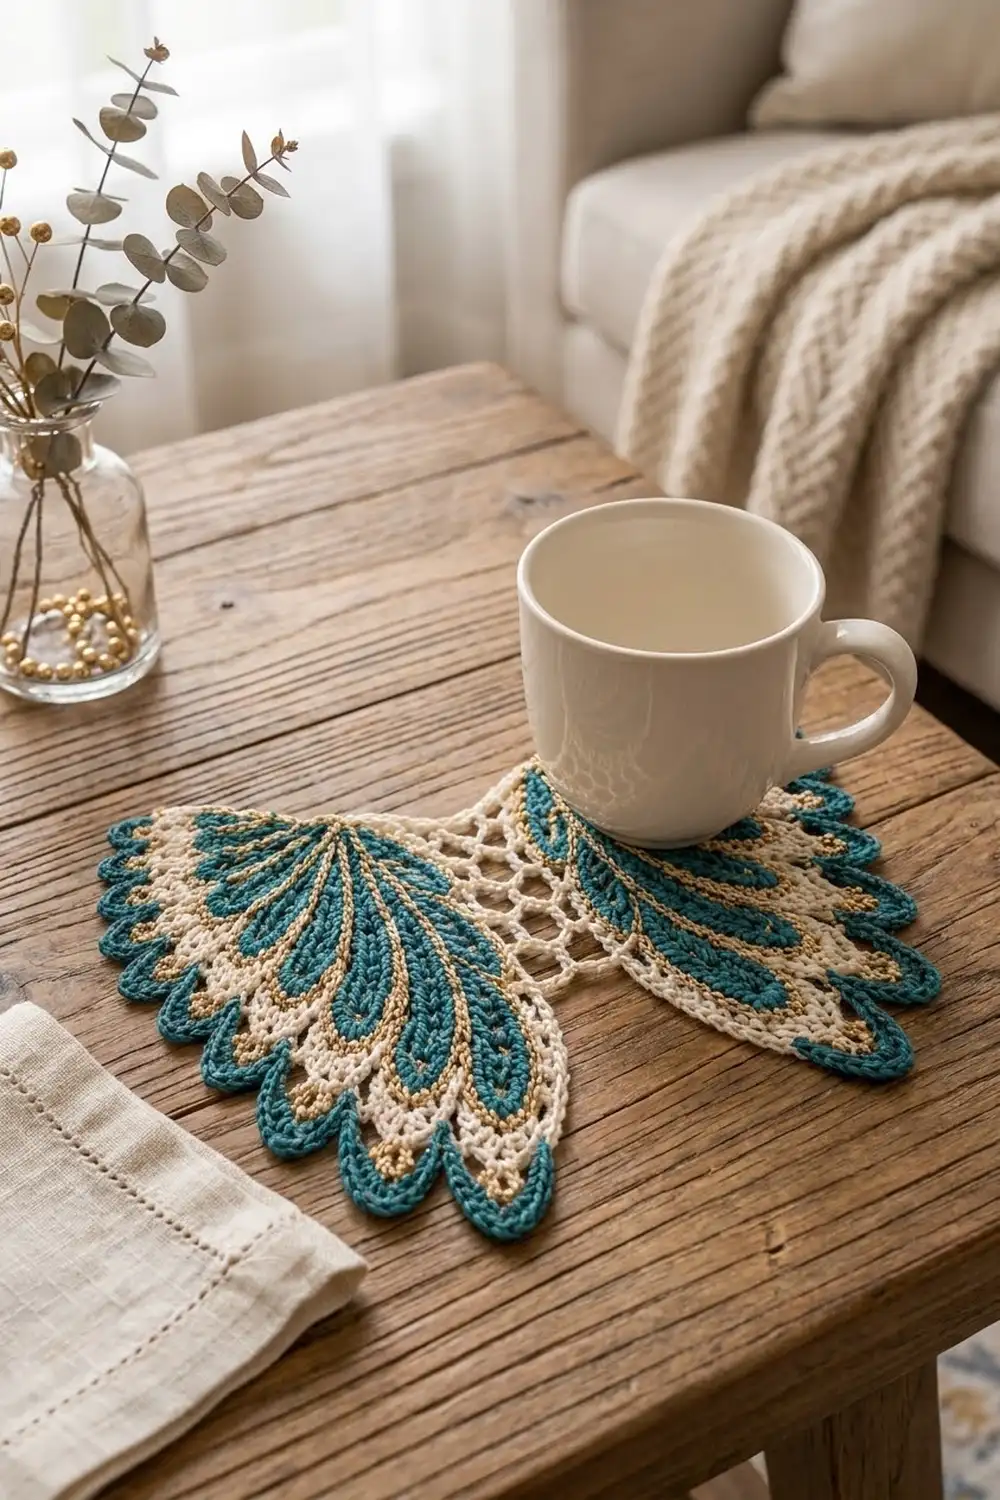
The Gilded Plume Wings are a pair of feathered lace wings joined by a soft open net at the center. Each wing fans out into five long feathers. Every feather has a deep teal core, a fine metallic gold outline, and a halo of ivory lace loops. A tiny teal scalloped edge finishes the wings and gives the bottom its rippled, plume-like outline.
The palette uses three colors: teal, metallic gold, and cream. The style sits between Irish lace and modern appliqué. You can use the motif as a wall piece, a framed motif, a bag or jacket-back appliqué, or a centerpiece on a plain table runner.
This pattern is written in US crochet terms. After blocking, the finished motif measures 10.5 in (26.7 cm) wide and 5 in (12.7 cm) tall.
Construction is simple and modular. You crochet 10 oval feathers around a foundation chain and join them as you go into two mirrored wings of 5 feathers each. A small cream net panel links the two wings. A two-row gold-and-teal border then outlines the free edge of each wing.
Finished Size and Construction
- Finished size: 10.5 in x 5 in (26.7 cm x 12.7 cm)
- Skill level: Intermediate
- Terminology: US crochet terms
- Yarn weight: Super fine (#1) cotton or size 3 crochet thread
- Hook: 2.25 mm (US B/1)
- Number of pieces: 10 feathers + 1 net panel = 11 pieces
- Layout: 2 wings of 5 feathers each, mirrored, with the net panel between them
- Piece size: small feather 2.75 in (7.0 cm), medium 3.25 in (8.3 cm), and large 3.75 in (9.5 cm) long. All feathers are 1.25 in (3.2 cm) wide. The net panel is 2 in x 3 in (5.1 cm x 7.6 cm)
- Size before border: 10 in x 4.5 in (25.4 cm x 11.4 cm)
- Border depth: 0.25 in (0.6 cm)
Materials
Choose a smooth, mercerized cotton. It gives crisp stitch definition and keeps the lace loops open. For the gold, use a metallic thread of similar thickness, because a very thin metallic will disappear between the teal and cream rounds.
- Teal: 15 g (51 m)
- Cream: 15 g (51 m)
- Metallic gold: 10 g (34 m)
Quantities assume a cotton of about 170 m per 50 g. They include a margin of roughly 30 percent for swatching and joining.
Color tip: Pick a teal that is clearly darker than the gold. The design depends on contrast: dark core, bright outline, pale lace. If the teal and gold are close in value, the feathers lose their outline from a distance.
Tools:
- 2.25 mm (US B/1) hook
- Tapestry needle
- Stitch markers (at least 4)
- Small sharp scissors
- Rust-proof pins and a blocking mat
- Spray bottle with clean water
- Ruler or tape measure
Abbreviations (US Terms)
- ch – chain
- sl st – slip stitch
- sc – single crochet
- hdc – half double crochet
- dc – double crochet
- BLO – back loop only
- sk – skip
- st(s) – stitch(es)
- rnd – round
Special stitch – join loop: Use this in place of a ch-3 loop. Ch 1, sl st into the matching ch-3 loop of the neighboring piece, then ch 1. The join loop counts as one ch-3 loop.
Special stitch – mini scallop (worked over 4 sts): Sc in next st, (hdc, dc, hdc) in next st, sc in next st, sl st in next st. This makes 6 sts.
Gauge and Checkpoints
Gauge: 8 sc and 8 sc rows = 1 in (2.5 cm) with a 2.25 mm hook.
Make one large feather first and use it as your test piece. Check these measurements:
- After Rnd 1 (large feather): 2.75 in (7.0 cm) long
- After Rnd 4 (large feather): 3.75 in (9.5 cm) long and 1.25 in (3.2 cm) wide
- Net panel: 2 in x 3 in (5.1 cm x 7.6 cm)
- One wing, unbordered: 4 in (10.2 cm) across the fan
If the feather is too long, go down a hook size. If it is too short, go up one size. Check again before you make the rest, because every join depends on the loop counts and lengths matching.
Metallic thread often works up a little tighter than cotton. If your gold round makes the feather cup, loosen your tension on that round only.
Feather Pattern
All three feather sizes use the same 4 rounds. Only the foundation chain changes. In the instructions, L is the length of the foundation chain before the extra ch. For example, the large feather uses L = 20, so you chain 21.
| Size | Foundation ch | L | Rnd 1 | Rnd 2 | Rnd 3 | Rnd 4 loops |
|---|---|---|---|---|---|---|
| Small (S) | 13 | 12 | 30 | 34 | 38 | 19 |
| Medium (M) | 17 | 16 | 38 | 42 | 46 | 23 |
| Large (L) | 21 | 20 | 46 | 50 | 54 | 27 |
The end of the chain where you start is the base. The far end is the tip.
Rnd 1 (teal): Ch L + 1. Sc in 2nd ch from hook and in each of next L − 2 ch. Work 5 sc in the last ch (tip). Rotate and work along the underside of the chain: sc in each of next L − 2 ch, then 4 sc in the last ch (the same ch as the first sc). Join with sl st to first sc.
Count: (L − 1) + 5 + (L − 2) + 4 = 2L + 6 sts. Each long side has L − 2 sts, and each end has 5 sts. Place a marker in the center (3rd) st of each end.
Rnd 2 (teal, BLO): Ch 1. Working in BLO, sc in each st around, working 3 sc in each marked center st. Move each marker to the middle sc of its 3-sc group. Join.
Count: 2L + 10 sts. Each end now has 7 sts. The BLO ridge makes the raised vein around the teal core.
Rnd 3 (gold): Join gold in any st. Ch 1, sc in each st around, working 3 sc in each marked st. Move markers up. Join and fasten off.
Count: 2L + 14 sts. Each end has 9 sts, and each side still has L − 2 sts.
Rnd 4 (cream): Join cream in the marked base st. Ch 3, sk 1 st, sc in next st; repeat around, ending with ch 3, sk last st, sl st in joining st. Fasten off.
Count: (2L + 14) ÷ 2 = L + 7 ch-3 loops.
From the starting point, the loops fall in this order: 2 base loops, (L − 2) ÷ 2 side loops, 5 tip loops, (L − 2) ÷ 2 side loops, 2 base loops.
- Large: 2 + 9 + 5 + 9 + 2 = 27 loops
- Medium: 2 + 7 + 5 + 7 + 2 = 23 loops
- Small: 2 + 5 + 5 + 5 + 2 = 19 loops
The first set of side loops is side A, and the second set is side B. On each side, the 4 loops closest to the base are the joining loops.
Make All Pieces
Make Rnds 1–3 for all 10 feathers first. Then work Rnd 4 on each feather as you assemble the wings.
| Piece | Quantity | Teal | Gold | Cream |
|---|---|---|---|---|
| Small feather | 2 | Rnds 1–2 | Rnd 3 | Rnd 4 |
| Medium feather | 4 | Rnds 1–2 | Rnd 3 | Rnd 4 |
| Large feather | 4 | Rnds 1–2 | Rnd 3 | Rnd 4 |
| Net panel | 1 | – | – | All rows |
Layout grid (front view, bases toward the center):
- ROW 1: S M M L L | NET | L L M M S
- The left wing reads outer → inner. The right wing reads inner → outer.
Net panel (cream):
Ch 17.
Row 1: Sc in 2nd ch from hook, ch 5, sk 3 ch, sc in next ch; repeat from * 3 more times. Turn. (4 ch-5 loops)
Row 2: Ch 5 (counts as dc + ch 2), sc in first ch-5 loop, (ch 5, sc in next loop) 3 times, ch 2, dc in last sc. Turn. (3 ch-5 loops + 2 half loops)
Row 3: Ch 1, sc in dc, (ch 5, sc in next ch-5 loop) 3 times, ch 5, sc in 3rd ch of turning ch. Turn. (4 ch-5 loops)
Rows 4–9: Repeat Rows 2–3 three more times. Do not fasten off.
You now have 9 rows and 9 row ends on each side edge. The panel measures 2 in x 3 in (5.1 cm x 7.6 cm).
Joining
All feather joins are worked join-as-you-go during Rnd 4, using the join loop.
Left wing:
- Work Rnd 4 on a small feather with no joins.
- Work Rnd 4 on a medium feather. On side A, replace the 4 joining loops with join loops. Connect each one to the 4 side B joining loops of the small feather, base to base.
- Repeat step 2 with the second medium feather (joined to the first medium), then a large feather, then the last large feather.
Each seam uses 4 loops per feather, joined loop to loop. No stitches are added or skipped, so every feather keeps its full loop count. Above the joins, the feathers are free to splay into a fan.
Right wing: Make it exactly the same way, then turn it face down so it mirrors the left wing. Feathers are symmetrical, so both faces look the same. The order now runs L L M M S outward from the center.
Attach the net panel: Keep the working loop from Row 9 on the hook. Ch 2, then sl st into the side B loop closest to the base on the innermost large feather of one wing. Ch 2, sl st into the next row end of the panel, ch 2, sl st into the next side B loop toward the tip; repeat from * until all 9 row ends are joined to all 9 side B loops. Fasten off. Rejoin cream at the Row 9 end of the opposite edge and repeat on the second wing.
Keep the ch-2 bridges loose. If you pull them tight, the net puckers and the wings tilt upward. Lay the work flat after every few joins to check.
Size checkpoint: The joined motif measures 10 in x 4.5 in (25.4 cm x 11.4 cm).
Border
Border gauge: 4 sc per ch-3 loop. This matches the 8 sc = 1 in (2.5 cm) gauge along the loop edge.
Work the border in two rows along the free edge of each wing. Leave the base loops gathered at the center, and the side B loops joined to the net, unbordered.
Free loops per wing:
- Small feather: 5 side A + 5 tip + 1 side B = 11 loops
- Medium feather 1: 3 + 5 + 3 = 11 loops
- Medium feather 2: 3 + 5 + 3 = 11 loops
- Large feather 1: 5 + 5 + 5 = 15 loops
- Large feather 2: 5 side A + 5 tip = 10 loops
- Total: 58 loops
Row 1 (gold): Join gold in the first free side A loop of the small feather (the outer top edge). Work 4 sc in each free loop until you reach the end of the inner large feather’s tip. Fasten off.
Counts per feather: 44, 44, 44, 60, and 40 sc. Total: 232 sc per wing.
Row 2 (teal): Join teal with a sc in the first gold sc. This counts as the first sc of the first mini scallop. Complete that mini scallop, then work 57 more mini scallops to the end. Fasten off.
Counts per feather: 66, 66, 66, 90, and 60 sts. Total: 348 sts (58 scallops) per wing.
Repeat both rows on the second wing. Both wings together have 464 gold sc and 696 teal sts.
Why the math works: Each loop gets exactly 4 sc, and a mini scallop uses exactly 4 sts. Every loop therefore ends up with one scallop centered over it: 232 ÷ 4 = 58 scallops, with nothing left over. The scallops bunch into the valleys between feathers and spread across the tips, which creates the rippled plume edge.
The border adds 0.25 in (0.6 cm) at the top, bottom, and outer ends. This takes the motif from 10 in x 4.5 in (25.4 cm x 11.4 cm) to 10.5 in x 5 in (26.7 cm x 12.7 cm).
Final Blocking
- Weave in all ends along the gold rounds, where they hide best.
- Spray the motif until it is evenly damp but not dripping.
- Lay it face up on the blocking mat.
- Pin the net panel first, squared to 2 in x 3 in (5.1 cm x 7.6 cm).
- Fan each wing so the feathers radiate from the center. Pin each feather tip, keeping the gaps between tips even.
- Check the overall size: 10.5 in x 5 in (26.7 cm x 12.7 cm).
- Pin the dc point of every mini scallop for a crisp edge.
- Let it dry completely before unpinning.
Final Quality-Control Checklist
- Each feather has the correct Rnd 4 loop count: 19, 23, or 27.
- Each seam joins exactly 4 loops to 4 loops.
- Each wing has the feathers in S M M L L order, with the largest next to the net.
- The net panel has 9 rows and is joined to 9 loops on each side.
- Border Row 1 has 232 sc per wing.
- Border Row 2 has 58 scallops per wing.
- The gold rounds show as an unbroken line around every teal core.
- The finished motif measures 10.5 in x 5 in (26.7 cm x 12.7 cm).
Troubleshooting
Feather tip is pointy or cupped: Check that you worked exactly 3 sc in the marked st on Rnds 2 and 3, not more.
Feather twists: Rnd 1 was worked too tightly along the chain. Make the foundation chain with a hook one size larger.
Loop count is off on Rnd 4: Count Rnd 3 again. It must equal 2L + 14, which is always an even number.
Wings curl upward: The joins or the net bridges are too tight. Redo them with looser chains.
Gold looks thin: Use a metallic thread closer in weight to the cotton, or hold two strands together.
Border ruffles: Some loops have more than 4 sc. Recount feather by feather.
Net panel is too short: Add one pair of rows only if it also adds matching joining points. Otherwise, block the panel longer.
Care
Hand wash in cool water with a mild detergent and dry flat. Do not iron the metallic gold directly; if needed, press from the back under a cloth on low heat.
Final Notes
Here is the measurement chain. A gauge of 8 sc = 1 in (2.5 cm) gives a large feather 3.75 in (9.5 cm) long. Five feathers fan into a 4 in (10.2 cm) wing. Two wings plus the 2 in (5.1 cm) net panel make 10 in x 4.5 in (25.4 cm x 11.4 cm). A 0.25 in (0.6 cm) border brings the finished motif to 10.5 in x 5 in (26.7 cm x 12.7 cm).
If you check the measurements at each stage, the feathers will line up, the scallops will fall evenly, and the wings will lie flat.
Happy crocheting!