

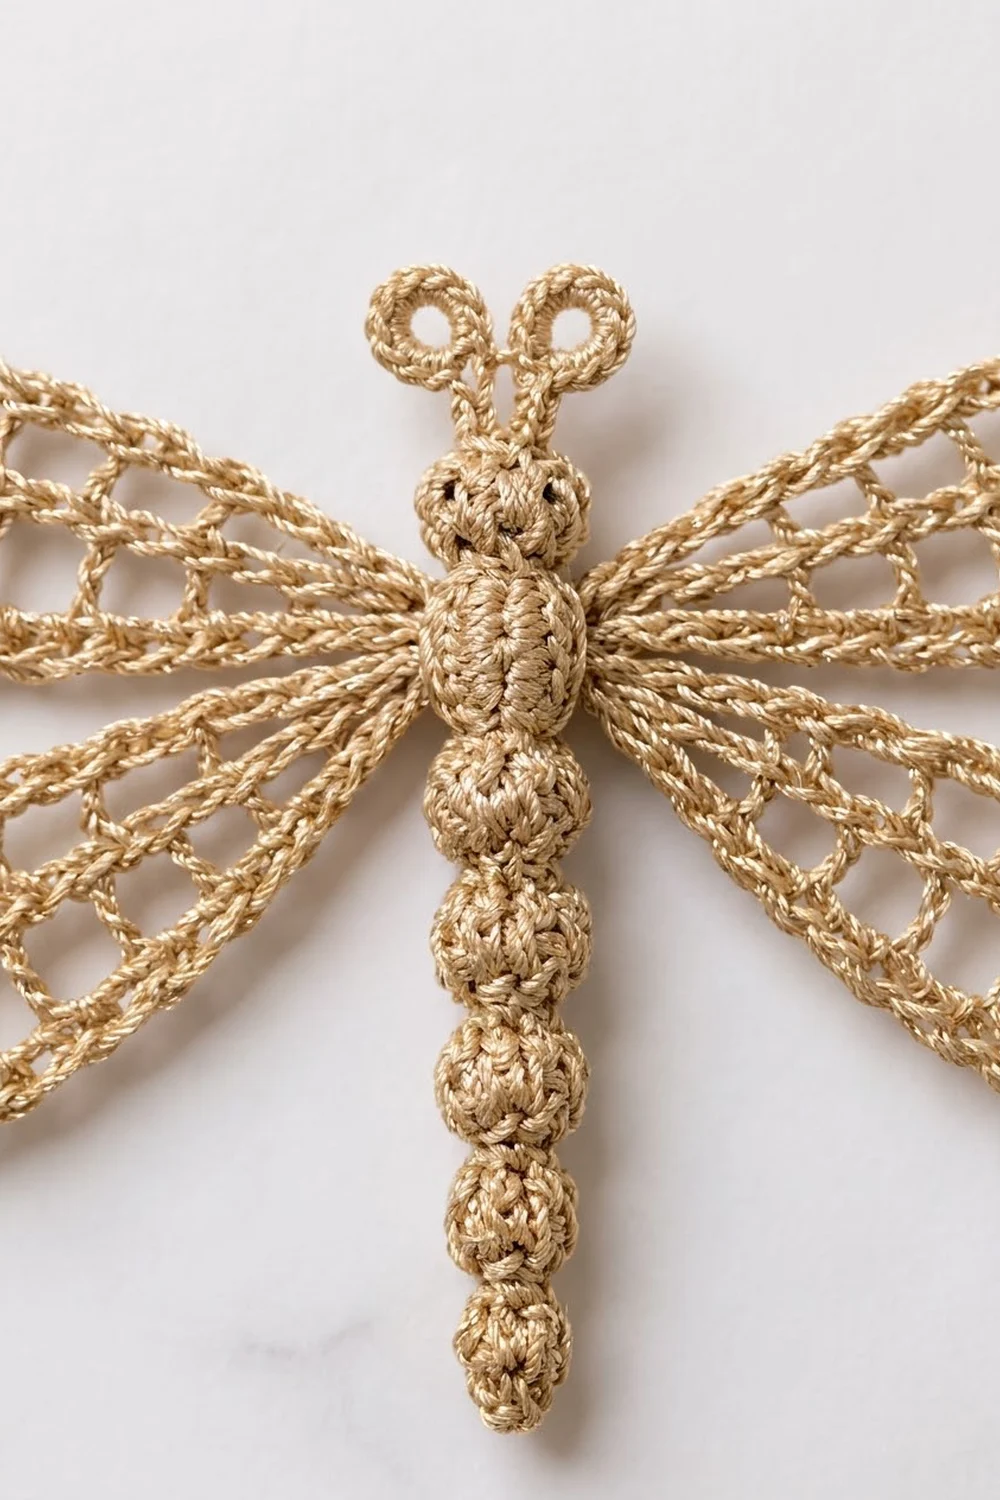
This dragonfly is a small piece of golden lace. It has four long oval wings with an open ladder texture and a twisted, rope-like edge. The body is a row of little beads: a round head with two ring-shaped eyes, a full thorax, and five tapering abdomen segments.
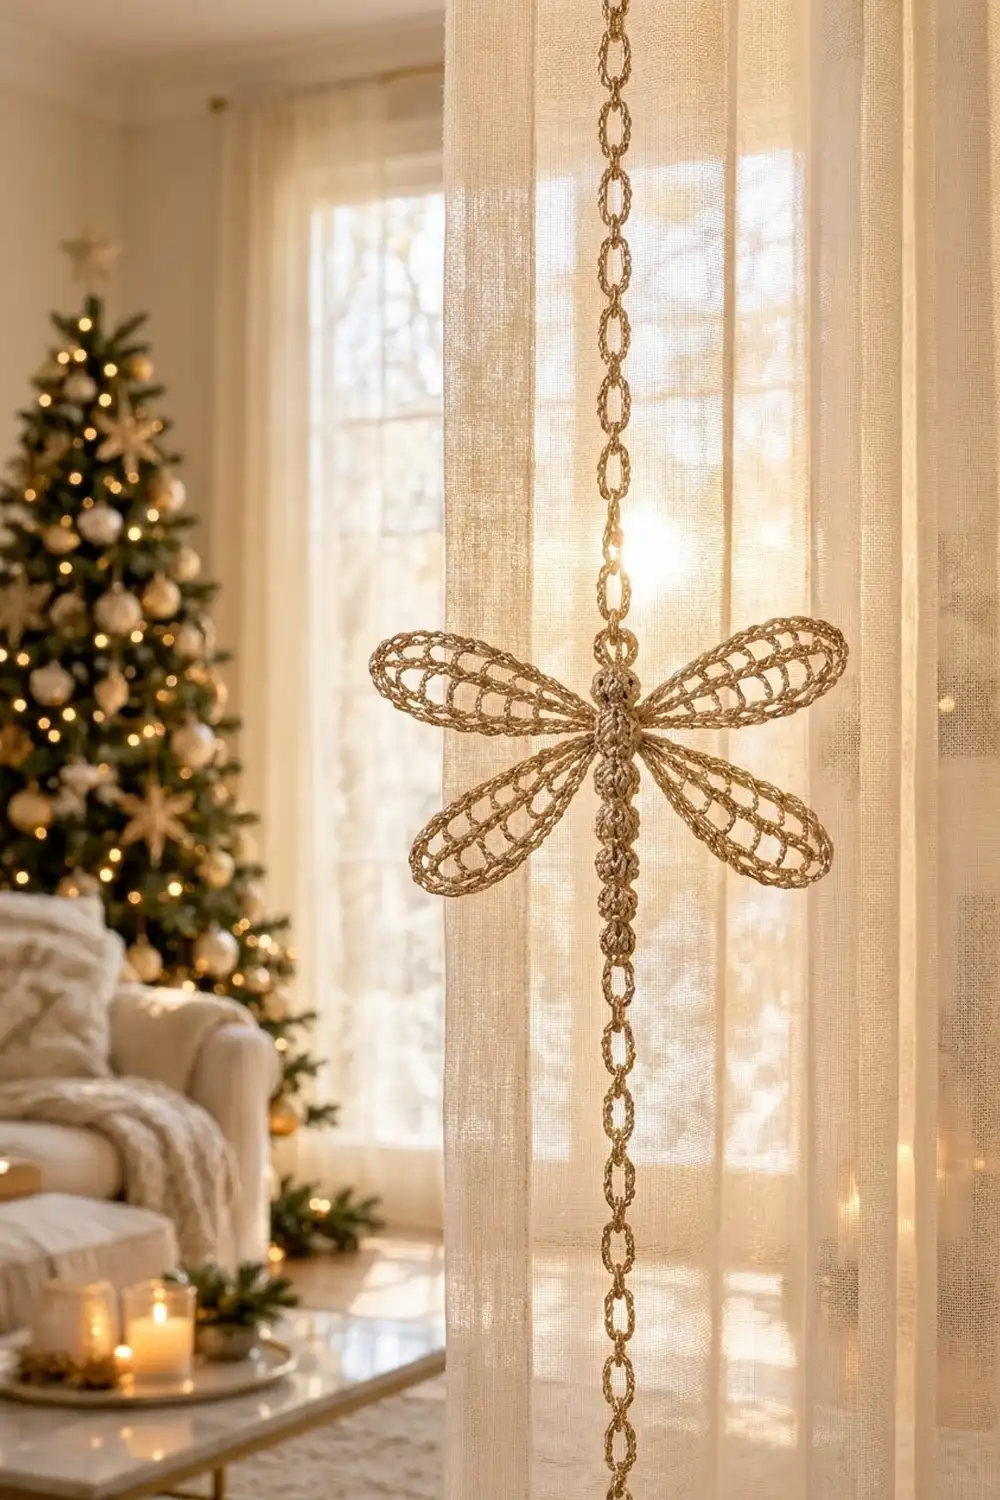
The sample uses one color, a champagne-gold metallic fingering-weight thread. On a table it looks like filigree jewelry, and it catches the light when it hangs in a window. The style is elegant and quiet, good for holiday décor, gift toppers, or a single ornament.
The pattern uses US crochet terms. The finished dragonfly measures 7.75 in (19.7 cm) across the wings and 4.25 in (10.8 cm) from the top of the eye loops to the tail tip.
You make one dragonfly from five parts. The body is worked first, in continuous rounds from the head down to the tail. Each wing starts as a single-crochet oval worked around a foundation chain. A ladder round of double crochet comes next, then a two-round border. The wings are blocked flat and sewn to the thorax.
Finished Size and Construction
- Finished size: 7.75 in (19.7 cm) wingspan × 4.25 in (10.8 cm) long
- Skill level: Intermediate (small-scale amigurumi plus lace ovals)
- Terminology: US crochet terms
- Yarn weight: Fingering / Super Fine (#1), metallic blend
- Hook: 2.25 mm (US B-1)
- Number of pieces: 1 finished motif (1 body + 4 wings, sewn together)
- Layout: Upper wing pair above, lower wing pair below, both attached to the thorax
- Piece sizes: Upper wing 3.75 × 1.25 in (9.5 × 3.2 cm); lower wing 3.5 × 1.25 in (8.9 × 3.2 cm); body 3.75 in (9.5 cm) long without the eye loops
- Wing size before border: Upper 3.25 × 0.75 in (8.3 × 1.9 cm); lower 3 × 0.75 in (7.6 × 1.9 cm)
- Border depth: 0.25 in (0.6 cm) on every edge of each wing
Materials
Yarn advice: Choose a fingering-weight cotton or viscose with a metallic strand. You want a firm thread with good stitch definition. Avoid fuzzy or very slippery yarns, because the rope-like edge and the beaded segments depend on clean, round stitches. A yarn of about 170 m per 50 g (186 yd per 1.75 oz) matches the gauge below.
- Gold: 12 g, about 41 m (45 yd)
The quantity includes a margin of about 30%. One dragonfly uses roughly 9 g, which leaves enough for a gauge swatch and some re-working.
Tools:
– 2.25 mm (US B-1) crochet hook
– Tapestry needle with a small eye
– Locking stitch marker
– Small scissors
– Gold yarn scraps or a little polyester fiberfill for stuffing
– Rust-proof pins and a foam blocking mat
– Spray bottle with cool water
– Optional: fabric stiffener diluted 1:1 with water
Abbreviations (US Terms)
- ch – chain
- sl st – slip stitch
- sc – single crochet
- dc – double crochet
- sc2tog – single crochet 2 together
- sk – skip
- sp – space
- st(s) – stitch(es)
- rnd(s) – round(s)
- MR – magic ring
- rev sc – reverse single crochet
Special stitch: reverse single crochet (rev sc). Work from left to right (or right to left if you crochet left-handed). Insert the hook into the next stitch to the right, yarn over, pull up a loop, yarn over, and draw through both loops. This makes the twisted, corded outline on the wings.
Gauge and Checkpoints
Gauge: 7 sc and 8 rnds = 1 in (2.5 cm) in sc worked in rounds.
Test one upper wing first. It is the quickest piece and shows any gauge problem right away. Measure at each checkpoint:
- Upper wing Rnd 1: 2.75 in (7.0 cm) long, 0.25 in (0.6 cm) wide
- Upper wing Rnd 2: 3.25 × 0.75 in (8.3 × 1.9 cm)
- Upper wing Rnd 4 (blocked): 3.75 × 1.25 in (9.5 × 3.2 cm)
- Head (Rnd 3): 0.5 in (1.3 cm) wide
- Thorax (Rnd 8): 0.75 in (1.9 cm) wide
- Each abdomen segment: 0.4 in (1.0 cm) wide
Too big? Go down to a 2 mm hook, or tighten your tension on the chain and sc rounds.
Too small? Go up to a 2.5 mm hook. Check the body too: if the body rounds look loose and stuffing shows through, keep the smaller hook for the body and use the larger hook only for the wings.
Body
The body is worked in continuous spiral rounds, with no joins and no turning. Place a marker in the first stitch of each round and move it up as you go.
Head
- Rnd 1: Make a MR, 6 sc in ring. (6)
- Rnd 2: 2 sc in each st around. (12)
- Rnd 3: Sc in each st around. (12)
- Rnd 4: Sc2tog 6 times. (6)
Checkpoint: the head is a small ball 0.5 in (1.3 cm) wide. Push in a pinch of stuffing.
Thorax
- Rnd 5: 2 sc in each st around. (12)
- Rnd 6: [Sc in next st, 2 sc in next st] 6 times. (18)
- Rnds 7–8: Sc in each st around. (18)
- Rnd 9: [Sc in next st, sc2tog] 6 times. (12)
Stuff the thorax firmly enough to hold an oval shape.
- Rnd 10: Sc2tog 6 times. (6)
Checkpoint: the thorax is 0.75 in (1.9 cm) wide at Rnds 7–8.
Abdomen (5 segments)
Each segment takes 3 rounds and goes from 6 to 9 and back to 6 stitches. That makes the beaded look.
- Segment Rnd A: [Sc in next st, 2 sc in next st] 3 times. (9)
- Segment Rnd B: Sc in each st around. (9)
- Segment Rnd C: [Sc in next st, sc2tog] 3 times. (6)
Repeat Rnds A–C 5 times in total (Rnds 11–25). Add a little stuffing after every second segment, using a hook tip to push it in.
- Rnd 26: Sc2tog 3 times. (3)
Fasten off. Leave a 4 in (10.2 cm) tail and weave it through the 3 remaining stitches. Pull it closed and weave it in.
Checkpoint: the body is 3.75 in (9.5 cm) long, and each segment is 0.4 in (1.0 cm) wide.
Eye Loops
Join the yarn with a sl st in one Rnd 2 stitch at the top of the head, slightly left of center. Ch 6. Sl st in the 4th ch from the hook to form a small ring, then sl st in each of the next 2 ch. Sl st in the next head stitch.
Sk 1 head stitch and sl st in the next one. Repeat the eye sequence (ch 6, ring, 2 sl sts down the stalk), then sl st in the next head stitch. Fasten off and weave in the end.
Checkpoint: the eyes rise 0.5 in (1.3 cm) above the head, which brings the total length to 4.25 in (10.8 cm).
Upper Wings (make 2)
Foundation: Ch 21.
Rnd 1 (spine): Sc in the 2nd ch from the hook and in each of the next 18 ch (19 sc). Work 3 sc in the last ch. Rotate and work along the opposite side of the foundation: sc in each of the next 18 ch, then 2 sc in the last ch (the same ch that holds the first sc). Sl st to the first sc. (42)
Count check: 19 + 3 + 18 + 2 = 42. Each wing has 4 zones:
– Tip A: sts 1, 41, 42
– Side 1: sts 2–19 (18 sts)
– Tip B: sts 20–22
– Side 2: sts 23–40 (18 sts)
Rnd 2 (ladder): Ch 4 (counts as dc + ch 1), dc in the same st, ch 1.
Side 1: [Dc in next st, ch 1, sk next st] 9 times.
Tip B: [(Dc, ch 1, dc, ch 1) in next st] 3 times.
Side 2: [Dc in next st, ch 1, sk next st] 9 times.
Tip A: [(Dc, ch 1, dc, ch 1) in next st] 2 times.
Sl st to the 3rd ch of the beginning ch-4.
Count: 2 + 9 + 6 + 9 + 4 = 30 dc and 30 ch-1 sps.
The dc posts stand upright along the spine like ladder rungs. At each tip, every stitch gets 2 dc, so the round curves around the ends and stays flat.
Checkpoint: 3.25 × 0.75 in (8.3 × 1.9 cm).
Lower Wings (make 2)
Foundation: Ch 19.
Rnd 1: Sc in the 2nd ch from the hook and in each of the next 16 ch (17 sc). Work 3 sc in the last ch. Along the opposite side, sc in each of the next 16 ch, then 2 sc in the last ch. Sl st to the first sc. (38)
Count check: 17 + 3 + 16 + 2 = 38. Each side has 16 sts, and each tip has 3.
Rnd 2: Work as for the upper wing, but repeat each side bracket 8 times instead of 9.
Count: 2 + 8 + 6 + 8 + 4 = 28 dc and 28 ch-1 sps.
Checkpoint: Rnd 1 is 2.5 in (6.4 cm) long. After Rnd 2, the wing is 3 × 0.75 in (7.6 × 1.9 cm).
Border (Wing Edging, Rnds 3–4)
The border is worked on each wing separately. It is 0.25 in (0.6 cm) deep, which is 2 rounds at 8 rnds per 1 in (2.5 cm).
Rnd 3 (conversion round): Ch 1. Sc in each dc and in each ch-1 sp around. At each tip there are 6 ch-1 sps; work 2 sc in the 1st, 3rd, and 5th of them. Sl st to the first sc.
- Upper wing: 60 sts worked 1 per existing st or sp + 6 extra = 66 sc
- Per long side: 18 sc (9 dc + 9 sps)
- Per tip: 15 sc (6 dc + 6 sps + 3 extra)
- Total: 18 + 18 + 15 + 15 = 66
- Lower wing: 56 sts worked 1 per existing st or sp + 6 extra = 62 sc
- Per long side: 16 sc
- Per tip: 15 sc
- Total: 16 + 16 + 15 + 15 = 62
Rnd 4 (corded edge): Ch 1. Rev sc in each st around. Sl st to the first st and fasten off.
- Upper wing: 66 rev sc (18 per side, 15 per tip)
- Lower wing: 62 rev sc (16 per side, 15 per tip)
Leave a 10 in (25.4 cm) tail on each wing for sewing.
Why the math works: On the long sides, each (dc, ch 1) pair sits over 2 spine stitches. Rnd 3 then puts 1 sc in each dc and 1 sc in each space, so each side ends with exactly as many stitches as the spine: 18 on the upper wing, 16 on the lower. The edges stay straight with no ruffling.
The tips are curves, so they need more stitches. Rnd 1 has 3 sts at each tip, Rnd 2 has 12 units (6 dc + 6 sps), and Rnd 3 has 15 sc. That is the gradual growth a semicircle needs at each larger radius. Rev sc adds no stitches, so Rnd 4 keeps the Rnd 3 counts.
Assembly
Tip A (the end where the round started) is the wing base. Pinch the base flat, about 0.5 in (1.3 cm) wide.
- Place an upper wing against the thorax at Rnd 7, angled slightly toward the head. Sew it on with small whip stitches through the base and 3 thorax stitches.
- Sew the second upper wing to the opposite side in the same way.
- Sew the lower wings at Rnd 8, angled slightly toward the tail.
- Run the tails under the thorax and weave them back into the wing spines.
Checkpoint: with the wings flat, the wingspan is 7.75 in (19.7 cm).
Final Blocking
- Mist the whole dragonfly lightly with cool water. Do not steam metallic yarn, because heat can dull or kink the metallic strand.
- Lay the dragonfly face up on the blocking mat.
- Pin each wing at both tips and at the middle of both long sides, so it measures its finished size: 3.75 × 1.25 in (9.5 × 3.2 cm) for upper wings, 3.5 × 1.25 in (8.9 × 3.2 cm) for lower wings.
- Use the tip of a pin to straighten each dc rung so the ladder spacing is even.
- Pinch the abdomen segments into neat, round beads in a straight line.
- For a hanging ornament, brush diluted stiffener onto the wings only.
- Let it dry completely, at least 6 hours, before you unpin it.
Final Quality-Control Checklist
- [ ] Body has a round head, an oval thorax, and 5 even abdomen segments
- [ ] Two eye loops of matching size, 0.5 in (1.3 cm) tall
- [ ] Upper wings have 66 sts in Rnds 3 and 4; lower wings have 62
- [ ] Each wing has 30 (upper) or 28 (lower) dc rungs
- [ ] Wing edges lie flat, with no ruffling on the sides and no cupping at the tips
- [ ] Wingspan 7.75 in (19.7 cm); length 4.25 in (10.8 cm)
- [ ] Wing pairs match in angle and height
- [ ] All tails woven into spines or the body, none visible in the lace
Troubleshooting
Wing sides ruffle. You probably skipped no stitches in Rnd 2. Recount: each side bracket uses exactly 2 spine stitches.
Wing tips cup. Make sure you placed the 3 extra sc in the tip spaces in Rnd 3. If the tips still cup, add a fourth extra sc in the 6th tip sp, but only on both tips of every wing, so the wings still match.
Wing tips ruffle. Your dc may be too loose. Tighten your tension, or skip the extra sc in the 3rd tip sp.
Stuffing shows through the body. Use a smaller hook for the body, and stuff with gold yarn scraps instead of white fiberfill.
Segments look blurry. Pull each sc2tog snug, and stuff a little more firmly so each bead fills out.
Rev sc edge looks flat. Keep your loops relaxed. Rev sc needs slightly looser tension than regular sc to twist into a rope.
Metallic strand splits. Use a hook with a rounded throat, and slow down on the decreases.
Care
Hand wash in cool water with mild soap, press out the water in a towel, and re-pin flat to dry. If the wings were stiffened, re-apply stiffener after washing.
Final Notes
The measurement chain is short. The gauge is 7 sc per 1 in (2.5 cm). The upper wing spine is 2.75 in (7.0 cm) long and becomes 3.25 × 0.75 in (8.3 × 1.9 cm) after the ladder round. The 0.25 in (0.6 cm) border brings it to 3.75 × 1.25 in (9.5 × 3.2 cm). The lower wing goes from 2.5 in (6.4 cm) to 3 in (7.6 cm) to 3.5 in (8.9 cm) long.
Stitch counts follow the same chain. The upper wing goes 42 → 30 dc → 66 → 66, and the lower wing goes 38 → 28 dc → 62 → 62. Sewn to a 0.75 in (1.9 cm) thorax, the wings give a 7.75 in (19.7 cm) wingspan on a 4.25 in (10.8 cm) body. If each checkpoint matches, the finished dragonfly will too.
Happy crocheting!