

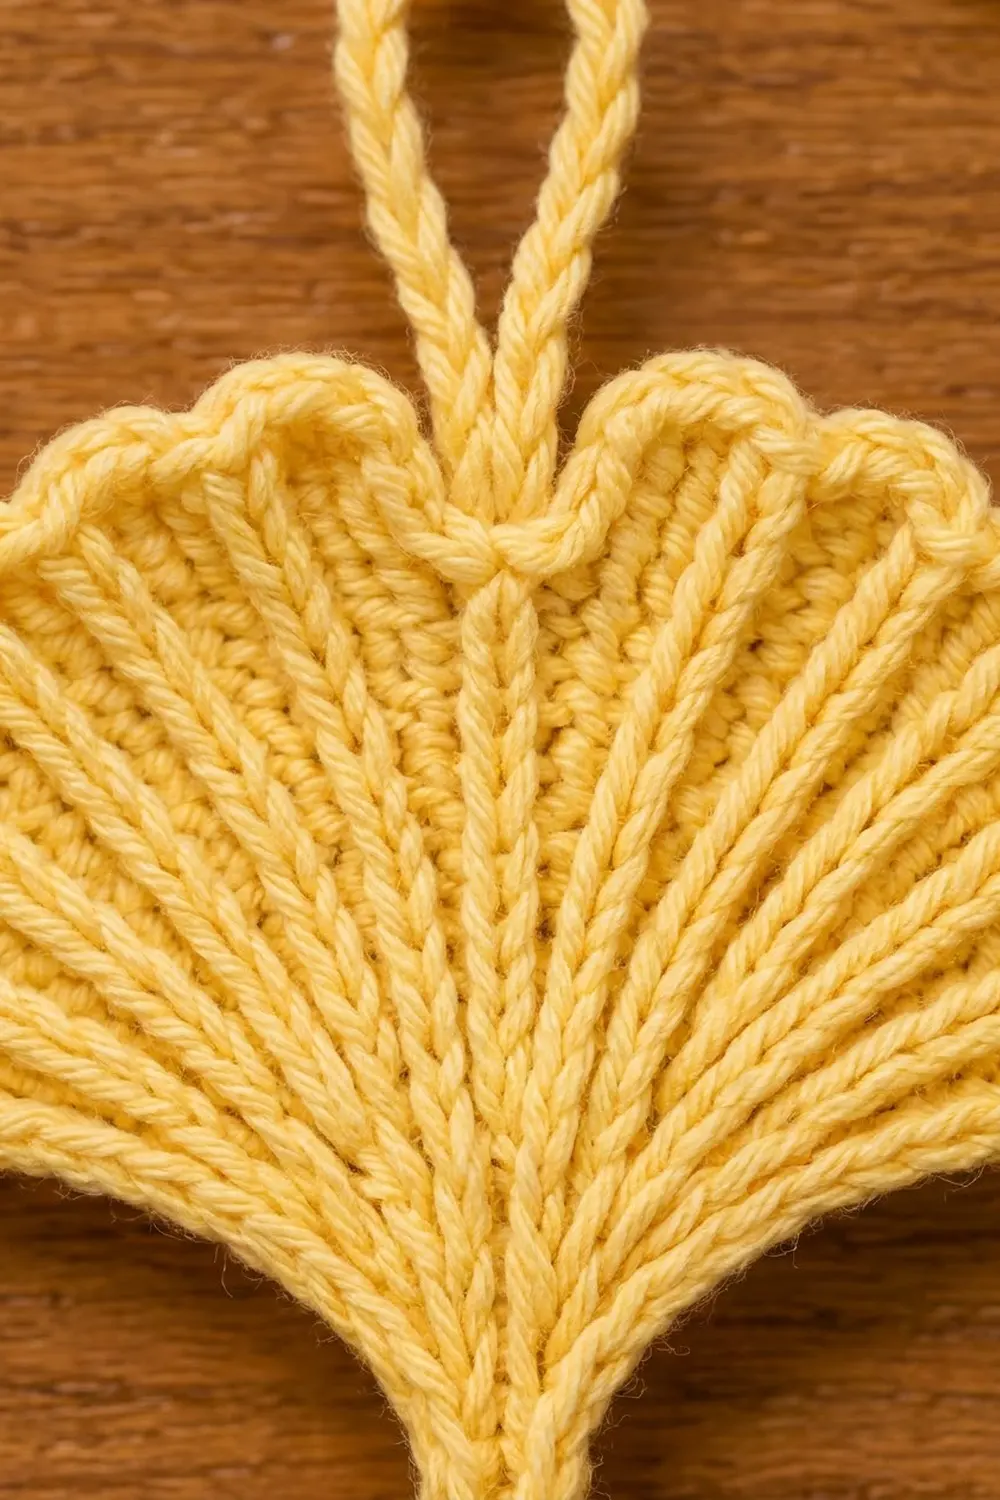
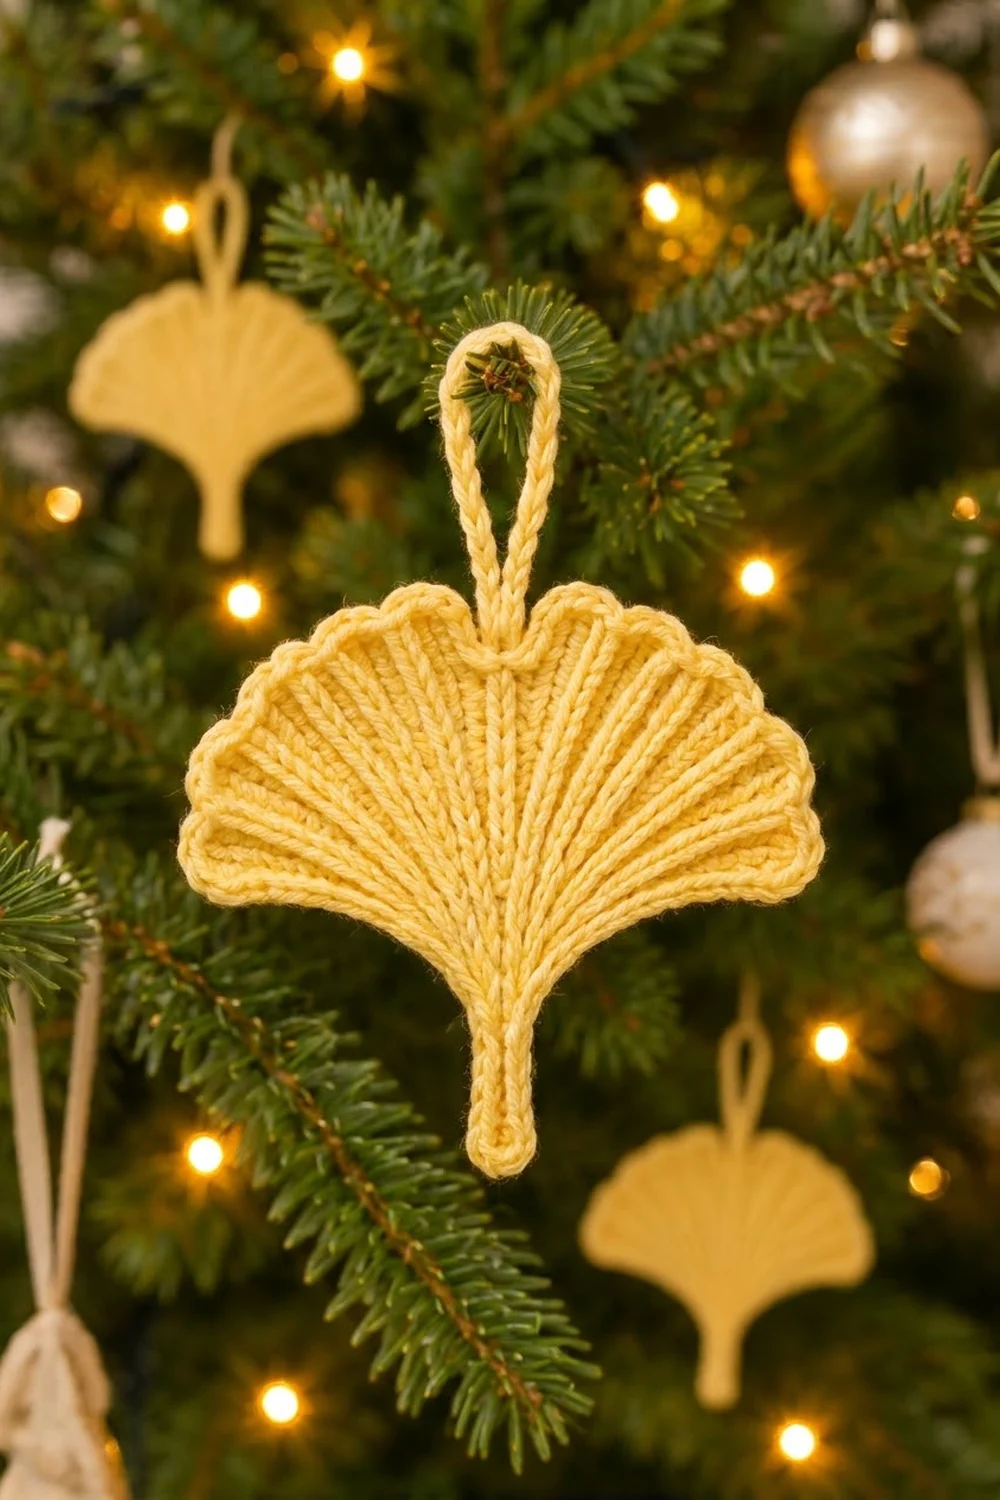
This little ginkgo leaf is a flat, fan-shaped ornament with a short stem and a notched top edge. Raised ribs spread out from the base like real leaf veins. A neat corded edge outlines the whole shape, and a sturdy loop at the center notch lets you hang it from a tree branch, a window latch, or a gift.
The sample is worked in a single pale butter yellow. That gives it a soft, autumn-gold look that also glows nicely among Christmas lights. The style is clean and simple. All the texture comes from post stitches and the edging, so there are no color changes and only two ends to weave in.
This pattern uses US crochet terms. The finished leaf is 5.5 in (14.0 cm) wide and 4.25 in (10.8 cm) tall, including the stem. The hanging loop adds about 1.5 in (3.8 cm), for a total hanging height of 5.75 in (14.6 cm).
You’ll start from a magic ring and work turned rows that grow into a fan, with front- and back-post ribs. The last row shapes the center notch. A two-round border then adds the scalloped lobes, the stem, and the corded outline. The hanging loop comes last.
Finished Size and Construction
- Finished size: 5.5 in (14.0 cm) wide x 4.25 in (10.8 cm) tall, plus a 1.5 in (3.8 cm) loop
- Skill level: Intermediate (post stitches, working into row ends)
- Terminology: US crochet terms
- Yarn weight: DK (light, #3)
- Hook: 3.5 mm (E-4)
- Number of pieces: 1
- Layout: One single motif, no joining
- Piece size before border: 5 in (12.7 cm) wide x 2.5 in (6.4 cm) from the ring to the lobe tops
- Border depth: about 0.25 in (0.6 cm) on each edge, plus a stem about 1.5 in (3.8 cm) long
Materials
Yarn: Use a smooth DK cotton or cotton blend. Cotton shows the post-stitch ribs clearly and keeps the scallops crisp after blocking. Fuzzy, brushed, or very soft acrylic yarn will blur the veins. Choose a light, solid shade. Variegated or heathered yarn hides the ribs.
- Pale butter yellow: 15 g, about 40 m (44 yd)
That amount includes a margin of about 30 percent for your gauge check, the hanging loop, and weaving in ends. One leaf uses about 11 g.
Tools:
– 3.5 mm (E-4) crochet hook
– Tapestry needle
– 2 stitch markers
– Blocking mat and rustproof pins
– Spray bottle with water
– Optional: fabric stiffener for a firmer ornament
Abbreviations (US Terms)
- ch – chain
- sl st – slip stitch
- sc – single crochet
- hdc – half double crochet
- dc – double crochet
- st(s) – stitch(es)
- RS / WS – right side / wrong side
- FPdc – front post double crochet: Yarn over, insert the hook from front to back to front around the post of the stitch, then complete a dc.
- BPdc – back post double crochet: Yarn over, insert the hook from back to front to back around the post of the stitch, then complete a dc.
Rib logic: Ribs are FPdc on RS rows and BPdc on WS rows. Both push the post toward the RS, so every rib stays raised on the front.
Turning chains: The ch 2 at the start of each row does not count as a stitch.
Gauge and Checkpoints
Gauge: 20 sts and 13 rows of dc = 4 in (10.2 cm) in plain dc rows.
This is a one-piece project, so your first leaf is your test piece. Measure it at each checkpoint below. Lay it flat without stretching, and measure the radius from the center of the magic ring straight up the middle to the top edge.
- After Row 3: radius about 1 in (2.5 cm)
- After Row 5: radius about 1.5 in (3.8 cm)
- After Row 8: radius about 2.5 in (6.4 cm) at the lobe tops, width about 5 in (12.7 cm)
- After the border: 5.5 in (14.0 cm) wide x 4.25 in (10.8 cm) tall, including the stem
Too big: If the leaf is more than 0.25 in (0.6 cm) over at any checkpoint, change to a 3.25 mm (D-3) hook. Too small: Change to a 3.75 mm (F-5) hook.
If the fan cups instead of lying flat, the post stitches are too tight. Loosen them rather than changing the counts. It’s best to restart early: a size error at Row 3 is twice as large by Row 8.
Leaf Body
Make a magic ring.
Row 1 (RS): Ch 2, 6 dc in the ring. Pull the ring snug. Turn. (6 sts)
Row 2 (WS): Ch 2, 2 dc in each st across. Turn. (12 sts)
Row 3 (RS): Ch 2, FPdc around the next st, 2 dc in the next st; repeat from * 5 more times. Turn. (18 sts: 6 FPdc, 12 dc)*
This sets up the first 6 ribs.
Row 4 (WS): Ch 2, dc in the next dc, 2 dc in the next dc, BPdc around the next post st; repeat from * 5 more times. Turn. (24 sts: 6 BPdc, 18 dc)*
Row 5 (RS): Ch 2, FPdc around the next post st, dc in the next dc, 2 dc in each of the next 2 dc; repeat from * 5 more times. Turn. (36 sts: 6 FPdc, 30 dc)*
Each section between the ribs now holds 5 dc. Check the 1.5 in (3.8 cm) radius here.
Row 6 (WS, branching row): This row starts a new rib in the middle of each section, which takes the leaf from 6 ribs to 12. Real ginkgo veins branch the same way.
Ch 2, 2 dc in the next dc, dc in the next dc, BPdc around the next dc (new rib), dc in the next dc, 2 dc in the next dc, BPdc around the next post st; repeat from * 5 more times. Turn. (48 sts: 12 BPdc, 36 dc)*
Row 7 (RS): Ch 2, FPdc around the next post st, dc in the next dc, 2 dc in the next dc, dc in the next dc; repeat from * 11 more times. Turn. (60 sts: 12 FPdc, 48 dc)*
Row 8 (WS, notch row): This row keeps the ribs going and steps down to slip stitches at the exact center to form the notch. The center pair is sts 30 and 31.
Ch 2, dc in each of the next 4 dc, BPdc around the next post st; repeat from * 4 more times (25 sts made). Dc in each of the next 3 dc, hdc in the next dc, sl st in the next post st, sl st in the next dc, hdc in the next dc, dc in each of the next 2 dc, BPdc around the next post st. Dc in each of the next 4 dc, BPdc around the next post st; repeat from * 4 more times. Do not fasten off. (60 sts: 11 BPdc, 45 dc, 2 hdc, 2 sl st)
The center rib ends in the notch, so this row has only 11 post sts. The notch is about 0.3 in (0.8 cm) deep. Place a marker in each of the 2 center sl sts.
Checkpoint: The body should measure about 5 in (12.7 cm) wide and 2.5 in (6.4 cm) from the ring to the lobe tops.
Border
Border gauge: Along the top edge, work 1 border st into each Row 8 st. Along the side edges, work 2 sc into each dc row end. Each row end is about 0.3 in (0.8 cm) tall, and 2 sc fill that height without pulling in or rippling.
Round 1 (RS, scallops and stem): Turn so the RS faces you. Ch 1.
- First lobe (28 sts): Sc in the next st, hdc in the next st, dc in each of the next 3 sts, hdc in the next st, sc in the next st; repeat from * 3 more times. (4 scallops)*
- Notch (4 sts): Sc in the hdc, sl st in each of the 2 marked sl sts, sc in the next hdc.
- Second lobe (28 sts): Work 4 scallops as for the first lobe.
- First side (16 sts): Rotate the work and work 2 sc in each of the 8 row ends down to the magic ring.
- Stem: Ch 10, hdc in the 3rd ch from the hook and in each of the next 7 ch (8 hdc), then sl st into the base of the leaf at the magic ring.
- Second side (16 sts): Work 2 sc in each of the 8 row ends up to the top corner. Sl st in the first sc to join.
Round 1 count: 60 top sts + 16 + 16 side sts = 92 sts, plus 8 hdc on the stem.
Why the math works: Each lobe has 28 Row 8 sts, and 4 scallops x 7 sts = 28. The notch uses the remaining 4 sts, and 28 + 4 + 28 = 60, so every top stitch is worked exactly once. Each side has 8 rows x 2 sc = 16 sc. The scallops rise from sc to dc height and back again, which creates the wavy lobe outline.
Round 2 (RS, corded edge): Ch 1. Working loosely, sl st in each st across the top and down the first side (76 sl sts). Sl st in each of the 8 sts along the first long edge of the stem, 1 sl st in the ch-2 tip, then sl st in each of the 8 sts along the second long edge (17 sl sts). Sl st in each of the 16 sts up the second side. Join to the first sl st. (109 sl sts total: 92 around the leaf + 17 on the stem)
Keep the slip stitches about as loose as your sc. If Round 2 pulls the edge in, work it with a 4.0 mm (G-6) hook. Fasten off and weave in the ends along the back of the corded edge.
Hanging Loop
Join the yarn with a sl st between the 2 center sl sts of the notch. Ch 20, then sl st in the same spot to form a loop. Ch 1, work 30 sc into the ch-20 loop, and sl st into the base.
Fasten off and weave the tail into the back of the notch, going through the loop base twice so it can hold the leaf’s weight. The loop should stand about 1.5 in (3.8 cm) tall.
Final Blocking
- Lightly spray the leaf until it’s damp all the way through.
- Lay it RS up on the blocking mat.
- Pin the stem straight down from the center of the base.
- Pin the 2 lobe tops so the width is 5.5 in (14.0 cm), with the notch centered between them.
- Pin the tip of each scallop gently outward to open the waves.
- Run a finger along each rib so it lies straight from the base to the edge.
- Check the height: 4.25 in (10.8 cm) from the stem tip to the lobe tops.
- Pin the hanging loop straight up from the notch.
- Optional: Brush on a thin coat of fabric stiffener now.
- Let the leaf dry completely before you unpin it.
Final Quality-Control Checklist
- The leaf is 5.5 in (14.0 cm) wide and 4.25 in (10.8 cm) tall, not counting the loop.
- All 12 ribs are raised on the RS and run straight.
- The notch is exactly at the center, with 4 scallops on each lobe.
- The side edges lie flat, with no ripples or puckers.
- The stem is straight and about 1.5 in (3.8 cm) long.
- The corded edge is even all the way around.
- The loop is centered and firmly anchored.
- All ends are woven in on the WS.
Troubleshooting
- The fan cups or bowls: Your post stitches are too tight. Loosen them, or use a hook half a size larger for the post stitches only.
- The fan ruffles: Recheck the counts for Rows 5–7. If they’re correct, change to a smaller hook.
- The ribs lean or disappear: A post stitch was worked from the wrong side. Ribs must be FPdc on RS rows and BPdc on WS rows.
- The notch is off-center: Recount Row 7. The sl sts must land on sts 30 and 31 of Row 8.
- The side edges ripple: You’ve worked 3 sc into some row ends. Work exactly 2 per row end.
- The stem curls: Pin it straight while it’s damp, or work the stem hdc more loosely.
- The ring loosens: Weave the starting tail around the ring in a full circle, pull it snug, and then weave it in.
Care
Hand wash in cool water, press out the water in a towel, and dry flat while reshaping the scallops. If you used fabric stiffener, spot clean only.
Final Notes
At a gauge of 20 sts and 13 rows = 4 in (10.2 cm), the body is 5 in (12.7 cm) wide and 2.5 in (6.4 cm) tall after Row 8. The 0.25 in (0.6 cm) border brings the width to 5.5 in (14.0 cm). The stem brings the height to 4.25 in (10.8 cm), and the 1.5 in (3.8 cm) loop gives a hanging height of 5.75 in (14.6 cm). If you check each stage, your ginkgo will hang flat and even.
Happy crocheting!