

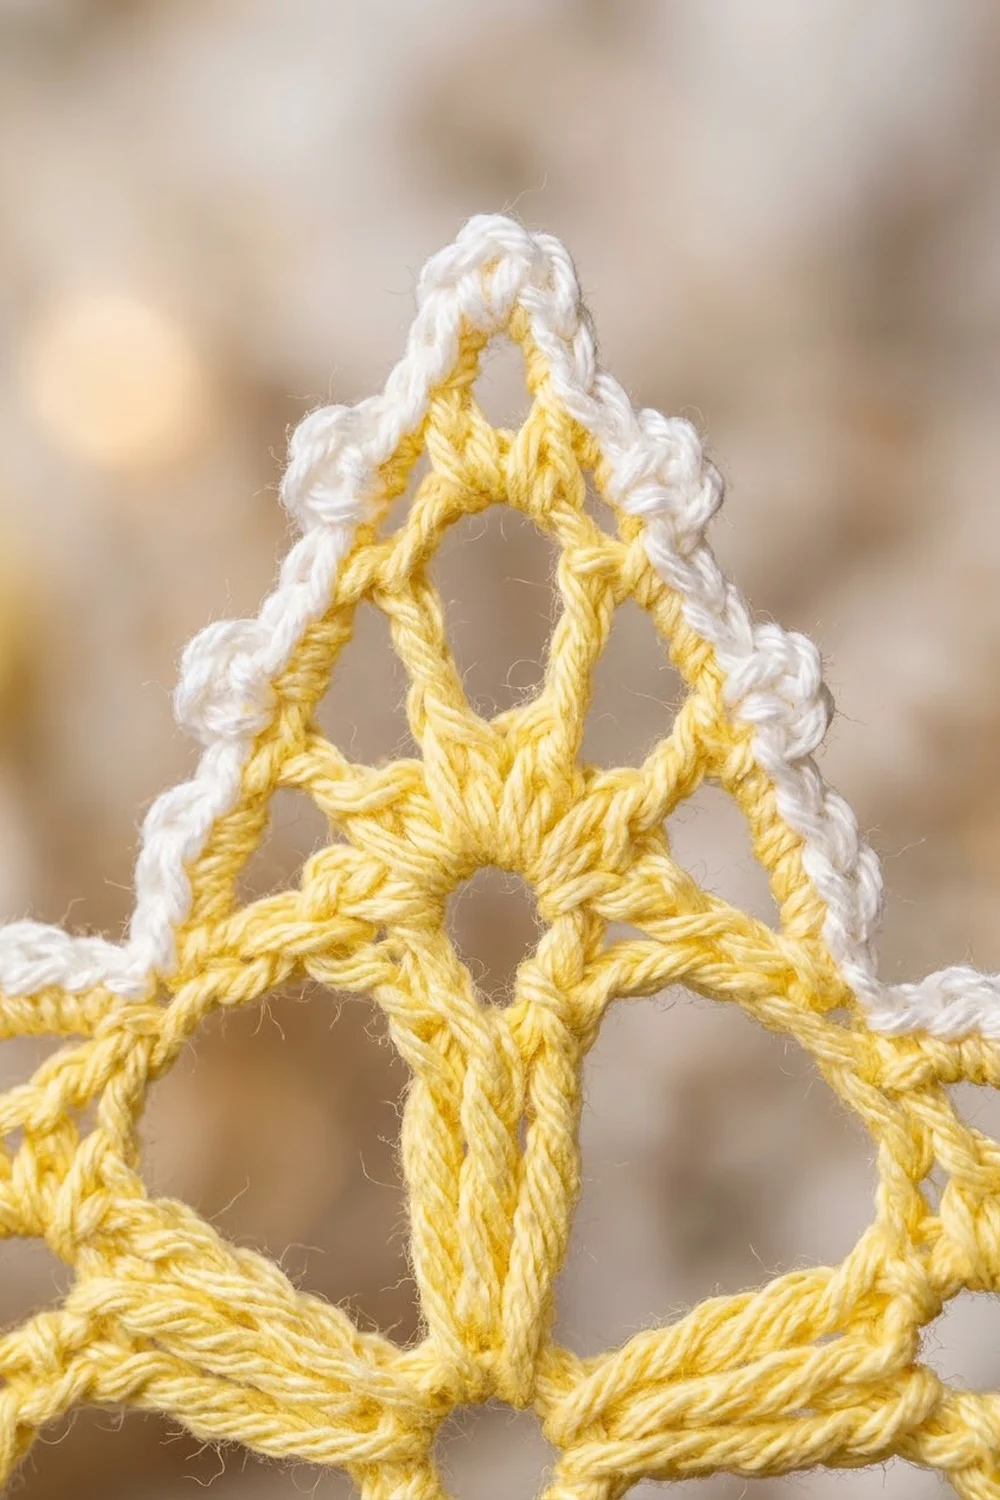
This star is a light, lacy Christmas ornament in pale buttery yellow cotton with a crisp white picot edge. Five long spokes meet at a small center hole, with triangular windows between them. Each point has its own round eyelet and an open lattice that runs up to the tip.
It has a classic, slightly vintage look, like a doily shrunk down to tree size. The white picot border frames the yellow lace and keeps the five points looking sharp from across the room. A thin white chain loop at the top tip lets the star hang straight on a branch.
The pattern uses US crochet terms. The finished star is about 5.5 in (14.0 cm) across from point to point and about 5.25 in (13.3 cm) tall, not counting the hanging loop.
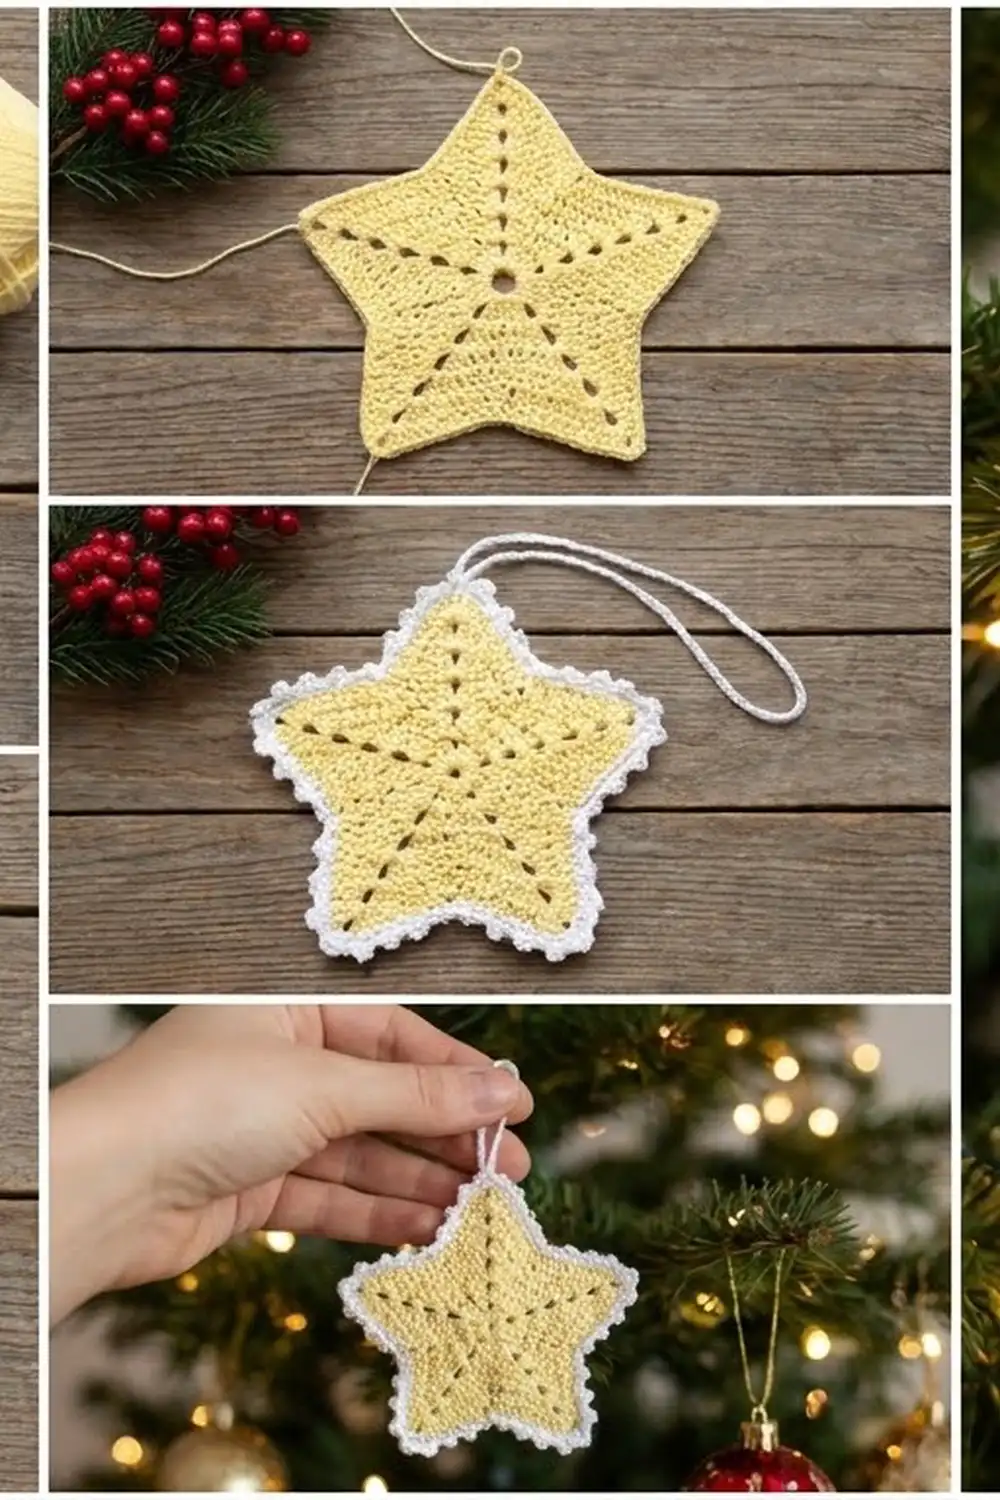
The whole star is made in one piece. You crochet a pentagon center in the round, then work the five points in short rows straight off its sides. A two-round white picot border goes all the way around, and a chain hanging loop finishes it.
Finished Size and Construction
- Finished size: about 5.5 in (14.0 cm) wide x 5.25 in (13.3 cm) tall, plus the hanging loop
- Skill level: Intermediate (rounds, short rows, decreases, picots)
- Terminology: US crochet terms
- Yarn weight: size 3 mercerized cotton crochet thread, or a fine cotton yarn of similar thickness
- Hook: 2.0 mm (US 4 steel)
- Number of pieces: 1 single star; nothing is joined
- Layout: pentagon center with 5 points worked off its sides
- Pentagon center: about 2.5 in (6.4 cm) from one corner to the opposite flat side; each side about 1.67 in (4.2 cm)
- Size before border: about 5 in (12.7 cm) wide x 4.75 in (12.1 cm) tall
- Border depth: about 0.25 in (0.6 cm), picots included
Materials
Choose a smooth mercerized cotton. It shows the lace clearly, holds a crisp shape after blocking, and doesn’t fuzz on the tree. Avoid fuzzy or very stretchy fibers, because the open windows will sag.
- Color A, pale yellow: about 6 g / 25 m (center and points)
- Color B, white: about 3 g / 12 m (border and hanging loop)
Both amounts include a margin for a gauge test and weaving in ends. One standard ball of each color will make many stars.
Tools:
- 2.0 mm (US 4 steel) crochet hook
- Tapestry needle with a small eye
- Scissors
- Rustproof pins and a foam blocking mat
- Spray bottle of water, plus spray starch or a light starch solution (optional)
- Ruler or tape measure
Abbreviations (US Terms)
- ch – chain
- sl st – slip stitch
- sc – single crochet
- dc – double crochet
- tr – treble crochet
- sk – skip
- sp(s) – space(s)
- st(s) – stitch(es)
- RS / WS – right side / wrong side
- dc2tog – (yarn over, insert hook in next st, pull up a loop, yarn over, pull through 2 loops) twice, yarn over, pull through all 3 loops on hook
- Beg dec – ch 2, dc in next st. Counts as a dc2tog over the first 2 sts of the row.
Special stitch – Picot: ch 3, sl st in the 3rd ch from hook.
Gauge and Checkpoints
Gauge: 9 dc = 1 in (2.5 cm), and 8 rows of dc = 1.5 in (3.8 cm), using a 2.0 mm hook with relaxed tension.
Gauge isn’t critical for an ornament, but it sets the star’s final size and how flat the points lie. The center makes the best test piece. Work Rounds 1–4 and measure before you start any points.
Checkpoints:
- After Round 2: the spoke circle is about 1.25 in (3.2 cm) across.
- After Round 4: the pentagon is about 2.5 in (6.4 cm) from a corner to the opposite flat side. Each side has 15 dc and is about 1.67 in (4.2 cm) long.
- After one point: the point is about 1.5 in (3.8 cm) tall, measured from the pentagon edge to the tip.
- After all points: the star is about 5 in (12.7 cm) wide.
- After the border: the star is about 5.5 in (14.0 cm) wide.
If your pentagon is too big, switch to a 1.75 mm hook or crochet a little tighter. If it’s too small, switch to a 2.25 mm hook. If the center ruffles, your ch-7 spaces are too long for your dc, so work them a little tighter. If it cups, loosen those chains.
Pentagon Center
With Color A.
Round 1 (RS): Make a magic ring. Ch 1, 10 sc in the ring. Join with a sl st to the first sc. Pull the ring snug but leave a small center hole. (10 sc)
Round 2 (spokes): Ch 4 (counts as first tr), 2 tr in the same st, ch 4, sk next sc. 3 tr in next sc, ch 4, sk next sc. Repeat from * 3 more times. Join with a sl st to the top of the beginning ch-4. (15 tr in 5 groups of 3; 5 ch-4 sps)*
Each 3-tr group makes one long spoke. Checkpoint: about 1.25 in (3.2 cm) across.
Round 3 (windows): Sl st in the next tr (the center tr of the first group). Ch 6 (counts as dc + ch 3), dc in the same st. Ch 7. (Dc, ch 3, dc) in the center tr of the next group, ch 7. Repeat from * 3 more times. Join with a sl st to the 3rd ch of the beginning ch-6. (10 dc; 5 corner ch-3 sps; 5 ch-7 sps)*
Each ch-7 bridges the gap between two spokes, which opens up the five triangular windows. The ch-3 spaces sit at the spoke tips and become the five corners of the pentagon.
Round 4 (pentagon edge): Sl st in the first corner ch-3 sp. Ch 3 (counts as dc), (2 dc, ch 2, 3 dc) in the same sp. Dc in next dc, 7 dc in ch-7 sp, dc in next dc. *(3 dc, ch 2, 3 dc) in next corner ch-3 sp, dc in next dc, 7 dc in ch-7 sp, dc in next dc. Repeat from * 3 more times. Join with a sl st to the top of the beginning ch-3. Fasten off.
Count per side: 3 + 1 + 7 + 1 + 3 = 15 dc between corner ch-2 sps. (75 dc total; 5 corner ch-2 sps)
Count the last side carefully. Its final 3 sts are the beginning ch-3 and the 2 dc worked with it.
Checkpoint: about 2.5 in (6.4 cm) from a corner to the opposite side. The pentagon should lie flat without cupping.
Points (Make 5)
Each point is worked in 8 short rows across the 15 dc of one pentagon side. Leave the corner ch-2 sps unworked here. They become the valleys between the points and are worked in the border.
Row 1 (RS): With RS facing, join Color A with a sl st in the first dc after any corner ch-2 sp. Ch 3 (counts as dc), dc in the next 5 dc, ch 3, sk 3 dc, dc in the last 6 dc of the side. Turn. (12 dc and 1 ch-3 sp = 15 sts wide)
The ch-3 over the skipped stitches forms the eyelet at the base of the point.
Row 2 (WS): Beg dec, dc in the next 4 dc, 3 dc in the ch-3 sp, dc in the next 4 dc, dc2tog over the last dc and the top of the turning ch. Turn. (13 sts)
Count check: 1 + 4 + 3 + 4 + 1 = 13.
Row 3 (RS, lattice): Beg dec, ch 1, sk 1, dc in next st, ch 1, sk 1, dc in the next 3 sts, ch 1, sk 1, dc in next st, ch 1, sk 1, dc2tog. Turn. (11 sts: 7 dc-type sts and 4 ch-1 sps)
The 3 center dc sit right above the eyelet, and the ch-1 spaces form the open mesh on each side.
Row 4 (WS): Beg dec, dc in each of the next 7 sts (every dc and every ch-1 sp), dc2tog. Turn. (9 sts)
Row 5 (RS): Beg dec, ch 1, sk 1, dc in the next 3 sts, ch 1, sk 1, dc2tog. Turn. (7 sts)
Row 6 (WS): Beg dec, dc in the next 3 sts, dc2tog. Turn. (5 sts)
Row 7 (RS): Beg dec, dc in next st, dc2tog. Turn. (3 sts)
Row 8 (WS): Ch 2, dc2tog over the next 2 sts (counts as a dc3tog). (1 st – the tip) Fasten off.
Every row loses exactly 1 st at each end: 15, 13, 11, 9, 7, 5, 3, 1. That steady decrease keeps both sides of the point straight and even.
Checkpoint: the point is about 1.5 in (3.8 cm) tall.
Repeat Rows 1–8 on the other four pentagon sides. Always join with RS facing, in the first dc after a corner ch-2 sp, so all five points match.
Checkpoint: before the border, the star is about 5 in (12.7 cm) wide and 4.75 in (12.1 cm) tall.
Weave in all the yellow ends now, along the row edges or back through the pentagon dc. Ends left until later get trapped under the border and are much harder to hide.
Border
With Color B. Border gauge: 2 sc per dc row end, about 10 sc = 1 in (2.5 cm).
Round 1 (RS): With RS facing, join Color B with a sl st in the tip st of any point. Ch 1, (sc, ch 2, sc) in the tip st. Down the left edge of the point, work 2 sc in each of the 8 row ends (16 sc). Sc in the corner ch-2 sp of the pentagon (the valley). Up the right edge of the next point, work 2 sc in each of the 8 row ends (16 sc). *(Sc, ch 2, sc) in the tip st, 16 sc down the edge, sc in the valley ch-2 sp, 16 sc up the next edge. Repeat from * 3 more times to get back to the first tip. Join with a sl st to the first sc.
Count per point: 2 tip sc + 16 + 1 valley sc + 16 = 35 sc. (175 sc total; 5 tip ch-2 sps)
Round 2 (picots): Ch 1, sc in the same sc (the first tip sc), (sc, picot, sc) in the tip ch-2 sp, sc in the next tip sc.
Down the edge: [sc in the next 2 sc, picot] 7 times, sc in the next 2 sc. (16 sc, 7 picots)
Valley: sc in the valley sc. Keep this stitch snug and don’t add a picot here, so the inner corner stays sharp.
Up the next edge: sc in the next 2 sc, [picot, sc in the next 2 sc] 7 times. (16 sc, 7 picots)
Next tip: sc in the first tip sc, (sc, picot, sc) in the tip ch-2 sp, sc in the next tip sc.
Repeat edge, valley, edge, and tip all the way around. On the last up edge, stop after the final 2 sc and join with a sl st to the first sc. Fasten off.
Count per point: tip 4 sc + 16 + 1 + 16 = 37 sc, and 1 + 7 + 7 = 15 picots. This is a conversion round: 35 sc worked 1 per existing sc, plus 2 extra sc added in the tip sp, gives 37. (185 sc and 75 picots total)
Why the math works: Each point edge is 8 dc rows, about 1.5 in (3.8 cm) tall. The slanted edge is a little longer, close to 1.7 in (4.3 cm). At 10 sc per inch, 16 sc covers about 1.6 in (4.1 cm), so the edge is eased in slightly. That pulls it straight instead of letting it wave. The 2 tip sc and the ch-2 sp between them add the extra length a sharp point needs. The single valley sc adds none, which keeps the inner corners crisp. A picot after every 2 sc spaces them evenly, 7 per edge, with plain sc on both sides of each valley.
Hanging Loop
With Color B, join with a sl st in the picot of the tip you want at the top. Ch 25, sl st in the same picot. Fasten off and weave the ends into the border sc. The loop hangs about 1.5 in (3.8 cm) long.
Final Blocking
- Weave in any remaining ends.
- Soak the star in cool water for a few minutes, or mist it well. For a stiffer ornament, dip it in a light starch solution instead.
- Press out the excess water in a towel. Don’t wring it.
- Lay the star RS up on the blocking mat and pin the center flat first.
- Pin the tips out until the star is 5.5 in (14.0 cm) across and 5.25 in (13.3 cm) tall. Every tip should be the same distance from the center, about 2.75 in (7.0 cm).
- Pin each valley inward so the inner corners are sharp.
- Open each eyelet and triangular window with a pin or your fingertip.
- Pull each picot out from the edge so it stands clear.
- Let the star dry completely, then unpin. If the hanging loop twisted, mist it and pin it straight to dry.
Final Quality-Control Checklist
- Center: small hole, 5 even spokes, 5 open triangular windows.
- Pentagon: 15 dc per side and 5 corner ch-2 sps.
- Points: 8 rows each, ending in 1 st, with a clear eyelet near the base.
- All five points are the same height, about 1.5 in (3.8 cm).
- Border Round 1: 35 sc per point, 175 in total.
- Border Round 2: 37 sc and 15 picots per point; 185 sc and 75 picots in total.
- Tips are sharp, valleys are crisp, and the star lies flat.
- Finished size: about 5.5 in (14.0 cm) x 5.25 in (13.3 cm).
- The hanging loop is secure and centered on the top tip.
- All ends are woven in and can’t be seen from the front.
Troubleshooting
The center cups. Your ch-7 spaces are too short or tight. Loosen them, or use a hook one size larger for Round 3 only.
The points lean. You probably joined at the wrong end of a side. Always join with RS facing, in the first dc after a corner ch-2 sp.
The point edges are wavy. Make sure you worked exactly 2 sc per row end. Too many sc makes the edge ruffle; too few makes it pucker.
The valleys gap or pull. Work the valley sc into the corner ch-2 sp, not around the row ends, and keep it snug.
The picots look flat. Keep the ch-3 relaxed and sl st into the 3rd ch, not into the sc below.
The star curls after drying. Wet it again, starch it lightly, and re-pin every tip and valley.
Care
Hand wash in cool water with mild soap, then reshape and dry flat, pinning the tips if needed. Re-starch after washing if you want the star crisp.
Final Notes
Here’s the full measurement chain. Round 2 is about 1.25 in (3.2 cm) across. The finished pentagon is about 2.5 in (6.4 cm) with 15 dc per side. Each point is 8 rows and about 1.5 in (3.8 cm) tall, which makes the star about 5 in (12.7 cm) wide before the border. The 0.25 in (0.6 cm) picot border brings it to about 5.5 in (14.0 cm) by 5.25 in (13.3 cm). If your pentagon matches its checkpoint, the rest of the star will come out the right size.
Happy crocheting!