

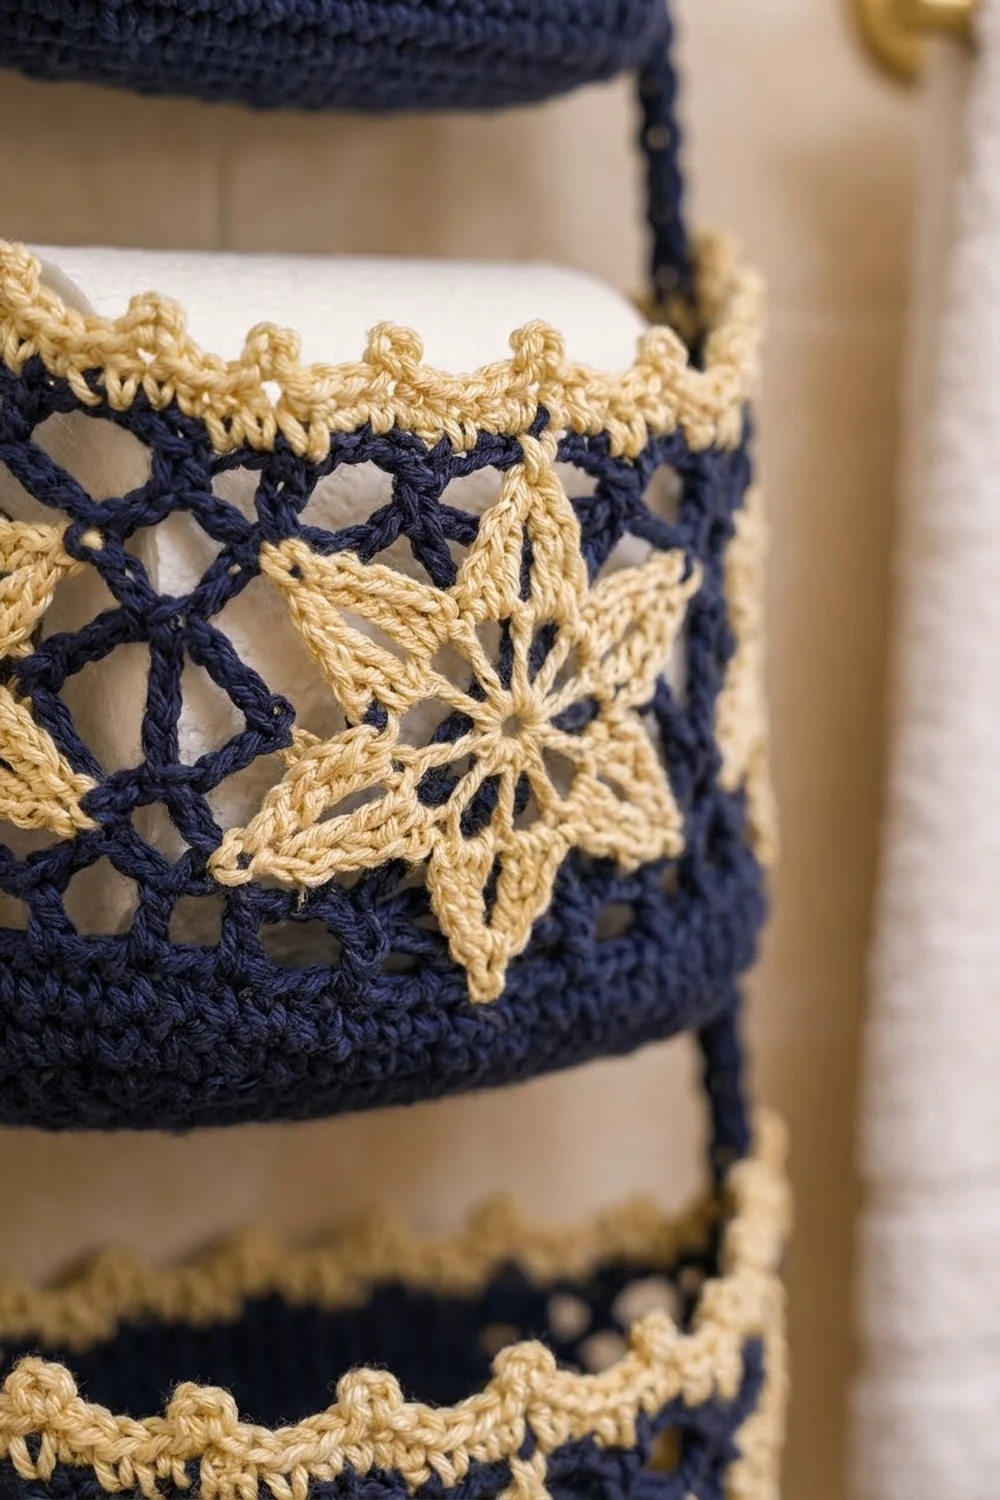
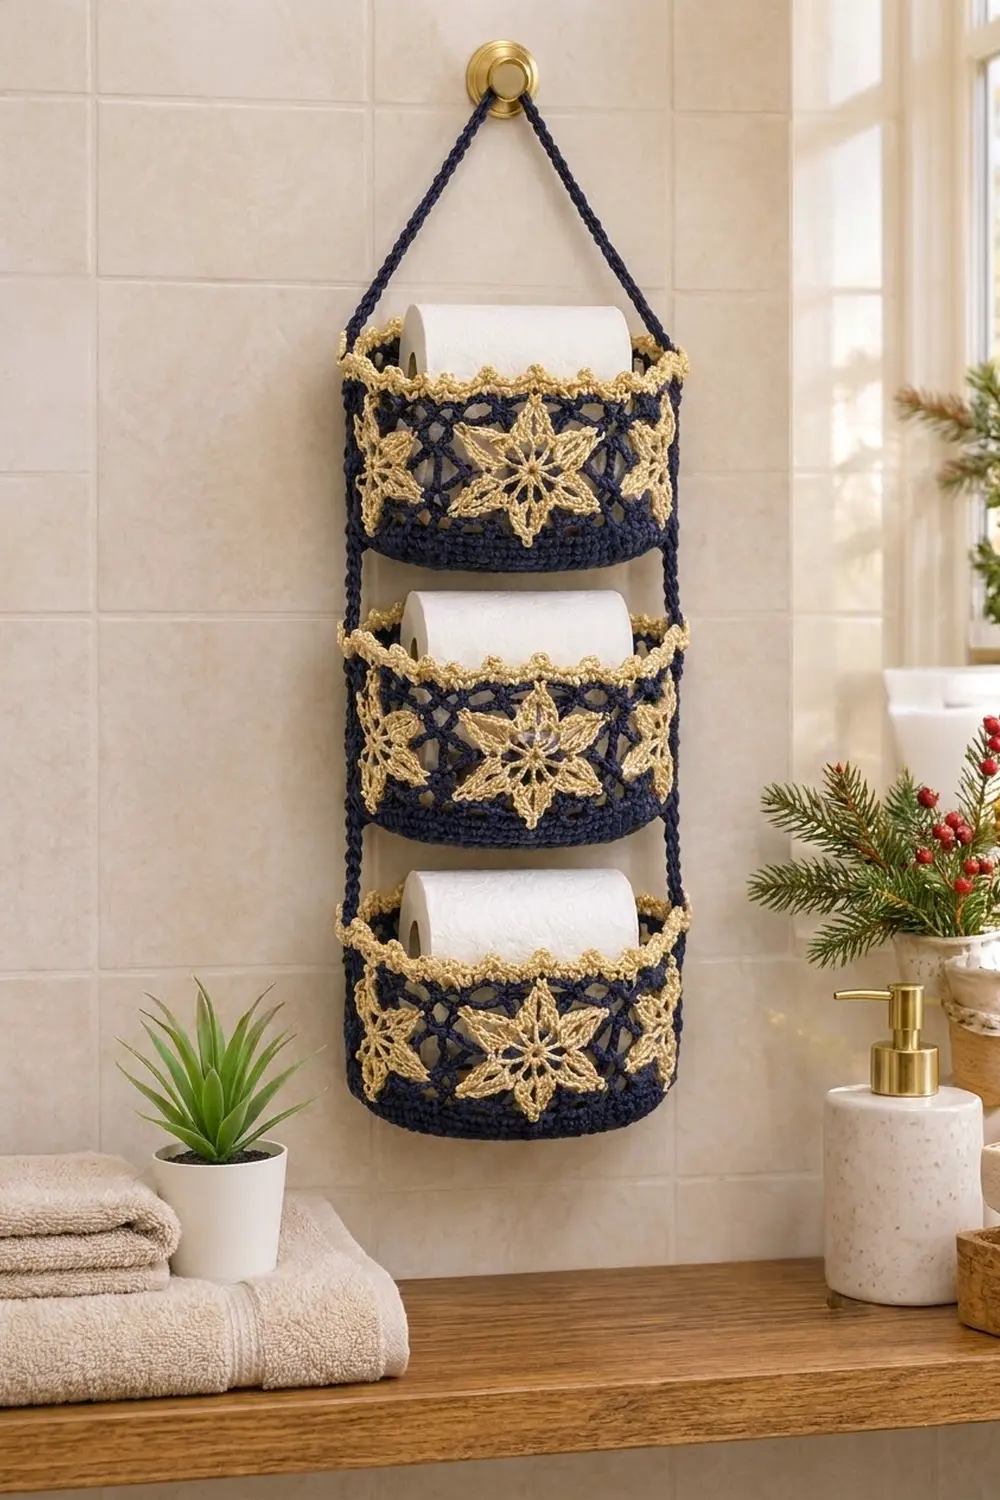
This three-tier hanging holder stores spare toilet rolls in a way that looks good on the wall. It has three oval baskets in deep navy cotton, each with a diamond mesh band, cream six-pointed stars and a cream picot rim. Two slim navy cords connect the baskets and meet at one hanging loop.
The navy and cream colors look calm and a little festive, so the holder suits both everyday use and winter decorating. Each basket holds one standard roll standing upright.
The pattern uses US crochet terms. The finished holder hangs about 24.5 in (62.2 cm) long. Each basket measures 7.5 in long × 5 in deep × 4 in tall (19.1 × 12.7 × 10.2 cm).
How it’s built: You make each basket in joined rounds: an oval base first, then the solid wall, the mesh band and the cream rim. Next you make 18 small cream stars and sew six onto each basket. Last, you sew two long slip-stitch cords up the narrow ends of all three baskets and join them at a hanging loop.
Finished Size and Construction
- Finished size: about 24.5 in (62.2 cm) long, including the hanging loop
- Each basket: 7.5 × 5 in (19.1 × 12.7 cm) base, 4 in (10.2 cm) tall
- Skill level: Intermediate (an easy intermediate pattern)
- Terminology: US
- Yarn weight: Worsted (#4) cotton
- Hooks: 5.0 mm (H-8) for the baskets and cords, 4.0 mm (G-6) for the stars
- Number of pieces: 3 baskets, 18 stars, 2 cords, 1 hanging loop
- Layout: 3 baskets stacked vertically, 2 in (5.1 cm) apart
- Basket wall before the rim: 3.5 in (8.9 cm) tall
- Rim depth: 0.5 in (1.3 cm)
Materials
Use a smooth 100% cotton or cotton blend in worsted weight. Cotton holds its shape, can be washed and won’t stretch out under the weight of the rolls. Avoid fuzzy acrylic, because the mesh will lose its crisp diamond shape.
The yarn amounts below assume about 155 m per 100 g.
- Navy (MC): 150 g / about 233 m. This covers the baskets, cords and loop.
- Cream (CC): 75 g / about 116 m. This covers the rims and stars.
Both amounts include a margin of about 15% for your gauge swatch and small differences in tension.
Tools:
– 5.0 mm (H-8) and 4.0 mm (G-6) crochet hooks
– 8 locking stitch markers
– Tapestry needle
– Scissors
– Tape measure
– Rust-proof pins
– A spray bottle or steam iron
– A wall hook that can hold at least 2 lb (0.9 kg)
Abbreviations (US Terms)
- ch: chain
- sl st: slip stitch
- sc: single crochet
- hdc: half double crochet
- dc: double crochet
- BLO: back loop only
- sk: skip
- st(s): stitch(es)
- inc: 2 sc in the same stitch
- MR: magic ring
Special stitch – picot: Ch 3, then sl st into the 3rd ch from the hook (the first chain you made). This makes a small rounded bump.
Special stitch – slip-stitch cord: Make a chain. Starting in the 2nd ch from the hook, sl st into the back bump of each chain. The result is firm and does not stretch.
Gauge and Checkpoints
Gauge: 14 sc and 14 sc rounds = 4 in (10.2 cm) with the 5.0 mm hook.
Make one full basket before you start the others. If that basket comes out the right size, the cords and spacing will work without any changes. Check these measurements as you go:
| Stage | Measurement |
|---|---|
| After base Rnd 9 | 7.5 × 5 in (19.1 × 12.7 cm), 72 sts |
| After Rnd 12 (solid wall) | wall 0.9 in (2.3 cm) tall |
| After Rnd 16 (mesh) | mesh band 2.25 in (5.7 cm) tall |
| After Rnd 17 | wall 3.5 in (8.9 cm) tall |
| After rim | wall 4 in (10.2 cm) tall |
| One star | 2.25 in (5.7 cm) point to point |
| Cord | 24 in (61.0 cm) |
If the base is too big: go down half a hook size. A base that is too large lets the roll tip over and makes the star spacing look loose.
If the base is too small: go up half a hook size. Make sure a roll that is 4.5 in (11.4 cm) wide can stand upright inside before you start the walls.
Basket (Make 3)
Use navy and the 5.0 mm hook. Work in joined rounds and do not turn. At the start of each round, ch 1; this ch-1 does not count as a stitch. Join each round with a sl st into the first sc.
Oval Base
Foundation: Ch 12.
Rnd 1: Sc in the 2nd ch from the hook and in the next 9 ch (10 sc). Work 3 sc in the last ch. Rotate the piece and work along the other side of the foundation chain: sc in the next 9 ch, then 2 sc in the same ch as the first sc. Join. (24 sts)
Rnd 2: Inc in the first st, sc in the next 9, inc in each of the next 3, sc in the next 9, inc in each of the last 2. Join. (30 sts)
Rnd 3: [sc in the next st, inc] once, sc in the next 9, [sc in the next st, inc] 3 times, sc in the next 9, [sc in the next st, inc] 2 times. Join. (36 sts)
Rnd 4: [sc in the next 2, inc] once, sc in the next 9, [sc in the next 2, inc] 3 times, sc in the next 9, [sc in the next 2, inc] 2 times. Join. (42 sts)
Rnd 5: Repeat Rnd 4, but work 3 sc before each inc instead of 2. (48 sts)
Rnd 6: Repeat Rnd 4, but work 4 sc before each inc. (54 sts)
Rnd 7: Repeat Rnd 4, but work 5 sc before each inc. (60 sts)
Rnd 8: Repeat Rnd 4, but work 6 sc before each inc. (66 sts)
Rnd 9: Repeat Rnd 4, but work 7 sc before each inc. (72 sts)
Every round adds exactly 6 sts, and the two straight sides stay at 9 sts throughout. That is what keeps the base oval instead of round.
Checkpoint: the base should measure 7.5 × 5 in (19.1 × 12.7 cm) and lie flat.
Solid Wall
Rnd 10: Sc BLO in each st around. Join. (72 sts) Working in the back loop leaves a crisp ridge where the base turns up into the wall.
Rnds 11–12: Sc in each st around. Join. (72 sts)
Checkpoint: the wall should be 0.9 in (2.3 cm) tall.
Diamond Mesh Band
Rnd 13: Ch 1, sc in the first st. Ch 5, sk 3, sc in the next st. Repeat from * 16 more times. To finish, ch 2, sk 3, and dc in the first sc. The ch-2 plus dc stands in for the last ch-5 loop and leaves your hook at the center of that loop. (18 loops)
The loop count works because 72 sts ÷ 4 sts per repeat = 18.
Rnds 14–15: Ch 1, sc around the post of the joining dc. Ch 5, sc in the next ch-5 loop. Repeat from * 16 more times. Ch 2, dc in the first sc. (18 loops)
Rnd 16: Ch 1, sc around the post of the joining dc. Ch 5, sc in the next ch-5 loop. Repeat from * 16 more times. Ch 5, sl st in the first sc. (18 full loops)
Checkpoint: the mesh band should be 2.25 in (5.7 cm) tall, with diamond-shaped openings.
Rnd 17 (conversion round): Ch 1. Work 4 sc into each ch-5 loop around and skip the sc between loops. Join.
Count: 18 loops × 4 sc = 72 sts. This is 0 sts added compared with Rnd 12, so the rim sits exactly over the solid wall.
Checkpoint: the wall should be 3.5 in (8.9 cm) tall. Fasten off navy.
Stars (Make 18)
Use cream and the 4.0 mm hook.
Rnd 1: Make an MR. Ch 3 (this counts as a dc), then work 11 dc in the ring. Pull the ring closed, leaving a small opening. Join to the top of the ch-3. (12 dc)
Rnd 2: Ch 5. Working back down the chain: sl st in the 2nd ch from the hook, sc in the next ch, hdc in the next ch, dc in the next ch. Sk 1 dc, sl st in the next dc. Repeat from * 5 more times. Your last sl st lands in the joining st. (6 points, 4 sts each)
The point count works because 12 sts ÷ 2 sts per repeat = 6. The stitches get taller from the tip (sl st) to the base (dc), which gives each point its tapered shape.
Fasten off and leave a 12 in (30.5 cm) tail for sewing.
Checkpoint: each star should measure 2.25 in (5.7 cm) from point to point.
Make All Pieces
- Navy: 3 baskets (Rnds 1–17), 2 cords, 1 hanging loop
- Cream: 3 rims (see Border), 18 stars (6 per basket)
Layout:
           ( loop )
             /\
            /  \     cords rise 8 in (20.3 cm)
           /    \
   cord |[ Basket 3 ]| cord      top
        |   2 in gap  |
   cord |[ Basket 2 ]| cord      middle
        |   2 in gap  |
   cord |[ Basket 1 ]| cord      bottom
Placing the Stars
Flatten each basket so that the two narrow ends sit at the folds. On Rnd 17, put a marker in the st at each fold. These are the cord positions, and they are 36 sts apart.
Starting from one fold marker and counting in one direction, mark sts 6, 18, 30, 42, 54 and 66. Center one star over the mesh band at each of these marks.
This gives 6 stars spaced 12 sts apart, which is 3.4 in (8.6 cm). Each cord ends up exactly halfway between two stars, so the stars are never covered. One star sits at the center of each long side, and the others wrap around the curves.
Pin each star so its center is level with the middle of the mesh band. Using the cream tail, tack down each of the 6 points and stitch once through the center ring. Weave in the ends on the inside.
Border (Cream Rim)
Border gauge: the 2 rim rounds add 0.5 in (1.3 cm) of height.
Join cream in any st of Rnd 17, using the 5.0 mm hook.
Rnd 18: Ch 1, sc in each st around. Join. (72 sts: 36 on each half between the fold markers)
Rnd 19: Sc in the next 2 sts, picot, sc in the next st. Repeat from * around. Join. (72 sc + 24 picots: 12 picots on each half)
Why the math works: each repeat uses 3 sts, and 72 ÷ 3 = 24 repeats with no leftover stitches. Each half has 36 sts, and 36 ÷ 3 = 12, so the picots are spread evenly on both sides of the cords. No stitches are added or skipped, so the rim keeps the same 20.5 in (52.1 cm) circumference as the wall and won’t flare.
The basket is not joined to any other piece at the rim, so each rim starts with the basket’s own 72 sts. No seam stitches need to be accounted for.
Checkpoint: the basket should be 4 in (10.2 cm) tall. Weave in all ends.
Cords (Make 2)
Use navy and the 5.0 mm hook.
Ch 85. Starting in the 2nd ch from the hook, sl st into the back bump of each ch. (84 sl sts)
Cord gauge: 7 sts = 2 in (5.1 cm), so 84 sts = 24 in (61.0 cm).
Put markers in cord sts 14, 21, 35, 42 and 56, counting from the starting end:
- Sts 1–14: bottom basket, 4 in (10.2 cm)
- Sts 15–21: gap, 2 in (5.1 cm)
- Sts 22–35: middle basket, 4 in (10.2 cm)
- Sts 36–42: gap, 2 in (5.1 cm)
- Sts 43–56: top basket, 4 in (10.2 cm)
- Sts 57–84: rise to the hanging loop, 8 in (20.3 cm)
Check the total: 14 + 7 + 14 + 7 + 14 + 28 = 84 sts.
Joining
Method: whipstitch the cords onto the outside of the baskets with navy yarn.
- Lay one cord along a fold-marker column of the bottom basket. Line up cord st 1 with the Rnd 10 ridge, and cord st 14 with Rnd 18, just under the picots.
- Whipstitch the cord to the wall. Make one stitch through each cord st, passing through the wall at the matching height. Make 2 extra stitches where the cord crosses Rnd 13, Rnd 17 and Rnd 18; these are the points that carry the most weight.
- Leave cord sts 15–21 free. This makes the 2 in (5.1 cm) gap.
- Attach the middle basket to cord sts 22–35 and the top basket to cord sts 43–56 in the same way.
- Repeat steps 1–4 with the second cord on the opposite fold of every basket.
Tension: keep the cord flat against the wall but don’t pull it tight. If the cord is drawn in, the wall will pucker. If it is too loose, the basket will tilt forward once it holds a roll.
Size checkpoint: measure from the base of the bottom basket to the rim of the top basket. It should be 16 in (40.6 cm). Hold the piece up by both cord ends and check that all three baskets hang level.
Hanging Loop
Overlap the last 2 sts of each cord and sew them together firmly. Join navy at that point, ch 12, and sl st back into the same point. Work 18 sc into the loop and sl st to join. Fasten off.
The finished loop is about 1.5 in (3.8 cm) long. The cords form a triangle about 7.1 in (18.0 cm) tall above the top basket.
Final Blocking
- Weave in any loose ends, then trim them.
- Spritz each basket with water until it is damp, or hover a steam iron over it without touching the fabric.
- Put a toilet roll or a rolled towel inside each basket so it holds an even oval shape.
- Pin the star points flat and pull the mesh diamonds into even shapes with your fingers.
- Pin out each picot so it stands upright.
- Lay the holder flat with the cords straight and the gaps measuring 2 in (5.1 cm).
- Let it dry completely, which takes about 6 hours (24 hours if you wet-blocked), then remove the pins.
Final Quality-Control Checklist
- Each base measures 7.5 × 5 in (19.1 × 12.7 cm) and lies flat.
- All three baskets are 4 in (10.2 cm) tall.
- Each mesh band has 18 even loops.
- Each basket has 6 stars spaced 12 sts apart, with no star covered by a cord.
- Each rim has 24 picots, 12 on each half.
- The gaps between baskets are 2 in (5.1 cm).
- The baskets hang level, with no forward tilt.
- The hanging loop is secure and fits your hook.
Troubleshooting
The base cups or ruffles. If it cups, you are crocheting too tightly; go up a hook size. If it ruffles, you are too loose; go down a hook size. Also count each round to confirm it has exactly 6 increases.
The mesh slants. Make sure every sc goes into the center of a loop, not into a chain stitch.
The stars curl. Steam them flat before sewing them on, and make sure all 6 points are tacked down.
The baskets tip forward. The cords are too loose. Add extra whipstitches at Rnds 13, 17 and 18.
The picots lean over. Pin them upright while blocking and make sure your ch-3 is not too tight.
Care
Hand wash in cool water with mild soap. Reshape the holder and lay it flat to dry. Don’t tumble dry it, because the cords and mesh can stretch.
Final Notes
Everything in this pattern follows from one gauge, 14 sc = 4 in (10.2 cm):
- That gauge gives a 72-stitch base measuring 7.5 × 5 in (19.1 × 12.7 cm).
- The same 72 stitches carry up a wall that is 3.5 in (8.9 cm) tall, and the rim brings it to 4 in (10.2 cm).
- The mesh breaks those 72 stitches into 18 loops, and the conversion round brings it back to exactly 72.
- The stars are spaced every 12 stitches, and the picots repeat every 3 stitches.
- The 84-stitch cords stack the three baskets 2 in (5.1 cm) apart, for a total hanging length of 24.5 in (62.2 cm).
If your first basket matches its checkpoints, the rest of the holder will come out to the right size.
Happy crocheting!