

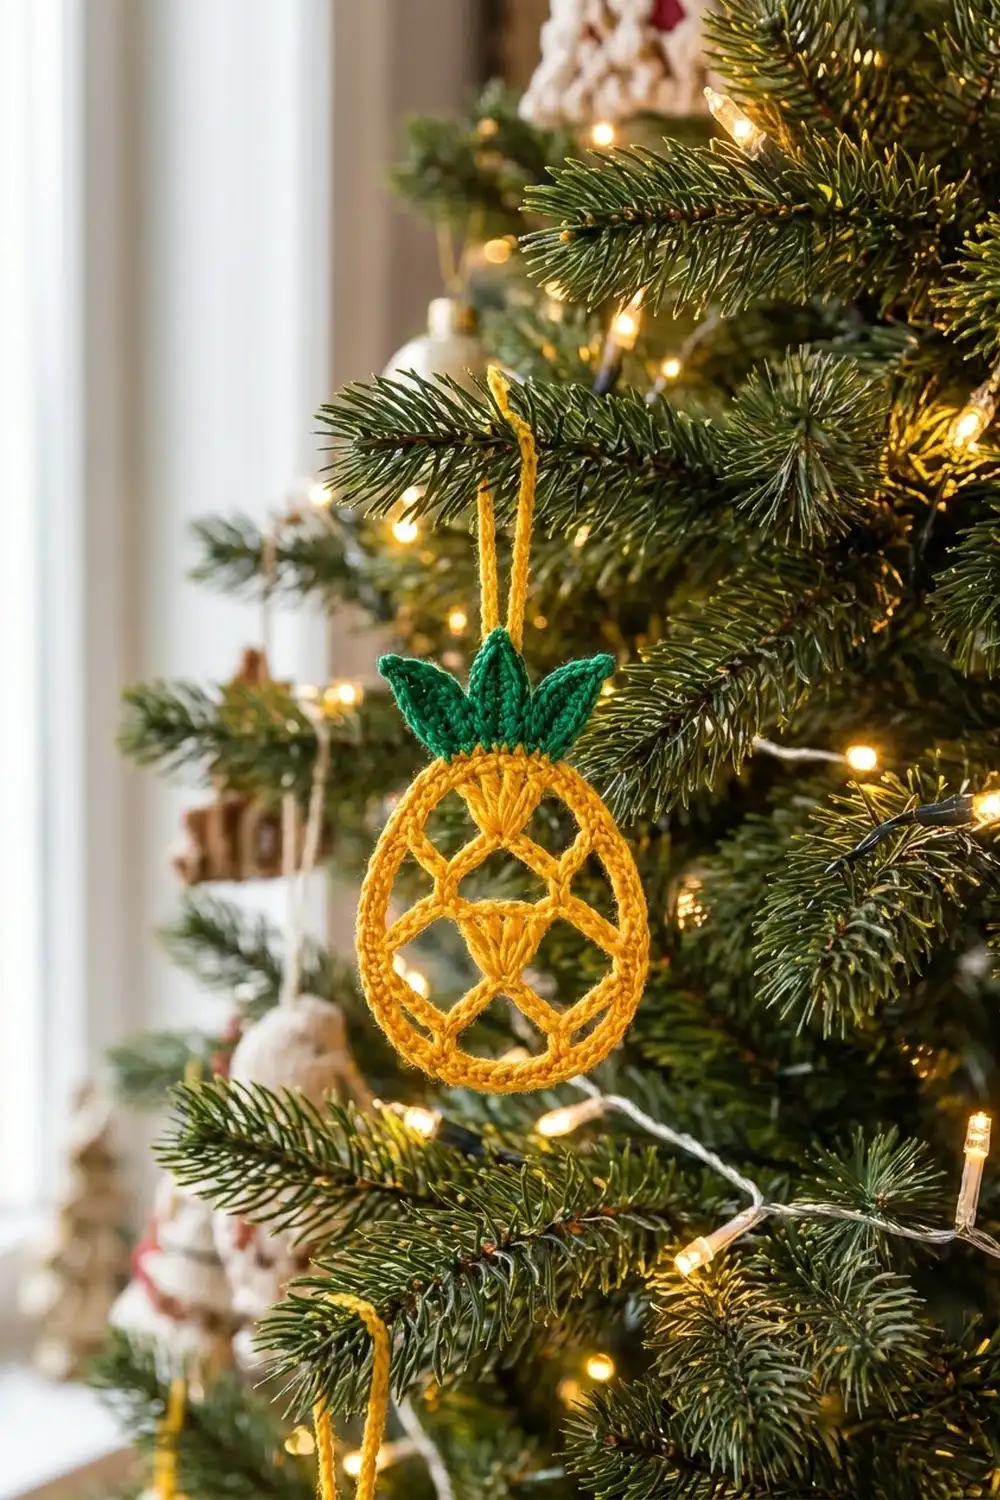
This little pineapple is mostly open space. The body is a smooth yellow egg-shaped frame. Inside it, a light chain lattice holds two fan-shaped shells, one above the other, like the scales of a real pineapple. A crown of five green leaves sits on top, and a slim yellow loop lets it hang from a branch.
The palette is just two colors: warm golden yellow and deep green. On a tree with warm lights, the open frame lets the lights and needles show through, so the ornament looks delicate but still reads as a pineapple from across the room.
This pattern uses US crochet terms. The finished body is 3 in (7.6 cm) wide and 4 in (10.2 cm) tall. With the leaves it is 5.25 in (13.3 cm) tall, and about 6.25 in (15.9 cm) tall including the hanging loop.
Construction is simple and done in stages:
1. Crochet a chain ring and cover it with single crochet to make the frame.
2. Work the lattice and shells inside the frame using one continuous strand.
3. Add a single crochet border with 4 increases.
4. Make five separate leaves and sew them on.
5. Add the loop.
Finished Size and Construction
- Finished size: 3 in (7.6 cm) wide x 4 in (10.2 cm) tall for the body; 5.25 in (13.3 cm) tall with leaves
- Skill level: Easy / advanced beginner
- Terminology: US
- Yarn weight: DK (#3 light), cotton or cotton blend
- Hook: 3.5 mm (E-4)
- Number of pieces: 1 ornament, made from 1 frame-and-lattice body plus 5 sewn-on leaves
- Layout: Single standalone motif with a vertical center line
- Body size before border: 2.75 in (7.0 cm) x 3.75 in (9.5 cm)
- Border depth: 1/8 in (0.3 cm) on every side
- Body size after border: 3 in (7.6 cm) x 4 in (10.2 cm)
Materials
Use a smooth, mercerized DK cotton. It shows the stitch definition clearly, holds the fan shapes well, and blocks into a crisp egg shape. Acrylic will work, but the lattice may sag a little more.
- Golden yellow: 7 g / 16 m (17.5 yd), for the frame, lattice, border and loop
- Deep green: 3 g / 7 m (7.7 yd), for the leaves
Both amounts include a margin of about 20% for your gauge swatch and weaving in ends.
Tools:
– 3.5 mm (E-4) crochet hook
– Tapestry needle
– 4 locking stitch markers
– Scissors
– Rustproof pins and a foam blocking mat
– Spray bottle with water
Abbreviations (US Terms)
- ch – chain
- sl st – slip stitch
- sc – single crochet
- hdc – half double crochet
- dc – double crochet
- st(s) – stitch(es)
- RS – right side
Special stitch – Fan: Work (ch 3, 6 dc) into the same chain. That gives 7 sts in total, because the ch-3 counts as the first dc. The narrow point sits on the chain and the stitches open upward.
Gauge and Checkpoints
- Gauge: 11 sc = 2 in (5.1 cm), which is 22 sc = 4 in (10.2 cm)
- Chain gauge: 6 ch = 1 in (2.5 cm), relaxed and not stretched
Make one test frame (Rounds 1–2) before going further. It only takes a few minutes and controls every later measurement.
Checkpoints:
– After Round 2: Lay the frame flat and gently ease it into an egg shape. It should be about 2.75 in (7.0 cm) x 3.75 in (9.5 cm). The outline should measure about 10.9 in (27.7 cm), because 60 sc ÷ 5.5 sc per inch = 10.9 in.
– After the lattice: The frame should keep its egg shape without being pulled inward. Each fan should be about 1.25 in (3.2 cm) wide across its top and 0.5 in (1.3 cm) tall.
– After the border: 3 in (7.6 cm) x 4 in (10.2 cm). The outer edge should be about 11.6 in (29.5 cm), because 64 sc ÷ 5.5 = 11.6 in.
– After the crown: 5.25 in (13.3 cm) from the bottom of the body to the tip of the center leaf.
If your frame is too big, go down to a 3.25 mm hook. If it is too small, go up to a 3.75 mm hook. Keep the stitch counts the same. The lattice chain lengths are designed for this frame size, so changing hooks is much safer than changing counts.
Frame
Round 1: With yellow, ch 60. Join with a sl st to the first ch to form a ring, making sure the chain is not twisted. (60 ch)
Round 2: Ch 1 (does not count as a st). Sc in each ch around. Join with a sl st to the first sc. (60 sc) Fasten off.
Number the stitches. Lay the ring flat with the RS facing you and shape it into an egg, with the narrower end at the top.
– St 1 is the sc at the bottom center. Mark it.
– Counting counterclockwise, sts 2–30 run up the right side.
– St 31 is the top center. Mark it.
– Sts 32–60 run down the left side.
Matching stitches on the left and right always add up to 62. For example, st 9 pairs with st 53.
Anchor stitches: Every lattice sl st into the frame goes through the inner edge of the given Round 2 sc, on the side facing the center. That way the outer edge stays clean for the border.
Lattice
Use one continuous strand of yellow. Keep your chains relaxed and even. The travel sl sts along the frame are worked into the inner edge too, so they disappear into the outline.
Lower Tier
- Join yellow with a sl st in st 9.
- Right lower arm: Ch 8.
- Spine: Ch 6, then sl st in st 1.
- Thicken the spine: Turn and sl st in each of the 6 spine ch back up. You end in the first spine ch, where the arm and spine meet. Call this Point 1.
- Fan 1: Work a Fan in Point 1, so (ch 3, 6 dc) in that ch. Let the ch-3 lean toward the right. (7 sts)
- Left lower bar: Ch 5, then sl st in st 46.
- Travel: Sl st in sts 47–53. (7 sl sts)
- Left lower arm: Ch 8, then sl st in Point 1, at the base of the fan.
- Climb: Sl st in each of the 3 ch of the Fan’s beginning ch-3, to reach its top. (3 sl sts)
- Right lower bar: Ch 5, then sl st in st 16.
Lower tier count: 32 ch (8 + 6 + 5 + 8 + 5), 1 Fan of 7 sts, and 16 sl sts of travel and thickening (6 + 7 + 3).
Upper Tier
- Travel: Sl st in sts 17–19. (3 sl sts)
- Right upper arm: Ch 8.
- Upper spine: Ch 4, then sl st in the 4th dc of Fan 1, which is its center st.
- Thicken the spine: Turn and sl st in each of the 4 spine ch back up. You end where the arm and spine meet. Call this Point 2.
- Fan 2: Work a Fan in Point 2. (7 sts)
- Left upper bar: Ch 4, then sl st in st 37.
- Travel: Sl st in sts 38–43. (6 sl sts)
- Left upper arm: Ch 8, then sl st in Point 2.
- Climb: Sl st in each of the 3 ch of Fan 2’s beginning ch-3. (3 sl sts)
- Right upper bar: Ch 4, then sl st in st 25. Fasten off.
Upper tier count: 28 ch (8 + 4 + 4 + 8 + 4), 1 Fan of 7 sts, and 16 sl sts (3 + 4 + 6 + 3).
Why it is symmetric: Every right-side anchor has a matching left-side anchor, and each pair adds up to 62: 9/53, 16/46, 19/43 and 25/37. The arms are 8 ch on both sides. Each tier’s two bars are the same length: 5 ch in the lower tier and 4 ch in the upper tier.
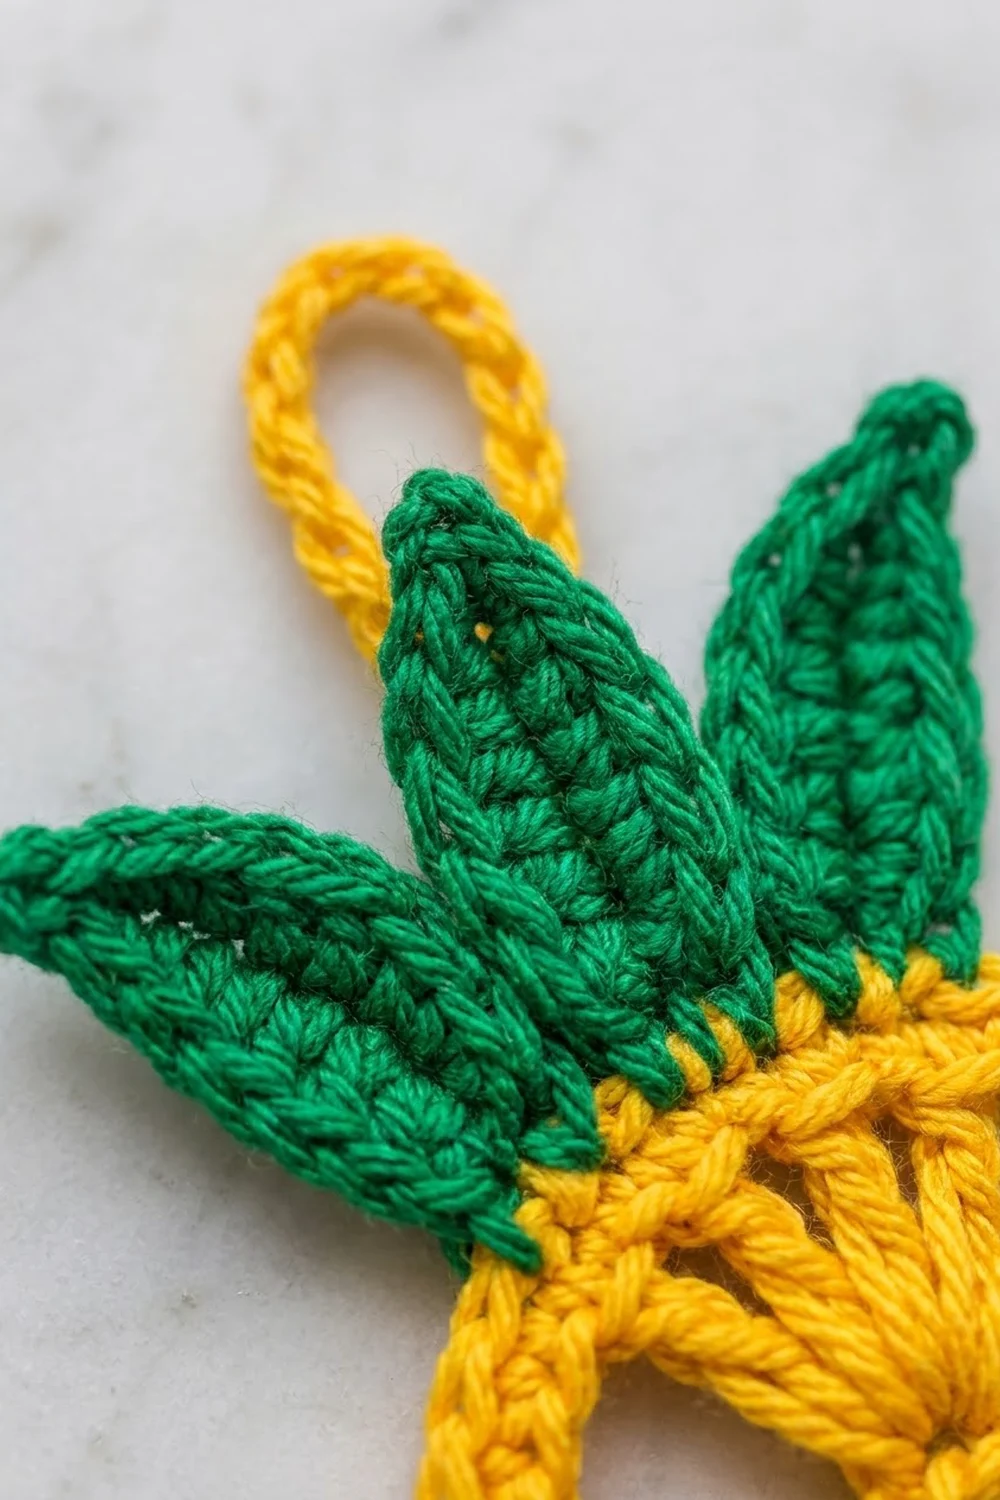
Crown Leaves (make 5, in green)
Each leaf is worked around both sides of a foundation chain, so the foundation chain shows as a center ridge. The first ch you make is the base, and the turning ch becomes the tip.
Large leaf (make 1):
1. Ch 10.
2. Working into ch 9 down to ch 2: sl st, sc, hdc, hdc, dc, dc, dc, hdc. (8 sts)
3. Work 3 sc in ch 1.
4. Working along the other side of the chain, from ch 2 up to ch 9: hdc, dc, dc, dc, hdc, hdc, sc, sl st. (8 sts)
5. Work (sl st, ch 2, sl st) in ch 10 for the pointed tip.
Total: 19 sts plus the tip. Length about 1.5 in (3.8 cm).
Medium leaf (make 2):
1. Ch 8.
2. Working into ch 7 down to ch 2: sl st, sc, hdc, dc, dc, hdc. (6 sts)
3. Work 3 sc in ch 1.
4. Working along the other side, from ch 2 up to ch 7: hdc, dc, dc, hdc, sc, sl st. (6 sts)
5. Work (sl st, ch 2, sl st) in ch 8.
Total: 15 sts plus the tip. Length about 1.2 in (3.0 cm).
Small leaf (make 2):
1. Ch 6.
2. Working into ch 5 down to ch 2: sl st, sc, hdc, dc. (4 sts)
3. Work 3 sc in ch 1.
4. Working along the other side, from ch 2 up to ch 5: dc, hdc, sc, sl st. (4 sts)
5. Work (sl st, ch 2, sl st) in ch 6.
Total: 11 sts plus the tip. Length about 0.8 in (2.0 cm).
Leave a 6 in (15.2 cm) tail on each leaf for sewing.
Crown Assembly and Hanging Loop
Finish the Border (below) before you do this step.
Hanging loop:
1. Join yellow at the back of Round 2 st 31.
2. Ch 30, then sl st in the same st.
3. Turn and sl st in each of the 30 ch to make a firmer cord.
4. Sl st in st 31 again and fasten off.
Leaves: With the RS facing, sew the base of each leaf about 1/4 in (0.6 cm) over the top of the frame.
1. Large leaf: Over sts 30–32, standing straight up and covering the base of the loop.
2. Medium leaves: Centered on sts 28 and 34, tilted slightly outward and tucked just behind the large leaf.
3. Small leaves: Centered on sts 26 and 36, tilted farther outward and tucked behind the medium leaves.
The loop rises behind the large leaf and stands about 1 in (2.5 cm) above its tip.
Border
The border is one round of sc worked into the outer edge of Round 2.
Border gauge: Same as the body, 5.5 sc per inch (2.5 cm).
Round 3: With RS facing, join yellow with a sl st in st 1. Ch 1. Sc in each of the next 14 sts, 2 sc in the next st. Repeat from * to * 3 more times. Join with a sl st to the first sc. Fasten off.
This round is a trim round: 60 sc worked one into each existing st, plus 4 increase sts, for a total of 64 sc.
Where the increases fall: at sts 15, 30, 45 and 60. That puts one at each side, one just below the top center and one just before the bottom center. Each quarter of the outline gets 15 + 1 = 16 sts.
Why the math works: The border sits about 1/8 in (0.3 cm) outside Round 2. Moving outward by that much lengthens the outline by about 2 × 3.14 × 1/8 in, which is 0.8 in (2.0 cm). Four extra sc at 5.5 per inch add 0.7 in (1.8 cm), which is close enough to lie flat without ruffling. The new outline of 64 ÷ 5.5 = 11.6 in (29.5 cm) gives the 3 in x 4 in (7.6 x 10.2 cm) egg.
Final Blocking
- Weave in all ends along the frame or behind the leaves. Trim them close.
- Mist the ornament until it is evenly damp, not soaked.
- Pin it RS up on the blocking mat at 3 in (7.6 cm) wide and 4 in (10.2 cm) tall. Put pins at the top center, bottom center and widest points first.
- Pin the top corners of each fan so each fan opens to about 1.25 in (3.2 cm) across.
- Ease the lattice arms and bars straight. Pin them at their frame anchors if needed.
- Fan the leaves out symmetrically and pin each tip. Check that the center leaf tip is 5.25 in (13.3 cm) above the bottom of the body.
- Let it dry completely, then unpin. Lightly starch it if you want an extra-crisp ornament.
Final Quality-Control Checklist
- The frame has 60 sc in Round 2 and 64 sc in the border.
- The body measures 3 in x 4 in (7.6 x 10.2 cm).
- Both fans have 7 sts and sit on the vertical center line.
- The left and right anchors pair up correctly: 9/53, 16/46, 19/43 and 25/37.
- No travel sl sts show on the outer edge.
- The leaves are sewn securely, with the large leaf in the center and medium and small leaves balanced on each side.
- The loop is firm, centered, and about 1 in (2.5 cm) above the center leaf tip.
- All ends are hidden and secure.
Troubleshooting
- Frame twisted: The chain was twisted before you joined Round 1. Restart, and keep the bumps of the chain all facing the same way before the join.
- Frame pulls inward: Your lattice chains are too tight. Remake the tier with looser chains, or add 1 ch to each arm.
- Lattice sags: Your chains are too loose. Use a smaller hook for the lattice only.
- Fan leans to one side: Make sure all 7 sts go into the same single chain, then pin the fan evenly when blocking.
- Border ruffles: Your increases are too loose. Leave out the increase at sts 15 and 45, so the border has 62 sts.
- Border cups: Add one more increase at each side, so the border has 66 sts.
- Leaves curl: Block them flat and pinned. Mercerized cotton relaxes nicely.
- Ornament tips forward: Move the loop so it sits exactly on st 31, on the back.
Care
Hand wash in cool water, press out the water with a towel, and reshape flat to dry. Store the ornament flat or hanging so the leaves keep their shape.
Final Notes
Each measurement builds on the one before it:
– Gauge: 22 sc = 4 in (10.2 cm).
– The 60-sc frame makes a 2.75 in x 3.75 in (7.0 x 9.5 cm) egg.
– The mirrored lattice keeps that shape steady.
– The 64-sc border brings the body to 3 in x 4 in (7.6 x 10.2 cm).
– The crown raises the height to 5.25 in (13.3 cm).
– The loop adds about 1 in (2.5 cm), for 6.25 in (15.9 cm) overall.
Check each step as you go and your pineapple will come out bright, crisp and ready for the tree. Happy crocheting!