

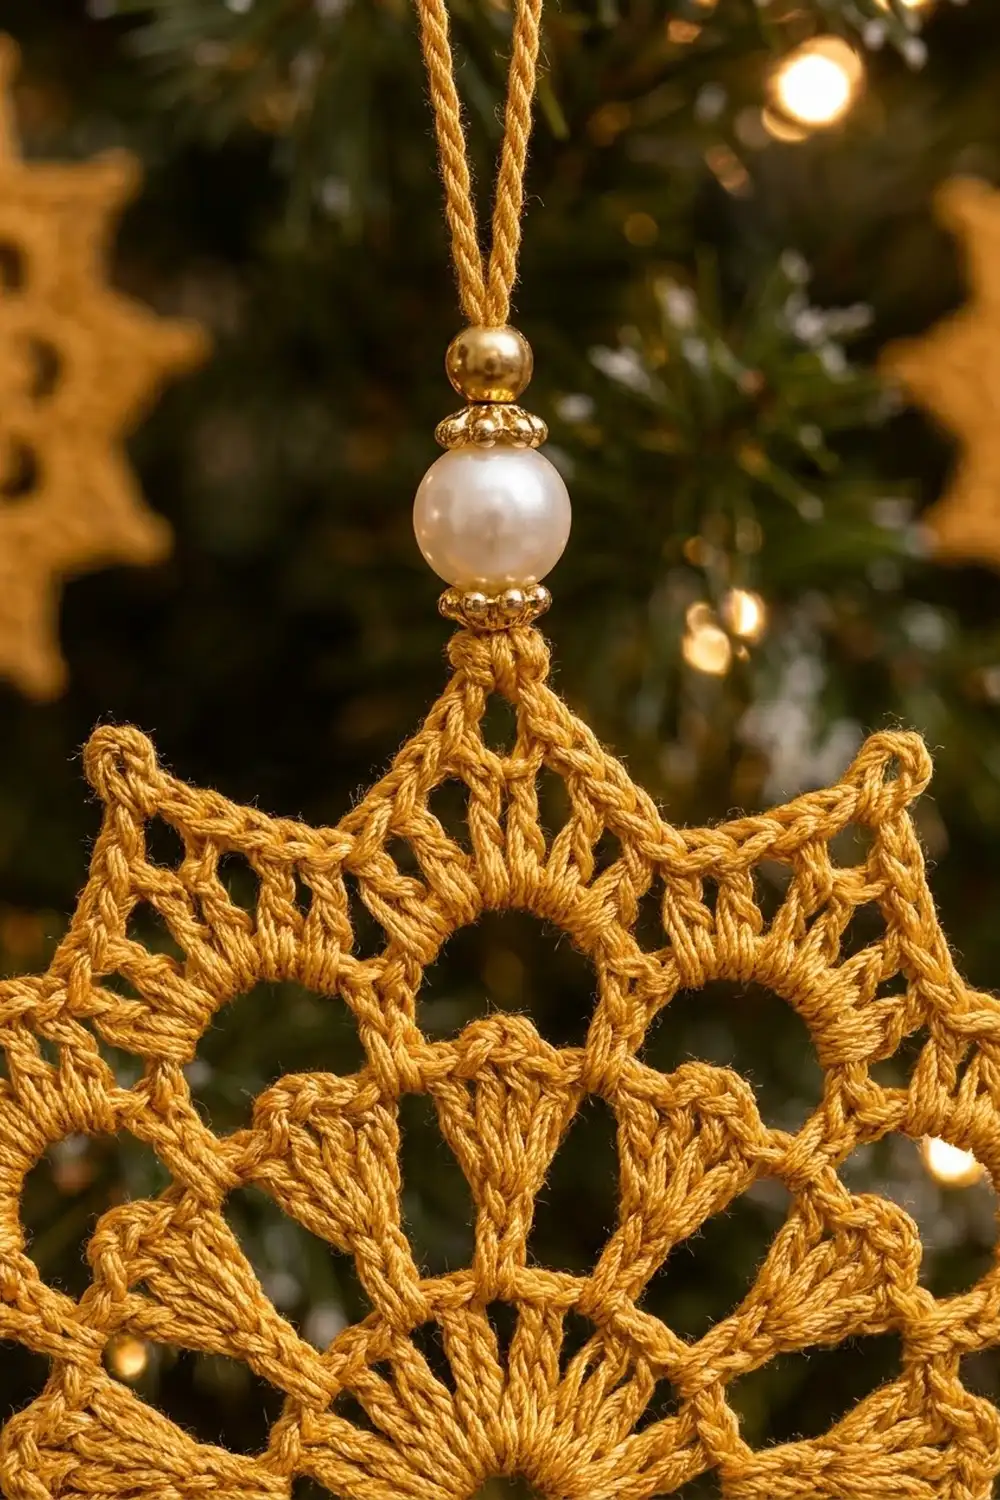
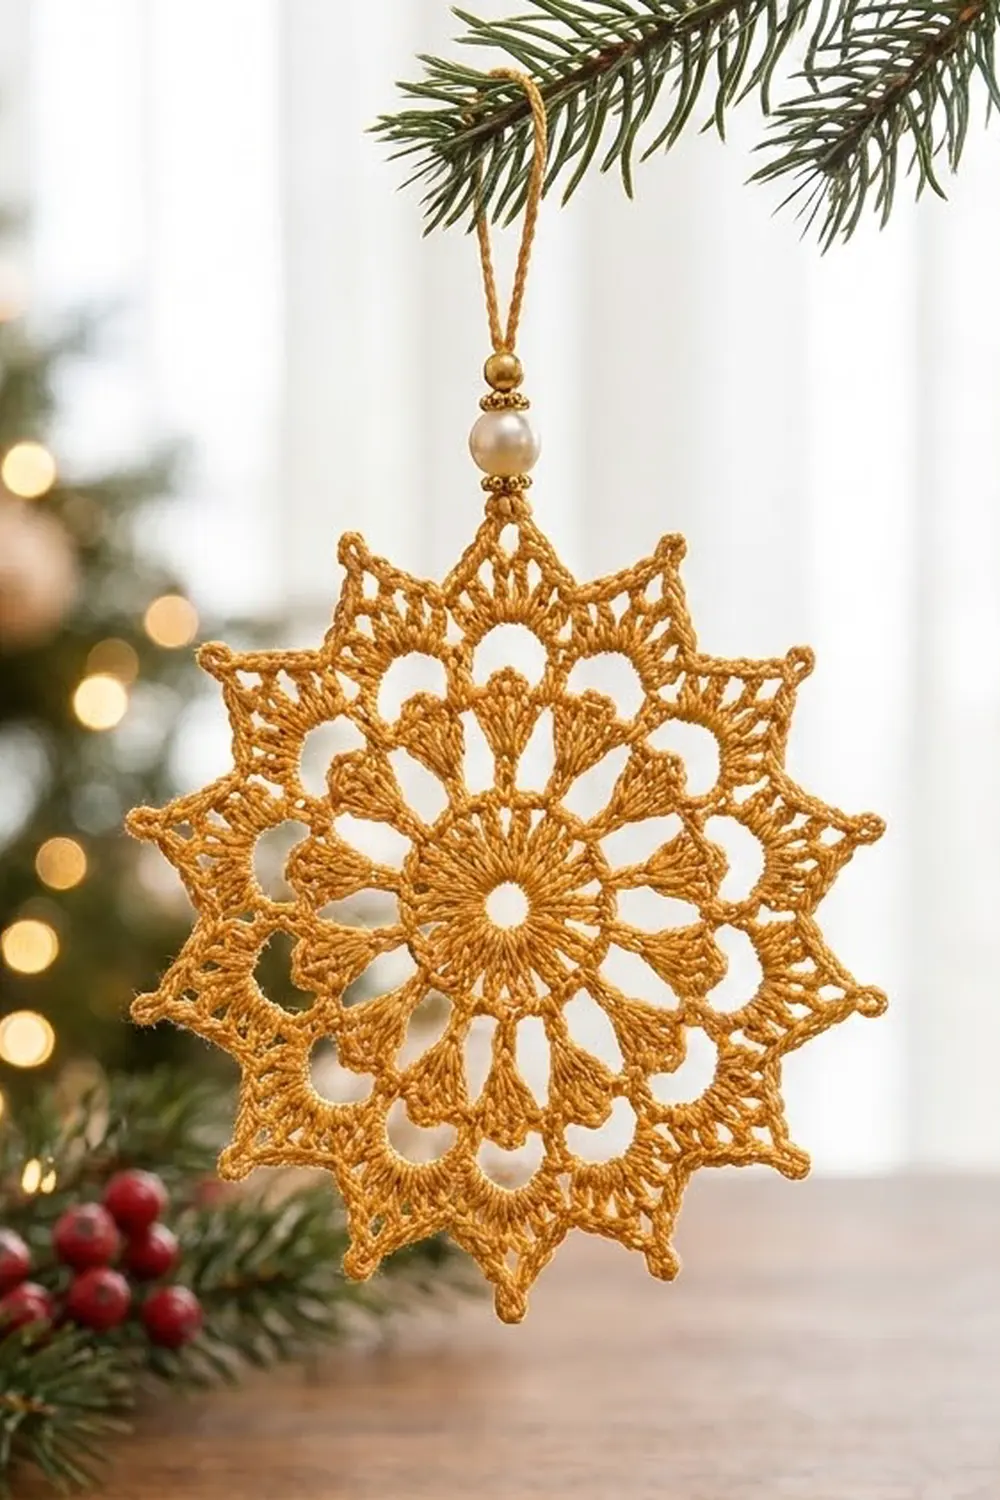
The Golden Starburst Mandala Ornament is a single round lace motif with twelve sharp points, worked in warm gold crochet thread. It has a solid little center ring, a wheel of fan-shaped petals, a circle of open arches, and a zigzag edge with twelve picot tips. A short chain loop with a pearl bead and two gold accents finishes the top, so it is ready to hang.
The look is classic holiday lace. It uses one color, has crisp texture, and leaves plenty of open space so tree lights show through. Gold looks festive without being loud, and the ornament looks just as good laid flat on a table as it does hanging from a branch.
The pattern uses US crochet terms. The finished ornament measures 4.5 in (11.4 cm) from point to opposite point, not counting the hanger. The hanging loop and beads add about 1.75 in (4.4 cm) above the top point.
You will work eight joined rounds from the center out:
- Rounds 1-3 build the center and the shell base.
- Round 4 makes the petal fans.
- Rounds 5-7 form the arches and the outer lattice.
- Round 8 is the pointed border.
Then you add the beaded hanger and block the piece with stiffener.
Finished Size and Construction
- Finished size: 4.5 in (11.4 cm) point to point, plus a hanger of about 1.75 in (4.4 cm)
- Skill level: Intermediate
- Terminology: US crochet terms
- Yarn weight: Size 10 cotton crochet thread (Lace, weight 0)
- Hook: 1.75 mm steel hook
- Number of pieces: 1
- Layout: Single round motif with 12-fold symmetry, worked in joined rounds
- Piece size: 4.5 in (11.4 cm) across after blocking
- Size before border: 3.75 in (9.5 cm) across after Round 7
- Border depth: 0.375 in (1.0 cm) per side (Round 8)
Materials
Choose a mercerized cotton thread in size 10. Mercerized cotton has a soft sheen that suits a gold ornament, holds starch well, and shows every stitch clearly. A thread with a slight metallic strand also works. Test your gauge first, though, because metallic blends are often a little thicker.
- Gold (mustard gold) size 10 thread: 6 g, about 50 m (55 yd)
One ornament uses roughly 4 g. The amount above includes a margin for your gauge swatch, the hanger, and weaving in ends.
Tools and notions:
- 1.75 mm steel crochet hook
- Fine beading needle or tapestry needle that fits through your beads
- 1 cream pearl bead, 8 mm
- 1 gold round bead, 4 mm
- 1 gold bead cap, 6 mm
- Scissors
- Fabric stiffener or heavy spray starch
- Foam blocking board and rustproof pins
- Plastic wrap to protect the board
Abbreviations (US Terms)
- ch – chain
- sl st – slip stitch
- sc – single crochet
- hdc – half double crochet
- dc – double crochet
- tr – treble crochet
- sp(s) – space(s)
- st(s) – stitch(es)
- sk – skip
- rep – repeat
Special stitches:
- Picot: ch 3, sl st in the 3rd ch from hook. A picot is not counted as a stitch.
- Shell: (2 dc, ch 2, 2 dc) in the same space.
The beginning ch 3 always counts as a dc. The ch 1 at the start of a round does not count as a stitch.
Gauge and Checkpoints
Gauge matters here. A lace ornament that is even slightly too tight will cup, and one that is too loose will ruffle. Make Rounds 1-2 first and measure.
Gauge: Rounds 1-2 = 1.25 in (3.2 cm) across.
Before you move on, measure each round flat, without stretching it:
- After Round 1: 0.75 in (1.9 cm)
- After Round 2: 1.25 in (3.2 cm)
- After Round 3: 1.75 in (4.4 cm)
- After Round 4: 2.5 in (6.4 cm)
- After Round 5: 3 in (7.6 cm)
- After Round 6: 3.25 in (8.3 cm)
- After Round 7: 3.75 in (9.5 cm)
- After Round 8: 4.5 in (11.4 cm), after blocking
If your piece is too big: switch to a 1.5 mm hook, or keep your chains snugger. In lace, loose chains add the most size.
If your piece is too small: switch to a 2.0 mm hook. Work Rounds 1-2 again and measure before you continue.
Being off by 0.125 in (0.3 cm) before blocking is normal. Blocking evens it out.
Pattern
Round 1: Center ring
Ch 8, sl st in the first ch to form a ring.
Ch 3 (counts as dc), 23 dc in ring. Join with a sl st to the top of the beginning ch-3.
Stitch count: 24 dc.
The ring leaves the small open hole at the very center of the ornament. Pull the starting tail gently to keep the ring neat, but do not close it completely.
Round 2: V spokes
Ch 3 (counts as dc), dc in the same st, ch 2, sk 1 st, *2 dc in next st, ch 2, sk 1 st; rep from * 10 more times. Join to the top of the beginning ch-3.
Stitch count: 24 dc in 12 pairs, 12 ch-2 sps.
This round sets up the 12 repeats that every later round follows.
Round 3: Shell base
Sl st in the next dc and into the first ch-2 sp. Ch 3 (counts as dc), (dc, ch 2, 2 dc) in the same sp, ch 1, *shell in the next ch-2 sp, ch 1; rep from * 10 more times. Join to the top of the beginning ch-3.
Stitch count: 12 shells = 48 dc, 12 ch-2 sps, 12 ch-1 sps.
Round 4: Petal fans
Sl st in the next dc and into the first ch-2 sp. Ch 3 (counts as dc), 6 dc in the same sp, ch 3, sc in the next ch-1 sp, ch 3, *7 dc in the next ch-2 sp, ch 3, sc in the next ch-1 sp, ch 3; rep from * 10 more times. Join to the top of the beginning ch-3.
Stitch count: 12 fans of 7 dc = 84 dc, 12 sc, 24 ch-3 sps.
Each 7-dc fan starts narrow at the shell’s chain space and spreads outward. These fans are the twelve petals around the center. The ch-3 sps on either side of each sc make the small openings between petals.
Round 5: Open arches
Sl st in the next 3 dc, so you are in the 4th (center) dc of the first fan. Ch 1, sc in the same st, ch 7. *Skip the rest of this fan, both ch-3 sps, the sc, and the first 3 dc of the next fan. Sc in the center dc of the next fan, ch 7; rep from * 10 more times. Join to the first sc.
Stitch count: 12 sc, 12 ch-7 loops.
The ch-7 loops float over the gaps between petals and form the circle of open arches.
Round 6: Filled arches
Sl st into the first ch-7 loop. Ch 1, *in the current loop work (2 sc, 2 hdc, 3 dc, 2 hdc, 2 sc), then move to the next loop; rep from * 11 more times. Skip each sc of Round 5 as you go. Join to the first sc.
Stitch count: 12 arches of 11 sts = 132 sts (48 sc, 48 hdc, 36 dc).
Each arch is a smooth, rounded scallop. The center dc of each arch (the 6th st) is your anchor point for Round 7.
Round 7: Outer lattice
Sl st in the next 5 sts, so you are in the 6th st (center dc) of the first arch. Ch 1, sc in the same st, ch 4. Sc in the space between this arch and the next (between the last sc of one arch and the first sc of the next), ch 4. *Sc in the center dc of the next arch, ch 4, sc in the space between arches, ch 4; rep from * 10 more times. Join to the first sc.
Stitch count: 24 sc, 24 ch-4 sps.
There are now two kinds of sc. The 12 sc on the arch centers will become the valleys of the border. The 12 sc between arches will become the points.
Checkpoint: the piece should measure 3.75 in (9.5 cm) across and lie flat. If it cups, your ch-4 sps are too tight. If it ruffles, they are too loose.
Border
Border gauge
The border adds 0.375 in (1.0 cm) on every side. That takes the ornament from 3.75 in (9.5 cm) to 4.5 in (11.4 cm), because 3.75 + 0.375 + 0.375 = 4.5 in. The tr stitches and picot at each point give the height. The sl st in each valley adds almost nothing, which creates the deep zigzag.
Round 8: Twelve points
Start at the join, which sits on an arch-center sc. Ch 1.
*In the next ch-4 sp work (sc, hdc, dc). In the next sc (the between-arch sc) work (tr, picot, tr). In the next ch-4 sp work (dc, hdc, sc). Sl st in the next sc (the arch-center sc); rep from * 11 more times. The final sl st lands in the first sc of Round 7 and joins the round.
Stitch count per point: 9 sts (sc, hdc, dc, tr, tr, dc, hdc, sc, sl st) + 1 picot.
Round total: 12 x 9 = 108 sts (24 sc, 24 hdc, 24 dc, 24 tr, 12 sl st) + 12 picots.
Fasten off, leaving a 6 in (15.2 cm) tail to weave in.
Why the math works
Round 2 sets up 12 repeats, and no later round breaks that count:
- Round 4 has 12 fans.
- Round 5 anchors one sc on each fan center.
- Round 6 fills 12 loops.
- Round 7 places exactly 2 sc per arch (24 total), with one ch-4 sp after each sc.
Round 8 uses those in fixed groups. Each point takes 2 ch-4 sps and the 1 between-arch sc they flank. Each valley takes 1 arch-center sc. So 24 sps / 2 = 12 points and 12 valleys, with no leftover spaces. Each point lines up with a petal fan below it, because the between-arch sc sits above a Round 5 sc, which sits on a fan center.
Beaded hanger
- Cut a 12 in (30.5 cm) length of thread. From one end, use the beading needle to string the gold 4 mm bead, then the 8 mm pearl, then the bead cap, with the cup facing the pearl. Leave the beads near the middle of the strand.
- Using the end you strung from, insert the hook into the picot at any point, pull up a loop, and ch 2. The bead cap is now the bead closest to your hook.
- Slide the bead cap up against the hook, then the pearl, then the gold bead. Ch 1 to lock them.
- Ch 30. Sl st in the ch directly above the gold bead to close the loop.
- Fasten off and weave both ends down through the bead stack and into the point.
The loop stands about 1 in (2.5 cm) tall, and the bead stem adds about 0.75 in (1.9 cm), for a hanger of about 1.75 in (4.4 cm).
Final Blocking
- Weave in all ends along the back of solid stitches, never across open chains.
- Mix fabric stiffener following the label, or prepare heavy spray starch.
- Soak the ornament fully, then press out the extra liquid in a towel. Do not wring it.
- Cover your blocking board with plastic wrap. Mark a 4.5 in (11.4 cm) circle as a guide.
- Pin the center flat first. Then pin the picot tip of each point on the circle. Work in opposite pairs (12 and 6 o’clock, then 3 and 9, and so on) so the points stay evenly spaced.
- Pin the top of each Round 6 arch so the scallops are round and open.
- Gently open each petal fan with a pin or your fingertip.
- Let it dry completely, at least 12 hours. Unpin only when the piece is stiff.
- Measure again. It should be 4.5 in (11.4 cm) point to point.
Final Quality-Control Checklist
- Center hole is open and round, not puckered.
- There are exactly 12 petal fans, each with 7 dc.
- All 12 arches are the same height and shape.
- Every border point has 2 tr and a visible picot.
- Every valley sits directly at an arch center.
- The ornament lies flat with no cupping or waves.
- It measures 4.5 in (11.4 cm) point to point.
- Beads sit snugly at the base of the hanger and do not slide.
- All ends are woven in and trimmed.
Troubleshooting
The motif cups like a bowl. Your chains are too tight. Loosen them in Rounds 5 and 7 first, or use a 2.0 mm hook for those rounds only.
The motif ruffles. Your chains are too loose. Use a 1.5 mm hook for Rounds 5 and 7, or pull each chain snug.
I have 11 or 13 points. You missed or doubled a repeat. Count Round 7: you need 24 sc and 24 ch-4 sps before starting Round 8.
The points are rounded, not sharp. Pin the picot tips firmly during blocking and use enough stiffener to set them.
The arches look lopsided. Check that each Round 6 arch has exactly 11 sts and that you started Round 7 in the 6th st.
The beads wobble. Add one more ch after the beads in Step 3, or put a tiny dab of clear glue under the bead cap.
Care
Dust the ornament gently with a soft brush. If it loses its shape, wet it again with stiffener, re-pin it on a 4.5 in (11.4 cm) circle, and let it dry. Store it flat in tissue paper.
Final Notes
The whole ornament follows one simple measurement chain:
- 0.75 in (1.9 cm) at the center
- 1.25 in (3.2 cm) at gauge
- 2.5 in (6.4 cm) after the petal fans
- 3.75 in (9.5 cm) after the lattice
- 4.5 in (11.4 cm) after the pointed border
If each checkpoint is on target, the finished star will be flat, even, and ready to hang. Once you know the rounds, one ornament goes quickly, so you can make several for the tree or for gifts.
Happy crocheting!