

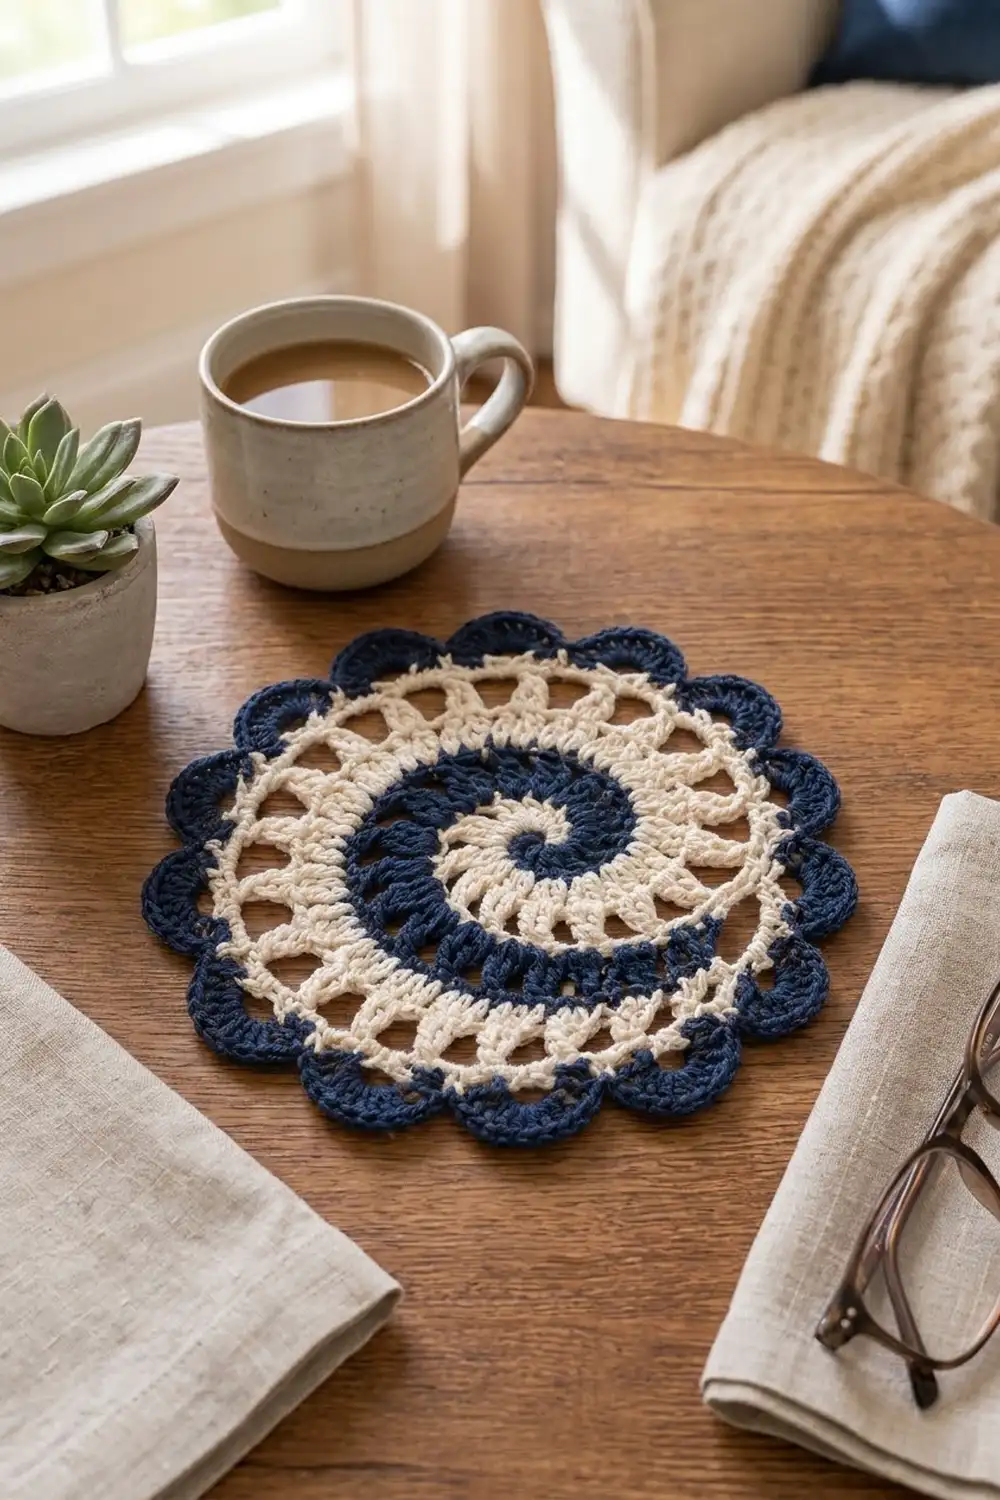
The Harbor Swirl is a round crochet motif with a lot of movement. A deep navy spiral curls out from the center, framed by ridged cream arms. A light, lacy cream ring surrounds it, and a crisp navy scalloped edge finishes it off.
The palette is two colors only: navy and cream. The style is a mix of classic doily and coastal cottage. On its own it makes a coaster, a doily, or a small decorative mat.
This pattern uses US crochet terms. The finished motif measures 7.25 in (18.4 cm) across after blocking.
The center is worked as a two-color spiral. Each color works over the other color’s last stitches, one half of the circle at a time. After the spiral, you work one evening round, two openwork cream rounds, and a two-round border of cream fans outlined in navy.
Finished Size and Construction
- Finished size: 7.25 in (18.4 cm) diameter
- Skill level: Intermediate (two-color spiral, live-loop management)
- Terminology: US crochet terms
- Yarn weight: DK / light (#3) cotton or cotton blend
- Hook: 4.0 mm (G-6)
- Number of pieces: 1 (single motif)
- Layout: one round motif, no joining
- Spiral size: 4 in (10.2 cm) after Round 6
- Size before border: 6 in (15.2 cm) after Round 9
- Border depth: 5/8 in (1.6 cm) on each side (Rounds 10–11)
Materials
Choose a smooth, mercerized or combed DK cotton. Cotton shows the spiral ridges clearly and blocks flat. Avoid fuzzy or very stretchy yarns, because the spiral will blur and the scallops will lose their shape.
- Color A, navy: 12 g / 28 m (31 yd)
- Color B, cream: 14 g / 32 m (35 yd)
Both quantities include a margin of about 20% for a gauge swatch, tails, and possibly ripping back.
Tools:
– 4.0 mm (G-6) crochet hook
– 2 locking stitch markers
– Tapestry needle
– Scissors
– Blocking mat and rustproof pins
– Spray bottle with clean water
Abbreviations (US Terms)
- ch: chain
- sl st: slip stitch
- sc: single crochet
- hdc: half double crochet
- dc: double crochet
- sk: skip
- sp: space
- st(s): stitch(es)
- rep: repeat
- A / B: navy / cream
Special technique: live-loop drop. When the pattern says “drop,” take the hook out of the working loop and put a locking marker through that loop so it can’t unravel. Leave the yarn attached. When you pick that color up again, put the hook back into the marked loop, remove the marker, and keep going.
Gauge and Checkpoints
Make the spiral center (Rounds 1–6) first and measure it before going on. That tells you whether your yarn and hook match the pattern. Measure flat, without stretching, across the widest point.
- After Round 1: 0.75 in (1.9 cm)
- After Round 3: 2.25 in (5.7 cm)
- After Round 5: 3.5 in (8.9 cm)
- After Round 6: 4 in (10.2 cm)
- After Round 7: 4.5 in (11.4 cm)
- After Round 8: 5.25 in (13.3 cm)
- After Round 9: 6 in (15.2 cm)
- After Round 10: 6.75 in (17.1 cm)
- After Round 11, blocked: 7.25 in (18.4 cm)
A difference of up to 0.25 in (0.6 cm) at any checkpoint is fine.
If your spiral is too big: go down to a 3.75 mm hook, or tighten your dc by pulling the first loop up less.
If your spiral is too small: go up to a 4.5 mm hook.
If the spiral cups: your increases are too tight, so go up a hook size.
If it ruffles: your stitches are too loose, so go down a hook size.
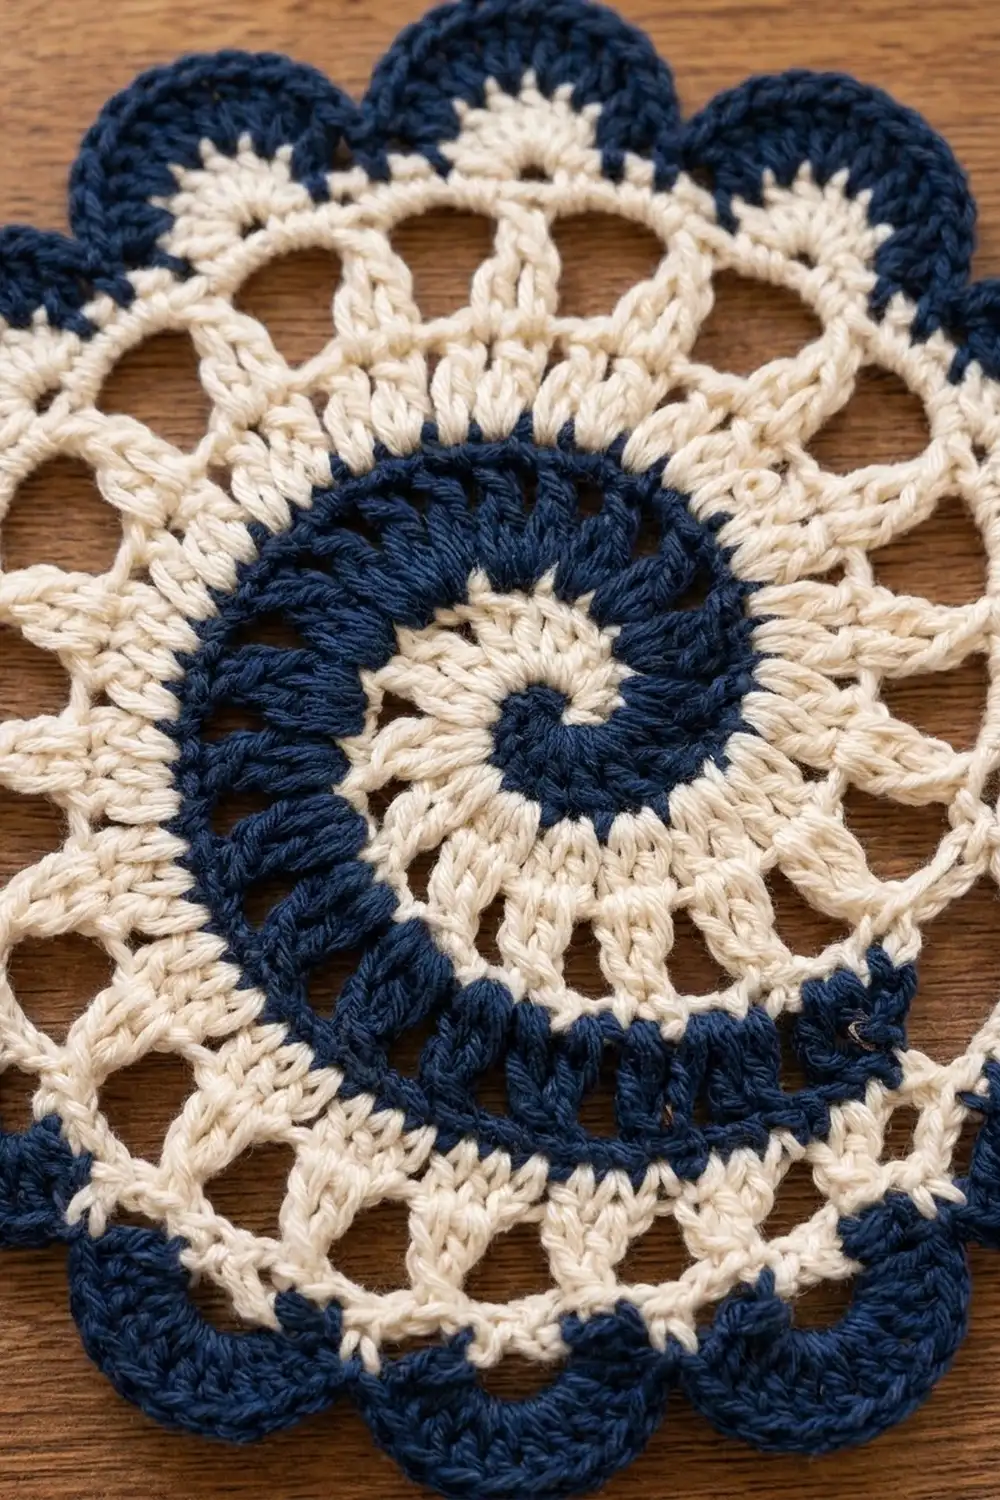
Spiral Center (Rounds 1–6)
Each round has two halves. Color A works one half and Color B works the other. In every round, each color works over the stitches the other color made in the round before. Work each half until you reach the other color’s live loop, then drop.
The stitch counts below are totals for the whole round, both colors combined.
Round 1 (both colors): Make a magic ring with A. Ch 2 (doesn’t count as a st). Work (sc, hdc, 4 dc) into the ring and drop A. Join B into the ring with a sl st and ch 2 (doesn’t count). Work (sc, hdc, 4 dc) into the ring and drop B. Pull the ring closed.
12 sts: 6 A, 6 B.
Round 2: Pick up A. Work 2 dc in each of the 6 B sts and drop A. Pick up B. Work 2 dc in each of the 6 A sts from Round 1 and drop B.
24 sts: 12 A, 12 B.
Round 3: Pick up A. Work (dc in next st, 2 dc in next st) 6 times across B’s sts and drop A. Pick up B and work the same over A’s sts. Drop B.
36 sts: 18 A, 18 B.
Checkpoint: about 2.25 in (5.7 cm).
Round 4: Each color in turn: (dc in next 2 sts, 2 dc in next st) 6 times, then drop.
48 sts: 24 A, 24 B.
Round 5: Each color in turn: (dc in next 3 sts, 2 dc in next st) 6 times, then drop.
60 sts: 30 A, 30 B.
Checkpoint: about 3.5 in (8.9 cm).
Round 6 (taper round): This round brings the spiral arm down to the surface so the outer edge is round, not stepped. Pick up A and work across B’s 30 sts:
- (dc in next 4 sts, 2 dc in next st) 3 times = 18 dc
- hdc in next 4 sts, 2 hdc in next st = 6 hdc
- sc in next 4 sts, 2 sc in next st = 6 sc
- sl st in next 4 sts, 2 sl st in next st = 6 sl st
That gives 36 A sts. Fasten off A and leave a 6 in (15.2 cm) tail.
Pick up B and work exactly the same sequence across A’s 30 sts from Round 5: 36 B sts. Fasten off B.
72 sts: 36 A, 36 B.
Checkpoint: 4 in (10.2 cm). The navy arm should now curl smoothly into the cream, with no ledge where it ends.
Evening and Openwork Rounds (Rounds 7–9)
Round 7 (B, evening round): This round uses taller stitches where Round 6 was low, so the edge becomes level. Join B with a sl st in the first dc of either half. Ch 1, then work around, matching each Round 6 section:
- sc in each of the 18 dc and 6 hdc = 24 sc
- hdc in each of the 6 sc = 6 hdc
- dc in each of the 6 sl st = 6 dc
Repeat for the second half. Sl st to the first sc. Don’t fasten off.
72 sts: 48 sc + 12 hdc + 12 dc, worked one per existing st, with 0 added.
Checkpoint: 4.5 in (11.4 cm). The edge should be level all the way around.
Round 8 (B, spokes): Ch 6 (counts as dc and ch 3), sk next 2 sts. Dc in next st, ch 3, sk next 2 sts. Rep from * 22 more times. Sl st in the 3rd ch of the beginning ch-6.
24 dc and 24 ch-3 sps. 24 x 3 = 72, which uses every st of Round 7.
Checkpoint: 5.25 in (13.3 cm).
Round 9 (B, arches): Sl st into the first ch-3 sp, ch 1, sc in the same sp, ch 5. Sc in next ch-3 sp, ch 5. Rep from * 22 more times. Sl st in the first sc.
24 sc and 24 ch-5 loops.
Checkpoint, size before border: 6 in (15.2 cm). If the arches pull the piece into a bowl, use ch 6. If they wave, use ch 4. Keep the same number of loops.
Border (Rounds 10–11)
Border gauge: At the Round 9 edge, one fan repeat (2 ch-5 loops) spans about 1.6 in (4.1 cm) of the outer circle. The 12 repeats fill the 18.8 in (47.8 cm) circumference of a 6 in (15.2 cm) circle with no gaps.
Round 10 (B, cream fans): Sl st into the first ch-5 loop, ch 1, sc in the same loop. Work 7 dc in next ch-5 loop, then sc in next ch-5 loop. Rep from * 10 more times. Work 7 dc in the last loop and sl st in the first sc. Fasten off B.
12 sc + 84 dc = 96 sts, making 12 fans.
Checkpoint: 6.75 in (17.1 cm).
Round 11 (A, navy scallop outline): Join A with a sl st in any sc between two fans. This sl st counts as the first st. Then work these 10 sts across the 7 dc of the fan:
- sc in next dc
- hdc in next dc
- 2 dc in each of next 3 dc
- hdc in next dc
- sc in next dc
Then sl st in the next sc. Work that fan-and-sl-st repeat 11 more times, ending with a sl st in the joining sl st. Fasten off.
Per repeat: 1 sl st + 10 sts = 11. 12 x 11 = 132 sts.
Why the math works: Round 9’s 24 loops pair up into exactly 12 repeats, one fan and one anchor sc each. Every fan has 7 dc, and Round 11 turns those 7 into 10 by adding 3 extra sts at the crown. That gives the navy edge just enough extra length to curve over each fan without ruffling. The sl sts sit on the sc anchors, so the scallops dip cleanly between fans. That dip is what makes the scalloped silhouette.
Final Blocking
- Weave in all ends. Weave the A tails into the navy stitches and the B tails into the cream, so nothing shows through.
- Soak the motif in cool water for 10 minutes, then press out the water gently in a towel. Don’t wring it.
- Lay it face up on the blocking mat. Mark a 7.25 in (18.4 cm) circle on the mat, or measure out from the center.
- Pin the center first, then pin the tip of each of the 12 scallops onto the marked circle, opposite pairs first.
- Pin the sc dip between each pair of scallops slightly inward so the scallops stay rounded.
- Smooth the spiral with your fingers so the navy arm lies flat and the curl is even.
- Let it dry completely before unpinning, usually 6–12 hours.
Final Quality-Control Checklist
- Diameter is 7.25 in (18.4 cm), give or take 0.25 in (0.6 cm).
- The spiral has one continuous navy arm and one continuous cream arm, with no gaps at the color changes.
- The spiral edge after Round 7 is level, with no step where the arms end.
- There are 24 spokes in Round 8 and 24 arches in Round 9.
- There are 12 fans, each outlined in navy, with 132 sts in Round 11.
- The motif lies flat with no cupping or ruffling.
- All tails are hidden in stitches of the same color.
Troubleshooting
The spiral looks lopsided. One color was worked tighter than the other. Keep the same tension on both, and don’t pull the live loop snug when you drop it.
A live loop unraveled. Always put a locking marker in the loop before you set the work down.
There’s a step at the end of the spiral. Check that Round 7 used dc over the sl sts and hdc over the sc sts.
The motif cups after Round 9. Lengthen the arches to ch 6, or go up a hook size for Rounds 8–9 only.
The scallops ruffle. Work 2 dc in only the center 2 dc of each fan, which gives 9 sts per fan in Round 11.
The scallops look flat. Make sure each fan has a full 7 dc and that the sl sts sit exactly on the sc anchors.
Care
Hand wash in cool water with mild soap, press out the water, and dry flat, reshaping to 7.25 in (18.4 cm). Don’t tumble dry. Heat can shrink the cotton and distort the spiral.
Final Notes
Here is the measurement chain in one place:
- The spiral center grows from 0.75 in (1.9 cm) to 4 in (10.2 cm) over 6 rounds and 72 sts.
- The evening round levels the edge at 4.5 in (11.4 cm).
- The spokes and arches open the motif out to 6 in (15.2 cm).
- The fan and navy scallop border adds 5/8 in (1.6 cm) on each side, for a blocked finish of 7.25 in (18.4 cm).
If your spiral hits 4 in (10.2 cm), the rest of the motif will follow. Take your time with the live loops, keep both colors at the same tension, and let blocking finish the curl.
Happy crocheting!