

This sunflower wall organizer is a practical piece of décor. A solid chocolate-brown center is surrounded by 16 pointed rust petals, and four little cylinder cups sit across the lower half of the flower. Hang it by the desk or the door and use the cups for pens, a notepad, a phone, or the TV remote.
The palette is just two colors: deep brown for the seed center and warm rust-orange for everything else. Firm single crochet in worsted cotton gives a dense, slightly sculpted fabric. It holds its shape on the wall and doesn’t sag when the cups are filled.
The pattern uses US crochet terms throughout. The finished organizer is about 14 in (35.6 cm) across from petal tip to petal tip. The center disc is 7.5 in (19.1 cm), and the row of cups is 7.6 in (19.3 cm) wide.
Construction is simple and modular. You work the brown disc in spiral rounds, make 16 petals flat in rows, and sew the petals behind the disc. Next you work one continuous outline round around all the petal edges. Last, you make four cups in the round, join them to each other, sew them to the front, and add a hanging strap.
Finished Size and Construction
- Finished size: 14 in (35.6 cm) diameter, tip to tip
- Skill level: Intermediate (simple stitches, careful assembly)
- Terminology: US crochet terms
- Yarn weight: Worsted (#4), cotton or cotton blend
- Hook: 4.0 mm (G-6)
- Number of pieces: 22 (1 disc, 16 petals, 4 cups, 1 hanging strap)
- Layout: petals in a ring behind the disc; cups in a horizontal row of 4 across the lower half
- Piece sizes: disc 7.5 in (19.1 cm); petal 3.5 in (8.9 cm) long × 2 in (5.1 cm) wide; cup 1.9 in (4.8 cm) diameter × 2.6 in (6.6 cm) tall
- Size before border: 13.5 in (34.3 cm)
- Border depth: 0.25 in (0.6 cm), one round of sc around all petal edges
Materials
Choose a smooth worsted cotton or cotton blend. Cotton keeps the petals crisp and the cups stiff. Acrylic also works, but the cups will be softer.
- Color A, dark brown: 50 g / 95 m (center disc)
- Color B, rust orange: 180 g / 342 m (petals, border, cups, strap)
These quantities are based on a yarn of about 1.9 m per gram. They include a safety margin of roughly 20% for gauge swatching and long sewing tails.
Tools:
– 4.0 mm (G-6) crochet hook
– Tapestry needle
– Stitch marker
– Rust-proof pins
– Scissors
– Measuring tape
– Spray bottle or steamer for blocking
Abbreviations (US Terms)
- ch – chain
- sc – single crochet
- sl st – slip stitch
- inc – 2 sc in the same stitch
- sc2tog – single crochet 2 together
- BLO – back loop only
- MR – magic ring
- st(s) – stitch(es)
- rnd(s) – round(s)
Special stitch – valley sc2tog: Insert the hook into the row-end of the left petal and pull up a loop. Insert the hook into the matching row-end of the next petal and pull up a loop. Yarn over and draw through all 3 loops. This makes 1 stitch that bridges the gap between two petals.
Gauge and Checkpoints
Gauge: 16 sc × 17 rows = 4 in (10.2 cm) in firm single crochet. That’s 4 sts per inch and 4.25 rows per inch.
Make one petal first and use it as your gauge test. It should be 3.5 in (8.9 cm) long and 2 in (5.1 cm) wide at its widest row.
Checkpoints:
– Disc after Rnd 8: 3.8 in (9.7 cm) across
– Disc after Rnd 16: 7.5 in (19.1 cm) across
– Petal after Row 9: 2.1 in (5.3 cm) long
– Cup base after Rnd 4: 1.9 in (4.8 cm) across
– Cup finished: 2.6 in (6.6 cm) tall
If your piece is too big, go down a half hook size (3.75 mm). If it’s too small, go up to 4.5 mm. Don’t change stitch counts, because every later step depends on them.
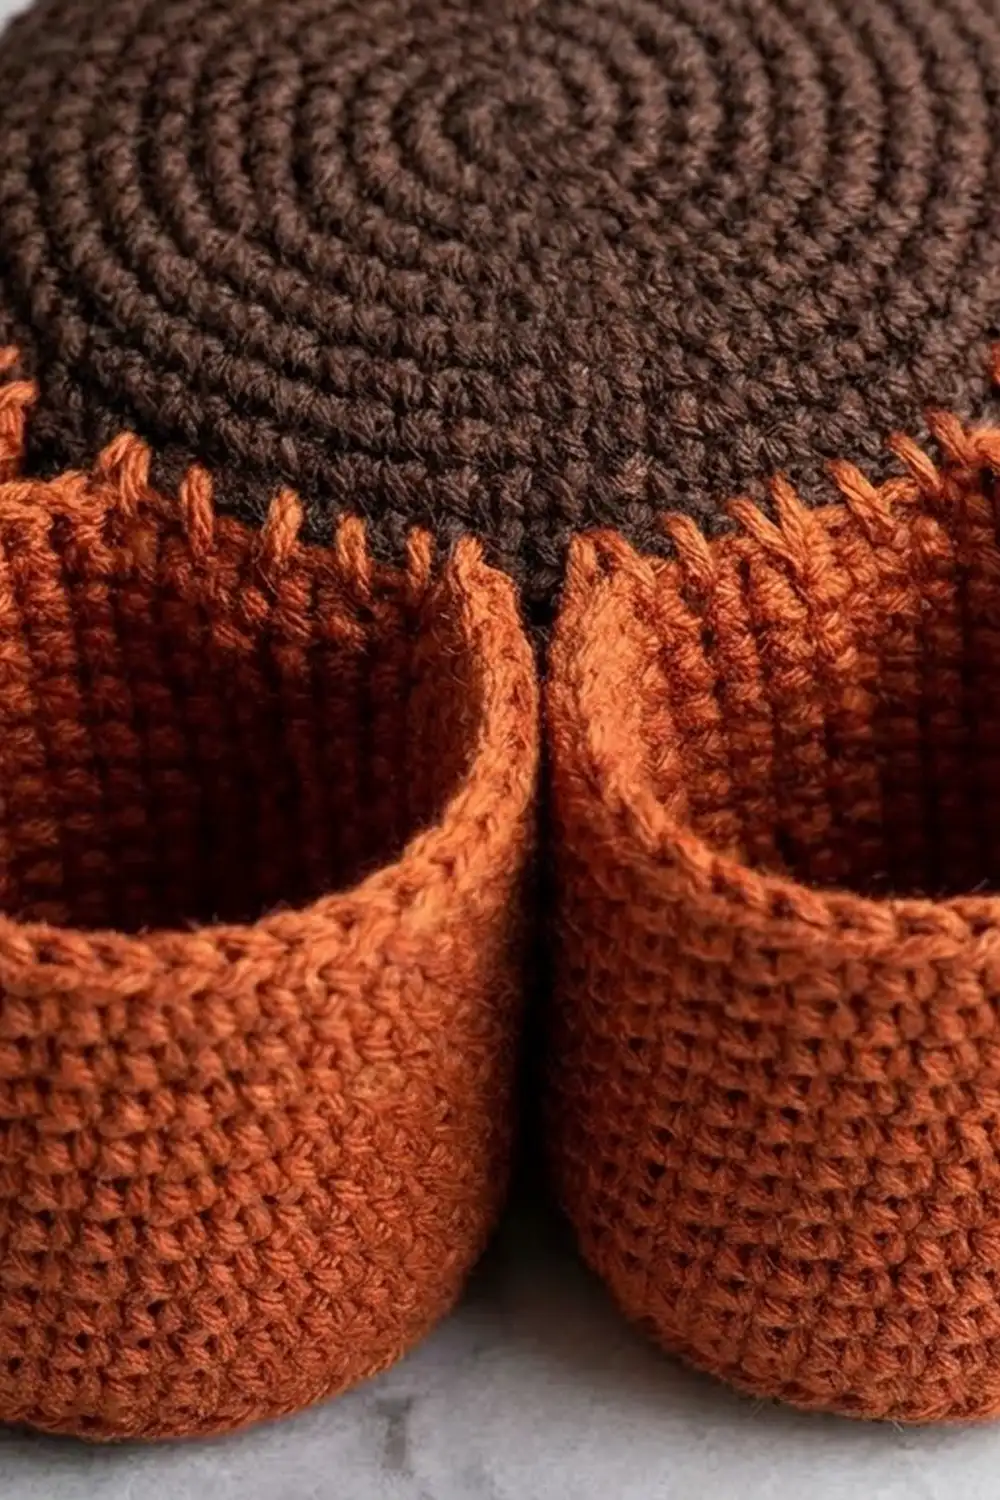
Center Disc (Color A, make 1)
Work in continuous spiral rounds. Don’t join. Mark the first stitch of each round.
- Rnd 1: MR, 6 sc in ring. (6)
- Rnd 2: inc in each st around. (12)
- Rnd 3: [sc 1, inc] × 6. (18)
- Rnd 4: [sc 2, inc] × 6. (24)
- Rnd 5: [sc 3, inc] × 6. (30)
- Rnd 6: [sc 4, inc] × 6. (36)
- Rnd 7: [sc 5, inc] × 6. (42)
- Rnd 8: [sc 6, inc] × 6. (48) Checkpoint: 3.8 in (9.7 cm).
- Rnd 9: [sc 7, inc] × 6. (54)
- Rnd 10: [sc 8, inc] × 6. (60)
- Rnd 11: [sc 9, inc] × 6. (66)
- Rnd 12: [sc 10, inc] × 6. (72)
- Rnd 13: [sc 11, inc] × 6. (78)
- Rnd 14: [sc 12, inc] × 6. (84)
- Rnd 15: [sc 13, inc] × 6. (90)
- Rnd 16: [sc 14, inc] × 6. (96)
Sl st into the next st to smooth the step and fasten off. The disc is 7.5 in (19.1 cm) across.
To keep the circle round instead of hexagonal, stagger the increases. On even rounds, work half of the plain stitches before the first increase. For Rnd 10, for example, work sc 4, inc, then [sc 8, inc] × 5, then sc 4. Each round’s total stays the same.
With a scrap of yarn, mark every 6th st of Rnd 16. This gives 16 sections of 6 sts, one for each petal (16 × 6 = 96).
Petals (Color B, make 16)
Each petal is worked flat in rows from the base up to the point. Ch 1 at the start of each row. The ch 1 doesn’t count as a stitch.
- Row 1: ch 7, sc in 2nd ch from hook and in each ch across. (6)
- Rows 2–3: sc in each st across. (6)
- Row 4: inc, sc 4, inc. (8)
- Rows 5–9: sc in each st across. (8) Checkpoint: 2.1 in (5.3 cm) long.
- Row 10: sc2tog, sc 4, sc2tog. (6)
- Row 11: sc in each st across. (6)
- Row 12: sc2tog, sc 2, sc2tog. (4)
- Row 13: sc in each st across. (4)
- Row 14: sc2tog twice. (2)
- Row 15: sc2tog. (1)
Fasten off, leaving a 10 in (25.4 cm) tail at the base (weave the tip tail in now). The petal is 3.5 in (8.9 cm) long and 2 in (5.1 cm) wide at Rows 4–9.
The 6-st base matches one 6-st section of the disc edge. The single stitch at Row 15 forms the sharp tip.
Make All Pieces
Before assembly, check that you have:
- Color A: 1 center disc (96 sts in last round)
- Color B: 16 petals, 4 cups (instructions below), and 1 hanging strap (instructions below)
Layout (front view):
                 [ LOOP ]
              P    P    P
          P                 P
       P      ( BROWN DISC )   P
       P                       P
       P   [C1][C2][C3][C4]    P
          P                 P
              P    P    P
P = petal (16 total, evenly spaced). C = cup. The strap is centered behind the top petal.
Cups (Color B, make 4)
Work in continuous spiral rounds and mark the first stitch.
- Rnd 1: MR, 6 sc in ring. (6)
- Rnd 2: inc in each st around. (12)
- Rnd 3: [sc 1, inc] × 6. (18)
- Rnd 4: [sc 2, inc] × 6. (24) Checkpoint: base 1.9 in (4.8 cm).
- Rnd 5: sc in BLO of each st around. (24) This makes the turning ridge.
- Rnds 6–15: sc in each st around. (24)
- Rnd 16 (rim): sl st loosely in each st around. (24)
Fasten off, leaving a 16 in (40.6 cm) tail.
The wall has 11 sc rounds (Rnds 5–15). At 4.25 rows per inch, that comes to 2.6 in (6.6 cm). A circumference of 24 sts is 6 in (15.2 cm), which gives a diameter of 1.9 in (4.8 cm).
Hanging Strap (Color B, make 1)
- Row 1: ch 4, sc in 2nd ch from hook and in next 2 ch. (3)
- Rows 2–34: ch 1, turn, sc in each st across. (3)
Fasten off, leaving a 12 in (30.5 cm) tail.
The strip is 0.75 in (1.9 cm) wide and 8 in (20.3 cm) long. Rows 1–18 form the strap, which is 4.2 in (10.7 cm) long. Rows 19–34 form the loop strip, which is 3.8 in (9.7 cm) long.
Fold Row 34 down onto the back of Row 18 and whip-stitch the two rows together across all 3 sts. This makes a teardrop loop about 1.9 in (4.8 cm) tall.
Joining
Petals to disc. Lay the disc face down. Place one petal face down behind one 6-st section so that its Rows 1–2 sit behind the disc and Row 3 lines up with the disc’s outer edge. With the base tail, whip-stitch the 6 sts of Row 1 to the back loops of Rnd 14. Then tack the Row 3 row-ends to the back of Rnd 16 so the petal can’t flip forward.
Work one stitch to one stitch: 6 petal sts to 6 disc sts. Repeat for all 16 petals (16 × 6 = 96 sts). Neighboring petals should just touch at the disc edge. Their widest rows, Rows 4–9, will overlap each other slightly. That overlap is correct and gives the flower its layered look.
Tension: Pull each whip stitch snug but not tight. If the disc edge starts to cup, your stitches are too tight.
Size checkpoint: Before the border, the flower should measure 13.5 in (34.3 cm) tip to tip. That’s the 7.5 in (19.1 cm) disc plus 3.0 in (7.6 cm) of visible petal on each side.
Cups. Stand the four cups in a row with their beginning-of-round markers facing the back. Where two neighbors touch, whip-stitch them together through one column of stitches over Rnds 7–14 (8 rnds). The row is now 7.6 in (19.3 cm) wide.
Center the row horizontally on the front of the flower, with the cup bases 0.5 in (1.3 cm) below the lower edge of the brown disc. The tops will sit about 1.65 in (4.2 cm) below the disc center. Pin the cups in place. Then sew the back column of each cup (Rnds 5–15) and the back half of each turning ridge through the disc and petals.
Strap. Place Rows 1–4 behind the top of the disc, centered on the top petal, so they overlap the disc by 0.9 in (2.3 cm). Rows 5–18 run up behind the top petal, and the loop rises above its tip. Sew all around Rows 1–8 and up both edges of the strap through to the back of the top petal.
Border (Petal Outline Round)
Border gauge: Work 1 sc per row-end along the petal sides. This keeps the 4 sts/in gauge and adds about 0.25 in (0.6 cm) all around.
Work the border with the right side facing and Color B. Join with a sl st at the valley between any two petals, at the Row 3 row-ends.
Per petal:
– 1 valley sc2tog (Row 3 end of the previous petal + Row 3 end of this petal)
– 12 sc up the right side, one in each row-end of Rows 4–15
– 3 sc in the tip stitch (Row 15)
– 12 sc down the left side, one in each row-end of Rows 15–4
Total per petal: 1 + 12 + 3 + 12 = 28 sts
Total round: 16 petals × 28 sts = 448 sts
Sl st into the first sc2tog and fasten off. The flower now measures 14 in (35.6 cm).
Why the math works: Each sc row is about the same height as one sc stitch is wide, so one stitch per row-end keeps the sides flat. Three stitches in the single tip stitch turn the point cleanly without curling. The valley sc2tog uses up one stitch at each inner angle, so the outline pulls in and the valleys stay crisp. Rows 1–2 are hidden behind the disc and get no border stitches.
Final Blocking
- Lightly mist the whole piece with water, or hover a steamer over it without touching the yarn.
- Lay it face up on a blocking mat.
- Pin the disc into a true 7.5 in (19.1 cm) circle.
- Pin each petal tip outward so that tip to tip measures 14 in (35.6 cm).
- Check that the tips are evenly spaced, about 2.7 in (6.9 cm) apart around the outer edge.
- Stuff each cup with a rolled towel so the walls dry straight and round.
- Let it dry completely, at least 12 hours, before unpinning.
Final Quality-Control Checklist
- Disc has 96 sts in the last round and measures 7.5 in (19.1 cm)
- All 16 petals are 3.5 in (8.9 cm) long and end in a single-stitch point
- Petals are evenly spaced, each on its own 6-st section
- Border round has 448 sts (28 per petal)
- Cups are 24 sts around and 2.6 in (6.6 cm) tall, with a visible BLO ridge
- Cup row is 7.6 in (19.3 cm) wide and centered
- Hanging loop is centered over the top petal, and the piece hangs level
- All tails are woven in on the back
Troubleshooting
Disc ruffles: You may have too many increases or a loose gauge. Count the stitches in each round and go down a hook size if needed.
Disc cups into a bowl: You may have skipped increases. Check that every round matches its count.
Petals curl: Your tension is too tight. Block with steam and keep side stitches loose.
Border tips look blunt: Work all 3 sc into the single Row 15 stitch, not across two stitches.
Cups lean forward: Sew them higher on the back column, up to Rnd 15.
Organizer tilts on the wall: Re-center the strap, or add a tack stitch on the lighter side.
Cups sag when full: Add a cardboard circle inside each base, or use stiffer cotton yarn.
Care
Spot clean with mild soap and cool water, then reshape and dry flat. Don’t put it in the dryer, because heat can shrink cotton and warp the cups.

Final Notes
Every measurement in this organizer comes from the gauge of 16 sc × 17 rows = 4 in (10.2 cm). That gauge gives a 96-st disc of 7.5 in (19.1 cm), split into 16 sections of 6 sts. Each 6-st section holds one 3.5 in (8.9 cm) petal, and the petals bring the flower to 13.5 in (34.3 cm). The 448-st outline adds 0.25 in (0.6 cm) all around for a final size of 14 in (35.6 cm). Four 24-st cups make a 7.6 in (19.3 cm) row across the front. If you check each stage against its checkpoint, the assembled piece will come out the right size.
Happy crocheting!