

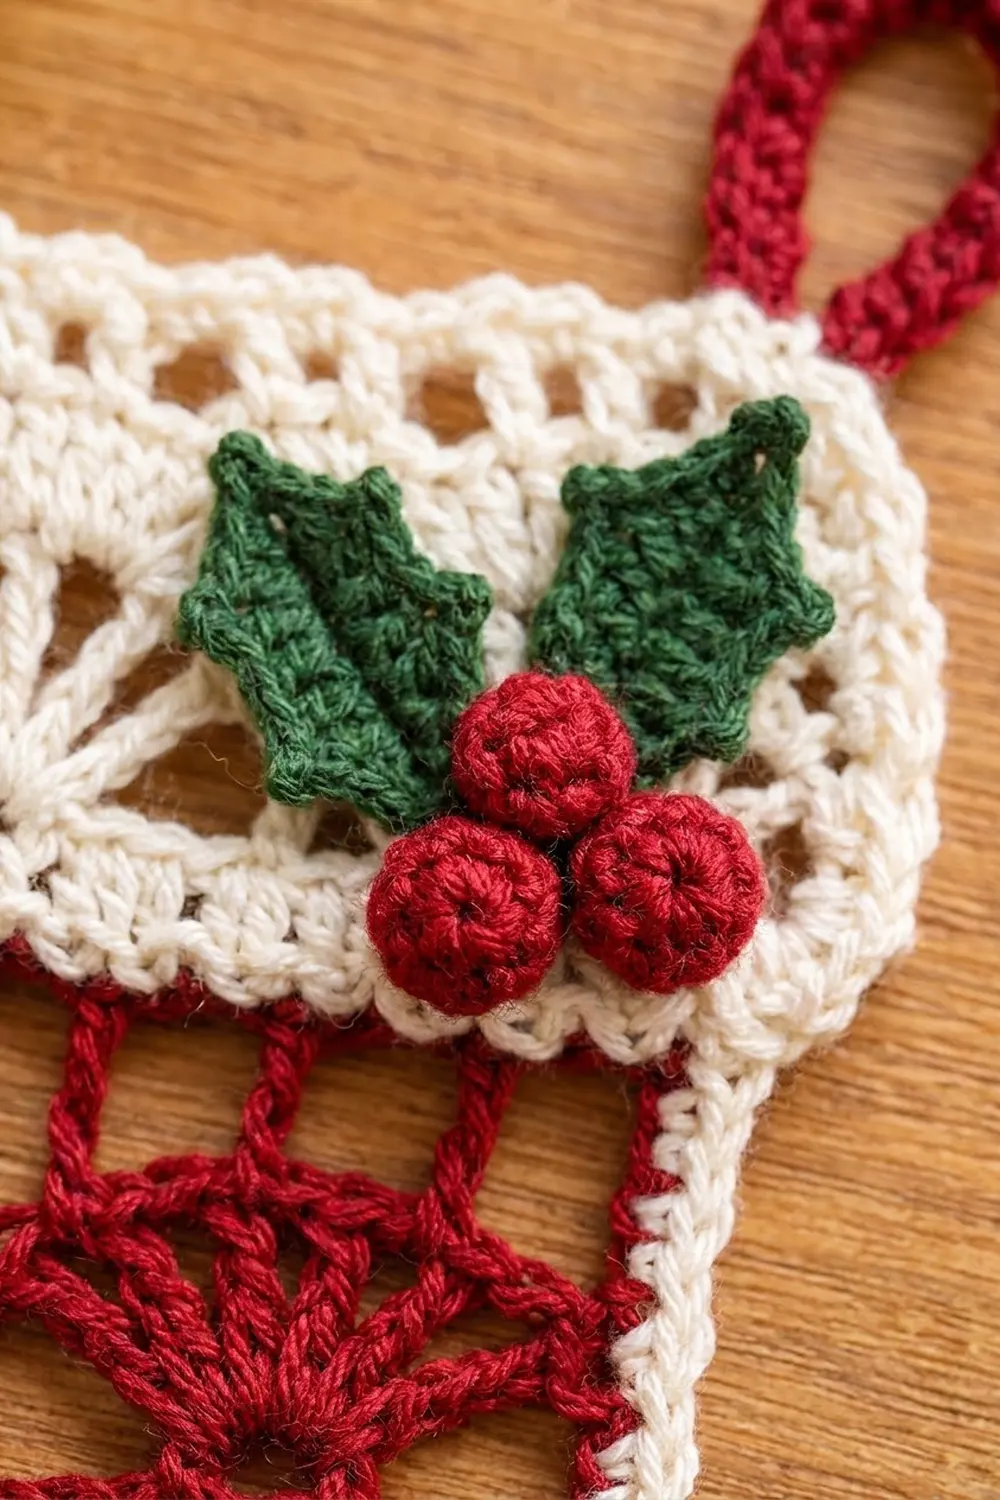
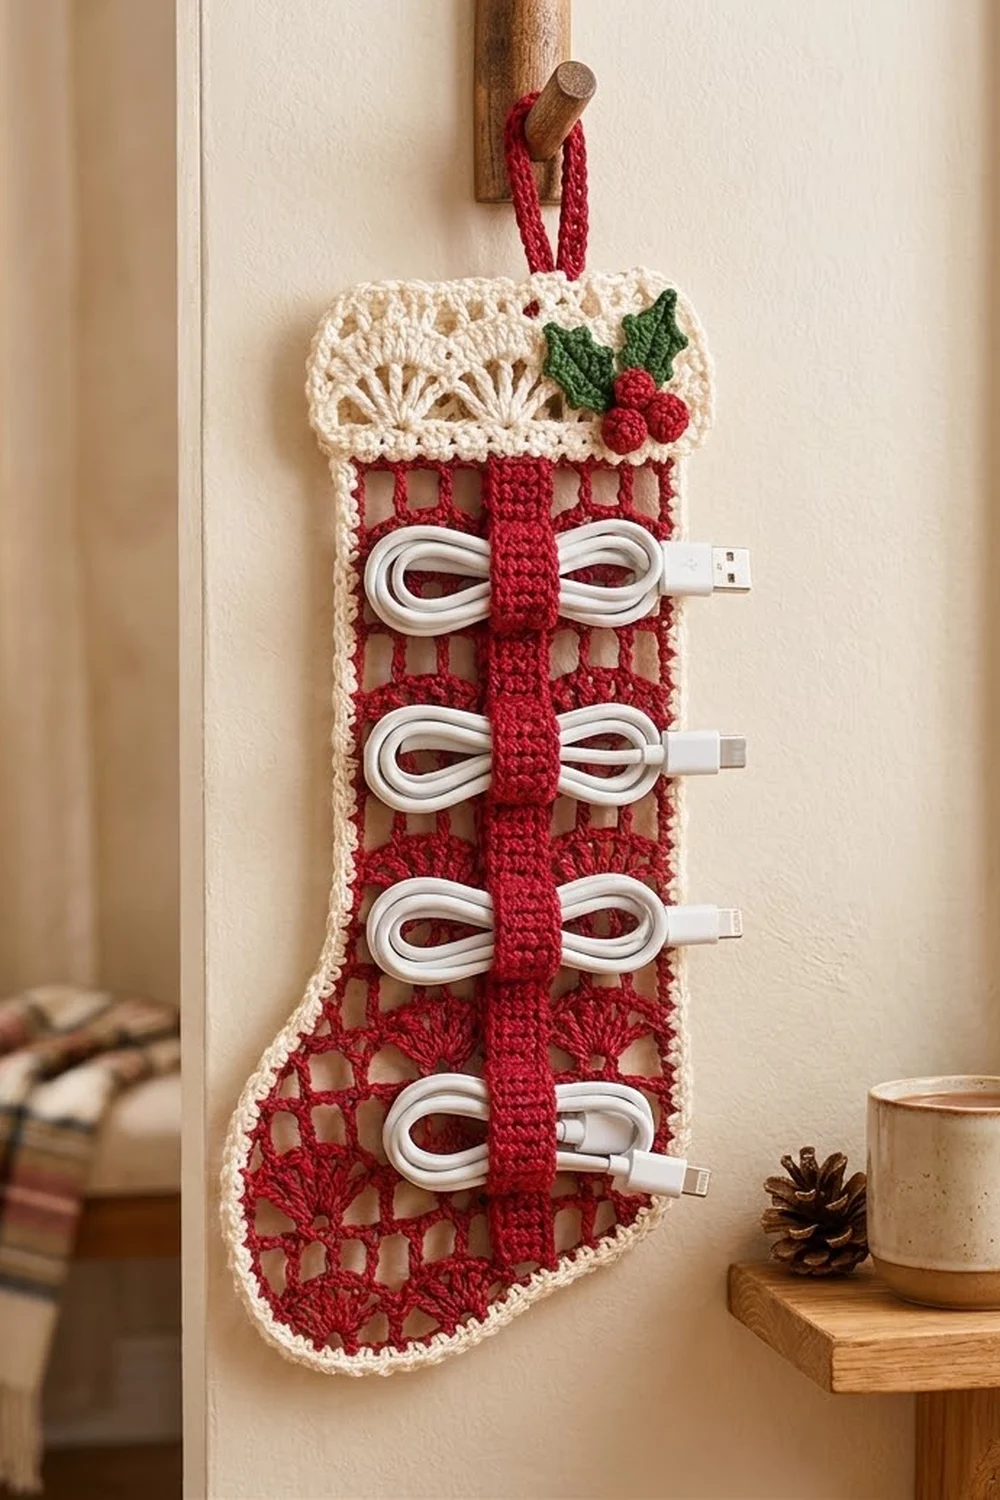
This Christmas stocking has a practical job. It is a flat, single-layer lace panel in cranberry red with a cream cuff, a cream corded edge and a small holly sprig. A red strap with four ring bands runs down the front to hold coiled charging cables, earbud cords or ribbon. Hang it on a peg by your desk and your cables stay tidy all season.
The body alternates open mesh rows with rows of seven-double-crochet fans. The cream cuff repeats the fan motif. A two-round border of single crochet and crab stitch firms up the edge and stops the lace from curling.
All instructions use US crochet terms. The finished stocking is 7 in (17.8 cm) wide at the leg, 11.5 in (29.2 cm) from heel to toe and 14.75 in (37.5 cm) tall from the bottom edge to the top of the cuff, not counting the hanging loop.
You work the red panel from the top down in rows. You chain extra stitches on the toe side to make the foot, then step in at the bottom to round the heel and toe. After that you add the cream border, make the cuff, strap, bands, loop and holly, and sew everything on.
Finished Size and Construction
- Finished size: 7 in (17.8 cm) leg width, 11.5 in (29.2 cm) foot length, 14.75 in (37.5 cm) total height
- Skill level: Intermediate
- Terminology: US
- Yarn weight: DK (#3) cotton
- Hook: 4.0 mm (G-6)
- Number of pieces: 1 stocking panel, plus a sewn-on cuff, strap, 4 bands, hanging loop, 2 leaves and 3 berries
- Layout: one flat stocking, toe pointing left, strap centered on the leg
- Panel before border: 6 in (15.2 cm) leg width, 10.5 in (26.7 cm) foot length, 12 in (30.5 cm) tall
- Border depth: 0.5 in (1.3 cm) on every edge
- Panel after border: 7 x 11.5 x 13 in (17.8 x 29.2 x 33.0 cm)
Materials
Use a smooth DK cotton of about 112 m per 50 g. Cotton shows the stitches clearly and blocks flat, which an open panel that carries weight needs.
- Red: 60 g, about 134 m (panel, strap, bands, loop, berries)
- Cream: 25 g, about 56 m (border and cuff)
- Dark green: 5 g, about 11 m (holly leaves)
Tools: 4.0 mm (G-6) hook, tapestry needle, stitch markers, rustproof pins, blocking mat, spray bottle and measuring tape.
All quantities include a margin of about 15 percent for swatching and tension differences.
Abbreviations (US Terms)
- ch: chain
- sl st: slip stitch
- sc: single crochet
- hdc: half double crochet
- dc: double crochet
- sc2tog: single crochet 2 together
- sp: space
- st(s): stitch(es)
- RS: right side
- rev sc: reverse single crochet (crab stitch)
Special stitches
- Fan: 7 dc in the same dc.
- Picot: Ch 2, sl st in the 2nd ch from the hook.
- Rev sc: Working from left to right, insert the hook in the next st to the right, yarn over, pull up a loop, yarn over, then pull through both loops.
Gauge and Checkpoints
Mesh gauge: 4 ch-2 sps = 3 in (7.6 cm) wide. A mesh row is 0.5 in (1.3 cm) tall and a fan row is 0.75 in (1.9 cm) tall.
Sc gauge: 18 sc and 20 rows = 4 in (10.2 cm).
The panel itself is your gauge test. Work Rows 1–5, then measure: the piece should be 6 in (15.2 cm) wide and 3 in (7.6 cm) tall.
Checkpoints:
- After Row 5: 6 x 3 in (15.2 x 7.6 cm)
- After Row 11: 6 x 6.75 in (15.2 x 17.1 cm)
- After Row 18: 10.5 in (26.7 cm) wide, 11 in (27.9 cm) tall
- After Row 20: 12 in (30.5 cm) tall
- After the border: 7 x 11.5 x 13 in (17.8 x 29.2 x 33.0 cm)
If your piece is too big, change to a 3.75 mm hook. If it is too small, change to a 4.5 mm hook. Get the width right first, because row height is easier to adjust when blocking.
Stocking Panel (Red)
In every mesh row, the ch 5 at the start counts as 1 dc plus ch 2. A mesh row with S spaces has S + 1 dc and 3S + 1 sts in total (each ch-2 sp counts as 2 sts).
Odd rows are RS rows. With the RS facing you, the toe points left.
Leg
Ch 29.
Row 1 (RS, mesh): Dc in 8th ch from hook. *Ch 2, sk 2 ch, dc in next ch; rep from * 6 more times. Turn. (8 sps, 9 dc, 25 sts)
Row 2 (fan): Ch 1, sc in first dc. *Ch 2, sk next sp, fan in next dc, ch 2, sk next sp, sc in next dc; rep from * 3 more times, working the last sc in the 3rd skipped ch at the start of Row 1. Turn. (4 fans, 5 sc)
Row 3 (mesh): Ch 5, dc in 4th dc of first fan, ch 2, dc in next sc. *Ch 2, dc in 4th dc of next fan, ch 2, dc in next sc; rep from * 2 more times. Turn. (8 sps, 9 dc, 25 sts)
Rows 4–11: Repeat Rows 2 and 3 four more times. In each later fan row, work the last sc in the 3rd ch of the ch-5. Do not fasten off. (Row 11: 8 sps, 9 dc, 25 sts)
Row 11 ends at the left edge, which is the toe side.
Foot
Row 12 (mesh, foot extension): Ch 22, dc in 8th ch from hook. Ch 2, sk 2 ch, dc in next ch; rep from * 3 more times. Ch 2, sk 2 ch, dc in last dc of Row 11. That makes 6 new sps. Ch 2, dc in next dc; rep from * 7 more times, working the last dc in the 3rd ch of the ch-5. Turn. (14 sps, 15 dc, 43 sts)
Row 13 (fan): Work as Row 2, with 7 fan repeats in total. Turn. (7 fans, 8 sc)
Row 14 (mesh): Work as Row 3, with 7 fan-and-sc repeats in total. Turn. (14 sps, 15 dc, 43 sts)
Rows 15–18: Repeat Rows 13 and 14 twice. (Row 18: 14 sps, 15 dc, 43 sts)
Heel and Toe Shaping
Row 19 (mesh, decrease): Sl st in each of next 2 ch and in next dc. Ch 5 (counts as dc and ch 2), dc in next dc. *Ch 2, dc in next dc; rep from * 10 more times. Leave the last sp unworked. Turn. (12 sps, 13 dc, 37 sts)
Row 20 (mesh, decrease): Sl st in each of next 2 ch and in next dc. Ch 5, dc in next dc. *Ch 2, dc in next dc; rep from * 8 more times. Leave the last sp unworked. (10 sps, 11 dc, 31 sts) Fasten off.
Each decrease row trims 0.75 in (1.9 cm) from both ends, which rounds the heel and toe.
Border (Cream)
Border gauge: 4 sc per 1 in (2.5 cm) on every edge.
- Along the tops of rows and along chains: 1 sc in each dc and 2 sc in each ch-2 sp. That gives 3 sc per 0.75 in (1.9 cm) space.
- Down the side edges: 2 sc per mesh row (0.5 in / 1.3 cm) and 3 sc per fan row (0.75 in / 1.9 cm).
Why the math works: Both directions come out to 4 sc per inch. That is just under the natural sc gauge of 4.5 sc per inch, so the border holds the lace slightly firm without puckering.
Round 1 (RS): Join cream at the top right corner and work counterclockwise:
- Top edge: 3 sc in the corner, 23 sc evenly across the foundation, 3 sc in the far corner. (29)
- Leg front, Rows 1–11: 27 sc (6 mesh rows x 2 + 5 fan rows x 3).
- Instep: Sc2tog over the inner corner, 15 sc evenly along the underside of the Row 12 chain, 3 sc in the toe corner. (19)
- Toe front, Rows 12–18: 17 sc (4 mesh rows x 2 + 3 fan rows x 3).
- Toe curve: 2 sc in the exposed sp of Row 18, sc in the step dc, 2 sc down the edge of Row 19. Then 2 sc in the exposed sp of Row 19, sc in the step dc, 2 sc down the edge of Row 20. (10)
- Bottom, Row 20: 3 sc in first dc. Then work 1 sc in each of the 9 inner dc and 2 sc in each of the 10 sps. Finish with 3 sc in last dc. (35)
- Heel curve: Work as the toe curve in mirror image. (10)
- Back edge, Rows 18–1: 44 sc (10 mesh rows x 2 + 8 fan rows x 3).
Sl st to the first sc. (191 sts: 29 + 27 + 19 + 17 + 10 + 35 + 10 + 44)
Round 2: Ch 1, rev sc in each st around, sl st to the first st. (191 rev sc) Fasten off.
The 0.5 in (1.3 cm) border on each edge takes the leg from 6 in to 7 in (15.2 cm to 17.8 cm), the foot from 10.5 in to 11.5 in (26.7 cm to 29.2 cm) and the height from 12 in to 13 in (30.5 cm to 33.0 cm).
Cuff (Cream)
Ch 35.
Row 1 (mesh): Dc in 8th ch from hook. *Ch 2, sk 2 ch, dc in next ch; rep from * 8 more times. Turn. (10 sps, 11 dc, 31 sts)
Row 2 (fan): Work as panel Row 2, with 5 fan repeats in total. Turn. (5 fans, 6 sc)
Row 3 (mesh): Work as panel Row 3, with 5 fan-and-sc repeats in total. (10 sps, 11 dc, 31 sts) Do not turn.
Edging round: Ch 1. Work 7 sc down the side (2 + 3 + 2). Work 3 sc in the corner, 29 sc evenly across the foundation and 3 sc in the next corner. Work 7 sc up the other side. Along Row 3, work 3 sc in the first dc, 1 sc in each inner dc, 2 sc in each sp and 3 sc in the last dc. Sl st to the first sc. (84 sc: 35 + 7 + 35 + 7) Fasten off.
The cuff measures 7.5 x 1.75 in (19.1 x 4.4 cm) before edging and 8 x 2.25 in (20.3 x 5.7 cm) after.
Strap and Bands (Red)
Strap: Ch 6.
– Row 1: Sc in 2nd ch from hook and in each ch across. Turn. (5 sc)
– Rows 2–55: Ch 1, sc in each sc. Turn. (5 sc)
Fasten off. The strap measures 1.1 x 11 in (2.8 x 27.9 cm).
Bands (make 4): Ch 21.
– Row 1: Sc in 2nd ch from hook and in each ch across. Turn. (20 sc)
– Rows 2–5: Ch 1, sc in each sc. Turn. (20 sc)
Fasten off and leave a long tail. Each strip measures 4.4 x 1 in (11.2 x 2.5 cm). Sew the short ends together to make a ring that lies 2.2 in (5.6 cm) wide when flat.
Hanging Loop and Holly
Loop (red): Ch 21, sc in 2nd ch from hook and in each ch across. (20 sc; 4.4 in / 11.2 cm long) Fasten off.
Leaf (green, make 2): Ch 9. Sl st in 2nd ch from hook, sc in next ch, hdc in next ch, picot, dc in next 2 ch, picot, hdc in next ch, sc in next ch, 3 sc in last ch. Turn to the other side of the chain. Sc in next ch, hdc in next ch, picot, dc in next 2 ch, picot, hdc in next ch, sc in next ch, sl st in last ch. Fasten off. Each leaf has 4 picot points and is about 1.8 in (4.6 cm) long.
Berry (red, make 3):
– Rnd 1: 6 sc in a magic ring. (6)
– Rnd 2: 2 sc in each st. (12)
– Rnd 3: Sc in each st. (12)
– Rnd 4: Sc2tog 6 times. (6)
Stuff the berry with the yarn tails and pull it closed. Each berry is about 0.6 in (1.5 cm) across.
Assembly
- Slide all 4 bands onto the strap. Place their centers 1.75, 4.25, 6.75 and 9.25 in (4.4, 10.8, 17.1 and 23.5 cm) below the strap’s top end. That spaces them 2.5 in (6.4 cm) apart. Turn each band so its seam sits at the center back of the strap, and tack it there with a few stitches.
- Center the strap on the leg, with its center line 3.5 in (8.9 cm) from each leg edge. Place its top end 0.25 in (0.6 cm) below the top of the bordered panel. Whipstitch both long edges to the mesh, but only between the bands, so the band fronts stay free to stretch over cables.
- Lap the cuff over the top of the panel so its lower edge sits 0.5 in (1.3 cm) below the panel top. This covers the end of the strap and leaves 1.75 in (4.4 cm) of cuff above the panel. Whipstitch the cuff in place.
- Fold the loop in half and sew both ends 0.75 in (1.9 cm) down inside the back of the cuff, at the heel-side corner.
- Sew the two leaves to the right end of the cuff in a V. Stack the three berries in a cluster over the leaf bases.
The total height is 13 in panel + 1.75 in cuff = 14.75 in (37.5 cm).
Final Blocking
- Mist the finished piece until it is damp, but avoid soaking the bands.
- Lay it flat with the RS up on a blocking mat.
- Pin the leg to 7 in (17.8 cm) wide and the foot to 11.5 in (29.2 cm) long.
- Pin the height to 14.75 in (37.5 cm). Make sure the mesh rows run straight and level.
- Pin each fan open so it sits as a smooth half-circle.
- Let it dry completely before you unpin it.
Final Quality-Control Checklist
- Mesh rows have 8, 14, 12 or 10 sps, as written.
- Fan rows have 4 or 7 fans.
- Border Round 1 has 191 sts.
- The cuff overhangs the leg by 0.5 in (1.3 cm) on each side.
- The bands are evenly spaced and stretch freely.
- The loop holds the weight without the cuff tilting.
- All ends are woven in through solid stitches.
Troubleshooting
- Fans ruffle: Your chains are too loose. Make the ch-2s firmer, or use a smaller hook for the fan rows only.
- Panel narrows as you go: Check that every mesh row has a dc in the 4th dc of each fan.
- Border flares: You worked too many sc. Go back to the per-row counts.
- Border puckers: Add 1 sc per fan row only.
- Bands are too tight for cables: Add 2 sc to each band’s foundation chain.
Care
Hand wash in cool water and lay flat to dry. Do not wring the lace or hang it while it is wet.
Final Notes
To recap the measurements: the panel is 6 in (15.2 cm) at the leg, 10.5 in (26.7 cm) at the foot and 12 in (30.5 cm) tall. The border brings it to 7 x 11.5 x 13 in (17.8 x 29.2 x 33.0 cm), and the cuff adds 1.75 in (4.4 cm) for a total height of 14.75 in (37.5 cm). Check each stage as you go and your stocking will hang straight and keep your cables in order. Happy crocheting!