
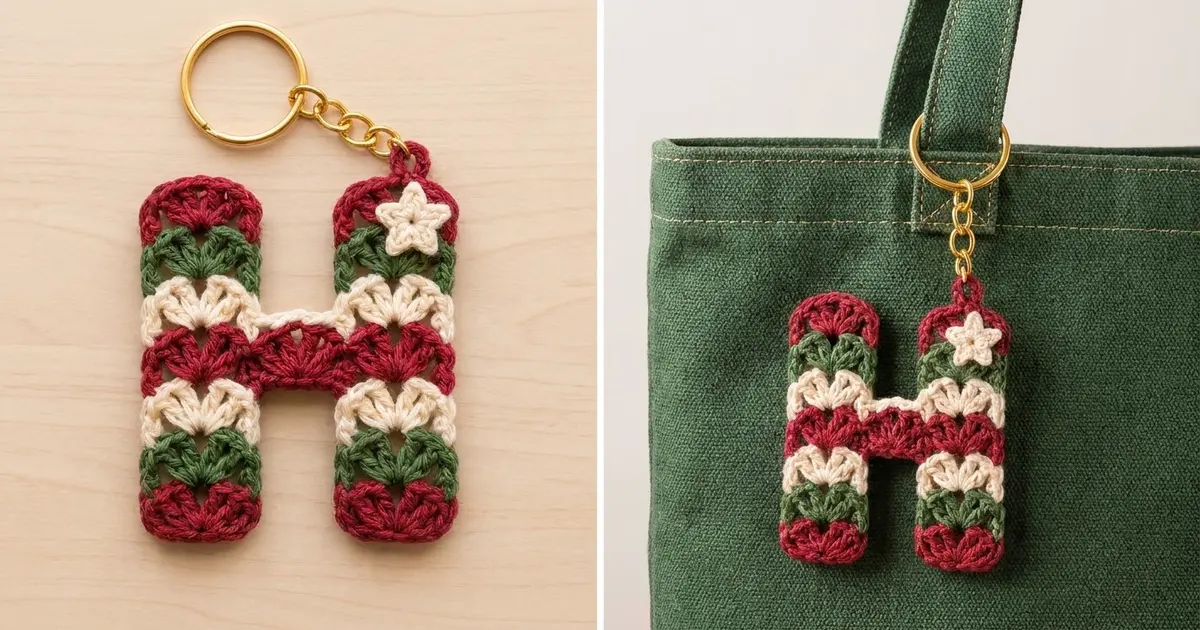
This little letter H keychain is a quick, cheerful holiday make. It’s worked in one-row stripes of cranberry red, forest green and cream. Classic five-double-crochet shells give each stripe a soft scalloped edge.
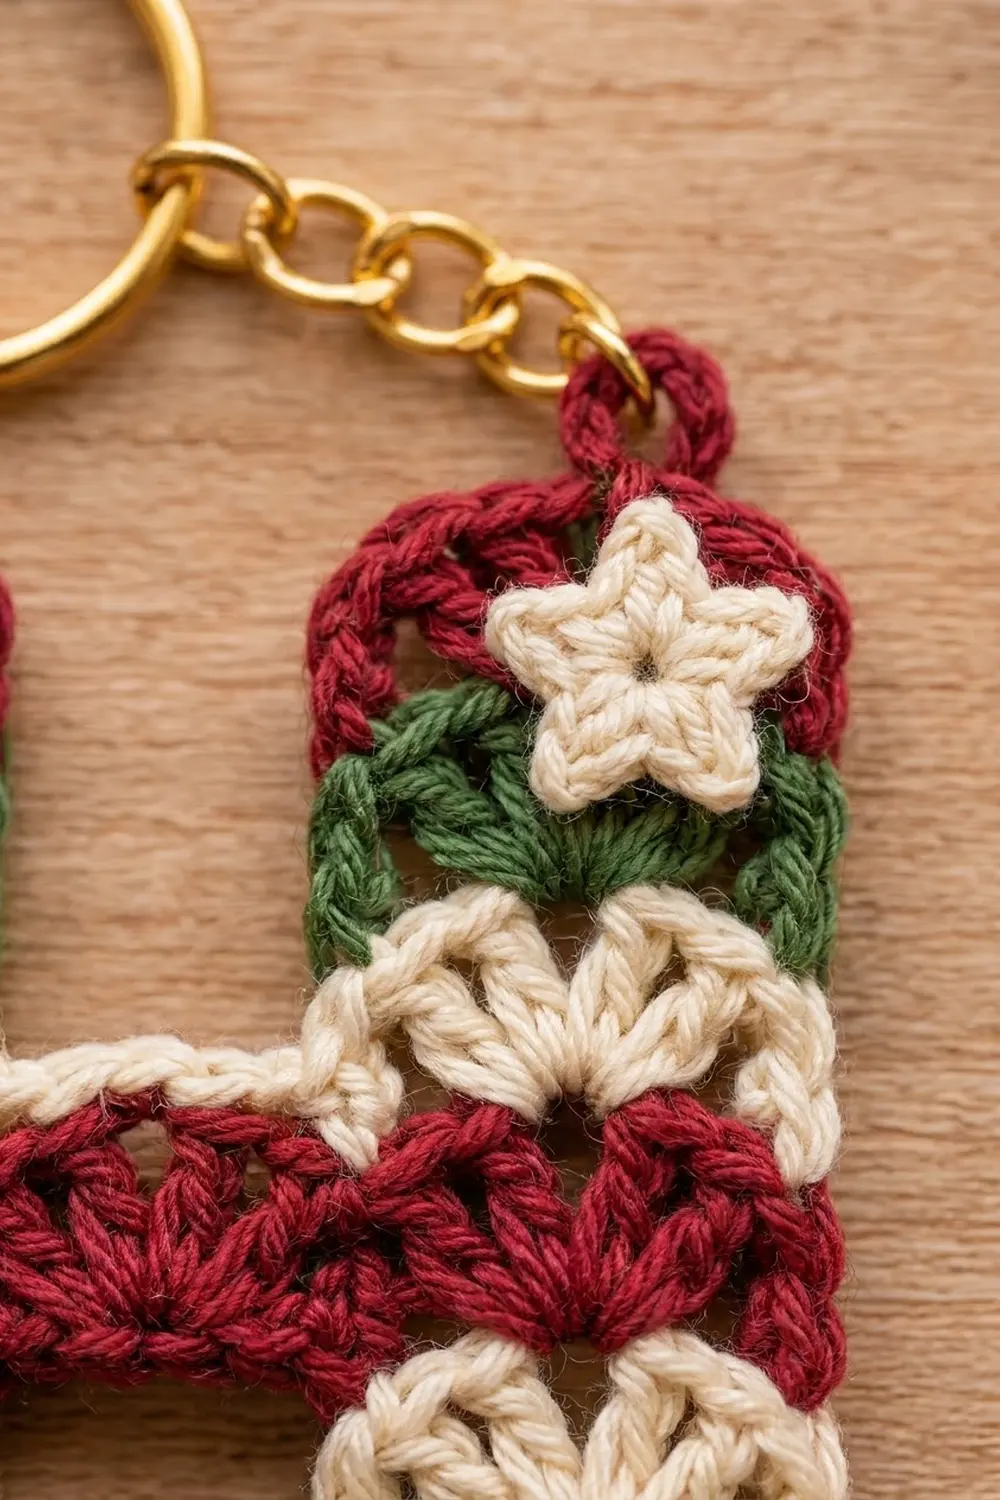
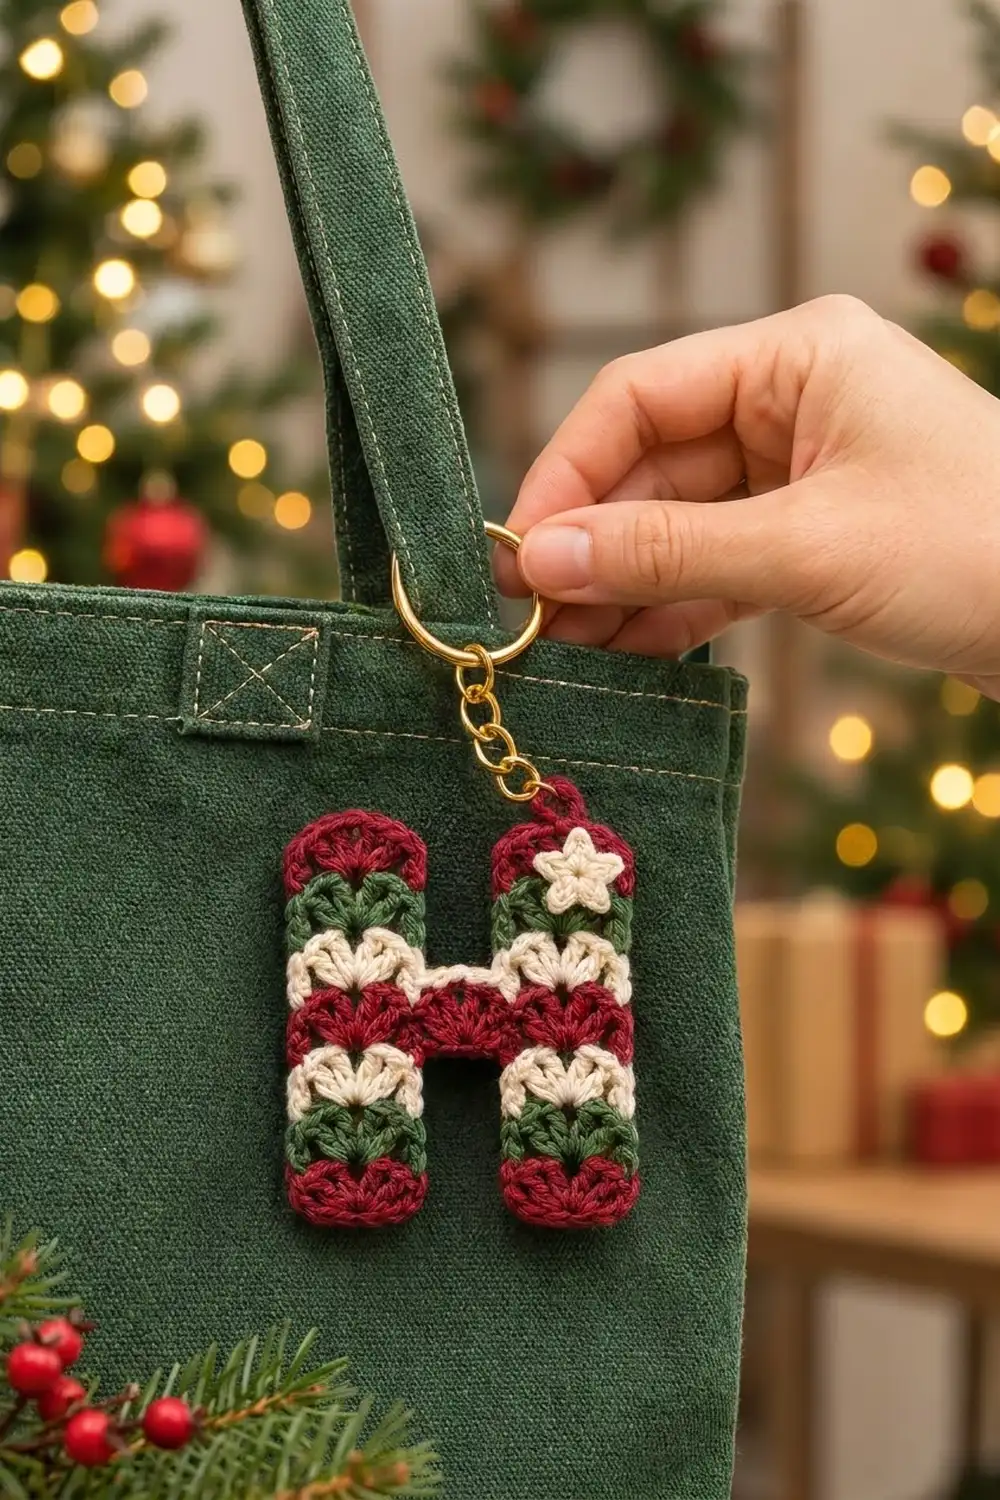
A solid red crossbar ties the two legs together, with a thin cream strand just above it. A tiny cream star on the top right corner finishes the design. Add a gold split ring and chain and the letter becomes a bag charm, key fob or gift tag.
The pattern uses US crochet terms. The finished letter measures about 3.4 in (8.6 cm) wide and 4 in (10.2 cm) tall, not counting the hardware.
Construction is simple. You work each leg flat for three rows. A joining row then links the legs with a chain across the gap, and the crossbar shell row fills that gap. Above the crossbar, you work the legs separately again. Red end caps round off all four leg ends, and you sew the star on last.
Finished Size and Construction
- Finished size: 3.4 in (8.6 cm) wide × 4 in (10.2 cm) tall
- Skill level: Easy / advanced beginner
- Terminology: US crochet terms
- Yarn weight: DK / light worsted (#3), cotton or cotton blend
- Hook: 3.5 mm (US E-4)
- Number of pieces: 1 letter + 1 tiny star appliqué
- Layout: Two vertical legs, 8 rows tall, linked at Rows 4–6
- Leg size: 1.25 in (3.2 cm) wide
- Gap between legs: 0.9 in (2.3 cm)
- Size before border: 3.4 in (8.6 cm) wide × 3.75 in (9.5 cm) tall
- Border depth: 0.125 in (0.3 cm) on each leg end, top and bottom only
Materials
Choose a smooth mercerized cotton or cotton blend in DK weight. Cotton shows the shell texture clearly, keeps a crisp shape, and holds up well on a keychain that gets handled a lot. Avoid fuzzy yarns, because they blur the fans.
Yarn:
– Cranberry red: 6 g, about 14 m
– Forest green: 3 g, about 7 m
– Cream: 4 g, about 9 m
These quantities include a margin for swatching and tails. Scraps from other projects work well here.
Tools:
– 3.5 mm (US E-4) crochet hook
– Tapestry needle
– Scissors
– Stitch markers (2)
– Gold split key ring, 1 in (2.5 cm), with a short chain of about 1.5 in (3.8 cm) and a jump ring
– Flat-nose pliers for opening the jump ring
– Blocking mat and rust-proof pins
– Optional: a dab of fabric glue for the star
Abbreviations (US Terms)
- ch – chain
- sl st – slip stitch
- sc – single crochet
- hdc – half double crochet
- dc – double crochet
- sk – skip
- st(s) – stitch(es)
- RS – right side
Special stitch – Shell: 5 dc in the same stitch.
Half shell: 3 dc in the same stitch. At the start of a row, ch 3 (counts as the first dc), then work 2 dc in the same stitch.
Turning chains: Ch 1 does not count as a stitch. Ch 3 counts as 1 dc.
Gauge and Checkpoints
Gauge matters less here than it would for a garment, but it controls the letter’s proportions. Make one leg first (Rows 1–3) and measure it before you make the second.
Gauge: One leg row of 7 sts = 1.25 in (3.2 cm) wide. One shell row = 0.5 in (1.3 cm) tall.
Checkpoints:
– After Row 3 of one leg: 1.25 in (3.2 cm) wide × 1.5 in (3.8 cm) tall.
– After Row 5 (crossbar): 3.4 in (8.6 cm) wide × 2.25 in (5.7 cm) tall.
– After Row 8: 3.75 in (9.5 cm) tall.
– After the end caps: 4 in (10.2 cm) tall.
Too big? Go down to a 3.25 mm hook, or check that your yarn-overs aren’t making the dc loose.
Too small? Go up to a 3.75 mm hook. Being off by 0.125 in (0.3 cm) is fine for a keychain.
Pattern Notes
- Every row is one color. Change colors in the last yarn-over of the final stitch of each row. Cut the old color, leaving a 4 in (10.2 cm) tail.
- Work over the tails in the next row where you can, and weave in the rest at the end.
- Turn at the end of every row.
- Make both legs the same way so their Row 3 faces the same direction when you lay them side by side.
Legs (Rows 1–3, make 2)
Row 1 (red): Ch 8. Sc in 2nd ch from hook, sk 2 ch, shell in next ch, sk 2 ch, sc in last ch. Change to green. Turn. (7 sts: 2 sc + 5 dc)
Row 2 (green): Ch 3 (counts as dc), 2 dc in first sc, sc in center dc of shell (3rd dc), 3 dc in last sc. Change to cream. Turn. (7 sts: 6 dc + 1 sc)
This is the half-fan row: half shells on the edges and a sc in the middle.
Row 3 (cream): Ch 1, sc in first dc, sk 2 dc, shell in sc, sk 2 dc, sc in top of turning ch-3. Fasten off. (7 sts: 2 sc + 5 dc)
Checkpoint: 1.25 in (3.2 cm) wide × 1.5 in (3.8 cm) tall.
Make a second leg the same way. Lay both legs side by side, RS up, with Row 3 at the top. The left leg is Leg A and the right leg is Leg B. Put a marker in the last st of Leg A and the first st of Leg B. These are the inner edges.
Crossbar (Rows 4–6)
Row 4 (red, joining row): Join red with a sl st in the outer-edge st of Leg A. Ch 1, sc in the same st and in each of the next 6 sts of Leg A (7 sc). Ch 5 for the gap. Sc in each of the 7 sts of Leg B. Turn. (19 sts: 7 sc + 5 ch + 7 sc)
Keep the ch-5 relaxed and untwisted. It should span the 0.9 in (2.3 cm) gap without pulling the legs together.
Row 5 (red, crossbar shells): Ch 1, sc in first sc, sk 2 sts, shell in next st, sk 2 sts, sc in next st; repeat from * 2 more times. Change to cream. Turn. (19 sts: 4 sc + 15 dc)
Where the stitches land:
– Sts 1–7 (Leg B): sc at the outer edge, shell centered on st 4, sc on the inner-edge st.
– Sts 8–12 (the chain): the shell lands in the 3rd ch, the exact center of the gap.
– Sts 13–19 (Leg A): sc on the inner-edge st, shell centered on the leg, sc at the outer edge.
Since 19 = (3 × 6) + 1, three shell repeats fit exactly, and each shell is centered on a leg or on the gap. That gives you the solid red crossbar band.
Checkpoint: 3.4 in (8.6 cm) wide × 2.25 in (5.7 cm) tall.
Row 6 (cream, separating row):
– Leg A (7 sts): Ch 3 (counts as dc), 2 dc in first sc, sc in center dc of the leg shell, 3 dc in the inner-edge sc.
– Gap (5 sts): Sc in each of the 5 dc of the gap shell.
– Leg B (7 sts): 3 dc in the inner-edge sc, sc in center dc of the leg shell, 3 dc in the last sc.
Change to green. Turn. (19 sts: 7 + 5 + 7)
The 5 sc across the gap make the thin cream strand on top of the red crossbar. The legs go back to half shells, so the stripe pattern carries on unbroken.
Upper Legs (Rows 7–8)
From here, work each leg on its own 7 sts. Leave the 5 gap sc unworked.
Row 7 (green), Leg B: Ch 1, sc in first dc, sk 2 dc, shell in sc, sk 2 dc, sc in last dc before the gap. Change to red. Turn. (7 sts)
Row 8 (red), Leg B: Ch 3 (counts as dc), 2 dc in first sc, sc in center dc of shell, 3 dc in last sc. Fasten off. (7 sts)
Row 7 (green), Leg A: With the same side facing you as for Leg B’s Row 7, join green in the inner-edge dc of Leg A, next to the gap. Ch 1, sc in the same st, sk 2 dc, shell in sc, sk 2 dc, sc in top of turning ch-3. Change to red. Turn. (7 sts)
Row 8 (red), Leg A: Work as Row 8 on Leg B. Fasten off. (7 sts)
Checkpoint: 3.4 in (8.6 cm) wide and 3.75 in (9.5 cm) tall, from the foundation chain to the top of Row 8.
Weave in all color tails now, before the border, so the caps can hide any bulk at the leg ends.
Border (Red End Caps)
The side edges stay unbordered so each stripe color runs right out to the scalloped edge. The border is a single red row of sc worked only across the four leg ends, which rounds them into soft caps.
Border gauge: 7 sc = 1.25 in (3.2 cm), the same as one leg row, so each cap matches the leg width exactly.
Bottom caps (2): Turn the letter upside down. Join red in the foundation-chain loop at the outer corner of Leg A. Ch 1, 2 sc in the same loop, sc in each of the next 5 loops, 2 sc in the last loop. Fasten off. (9 sc) Repeat on Leg B. (9 sc)
Top caps (2): Join red in the first st of Row 8 on Leg A. Ch 1, 2 sc in the same st, sc in each of the next 5 sts, 2 sc in the last st. Fasten off. (9 sc) Work Leg B’s cap the same way, starting at the inner edge so you finish at the outer corner. Don’t fasten off. (9 sc)
Hanging loop (Leg B, top outer corner): After the last sc of the Leg B cap, ch 5, then sl st in the same corner st. Fasten off. The loop is about 0.5 in (1.3 cm) long.
Totals: 4 caps × 9 sc = 36 sc, plus the ch-5 loop.
Why the math works: Each leg end has exactly 7 sts or 7 foundation loops. One sc in each keeps the cap flat at 1.25 in (3.2 cm). The 2 extra sts go only in the two corner sts, 1 extra per corner, so 7 + 2 = 9. That’s just enough to curve each corner without ruffling. The caps add 0.125 in (0.3 cm) at the top and bottom, taking the height from 3.75 in (9.5 cm) to 4 in (10.2 cm). The width stays 3.4 in (8.6 cm).
Star Appliqué (cream)
Rnd 1: Make a magic ring. Ch 1, 10 sc in the ring, sl st to the first sc. Pull the ring closed. (10 sc)
Rnd 2: Ch 3, sl st in 2nd ch from hook, hdc in next ch, sk 1 sc, sl st in next sc; repeat from * 4 more times. Fasten off, leaving a 6 in (15.2 cm) tail. (5 points)
10 sts at 2 sts per point gives exactly 5 points. The star is about 0.75 in (1.9 cm) across.
Center the star on the top red stripe of Leg B, just below the cap. Sew it down with small stitches through the center and through the tip of each point.
Final Blocking
- Mist the letter lightly with water until it’s damp but not soaked.
- Lay it RS up on a blocking mat.
- Pin the outer edges to 3.4 in (8.6 cm) wide and 4 in (10.2 cm) tall.
- Check that each leg is 1.25 in (3.2 cm) wide and the gap is 0.9 in (2.3 cm).
- Gently open each shell with your fingertips so the fans spread evenly.
- Shape the end caps into smooth curves.
- Let it dry completely, then unpin.
- Put the jump ring through the red hanging loop, add the chain and split ring, and close the jump ring fully with pliers.
Final Quality-Control Checklist
- Every leg row has 7 sts, and Rows 4, 5 and 6 have 19 sts each.
- From the bottom, the stripes run red, green, cream, red crossbar, cream, green, red.
- The crossbar shell is centered in the gap.
- The cream strand across the gap lies flat and isn’t tight.
- All four caps have 9 sc and curve smoothly.
- The star is sewn on firmly with no loose points.
- The jump ring is fully closed.
- The final size is 3.4 in (8.6 cm) × 4 in (10.2 cm).
Troubleshooting
The legs pull toward each other. The ch-5 in Row 4 was too tight. Redo Row 4 with a looser chain, or make the chain with a hook one size larger.
The crossbar shell is off center. Recount Row 4. It must be exactly 7 + 5 + 7 = 19 sts.
The leg edges lean or slant. Make sure you count the ch-3 as a dc and work into its top on shell rows.
The caps ruffle. You added extra increases. Work 2 sc only in each corner st.
Tails show through the cream. Weave red and green tails into stitches of the same color.
The star curls. Steam it lightly and press it flat before sewing it on.
Care
Hand wash in cool water with mild soap, roll it in a towel to press out the water, and dry flat. Take off the metal hardware first if you can, to protect its finish.
Final Notes
The measurement chain is short and easy to follow. Each leg is 7 sts and 1.25 in (3.2 cm) wide, and three shell rows bring it to 1.5 in (3.8 cm) tall. The joining row and crossbar give you 19 sts across 3.4 in (8.6 cm), at 2.25 in (5.7 cm) tall. Three more rows reach 3.75 in (9.5 cm), and the red caps finish the letter at 4 in (10.2 cm). Once you have the shell rhythm down, you can make more letters in the same stripes.
Happy crocheting!