

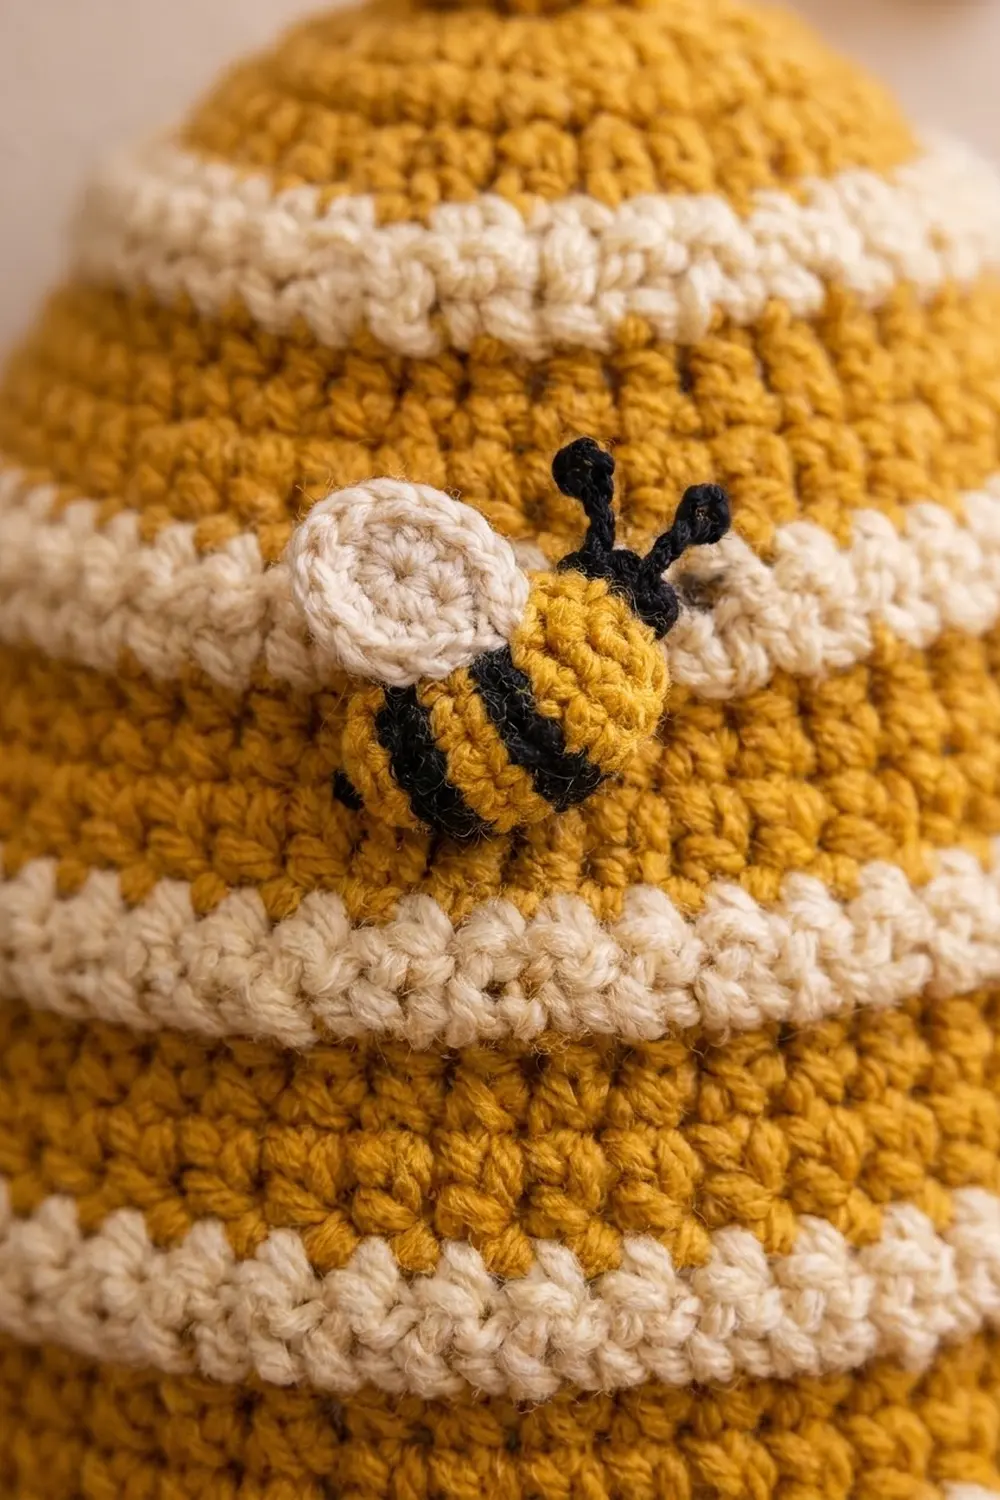
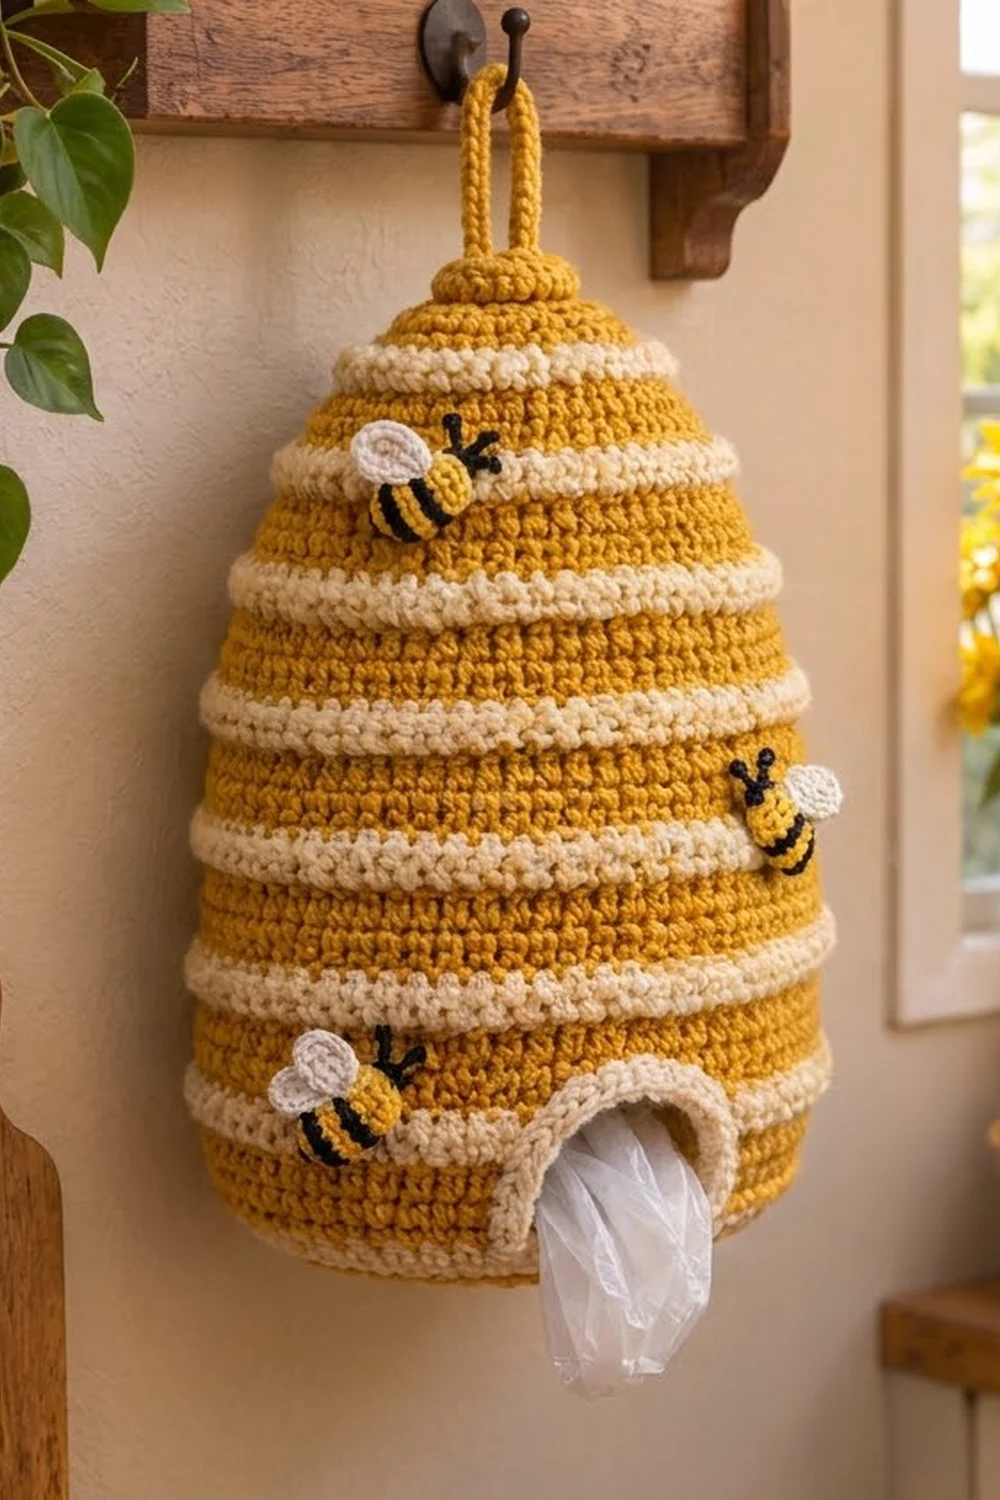
Plastic grocery bags pile up fast, and this little hive gives them a cheerful home. The Honey Hollow Beehive Bag Holder is a rounded mustard-gold dome circled by raised cream ridges. It has a cream-trimmed arched opening at the lower front, and three small bees “fly” across its surface.
The colors are warm and simple: mustard gold for the hive, cream for the ridges, arch trim and bee wings, and a little black for the bee stripes and antennae. It suits a farmhouse or cottage kitchen. The pattern uses US crochet terms throughout.
The finished hive is about 12 in (30.5 cm) tall and 7.6 in (19.3 cm) across at the widest point. The hanging loop adds 3 in (7.6 cm), for a total hanging length of about 15 in (38.1 cm).
You work the hive from the bottom up in one piece. Start with a flat base, then turn the edge up and shape the sides with increases. Then work a short section in rows to form the arched opening and close the dome with decreases. Finish with the arch trim, the top knob and loop, and three sewn-on bees. You load bags in and pull them out through the arch.
Finished Size and Construction
- Finished size: 12 in (30.5 cm) tall × 7.6 in (19.3 cm) wide; 24 in (61.0 cm) around at the widest
- Skill level: Intermediate
- Terminology: US
- Yarn weight: Worsted (#4)
- Hook: 5.0 mm (US H-8)
- Number of pieces: 1 hive body + 3 bee bodies + 3 wing pieces
- Layout: Single hanging hive; bees placed upper left, right side and lower left beside the arch
- Base size: 6 in (15.2 cm) across
- Opening before trim: 3.4 in (8.6 cm) wide × 2 in (5.1 cm) tall
- Arch trim depth: about 0.4 in (1.0 cm), which leaves a finished opening of about 2.5 in (6.4 cm) wide
Materials
Use a smooth worsted-weight yarn. Cotton or a cotton blend holds the shape best and shows the ridges clearly. Acrylic also works, but it makes a softer hive. The amounts below assume about 200 m per 100 g.
- Mustard gold (MC): 110 g / 220 m
- Cream (CC): 45 g / 90 m
- Black: 5 g / 10 m
These amounts include a margin of about 15% for your gauge swatch and weaving in ends.
Tools:
– 5.0 mm (US H-8) crochet hook
– Tapestry needle
– 4 locking stitch markers
– Scissors
– Measuring tape
– Pins and a spray bottle for blocking
Abbreviations (US Terms)
- ch: chain
- sl st: slip stitch
- sc: single crochet
- dc: double crochet
- sc2tog: single crochet 2 together (decrease)
- inc: 2 sc in the same stitch
- BLO: back loop only
- FPdc: front post double crochet
- BPdc: back post double crochet
- MR: magic ring
- st(s): stitch(es)
Special stitch: Ridge Round. Join CC. Ch 2 (does not count as a stitch), then work 1 FPdc around the post of each st around. Join with a sl st to the first FPdc. The stitch count does not change. On the next MC round, work 1 sc into the top of each FPdc. Each ridge round stands out about 0.4 in (1.0 cm) tall.
Gauge and Checkpoints
Gauge: 14 sc and 16 rounds = 4 in (10.2 cm) in sc worked in the round. One sc round is about 0.25 in (0.6 cm) tall.
Test one piece first. Work the base (Rounds 1–11) and lay it flat. It should measure 6 in (15.2 cm) across.
Checkpoints:
– After Round 11: 6 in (15.2 cm) across
– After Round 16: 24 in (61.0 cm) around
– After Round 24: 3.5 in (8.9 cm) tall, measured from the base edge
– After Round 35: 6.75 in (17.1 cm) tall
– Finished: 12 in (30.5 cm) tall
If your base is too big, go down to a 4.5 mm hook. If it is too small, go up to a 5.5 mm hook. Also check that your ridge rounds are not pulling in. If a ridge round is more than about 0.5 in (1.3 cm) smaller around than the gold round below it, work the FPdc more loosely.
Hive Base
Work in joined rounds. Do not turn. Begin each round with ch 1 (does not count as a stitch) and join each round with a sl st to the first sc.
With MC:
- Rnd 1: 6 sc in MR. (6)
- Rnd 2: Inc in each st around. (12)
- Rnd 3: (Sc 1, inc) 6 times. (18)
- Rnd 4: (Sc 2, inc) 6 times. (24)
- Rnd 5: (Sc 3, inc) 6 times. (30)
- Rnd 6: (Sc 4, inc) 6 times. (36)
- Rnd 7: (Sc 5, inc) 6 times. (42)
- Rnd 8: (Sc 6, inc) 6 times. (48)
- Rnd 9: (Sc 7, inc) 6 times. (54)
- Rnd 10: (Sc 8, inc) 6 times. (60)
- Rnd 11: (Sc 9, inc) 6 times. (66)
Checkpoint: The base measures 6 in (15.2 cm) across.
Lower Body
- Rnd 12: Sc in BLO of each st around. (66) This makes a crisp edge where the base turns up into the sides.
- Rnd 13: (Sc 10, inc) 6 times. (72)
- Rnd 14: (Sc 11, inc) 6 times. (78)
- Rnd 15: Ridge Round. (78 FPdc)
- Rnd 16: With MC, (sc 12, inc) 6 times. (84)
Checkpoint: The hive measures 24 in (61.0 cm) around. Fasten off MC.
Lay the hive flat with the join at center back. Count the stitches of Round 16 starting at the join. Place a marker in st 31 and another in st 42. The 12 stitches from st 31 to st 42 are the bottom of the arch. Leave them unworked.
Arch Opening (Worked in Rows)
- Row 17 (RS): Join MC in st 43. Ch 1, then sc in the same st and in each st around to st 30. (72) Turn.
- Row 18 (WS): Ch 1, sc across. (72) Turn.
- Row 19 (RS): Ch 1, sc across. (72) Fasten off MC and leave it attached to the work. Turn.
- Row 20 (WS, ridge): Join CC. Ch 2 (does not count as a stitch), then BPdc around each st across. (72) Working BPdc from the wrong side makes the ridge stand out on the right side, so it matches the ridges worked in the round. Fasten off CC. Turn.
- Row 21 (RS): Pick up MC. Ch 1, sc across. (72) Turn.
- Row 22 (WS): Ch 1, inc in the first st, sc 70, inc in the last st. (74) Turn.
- Row 23 (RS): Ch 1, inc in the first st, sc 72, inc in the last st. (76) Do not turn. Ch 8 and join with a sl st to the first sc of Row 23.
The opening started 12 stitches wide, and the chain that closes it is only 8. That difference pulls the top corners inward and gives the arch its rounded top.
- Rnd 24: Ch 1, sc in each sc and in each ch around. 76 sc + 8 ch = 84 sts. (84)
Checkpoint: The count is back to 84, and the hive is 3.5 in (8.9 cm) tall from the base edge. From here on, work in joined rounds again. Carry the unused color loosely up the inside at each join.
Upper Body and Dome
- Rnd 25: Ridge Round. (84)
- Rnds 26–29: With MC, sc around. (84)
- Rnd 30: Ridge Round. (84)
- Rnds 31–34: With MC, sc around. (84)
- Rnd 35: Ridge Round. (84)
Checkpoint: The hive is 6.75 in (17.1 cm) tall.
- Rnd 36: With MC, (sc 12, sc2tog) 6 times. (78)
- Rnd 37: Sc around. (78)
- Rnd 38: (Sc 11, sc2tog) 6 times. (72)
- Rnd 39: Sc around. (72)
- Rnd 40: Ridge Round. (72)
- Rnd 41: With MC, (sc 10, sc2tog) 6 times. (66)
- Rnd 42: (Sc 9, sc2tog) 6 times. (60)
- Rnd 43: (Sc 8, sc2tog) 6 times. (54)
- Rnd 44: Sc around. (54)
- Rnd 45: Ridge Round. (54)
- Rnd 46: With MC, (sc 7, sc2tog) 6 times. (48)
- Rnd 47: (Sc 6, sc2tog) 6 times. (42)
- Rnd 48: (Sc 5, sc2tog) 6 times. (36)
- Rnd 49: Sc around. (36)
- Rnd 50: Ridge Round. (36) Fasten off CC.
- Rnd 51: With MC, (sc 4, sc2tog) 6 times. (30)
- Rnd 52: (Sc 3, sc2tog) 6 times. (24)
- Rnd 53: (Sc 2, sc2tog) 6 times. (18)
- Rnd 54: Join CC. Work a Ridge Round. (18) Fasten off CC.
- Rnd 55: With MC, (sc 1, sc2tog) 6 times. (12)
- Rnd 56: Sc2tog 6 times. (6)
Top knob:
– Rnd 57: Sc around. (6)
– Rnd 58: Sc2tog 3 times. (3)
Do not fasten off.
Hanging loop: Ch 24 and sl st into the top of the knob to make a ring. Work 36 sc over the chain ring, then sl st to the knob. Fasten off and weave the tail down through the knob. The loop is 3 in (7.6 cm) tall.
The hive has 9 ridges in total, at Rounds 15, 20, 25, 30, 35, 40, 45, 50 and 54.
Arch Trim
Trim gauge: Each sc round of trim covers about 0.2 in (0.5 cm) of the opening, so 2 rounds take about 0.4 in (1.0 cm) off each side.
Rnd 1: Join CC at the bottom right corner of the opening. Work around the opening as follows, then join to the first sc. (36)
– Bottom: 1 sc in the free loop of each of the 12 marked sts from Round 16. (12)
– First side: 1 sc in each row end of Rows 17–23. Work 2 sc in the end of the taller Row 20. (8)
– Top: 1 sc in each of the 8 chains. (8)
– Second side: Work the same as the first side. (8)
Rnd 2: Ch 1, then sc in each st around. At each of the 4 corners, sc2tog over the last st of one side and the first st of the next. Join. (32) Fasten off.
Why the math works: The opening is 12 stitches wide at the bottom and 8 at the top. Each side is 7 rows tall, and the ridge row is about as tall as 2 sc rows, so each side gets 8 stitches. That gives 12 + 8 + 8 + 8 = 36. The trim lies inside the opening, so it needs fewer stitches as it moves inward. Taking 1 stitch away at each corner (36 − 4 = 32) keeps the trim flat instead of ruffled. The finished opening is about 2.5 in (6.4 cm) wide.
Bee Appliqués (Make 3)
Body (MC):
– Rnd 1: Ch 5. Sc in the 2nd ch from the hook, sc in the next 2 ch, 3 sc in the last ch. Turn the chain and work along the other side: sc in the next 2 ch, 2 sc in the same ch as the first sc. Join. (10)
– Rnd 2: Inc in the first st, sc 2, inc in each of the next 3 sts, sc 2, inc in each of the last 2 sts. Join. (16)
Fasten off and leave a 10 in (25.4 cm) tail. The body measures 1.25 in (3.2 cm) × 1 in (2.5 cm).
Stripes: With black, wrap 2 vertical stripes around the middle of the body. Use 3 wraps per stripe. Fill one end of the body with satin stitch to make the head.
Wings (CC): In an MR, ch 3, 6 dc, ch 3, sl st in the ring. Repeat once more. Pull the ring tight to make 2 teardrop wings. Fasten off and leave a tail for sewing.
Assembly: Sew the wings to the top of the body through the center only, so the wing tips lift slightly. Stitch 2 short black antennae from the head and finish each with a French knot.
Placement:
– Bee 1: Upper left, over Rounds 41–44
– Bee 2: Right side, over Rounds 31–34
– Bee 3: Lower left, beside the arch, over Rounds 21–24
Sew each bee down with its MC tail.
Final Blocking
- Weave in all ends on the inside of the hive.
- Stuff the hive firmly with plastic bags or a rolled towel so it holds its dome shape.
- Mist the outside lightly until it is damp but not soaked.
- Press the base flat on a table and smooth each ridge so it sits level all the way around.
- Pin the arch trim into a smooth curve.
- Let it dry completely, at least 24 hours.
- Remove the stuffing and check the measurements: 12 in (30.5 cm) tall and 24 in (61.0 cm) around.
Final Quality-Control Checklist
- [ ] The base lies flat and measures 6 in (15.2 cm) across.
- [ ] There are 9 cream ridges, all standing out on the right side.
- [ ] Row 20’s ridge lines up with the ridges worked in the round.
- [ ] The arch is about 2.5 in (6.4 cm) wide and has a rounded top.
- [ ] The trim lies flat without waving.
- [ ] The knob is closed and the loop is firmly attached.
- [ ] All 3 bees are secure, and their wings lift slightly.
- [ ] No ends show on the outside.
Troubleshooting
- The ridges pull in and the hive looks pinched. Your FPdc is too tight. Work them more loosely or use a hook 0.5 mm larger for ridge rounds only.
- The ridge in Row 20 sinks. You used FPdc on the WS. Redo the row with BPdc.
- The arch top is square. Check that you worked the increases in Rows 22–23 and closed the gap with only 8 chains.
- The trim ruffles. Add one more sc2tog at each top corner in Round 2.
- The join seam slants. This is normal for joined rounds. Keep it at the back.
- The hive sags when loaded. Use cotton yarn, or go down one hook size for a firmer fabric.
Care
Hand wash in cool water and lay flat to dry. Reshape the dome while it is damp.
Final Notes
Everything comes back to one measurement chain:
– 14 sc = 4 in (10.2 cm)
– A 66-stitch base = 6 in (15.2 cm) across
– 84 stitches = 24 in (61.0 cm) around at the widest
– 36 gold rounds at 0.25 in (0.6 cm) each plus 9 ridges at 0.4 in (1.0 cm) each = about 12 in (30.5 cm) tall
The 12-stitch gap closed with an 8-stitch chain shapes the arch, and the trim reduces it to about 2.5 in (6.4 cm). Check each measurement as you go and the hive will come out the right size.
Happy crocheting!