

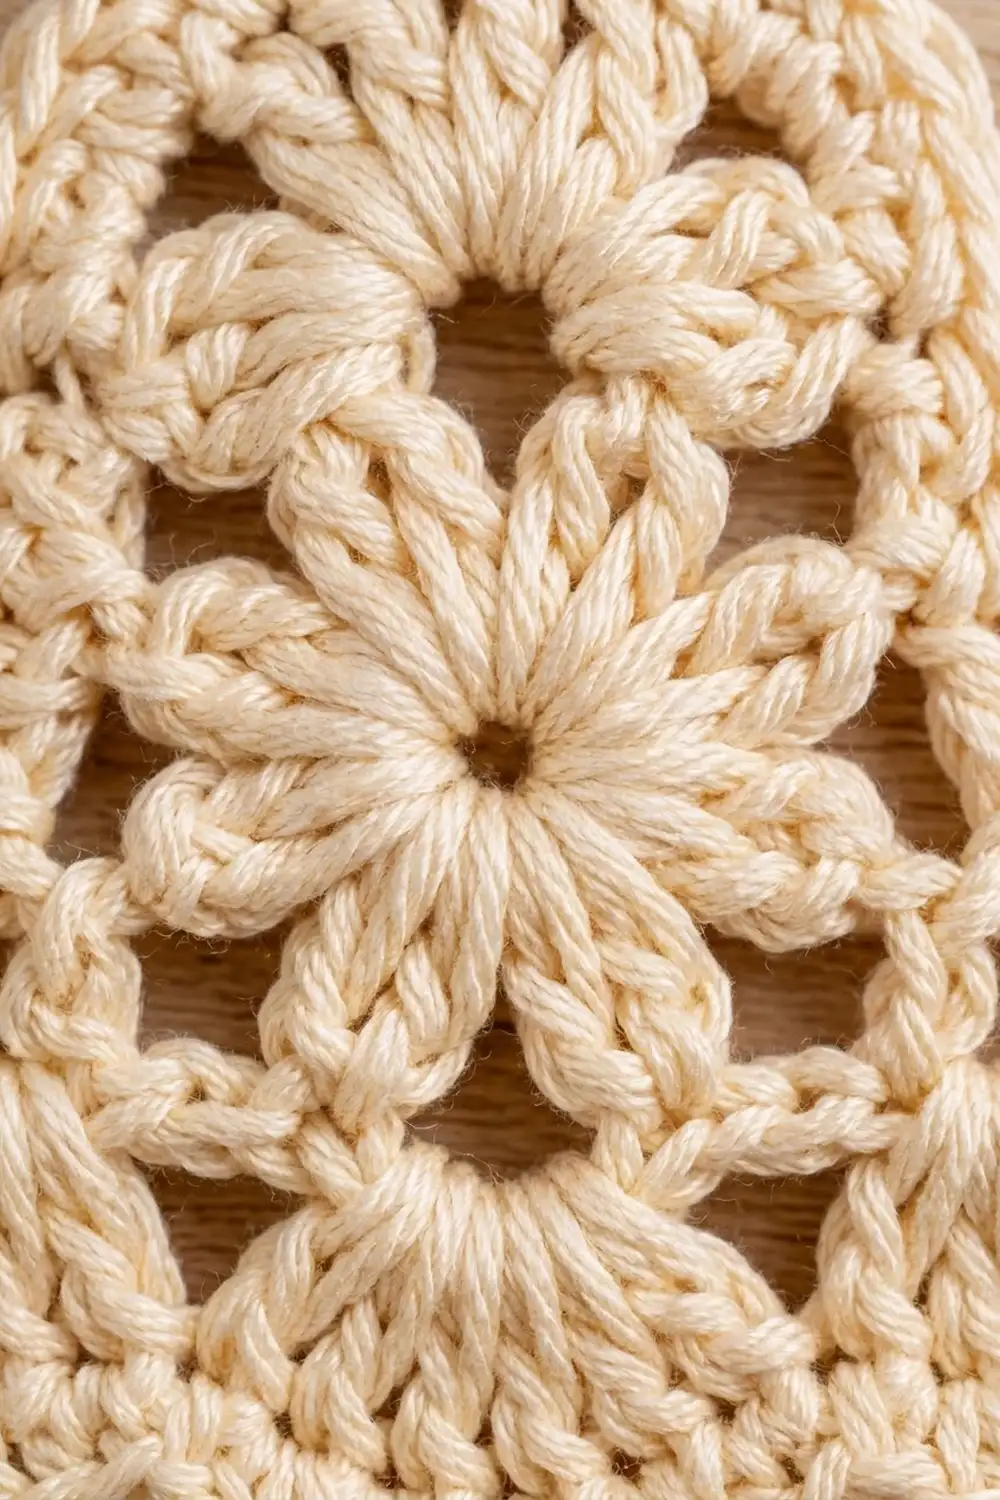
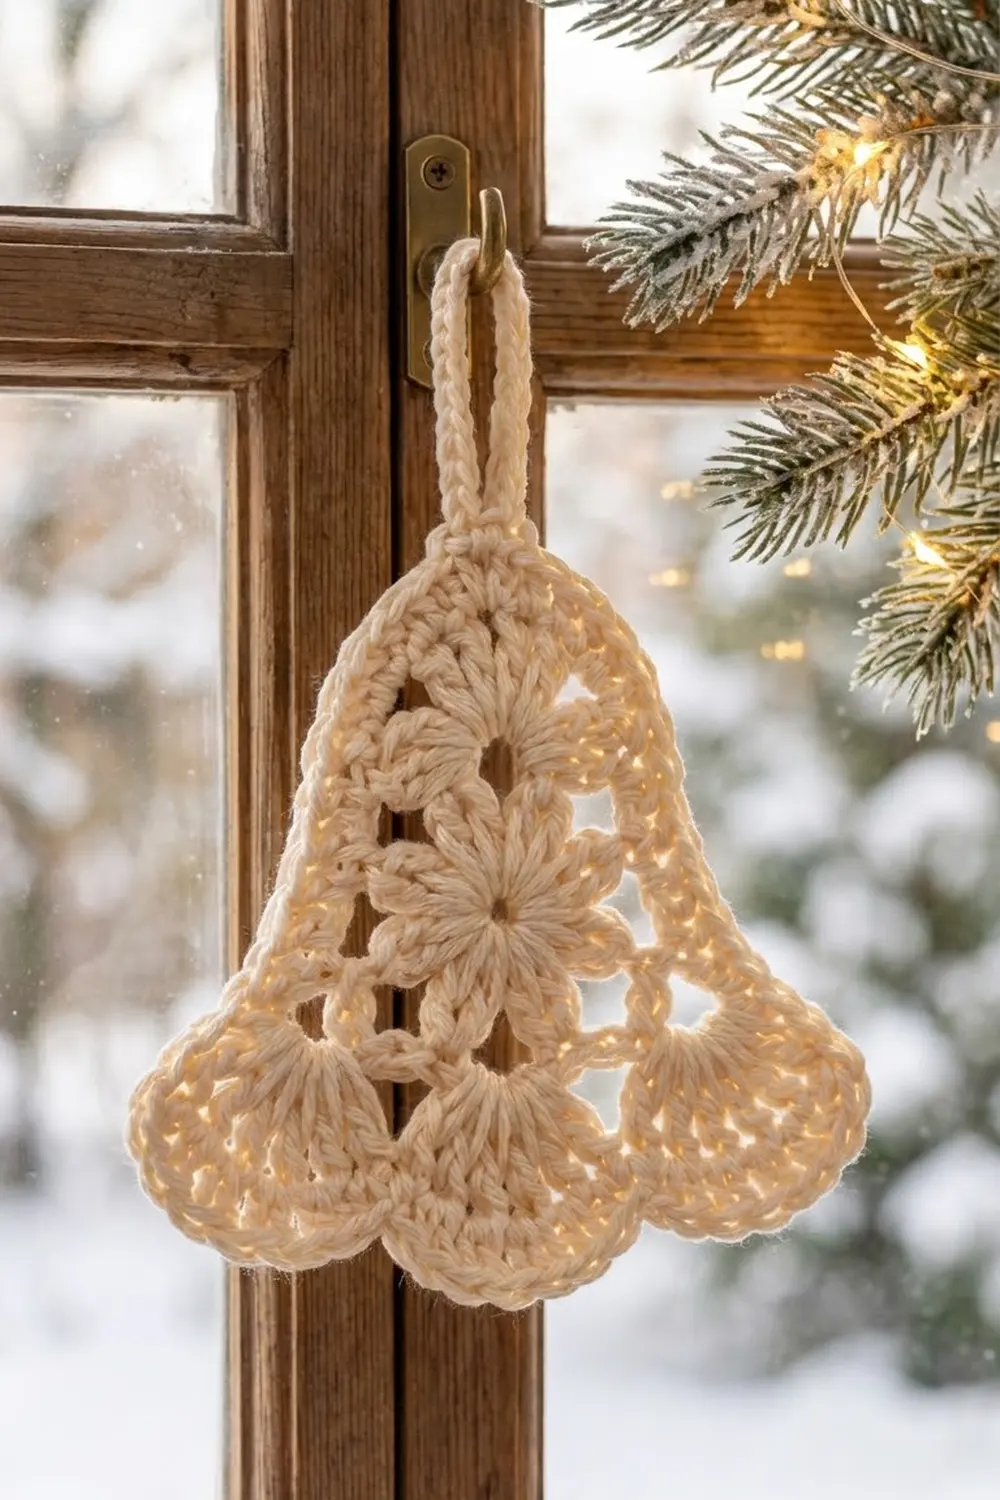
This lace bell ornament has a flower at its center and three rounded scallops along its hem. It’s worked in one soft ivory cotton, so the texture does the work: clustered petals, open chain gaps, a small fan with eyelets at the crown, and deep treble fans at the bottom.
The style is classic and calm, like a vintage doily cut into a bell shape. It looks good on a tree, tied to a gift, or hung in a window. Since it’s a single color and a single piece, it works well for batch-making in the weeks before the holidays.
The pattern uses US crochet terms. The finished bell measures 4.25 in (10.8 cm) wide by 4.25 in (10.8 cm) tall, plus a hanging loop about 1.5 in (3.8 cm) tall.
The bell is worked in the round from the center out. Rounds 1–3 make the flower and its frame of chain loops. Round 4 is the shaping round, where each chain loop gets a different stitch height to form the crown, shoulders, sides and scalloped hem. Round 5 is a single crochet border, and the hanging loop is built into it.
Finished Size and Construction
- Finished size: 4.25 in (10.8 cm) wide × 4.25 in (10.8 cm) tall, excluding the loop
- Hanging loop: about 1.5 in (3.8 cm) tall
- Skill level: Easy–Intermediate
- Terminology: US crochet terms
- Yarn weight: DK / light (#3) mercerized cotton
- Hook: 3.5 mm (E-4)
- Number of pieces: 1
- Layout: single motif, no joining
- Piece size before border: 3.75 in (9.5 cm) wide × 3.75 in (9.5 cm) tall
- Border depth: 0.25 in (0.6 cm) on every edge
- Size after border: 4.25 in (10.8 cm) × 4.25 in (10.8 cm)
Materials
Yarn: Use a smooth, mercerized cotton in DK weight. Mercerized cotton shows the petals and fans clearly, holds its shape after blocking, and has the soft sheen you see in the photo. Acrylic works too, but it blocks less crisply.
- Cream / ivory: 8 g, about 19 m (21 yd) per bell
The quantity includes a margin for your test rounds and for weaving in ends. A standard 50 g ball will make about six bells.
Tools:
- 3.5 mm (E-4) crochet hook, plus 3.25 mm (D-3) and 3.75 mm (F-5) for adjusting gauge
- Tapestry needle
- Scissors
- Locking stitch markers (at least 2)
- Blocking mat and rustproof pins
- Spray bottle
- Ruler or measuring tape
Abbreviations (US Terms)
- ch – chain
- sl st – slip stitch
- sc – single crochet
- hdc – half double crochet
- dc – double crochet
- tr – treble crochet
- sp(s) – space(s)
- st(s) – stitch(es)
- cl – cluster
- beg – beginning
Special stitches
- Beginning cluster (beg cl): Ch 2, yarn over, insert hook in the same st, yarn over and pull up a loop, yarn over and draw through 2 loops, yarn over and draw through both loops on hook.
- 3-dc cluster (cl): Yarn over, insert hook in the indicated st, yarn over and pull up a loop, yarn over and draw through 2 loops; repeat from * 2 more times in the same st (4 loops on hook), yarn over and draw through all 4 loops.
Gauge and Checkpoints
The ornament is too small for a regular swatch, so the first bell is your test piece. Measure it at each checkpoint below, laying it flat without stretching.
- After Round 1: ring diameter 1.25 in (3.2 cm)
- After Round 2: flower diameter 2 in (5.1 cm)
- After Round 3: diameter 2.75 in (7.0 cm), measured across the chain loops
- After Round 4: 3.75 in (9.5 cm) wide × 3.75 in (9.5 cm) tall
- After Round 5: 4.25 in (10.8 cm) wide × 4.25 in (10.8 cm) tall
If your piece is too big by more than 0.25 in (0.6 cm) at Round 2, change to a 3.25 mm (D-3) hook. If it’s too small by the same amount, change to a 3.75 mm (F-5) hook. Round 2 is the most reliable place to check, because the error grows with every round after it.
If the size matches but Round 4 ruffles, the fans are fine. The fix is tension, not hook size (see Troubleshooting).
Pattern
Round 1 – Center Ring
Make a magic ring.
Rnd 1: Ch 3 (counts as first dc), 15 dc in ring. Pull the ring closed, leaving a small hole about the width of a pencil. Join with sl st to top of beg ch-3.
(16 dc)
Checkpoint: 1.25 in (3.2 cm) across.
Round 2 – Eight-Petal Flower
Rnd 2: Beg cl in same st as join, ch 3, skip next st, cl in next st, ch 3, skip next st; repeat from * 6 more times. Join with sl st to top of beg cl.
(8 clusters, 8 ch-3 sps)
The clusters are the petals. Each one sits on every other dc of Round 1, so the 16 stitches are used as 8 × 2.
Checkpoint: 2 in (5.1 cm) across.
Round 3 – Open Frame
Rnd 3: Sl st in each of the next 2 ch, so you’re in the center of the first ch-3 sp. Ch 1, sc in same sp, ch 5, sc in next ch-3 sp; repeat from * 6 more times, ch 5. Join with sl st to first sc.
(8 sc, 8 ch-5 loops)
Each ch-5 loop arches over one petal. That arch leaves the open gaps around the flower.
Label the loops. Lay the piece flat. The loop just after your joining sc is Loop A (the crown). Going around in your working order, the rest are B (shoulder), C (side), D (hem corner), E (hem center), F (hem corner), G (side) and H (shoulder). Place a marker in Loop A and another in Loop E.
Checkpoint: 2.75 in (7.0 cm) across.
Round 4 – Bell Shaping
This round turns the circle into a bell. Each loop gets a stitch height that matches where it sits on the outline. Between loops, work 1 sc into each sc from Round 3.
Rnd 4: Ch 1, sc in same st as join.
- Loop A (crown): (dc, ch 1) 4 times, dc → 5 dc and 4 ch-1 sps (9 sts)
- sc in next sc
- Loop B (shoulder): 5 sc
- sc in next sc
- Loop C (side): 6 hdc
- sc in next sc
- Loop D (hem corner): 9 tr
- sc in next sc
- Loop E (hem center): 9 tr
- sc in next sc
- Loop F (hem corner): 9 tr
- sc in next sc
- Loop G (side): 6 hdc
- sc in next sc
- Loop H (shoulder): 5 sc
Join with sl st to first sc.
Stitch count: 8 sc between loops + 9 (A) + 5 (B) + 6 (C) + 9 (D) + 9 (E) + 9 (F) + 6 (G) + 5 (H) = 66 sts (including the 4 ch-1 sps in the crown)
How it makes the bell shape:
- The dc fan with eyelets rises above the low sc shoulders, so the crown is narrow and rounded.
- The hdc sides step down and outward.
- The three 9-tr fans are the tallest stitches, so they push the hem out wide. The sc between them pulls back in to make the dips between scallops.
Checkpoint: 3.75 in (9.5 cm) wide × 3.75 in (9.5 cm) tall. Measure the height from the top of the crown fan to the bottom of the Loop E fan. Measure the width across the outer tips of the D and F fans.
Round 5 – Border and Hanging Loop
The border is in the next section, because it sets the final size.
Border
Border gauge: One round of sc adds 0.25 in (0.6 cm) to every edge, so 0.5 in (1.3 cm) to the total width and height. That takes the piece from 3.75 in (9.5 cm) to 4.25 in (10.8 cm).
Rnd 5: Ch 1, sc in same st as join (this is the sc before Loop A).
Crown (over Loop A’s 9 sts):
– sc in dc, sc in ch-1 sp, sc in dc, sc in ch-1 sp
– Center dc: sc, ch 14, sl st in same dc to close the loop, 22 sc into the ch-14 loop, sc in same center dc
– sc in ch-1 sp, sc in dc, sc in ch-1 sp, sc in dc
– Crown total: 10 sc along the bell edge, plus the covered loop
Rest of the round:
– sc in next sc → 1
– Shoulder B: sc in each of 5 sc → 5
– sc in next sc → 1
– Side C: sc in each of 6 hdc → 6
– sc in next sc → 1
– Hem fan D: sc in each of first 4 tr, 3 sc in 5th (center) tr, sc in each of last 4 tr → 11
– sc in next sc → 1
– Hem fan E: same as D → 11
– sc in next sc → 1
– Hem fan F: same as D → 11
– sc in next sc → 1
– Side G: 6 sc → 6
– sc in next sc → 1
– Shoulder H: 5 sc → 5
Join with sl st to first sc. Fasten off.
Border count: 66 sts worked one sc per st + 7 extra sc (2 extra at the center of each of the 3 fans = 6, plus 1 extra at the crown center) = 73 sc. The 22 sc that cover the hanging loop are not part of this count.
Why the math works: Working one sc into every Round 4 stitch keeps the outline the same length, so the border lies flat along the shoulders and sides. Each fan’s outer curve is the longest stretch of the edge, so the 3 sc at each fan’s center tip give it the extra length it needs to round the scallop without cupping. The sc between fans gets no increase, which keeps the dips between scallops sharp. The 22 sc over a ch-14 loop pack the chain fully, so the hanger is firm and thick instead of floppy, at about 1.5 in (3.8 cm) tall.
Final Blocking
- Weave in ends first. Weave each tail through the back of 4–5 sc on the border, then go back the other way through 3 stitches before trimming.
- Dampen. Spray the bell evenly until it’s damp all the way through but not dripping. Or dip it in cool water and press it between towels.
- Pin the center. Lay it face up on the mat. Put a pin through the center ring and open it to about 0.25 in (0.6 cm).
- Pin the height. Pin the crown tip and the tip of fan E 4.25 in (10.8 cm) apart.
- Pin the width. Pin the outer tips of fans D and F 4.25 in (10.8 cm) apart. Pin them level with each other and slightly above fan E’s tip, so the hem reads as three even scallops.
- Shape the scallops. Put a pin into each sc dip between the fans to sharpen the scallops. Ease each fan into a smooth half-circle.
- Open the lace. Use a pin or the tip of your hook to open each petal gap and each crown eyelet.
- Shape the loop. Pin the hanging loop straight up, about 1.5 in (3.8 cm) tall.
- Dry fully. Leave it pinned until completely dry, at least 6 hours. For a crisper ornament, mist it lightly with fabric stiffener or starch before drying.
Final Quality-Control Checklist
- Round 1 has 16 dc and the center hole is small and neat
- Round 2 has 8 clusters and 8 ch-3 spaces
- Round 3 has 8 ch-5 loops, with each loop centered over one petal
- Round 4 has 66 sts and the three hem fans have 9 tr each
- Round 5 has 73 sc, plus 22 sc covering the hanging loop
- The hanging loop sits exactly above the hem center fan
- Size is 4.25 in (10.8 cm) × 4.25 in (10.8 cm), excluding the loop
- Fans D and F are level with each other, and all three scallops match
- All ends are woven in and invisible from the front
Troubleshooting
The hem fans ruffle or cup. Your tr may be too loose at the top. Pull each tr’s last loop snug. If they still ruffle, work all three fans as 9 dc instead of 9 tr. The stitch counts stay the same (66 in Round 4 and 73 in Round 5), but the bell will be slightly shorter.
The flower puckers in Round 2. The ch-3 spaces are too tight. Chain a little more loosely, or use a hook one size larger for the chains only.
The bell is lopsided. The loops were probably labeled from the wrong starting point. Check that Loop A comes right after the joining sc, and that Loop E is directly opposite it.
The hanging loop is off-center. Make sure the loop comes from the 3rd (center) dc of the crown fan, not from a ch-1 space.
The shoulders look too pointed. Work the 5 shoulder sc a little looser, and round them gently during blocking.
The scallops look flat. Put a pin firmly into each sc dip between fans while blocking. If that doesn’t fix it, work sc2tog over the dip sc and the first tr of the next fan on the border. Remove one sc from your count for each dip you change.
Care
Hand wash in cool water with mild soap, press out the water in a towel, then reshape and dry flat. Store flat or hung by the loop, away from direct sunlight, so the cream color stays bright.
Final Notes
Each measurement checks the one before it:
- 16 dc ring at 1.25 in (3.2 cm)
- 8-cluster flower at 2 in (5.1 cm)
- 8-loop frame at 2.75 in (7.0 cm)
- 66-stitch bell shape at 3.75 in (9.5 cm)
- 73-sc border to 4.25 in (10.8 cm) square, with a 1.5 in (3.8 cm) hanging loop at the top
If you check the first two rounds, the rest of the bell usually comes out on size. Once the first one is blocked and measured, you can use it as a template for any more bells you make.
Happy crocheting!