

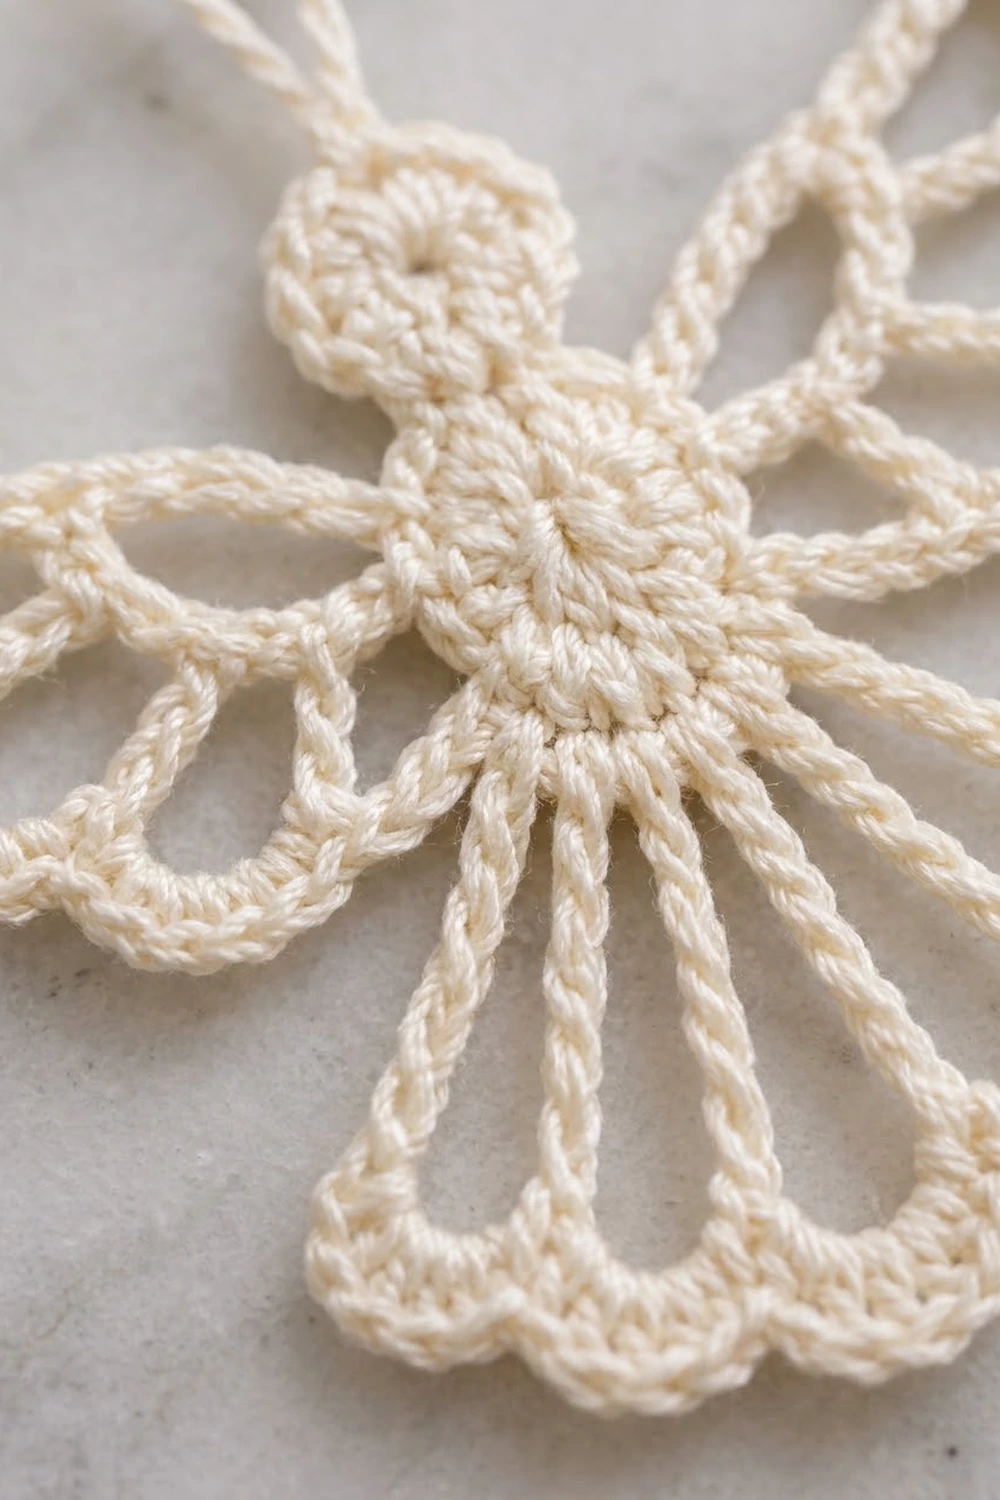
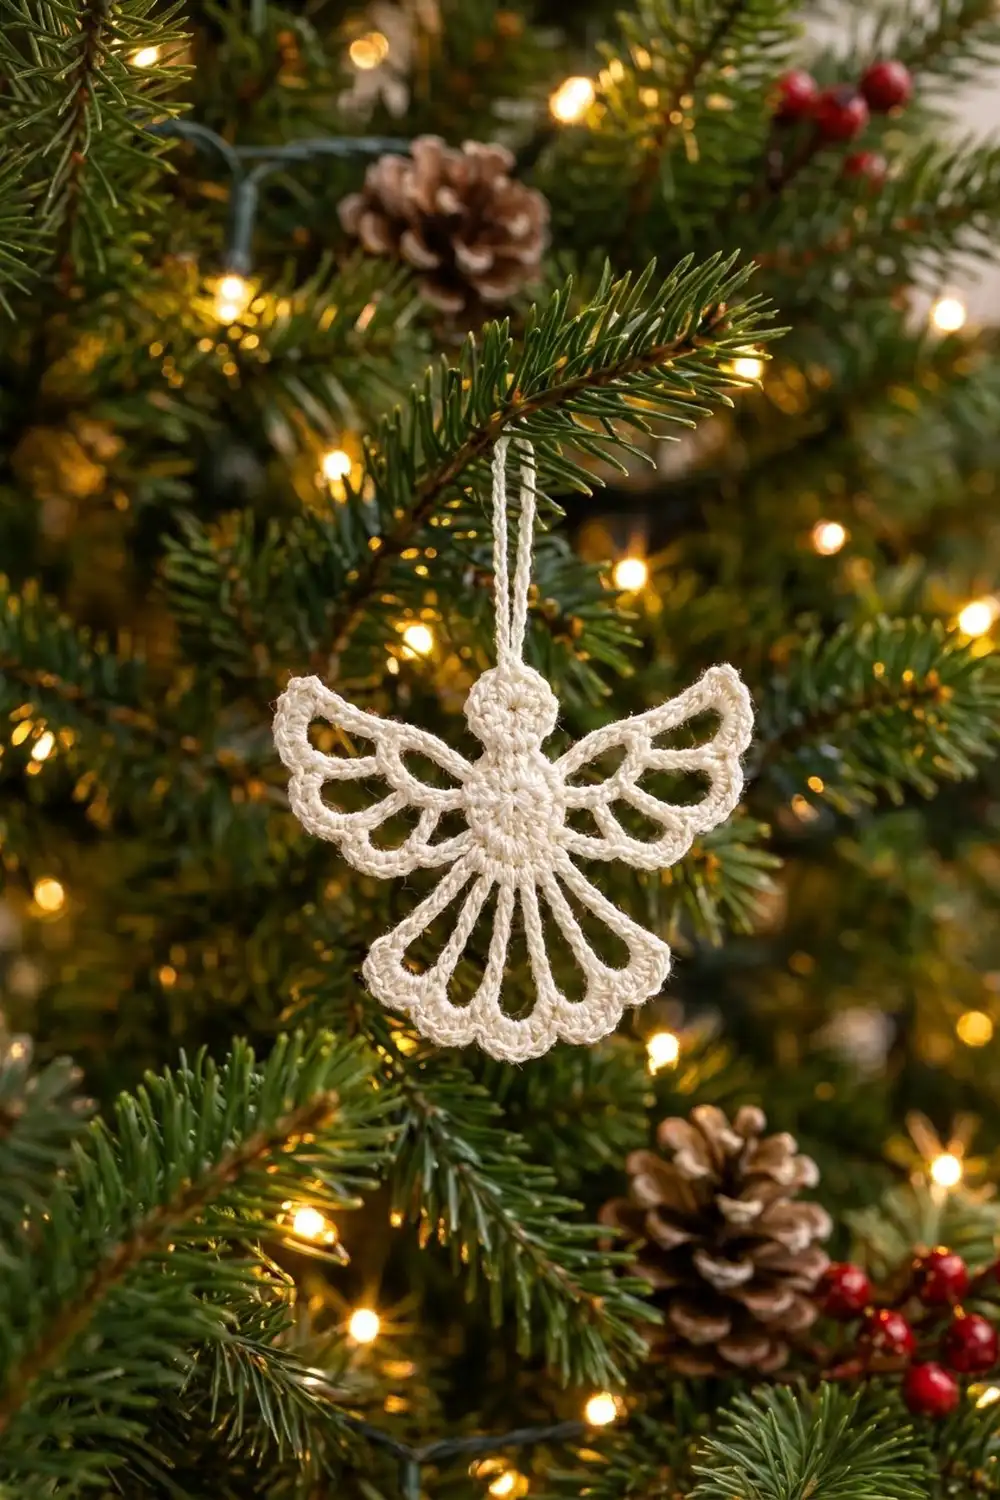
This little angel is lace you can hang on a tree. She has a solid round head, a round body, two wings made of fanned open loops, and a bell-shaped skirt with five tall open panels that end in a soft scalloped hem. The whole ornament is worked in one color of ivory cotton thread, so the open shapes catch the light and look lovely against green branches.
The style is classic and quiet: simple outlines, crisp loops, and enough stiffness after blocking to keep her shape. Make one as a gift tag or a whole set for the tree. This pattern covers one angel.
The pattern uses US crochet terms. The finished angel is 3.5 in (8.9 cm) wide across the wings and 3.25 in (8.3 cm) tall from the top of the head to the hem. The hanging loop adds about 1.25 in (3.2 cm).
Construction is simple:
- Work a small body disc in the round.
- Grow the head and the hanging loop off the top of the body.
- Chain loops off the body to make the frames for the wings and skirt.
- Cover every loop with single crochet. This edging is the angel’s “border,” and it creates the scallops.
The angel is one continuous piece with no sewing.
Finished Size and Construction
- Finished size: 3.5 in (8.9 cm) wide x 3.25 in (8.3 cm) tall, plus a 1.25 in (3.2 cm) loop
- Skill level: Easy-intermediate
- Terminology: US
- Yarn weight: Size 3 crochet thread (light fingering, cotton)
- Hook: 2.25 mm (B-1)
- Number of pieces: 1
- Layout: Single ornament, with the head, body, wings and skirt all worked from one central disc
- Body disc size: 1 in (2.5 cm) across
- Size before border (chain frames only): about 3.25 in (8.3 cm) wide x 3.125 in (7.9 cm) tall
- Border depth: about 0.125 in (0.3 cm) of single-crochet edging on every loop
Materials
Yarn: Use a mercerized cotton crochet thread in size 3. Mercerized cotton has a slight sheen, shows the stitches clearly, and holds starch well. Avoid acrylic: it won’t stiffen, and the wings will droop.
- Ivory / Cream: 5 g, about 15 m (16.4 yd)
This amount includes a margin for your gauge swatch and weaving in ends. One ball will make many angels.
Tools:
- 2.25 mm (B-1) crochet hook
- Fine tapestry needle
- 2 locking stitch markers
- Small sharp scissors
- Fabric stiffener or a starch solution
- Foam blocking board and rust-proof pins
- Plastic wrap to protect the board
Abbreviations (US Terms)
- ch – chain
- sl st – slip stitch
- sc – single crochet
- hdc – half double crochet
- dc – double crochet
- MR – magic ring
- st(s) – stitch(es)
- sp – space
Special technique – Covered loop: Work single crochet into the chain loop space, around the chain, not into the individual chains. Pack the stitches snugly so the chain is fully hidden. Each loop is covered from one anchor point, around the curve, and back to the other anchor point.
Special technique – Loop join: While covering a loop, remove your hook from the working loop. Insert it from front to back into the named sc of the neighboring loop, pick up the dropped loop, and pull it through. This joining sl st does not count as a stitch.
Gauge and Checkpoints
Gauge is not critical for a hanging ornament. It does control the size and how crisp the loops look, so test before working the whole angel.
Gauge:
- 8 sc = 1 in (2.5 cm)
- 7 ch = 1 in (2.5 cm)
- Body Rounds 1–2 = 1 in (2.5 cm) across
Test first: Work the body (Rounds 1–2) and measure. This disc is your gauge swatch. If it is right, keep going without fastening off.
Checkpoints:
- Body after Round 2: 1 in (2.5 cm) across, lying flat
- Head: 0.6 in (1.5 cm) across
- Largest wing frame loop (ch 18), before edging: about 1.25 in (3.2 cm) long from the body
- After all frames: about 3.25 in (8.3 cm) wide
- Finished and blocked: 3.5 in (8.9 cm) wide x 3.25 in (8.3 cm) tall
If the body is too big, or ruffles: change to a 2.0 mm hook. If it is too small, or cups: change to a 2.5 mm hook. Change hooks for the whole angel, not halfway through.
Body
Round 1: Make an MR. Ch 2 (does not count as a st), work 12 dc in the ring. Pull the ring closed. Join with sl st to the first dc. (12 dc)
Round 2: Ch 1, 2 sc in each st around. Join with sl st to the first sc. (24 sc)
This is a growth round, and its own complete count is 24 sc.
Number the stitches. Lay the disc flat, with the joining seam at the top. Place a marker in the sc just right of the seam and call it st 1. Count the stitches going around in order, so that st 24 is just left of the seam. The vertical center line of the angel runs through the gap between sts 24 and 1 at the top, and between sts 12 and 13 at the bottom. Every anchor point below is mirrored around this line.
Do not fasten off.
Head
Neck and head ring: Sl st in st 24. Ch 6, then sl st in the 4th ch from the hook to form a small ring. This leaves 2 ch as a neck.
Head round: Ch 2 (does not count as a st), work 12 hdc into the ring. Join with sl st to the first hdc. (12 hdc)
Return to the body: Sl st in each of the 2 neck ch, then sl st in st 1 of the body. The neck now sits over the gap between sts 24 and 1.
Checkpoint: The head should measure 0.6 in (1.5 cm) across and lie flat.
Fasten off and weave in the end.
Hanging Loop
Join the thread with a sl st in hdc 7 of the head. This is the hdc directly opposite the neck, at the top of the head.
Row 1: Ch 18, then sl st in the same hdc. (One ch-18 loop)
Row 2: Work 22 sc into the loop space (11 up each side of the curve). Sl st in hdc 7. (22 sc)
Checkpoint: The loop should be about 1.25 in (3.2 cm) long.
Fasten off and weave in the end.
Wing Frames
Work each frame as a single row of chain loops anchored into the body. Each wing has three loops. The smallest loop sits lowest and the largest sits at the top, near the head.
Right wing frame: Join with sl st in st 6.
- Ch 10, sl st in st 5 — Loop A
- Ch 14, sl st in st 4 — Loop B
- Ch 18, sl st in st 3 — Loop C
(3 loops: 10 + 14 + 18 = 42 ch)
Fasten off.
Left wing frame (mirror image): Join with sl st in st 19.
- Ch 10, sl st in st 20 — Loop A
- Ch 14, sl st in st 21 — Loop B
- Ch 18, sl st in st 22 — Loop C
(42 ch)
Fasten off.
Sts 3–6 and 19–22 are exact mirrors (25 − n), so the wings sit symmetrically.
Skirt Frame
Join with sl st in st 10.
- *Ch 22, sl st in the next st. Repeat from * 4 more times, ending in st 15.
- This makes Loops 1–5. (5 loops, 110 ch)
Fasten off.
Sts 10–15 are centered on the gap between sts 12 and 13, so the skirt hangs straight below the head.
Checkpoint: With the loops gently fanned out, the frame should measure about 3.25 in (8.3 cm) wide x 3.125 in (7.9 cm) tall.
Border: Covered-Loop Edging
The single-crochet covering is the angel’s border. It thickens each chain outline, makes the scalloped curves, and joins neighboring loops so the wings and skirt keep their shape.
Border gauge: 8 sc = 1 in (2.5 cm). The edging adds about 0.125 in (0.3 cm) to every outer edge.
Rule for every loop: sc count = chain count + 4. That gives 2 extra sc per side to ease around the curved tip. Half of the sc go up one side of the loop and half come back down the other.
| Loop | Chains | sc total | Per side |
|---|---|---|---|
| Wing Loop A | 10 | 14 | 7 / 7 |
| Wing Loop B | 14 | 18 | 9 / 9 |
| Wing Loop C | 18 | 22 | 11 / 11 |
| Skirt Loops 1–5 | 22 | 26 | 13 / 13 |
| Hanging loop (worked above) | 18 | 22 | 11 / 11 |
Right Wing Edging
Join with sl st in st 3. You work from the top loop down to the bottom loop.
Loop C: Work 22 sc into Loop C.
- sc 1–11 go out to the tip.
- sc 12–22 come back to st 4.
(22 sc)
Loop B: Work 3 sc into Loop B. Make a loop join into sc 20 of Loop C (the 3rd sc from its base). Then work 15 more sc into Loop B. (18 sc)
Loop A: Work 3 sc into Loop A. Make a loop join into sc 16 of Loop B (the 3rd sc from its base). Then work 11 more sc into Loop A. (14 sc)
Sl st in st 6. Fasten off.
Right wing total: 22 + 18 + 14 = 54 sc
Left Wing Edging
Join with sl st in st 22. Repeat the right wing edging exactly, with these changes:
- Cover Loop C toward st 21.
- Cover Loop B toward st 20.
- Cover Loop A toward st 19, then sl st in st 19.
(54 sc)
Skirt Edging
Join with sl st in st 15. You work from Loop 5 back to Loop 1.
Loop 5: Work 26 sc into Loop 5.
- sc 1–13 go down to the hem.
- sc 14–26 come back up to st 14.
(26 sc)
Loops 4, 3, 2 and 1: For each loop, work 8 sc into the loop. Make a loop join into sc 19 of the loop you just finished (the 8th sc from its base). Then work 18 more sc. (26 sc each)
Sl st in st 10. Fasten off.
Skirt total: 5 x 26 = 130 sc
Why the math works: Each join sits 8 sc from the body on both loops, because sc 19 is the 8th sc counting back from sc 26. That means the panels are held together through their upper part. The lower 5 sc of each side stay free, so every panel ends in its own rounded scallop and the hem looks like a scalloped edge. On the wings, the joins sit 3 sc from the body, which fans the three cells upward. Because each loop gets exactly chain + 4 sc, every curve is covered evenly, without gaps or ruffles.
Checkpoint: Before blocking, the angel should measure about 3.5 in (8.9 cm) wide.
Final Blocking
- Weave in all remaining ends along the sc edging, not across the open cells.
- Soak the angel in fabric stiffener, or a starch solution mixed per the label, until fully saturated.
- Press it gently in a towel so the open cells don’t keep a film of stiffener.
- Cover the blocking board with plastic wrap. Lay the angel face up.
- Pin the center of the body, then the top of the head.
- Pin each wing tip so the wings angle upward, matching right to left. Measure 3.5 in (8.9 cm) across.
- Fan out the skirt. Pin the bottom of each of the five scallops so the hem curves evenly. Measure 3.25 in (8.3 cm) from the head to the hem.
- Use pins or a toothpick to open each wing cell and skirt panel so they look clean and even.
- Pin the hanging loop straight up.
- Let it dry completely, at least overnight, before you unpin it.
Final Quality-Control Checklist
- Body has 24 sc, and the head has 12 hdc
- Neck is centered between sts 24 and 1
- Each wing has three cells: 14, 18 and 22 sc
- Wings mirror each other (sts 3–6 and 19–22)
- Skirt has five panels of 26 sc each, joined at sc 19
- No chain shows through any edging
- Hem has five separate rounded scallops
- Hanging loop is at the top of the head and about 1.25 in (3.2 cm) long
- Finished size is 3.5 in (8.9 cm) x 3.25 in (8.3 cm)
- The angel is stiff and flat, and all ends are hidden
Troubleshooting
- The body cups: Your dc are too tight. Go up a hook size, or loosen your tension in Round 1.
- The body ruffles: Your dc are too loose. Go down a hook size.
- Chain shows through the edging: Pack the sc closer together. Don’t add stitches, or the loop will ruffle.
- The loops twist: The chain twisted while you anchored it. Undo the frame and keep the chain flat before each sl st.
- The skirt flares sideways: One loop join landed in the wrong sc. Recount to sc 19 and redo the join.
- The wings droop: Not enough stiffener. Soak and block the angel again.
- The angel hangs crooked: The neck or the hanging loop is off center. Check st 24/st 1 and hdc 7.
Care
Dust gently with a soft brush. If you need to wash it, rinse it by hand in cool water, then stiffen and block it again. Store flat in a box between layers of tissue.
Final Notes
Here is the measurement chain to check as you go:
- The 1 in (2.5 cm) body disc sets your gauge.
- The 0.6 in (1.5 cm) head sits on top, with a 1.25 in (3.2 cm) hanging loop above it.
- The chain frames spread the angel to 3.25 in (8.3 cm) wide.
- The single-crochet edging (chain + 4 sc on every loop) adds 0.125 in (0.3 cm) to every edge. That brings the finished angel to 3.5 in (8.9 cm) wide and 3.25 in (8.3 cm) tall.
Check each stage and your angel will come out true and balanced.
Happy crocheting!