

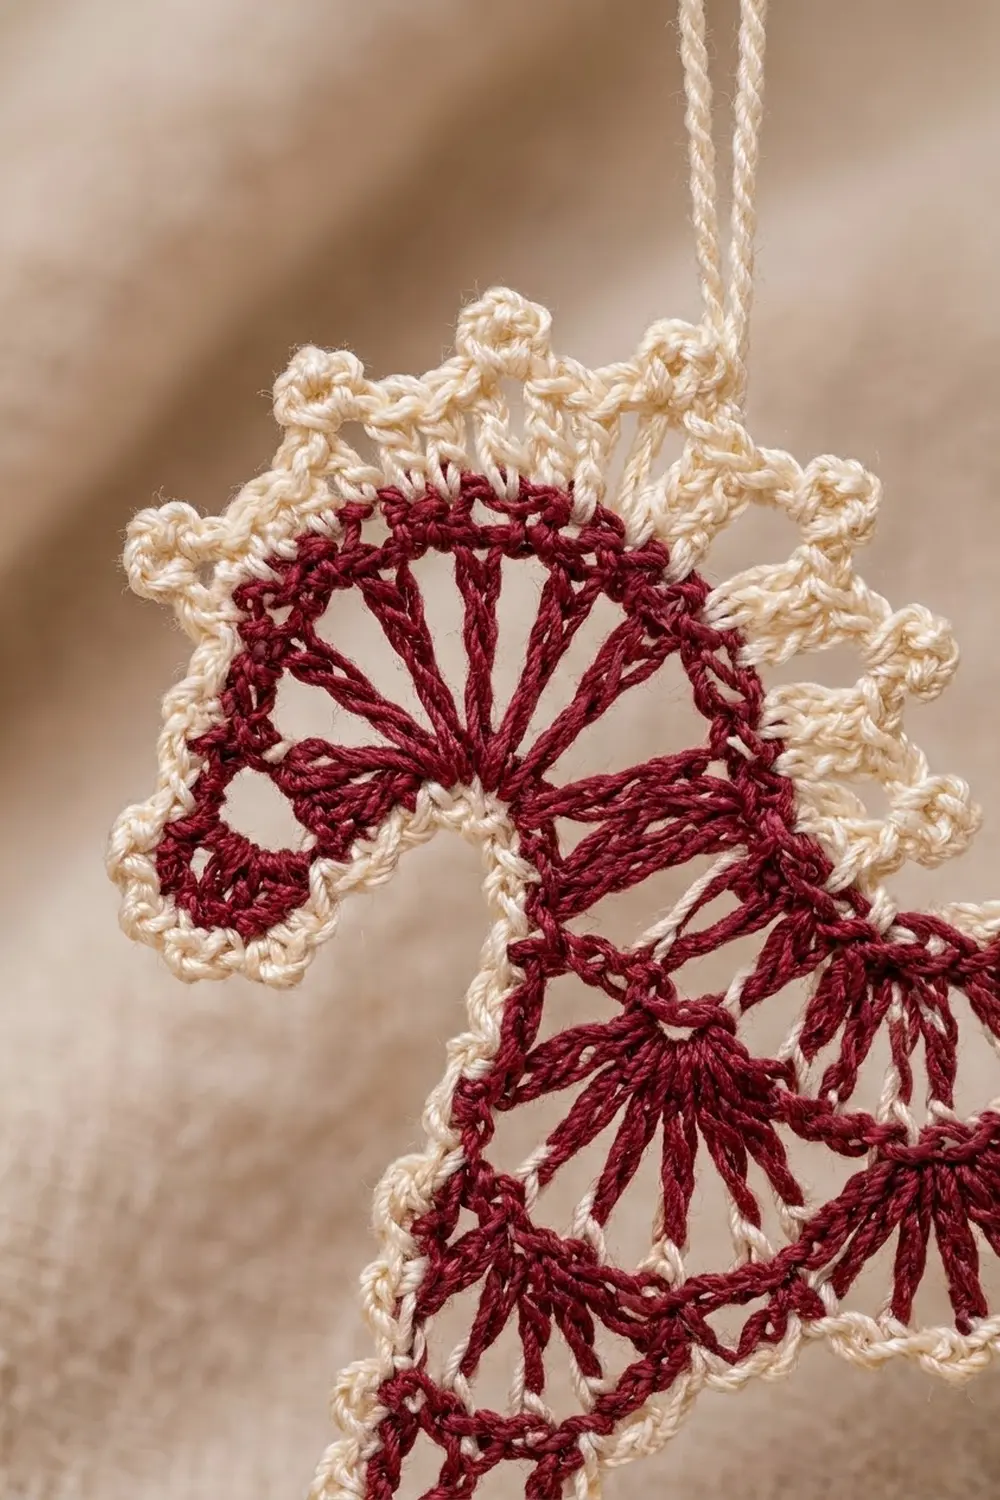
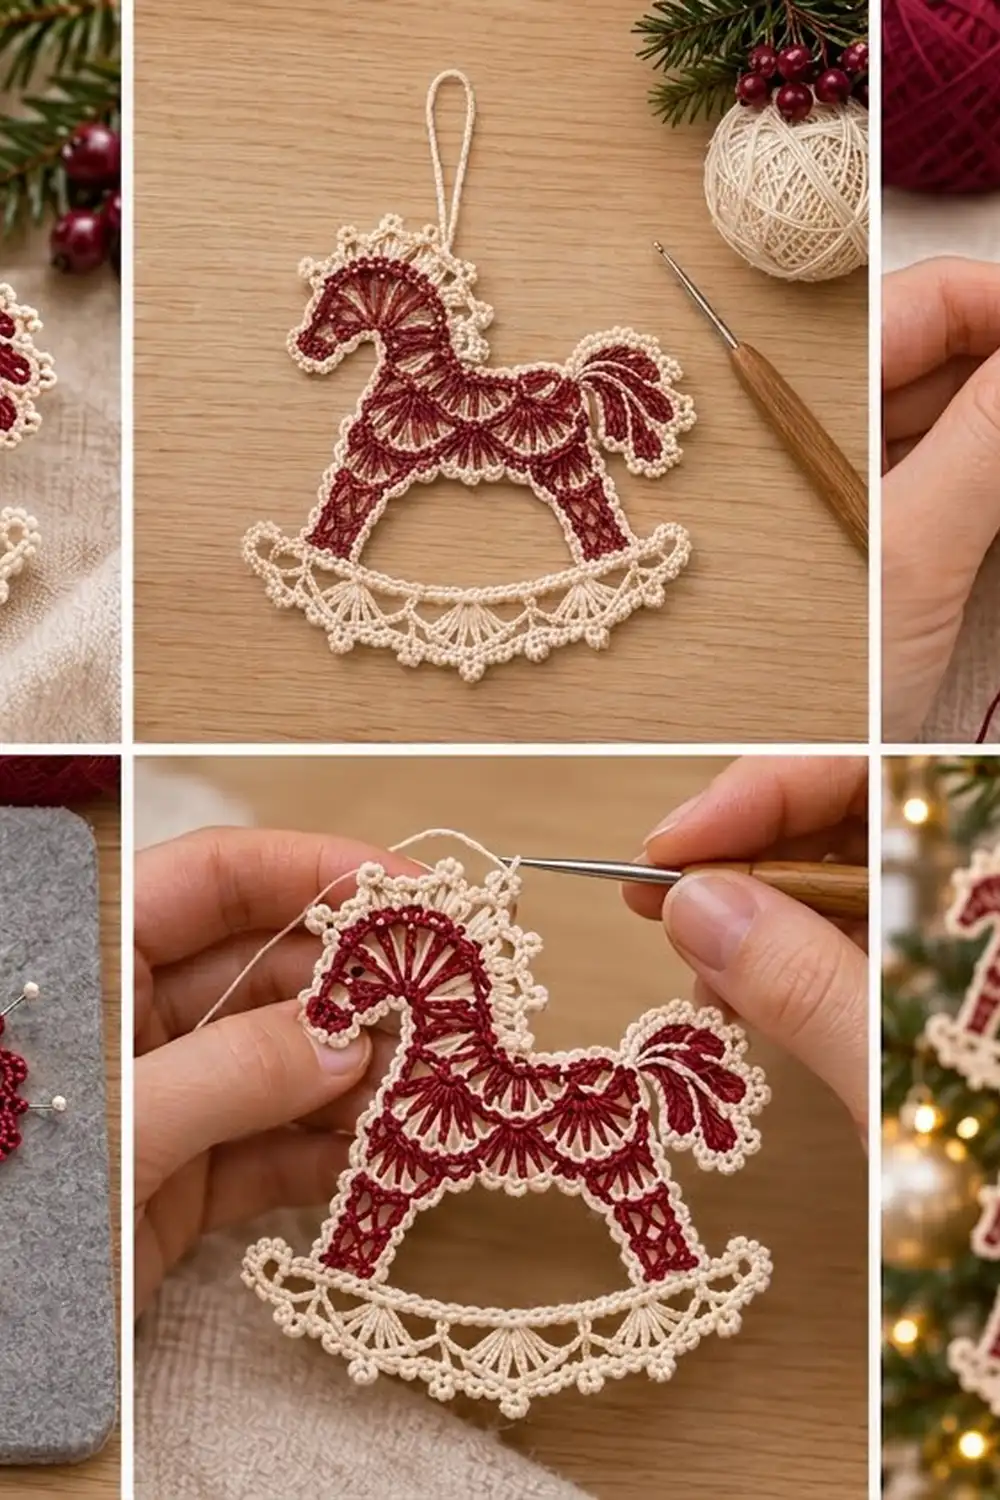
This Lacy Rocking Horse Ornament is a small heirloom-style Christmas decoration in crochet thread. The horse is open, airy lace in deep burgundy: a radiating spoke “wheel” for the head, two bands of downward-facing fans across the body, and crossed-stitch legs. A cream outline with tiny picots traces the whole silhouette and doubles as the mane.
The horse stands on a cream rocker. The rocker has a solid top line, a row of hanging fans, and a picot scallop along the bottom curve. Three short curled chain loops form the tail. A thin cream loop at the top of the head lets it hang on a tree.
The pattern uses US crochet terms. The finished ornament measures about 4.5 in (11.4 cm) wide and 4.25 in (10.8 cm) tall, not counting the hanging loop.
Construction is all one piece. You crochet the burgundy body in rows, then work the neck and head up from the top edge and the two legs down from the belly. Next you add the tail. The cream rocker is worked from a foundation chain, and its first row joins the hooves. A cream two-round border goes around the outside, a plain cream round finishes the inner window, and you block the ornament flat.
Finished Size and Construction
- Finished size: about 4.5 in (11.4 cm) wide × 4.25 in (10.8 cm) tall, plus a 1.5 in (3.8 cm) hanging loop
- Skill level: Intermediate (thread crochet, working into row ends)
- Terminology: US
- Yarn weight: Lace (0), size 10 cotton crochet thread
- Hook: 1.5 mm steel hook (often labeled US 8 steel)
- Number of pieces: 1 (a single ornament)
- Layout: one standing horse on one rocker
- Piece size before border: about 4.3 in (10.9 cm) wide × 4 in (10.2 cm) tall
- Border depth: about 1/8 in (0.3 cm) on each outer edge, including picots
Materials
Pick a mercerized cotton thread in size 10. Mercerized thread has a slight sheen and holds crisp lace shapes after blocking. Avoid fuzzy or acrylic thread, because it won’t hold the fans open.
- Color A, Burgundy: 6 g, about 31 m (34 yd) — horse body, neck, head, legs, tail
- Color B, Cream: 6 g, about 31 m (34 yd) — rocker, border, inner edging, hanging loop
Both quantities include a margin of roughly 30% to cover your gauge checks and any ripped-back rows.
Tools:
- 1.5 mm steel crochet hook
- Fine tapestry needle
- Small sharp scissors
- Blocking board or foam mat
- Rustproof pins
- Spray bottle with water, and optional spray starch or fabric stiffener
Abbreviations (US Terms)
- ch – chain
- sl st – slip stitch
- sc – single crochet
- hdc – half double crochet
- dc – double crochet
- tr – treble crochet
- dc2tog – double crochet 2 together
- sc2tog – single crochet 2 together
- st(s) – stitch(es)
- sp – space
- RS / WS – right side / wrong side
Special stitches:
- Fan: 7 dc in the same stitch.
- Crossed dc: skip the next st, dc in the following st, then dc in the skipped st, working over the dc you just made. One crossed dc uses 2 sts and makes 2 sts.
- Picot: ch 3, sl st in the 3rd ch from the hook.
Gauge and Checkpoints
Gauge: 20 dc and 9 rows = 2 in (5.1 cm) square, which is 10 dc and 4.5 rows per 1 in (2.5 cm).
Since this is a single ornament, the horse body is your test piece. Work the body (Rows 1–5) and measure it before you go on.
Checkpoints:
- After body Row 1: 31 dc measure about 3.1 in (7.9 cm) across.
- After body Row 5: the body is about 3.1 in (7.9 cm) wide × 1.3 in (3.3 cm) tall.
- After each leg: about 0.7 in (1.8 cm) wide × 1.1 in (2.8 cm) long.
- After the head rim: the top of the head is about 1 in (2.5 cm) above the body’s top edge.
- After the rocker: about 4.3 in (10.9 cm) long × 0.75 in (1.9 cm) deep at the center.
- Before the border: about 4.3 in (10.9 cm) × 4 in (10.2 cm).
If your piece is too big, go down to a 1.25 mm hook. If it’s too small, go up to a 1.75 mm hook. Don’t change the stitch counts, because the border math depends on them.
Horse Body (Color A)
Work in rows. The foundation chain becomes the horse’s back line.
Foundation: With A, ch 33.
Row 1 (RS): Dc in 4th ch from hook (the skipped 3 ch count as 1 dc) and in each ch across, turn. (31 sts)
Row 2: Ch 1, sc in first st, skip 2 sts, fan in next st, skip 2 sts, sc in next st; rep from * 4 more times, turn. (5 fans + 6 sc = 41 sts)*
The fans hang down from the back line. Their spokes point up and their curved edges point down.
Row 3: Ch 3 (counts as dc), 3 dc in first sc, sc in center (4th) dc of next fan, fan in next sc, sc in center dc of next fan; rep from * 3 more times, 4 dc in last sc, turn. (4 dc + 5 sc + 4 fans of 7 dc + 4 dc = 41 sts)*
This makes a second band of fans, offset from the first. It has 4 full fans and a half fan at each end.
Row 4: Ch 1, sc in first dc, ch 3, sc in next sc, ch 3, sc in center dc of next fan, ch 3, sc in next sc; rep from * 3 more times, ch 3, sc in top of turning ch, turn. (11 sc + 10 ch-3 sps)*
Row 5: Ch 1, sc in each sc and 2 sc in each ch-3 sp across. (11 + 20 = 31 sc) Fasten off.
Row 5 is the belly. Number its stitches 1–31, starting at the head end. The head end is the end where foundation chain stitch 1 sits right above. Number the foundation chain stitches 1–31 the same way.
Legs (Color A)
Both legs are worked downward from the belly.
Front Leg: With RS facing, join A in belly st 1.
Row 1: Ch 3 (counts as dc), crossed dc over next 2 sts; rep from * 2 more times, turn. (1 + 6 = 7 sts, using belly sts 1–7)*
Rows 2–4: Ch 3 (counts as dc), crossed dc over next 2 sts; rep from * 2 more times, turn. (7 sts)*
Row 5 (hoof): Ch 1, sc in each st across. (7 sc) Fasten off.
Back Leg: Join A in belly st 25. Work Rows 1–5 the same way as the front leg, using belly sts 25–31. (7 sc at the hoof)
That leaves belly sts 8–24 (17 sts) open between the legs.
Neck and Head (Color A)
Neck Row 1: Turn the body so the foundation chain is on top. Join A in foundation st 1. Ch 3 (counts as dc), dc in the remaining loop of foundation sts 2–8, turn. (8 dc)
Neck Row 2: Ch 3 (counts as dc), dc in next 5 sts, dc2tog over last 2 sts, turn. (7 sts)
The decrease falls on the back edge, so the neck leans forward a little.
Head Row 3 (spoke wheel): Ch 4 (counts as tr), ch 1, tr in same st, (ch 1, tr, ch 1, tr) in next st; rep from * 4 more times, ch 1, tr in last st, turn. (13 tr + 12 ch-1 sps)*
The trebles fan out in a half circle. These are the spokes you can see in the head.
Head Row 4 (rim): Ch 1, sc in first tr, 2 sc in next ch-1 sp, sc in next tr; rep from * 11 more times, turn. (1 + 36 = 37 sc)*
Number the rim stitches 1–37, starting at the front (face) end.
Muzzle Row 1: Ch 2 (counts as hdc), hdc in next 5 sts, turn. (6 sts on rim sts 1–6)
Muzzle Row 2: Ch 2 (counts as hdc), hdc in next 2 sts, ch 1, skip 1 st (eye), hdc in next 2 sts, turn. (5 hdc + 1 ch-1 sp = 6 sts)
Muzzle Row 3: Ch 1, sc in each hdc and ch-1 sp across. (6 sc) Fasten off.
Tail (Color A)
Join A in foundation st 31, at the top back corner of the body.
- Ch 18, sl st in same st. Ch 15, sl st in same st. Ch 12, sl st in same st. (3 loops)
- Work 24 sc into the ch-18 loop, sl st in base st.
- Work 20 sc into the ch-15 loop, sl st in base st.
- Work 16 sc into the ch-12 loop, sl st in base st. Fasten off.
Packing the sc tightly makes each loop curl into a flowing tail strand.
Rocker (Color B)
Foundation: With B, ch 44.
Row 1 (joining row): Sc in 2nd ch from hook and in next 5 ch (rocker sts 1–6). Now hold the front hoof against the chain. For the next 7 sc (sts 7–13), insert the hook through the chain and the matching hoof sc together. Sc in next 17 ch (sts 14–30). Join the back hoof the same way over sts 31–37. Sc in last 6 ch (sts 38–43), turn. (43 sc)
Check the layout: 6 + 7 + 17 + 7 + 6 = 43. The 17 sts between the hooves match the 17 open belly sts above them.
Row 2: Ch 3 (counts as dc), dc in each st across, turn. (43 sts)
Row 3: Ch 1, sc in first st, skip 2 sts, fan in next st, skip 2 sts, sc in next st; rep from * 6 more times. (7 fans + 8 sc = 57 sts)* Fasten off.
Border (Color B)
Border gauge: about 10 sc per 1 in (2.5 cm) along straight edges. The picot round adds about 1/8 in (0.3 cm).
Row-end rule for Round 1: work 1 sc per sc or hdc row end, 2 sc per dc row end, and 3 sc per tr row end.
Outer Round 1
Join B in rocker Row 1 st 6 (next to the front hoof). Ch 1 and work toward the front end of the rocker, then all the way around the outside:
- A. Rocker top, front: sc in sts 6–2, 3 sc in st 1 = 8
- B. Rocker front end: row ends 1 + 2 + 1 = 4
- C. Rocker bottom: 1 sc in each of 57 sts, with 3 sc in the first and last sc = 61
- D. Rocker back end: 4
- E. Rocker top, back: 3 sc in st 43, sc in sts 42–38 = 8
- F. Back leg, rear edge: 4 dc rows × 2 + 1 = 9
- G. Rump: body row ends 2 + 2 + 2 + 1 + 1 = 8
- H. Back line: 2 sc in foundation st 31 (behind the tail), sc in sts 30–9 = 24
- I. Neck back: 2 + 2 + 3 = 7
- J. Head rim: sc in rim sts 37–7 = 31
- K. Muzzle: 3 row ends, 3 sc in first sc, sc in next 4, 3 sc in last sc, 3 row ends = 16
- L. Neck front: 3 + 2 + 2 = 7
- M. Chest: 8
- N. Front leg, front edge: 9
Join with sl st to first sc. Total: 204 sc.
Outer Round 2 (picot)
Ch 1, sc in next 2 sts, picot, sc in next st; rep from * around. Join with sl st. (68 repeats: 204 sc + 68 picots)*
Why the math works: each repeat uses exactly 3 sts, and 204 ÷ 3 = 68. The picots space out evenly with no leftover stitches. Along the head rim they form the cream mane, and along the rocker bottom they form the picot scallops.
Inner Window Round
Join B at the inner corner where the front leg meets the rocker. Work sc around the opening under the belly:
- Front leg inner edge: 9
- Belly sts 8–24: 17
- Back leg inner edge: 9
- Rocker sts 30–14: 17
That’s 52 sts worked into. At each of the 4 inner corners, work the last sc of one edge and the first sc of the next together as sc2tog. Join. (52 − 4 = 48 sc) The decreases keep the inward corners from rippling.
Hanging Loop
Join B in the picot-round sc nearest rim st 19 (the center top of the head). Ch 36, sl st in same st, then sl st in each ch back along the loop. Fasten off. The loop hangs about 1.5 in (3.8 cm) tall.
Weave in all ends along edges of the same color.
Final Blocking
- Soak the ornament in cool water for 5 minutes. Press out the water in a towel.
- Lay it RS up on the board. Pin the rocker top line straight, then pin the rocker ends up into a gentle arc, about 1/4 in (0.6 cm) higher than the center.
- Pin each fan open in the body and rocker, with one pin at each fan’s widest point.
- Pin the head wheel into a half circle and open the eye hole.
- Pin out every outer picot.
- Pin the tail loops so they curve back and down.
- Check the size: about 4.5 in (11.4 cm) × 4.25 in (10.8 cm).
- Spray with starch or stiffener if you like. Leave it to dry completely, usually 12–24 hours, then unpin.
Final Quality-Control Checklist
- The body is 31 sts wide, about 3.1 in (7.9 cm).
- Both fan bands are open and even (5 fans, then 4 fans plus 2 half fans).
- Each leg is 7 sts wide with 4 crossed rows.
- The head wheel has 13 spokes, and the rim has 37 sc.
- The eye hole is visible.
- The rocker has 43 sts and 7 fans.
- The outer border has 68 picots.
- The inner window has 48 sc and no ripples.
- The hanging loop is secure, and all ends are hidden.
- The ornament lies flat at about 4.5 in × 4.25 in (11.4 × 10.8 cm).
Troubleshooting
- Fans cup or ruffle: Your tension is too loose, or you worked an extra dc. Recount to 7 dc per fan.
- Body doesn’t line up with the rocker gap: Check that Row 5 has 2 sc (not 3) in each ch-3 sp, for 31 sts.
- Legs twist: Make sure each crossed dc goes over the front of the first dc, every row.
- Head wheel won’t lie flat: Block it more firmly, or go up one hook size for the treble row only.
- Border ripples: Check your row-end counts against the segment list. The total must be 204.
- Rocker won’t arc: Spray more stiffener and re-pin the ends higher.
Care
Hand wash in cool water with mild soap, press dry in a towel, and re-block flat. Store flat in tissue paper between seasons.
Final Notes
Here’s how the measurements connect. Thirty-one body sts give a 3.1 in (7.9 cm) body. Two 7-st legs leave a 17-st gap that matches the center of the rocker. The 43-st rocker gives 4.3 in (10.9 cm) before the border. The 204-st border then becomes 68 even picots, for a finished ornament of about 4.5 in × 4.25 in (11.4 × 10.8 cm). If you check each stage against its checkpoint, your horse will stand square on its rocker.
Happy crocheting!