

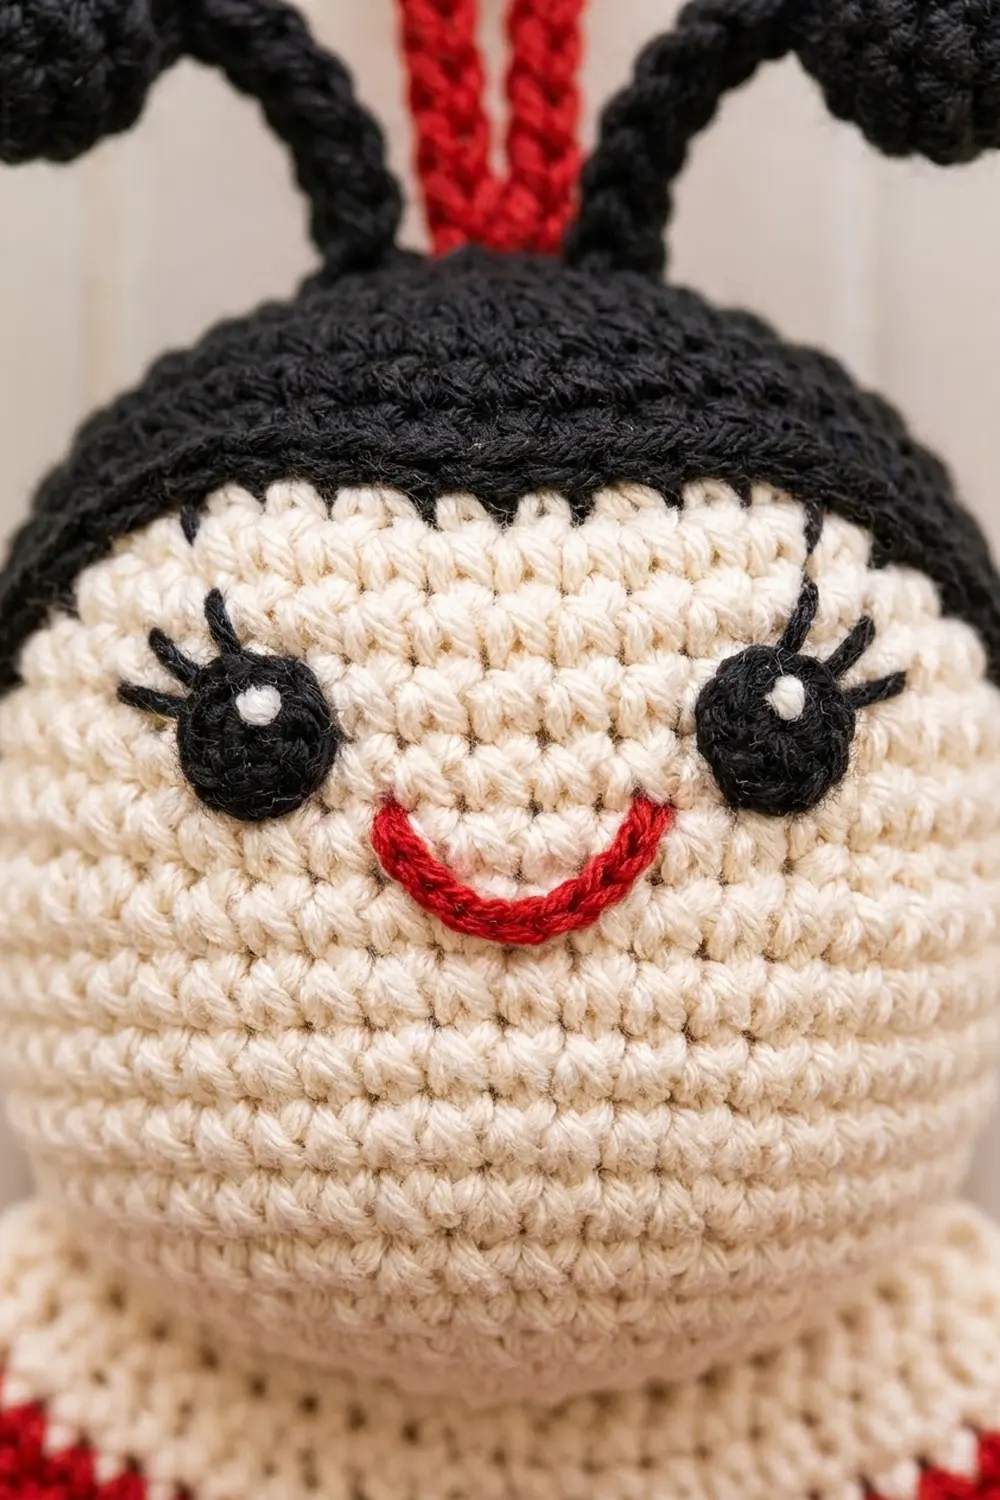
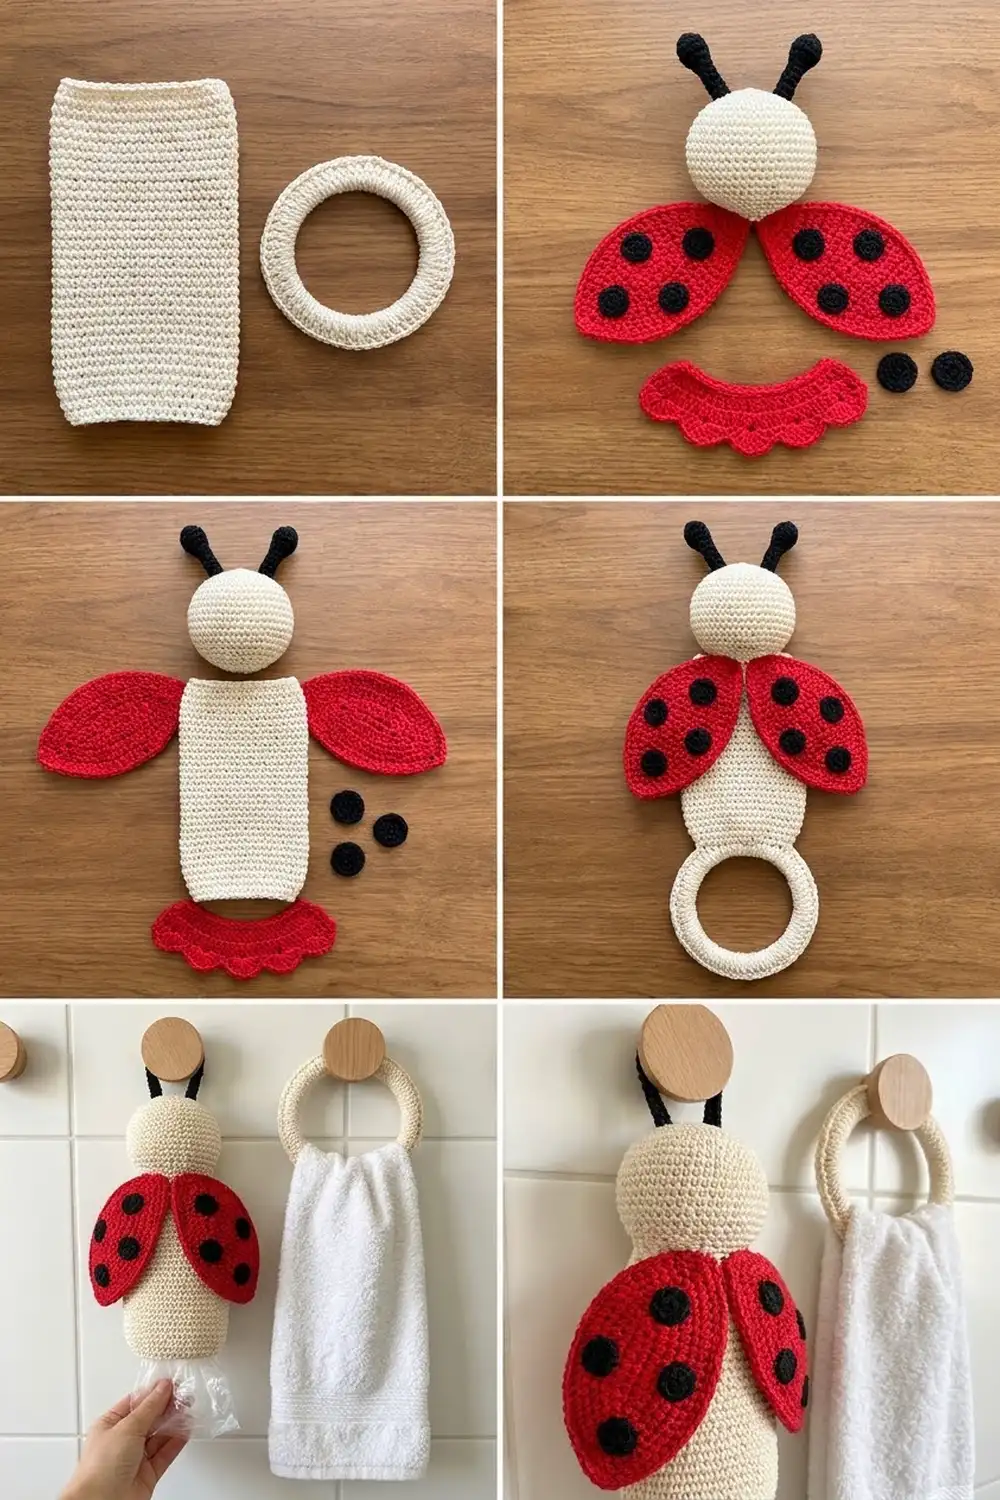
This cheerful kitchen-and-bath set has two matching items: a ladybug plastic bag holder and a ladybug towel ring. The bag holder has a cream bell-shaped body, a round smiling head with a black cap and curly antennae, two red spotted wings that open down the front, and a black-and-red scalloped hem. The towel ring has a smaller matching head on a plump cream ring, with a short scalloped trim along the bottom curve.
The set uses only three colors: cream, bright red and black. Everything is worked in worsted weight cotton for a firm, washable fabric. This pattern uses US crochet terms throughout.
Without its loop, the finished bag holder is about 13.25 in (33.7 cm) tall and about 6.5 in (16.5 cm) wide across the wings. Without its loop, the towel ring is about 7.25 in (18.4 cm) tall, and the ring itself is 5.25 in (13.3 cm) across.
Each item is built from separate pieces. You work the bag holder body top-down in spiral rounds and add the scalloped hem directly onto its last round. The heads, wings, spots, antennae, loops, ring cover and ring trim are made separately and sewn on.
Finished Size and Construction
- Bag holder size: 13.25 in (33.7 cm) tall, 6.5 in (16.5 cm) wide with wings
- Towel ring size: 7.25 in (18.4 cm) tall; ring 5.25 in (13.3 cm) outer diameter with a 3.75 in (9.5 cm) opening
- Skill level: Easy intermediate
- Terminology: US terms
- Yarn weight: Worsted (#4) cotton
- Hook: 4.0 mm (G-6)
- Number of items: 2, each assembled from several pieces
- Layout:
- Bag holder: body + head + 2 wings + 10 spots + 2 antennae + loop
- Towel ring: ring cover + head + 2 antennae + trim + loop
- Body size before hem: 10 in (25.4 cm) tall, 6 in (15.2 cm) wide at the bottom when laid flat
- Hem (border) depth: about 1 in (2.5 cm)
Materials
Choose a smooth worsted cotton, either mercerized or soft. Cotton holds its shape, doesn’t stretch under the weight of bags or towels and survives regular washing.
- Cream: 120 g / 190 m (body, both heads, ring cover)
- Red: 50 g / 80 m (wings, hem edging, ring trim edging, loops, smiles)
- Black: 30 g / 50 m (caps, antennae, spots, black scallops, eyes)
These amounts include about 15 percent extra for testing gauge and for yarn tails.
Tools:
- 4.0 mm (G-6) crochet hook
- Plastic macramé ring, 4.5 in (11.4 cm) outer diameter
- Polyester fiberfill
- Stitch markers
- Tapestry needle
- Sewing pins
- Scissors
Abbreviations (US Terms)
- ch: chain
- sl st: slip stitch
- sc: single crochet
- dc: double crochet
- inc: 2 sc in the same stitch
- sc2tog: single crochet 2 together
- sc3tog: single crochet 3 together
- MR: magic ring
- st(s): stitch(es)
- rnd(s): round(s)
Special stitch (Scallop): 7 dc worked into the same stitch.
Gauge and Checkpoints
Gauge: 18 sc and 20 rnds = 4 in (10.2 cm) in sc worked in the round. That works out to 4.5 sts and 5 rnds per 1 in (2.5 cm).
Make the bag holder head first as your test piece. After Rnd 6 it should measure about 2.5 in (6.4 cm) across when laid flat.
Checkpoints:
- Body after Rnd 1: 30 sts, about 6.7 in (17.0 cm) around and 3.3 in (8.4 cm) wide flat
- Body after Rnd 30: 54 sts, 6 in (15.2 cm) wide flat and 6 in (15.2 cm) tall
- Body after Rnd 50: 54 sts, 6 in (15.2 cm) wide flat and 10 in (25.4 cm) tall
- Wing after Row 46: 3.3 in (8.4 cm) wide and 9.2 in (23.4 cm) long
- Ring cover strip: 2.67 in (6.8 cm) wide and 13.2 in (33.5 cm) long
If your pieces come out too big, use a hook 0.5 mm smaller. If they come out too small, use a hook 0.5 mm larger. A firm fabric matters more than an exact size, because the stuffing should not show through.
Bag Holder Body
Work in continuous spiral rounds unless told otherwise. Place a marker in the first st of each round and move it up as you go.
With cream, ch 30. Join with a sl st to the first ch, taking care not to twist the chain.
Rnd 1: Sc in each ch around. (30)
Rnds 2–5: Sc in each st around. (30)
Rnd 6: (Sc in next 4 sts, inc) 6 times. (36)
Rnds 7–13: Sc around. (36)
Rnd 14: (Sc in next 5 sts, inc) 6 times. (42)
Rnds 15–21: Sc around. (42)
Rnd 22: (Sc in next 6 sts, inc) 6 times. (48)
Rnds 23–29: Sc around. (48)
Rnd 30: (Sc in next 7 sts, inc) 6 times. (54)
Rnds 31–50: Sc around. (54)
Sl st in the next st to smooth out the step at the end of the spiral. Fasten off cream. You now have a bell-shaped tube, open at both ends, 10 in (25.4 cm) tall.
The hem is worked onto Rnd 50; see the Border section.
Bag Holder Head
With black, make a MR.
Rnd 1: 6 sc in MR. (6)
Rnd 2: Inc in each st. (12)
Rnd 3: (Sc, inc) 6 times. (18)
Rnd 4: (Sc in next 2 sts, inc) 6 times. (24)
Rnd 5: (Sc in next 3 sts, inc) 6 times. (30)
Rnd 6: (Sc in next 4 sts, inc) 6 times. (36)
Change to cream.
Rnds 7–13: Sc around. (36)
Rnd 14: (Sc in next 4 sts, sc2tog) 6 times. (30)
Rnd 15: (Sc in next 3 sts, sc2tog) 6 times. (24)
Start stuffing firmly.
Rnd 16: (Sc in next 2 sts, sc2tog) 6 times. (18)
Rnd 17: (Sc, sc2tog) 6 times. (12)
Rnd 18: Sc2tog 6 times. (6)
Finish stuffing, fasten off and close the hole. The black cap covers the top third of the head.
Face: With black, embroider two small oval eyes between Rnds 10 and 11, 6 sts apart, with two tiny lash strokes at the outer corner of each eye. With red, embroider a smile 3 sts wide, centered 2 rnds below the eyes.
Towel Ring Head
With black, make a MR.
Rnds 1–5: Work as for Bag Holder Head Rnds 1–5. (30)
Change to cream.
Rnds 6–10: Sc around. (30)
Rnd 11: (Sc in next 3 sts, sc2tog) 6 times. (24)
Rnd 12: (Sc in next 2 sts, sc2tog) 6 times. (18)
Stuff firmly.
Rnd 13: (Sc, sc2tog) 6 times. (12)
Rnd 14: Sc2tog 6 times. (6)
Fasten off and close the hole. The head is about 2.25 in (5.7 cm) across. Embroider the face as for the bag holder, with the eyes between Rnds 8 and 9, 5 sts apart.
Wings (Make 2, Red)
Ch 2.
Row 1: 3 sc in 2nd ch from hook, turn. (3)
Row 2: Ch 1, inc in first st, sc across to last st, inc in last st, turn. (5)
Row 3: Ch 1, sc across, turn. (5)
Rows 4–12: Repeat Rows 2 and 3, ending with a Row 2 repeat. Even-numbered rows increase and odd-numbered rows keep the count:
– Row 4: 7 sts
– Row 6: 9 sts
– Row 8: 11 sts
– Row 10: 13 sts
– Row 12: 15 sts
Rows 13–34: Ch 1, sc across, turn. (15)
Row 35: Ch 1, sc2tog, sc across to last 2 sts, sc2tog, turn. (13)
Rows 36–45: Alternate a plain row with a Row 35 decrease row. Even-numbered rows are plain and odd-numbered rows decrease:
– Row 36: 13 sts
– Row 37: 11 sts
– Row 39: 9 sts
– Row 41: 7 sts
– Row 43: 5 sts
– Row 45: 3 sts
Row 46: Ch 1, sc3tog. (1)
Edging Rnd: Do not turn. Work 3 sc in the tip. Work 1 sc in each row-end down the first long side (46), then 3 sc in the tip at the foundation ch. Work 1 sc in each row-end up the second long side (46), then join. (98)
With edging, each wing is a pointed oval about 3.5 in (8.9 cm) wide and 9.5 in (24.1 cm) long.
Spots (Make 10, Black)
Rnd 1: 6 sc in MR. (6)
Rnd 2: Inc in each st. (12)
Sl st to join and fasten off, leaving a long tail. Each spot is about 0.85 in (2.2 cm) across.
Antennae (Make 4, Black)
Bag holder pair (make 2): Ch 14. Work 3 sc in each of the 2nd, 3rd and 4th ch from hook. Sl st in each of the remaining 10 ch. The 3-sc section curls into a ball at the tip. Each antenna is about 2 in (5.1 cm) long.
Towel ring pair (make 2): Ch 11. Work 3 sc in each of the 2nd, 3rd and 4th ch from hook. Sl st in each of the remaining 7 ch. Each antenna is about 1.5 in (3.8 cm) long.
Hanging Loops (Make 2, Red)
Ch 26.
Row 1: Sc in 2nd ch from hook and in each ch across. (25)
Fasten off, leaving a long tail. The strip is 5.6 in (14.2 cm) long and folds in half into a loop about 2.75 in (7.0 cm) tall.
Towel Ring Cover (Cream)
Ch 13.
Row 1: Sc in 2nd ch from hook and in each ch across, turn. (12)
Rows 2–66: Ch 1, sc across, turn. (12)
Fasten off, leaving a long tail. The strip is 2.67 in (6.8 cm) wide and 13.2 in (33.5 cm) long.
Make All Pieces
Cream: 1 body, 1 large head (Rnds 7–18), 1 small head (Rnds 6–14), 1 ring cover.
Red: 2 wings, 2 loops, the red edging round of the hem, the red edging row of the ring trim.
Black: 10 spots, 4 antennae, 2 head caps, the black rounds of the hem, the black base of the ring trim.
Bag holder front layout:
          [loop]
       [antenna x2]
         [ HEAD ]
   [WING]  cream  [WING]
   spots   center  spots
   x5      strip   x5
   [ black scallop hem ]
   [  red scallop edge  ]
Towel ring front layout:
      [loop]
   [antenna x2]
     [ HEAD ]
   (  cream   )
  (    ring    )
   ( [trim] )
Joining
Sew every seam with the tapestry needle and matching yarn tails. Pull each stitch snug but not tight, so the seams lie flat without puckering.
Bag holder head to body:
1. Push the head, closed end down, into the top opening of the body until head Rnd 14 lines up with body Rnd 1.
2. Both rounds have 30 sts, so whipstitch them together 1 st to 1 st all the way around.
Head Rnds 15–18 sit hidden inside the body, which closes the top.
Spots: Pin 5 spots on each wing in a loose column: 2 near the top, 1 in the middle and 2 near the bottom. Sew around the edge of each spot.
Wings:
1. Pin each wing so its top tip sits just under the head, angled outward.
2. Place them so the inner edges meet at the top and spread to about 1.5 in (3.8 cm) apart at the bottom, leaving the cream center showing.
3. Sew each wing along its outer long edge and top tip only. The inner edges stay free so the wings look slightly open.
Antennae and loop: Sew the antennae to the black cap about 6 sts apart. Fold the loop strip in half and sew both ends to the top of the head between the antennae.
Ring cover:
1. Wrap a thin layer of fiberfill around the plastic ring.
2. Wrap the strip around the ring and whipstitch the long edges together on the inner side of the ring, 1 row-end to 1 row-end (66 to 66).
3. Whipstitch the short ends together, 12 sts to 12 sts.
Towel ring head: Sew the base of the small head to the top of the ring, over the cover seam, catching about 8 sts on each side. Sew on the antennae 5 sts apart and the loop between them.
Size checkpoint: The bag holder should measure about 13.25 in (33.7 cm) from the top of the head to the bottom of the hem scallops. The towel ring should measure about 7.25 in (18.4 cm) from the top of the head to the bottom of the ring.
Using the bag holder: Push bags up into the body through the hem opening, then pull them out one at a time from the bottom.
Border
Border gauge: Each scallop repeat uses 6 base sts, which is 1.33 in (3.4 cm).
Bag Holder Hem
Join black in the last st of body Rnd 50. Work the hem in joined rounds.
Rnd 51: Ch 1, sc in each st around, join. (54)
Rnd 52: Ch 1, sc in first st, *skip 2 sts, scallop in next st, skip 2 sts, sc in next st; repeat from * 7 more times. Skip 2 sts, scallop in next st, skip 2 sts, join to first sc. (9 scallops: 9 sc + 63 dc = 72 sts)
Fasten off black. Join red in any sc.
Rnd 53: *Sl st in sc, sc in next dc, inc in each of next 5 dc, sc in next dc; repeat from * 8 more times, join. (9 sl st + 108 sc = 117 sts)
Fasten off and weave in the ends.
Why the math works: Rnd 51 has 54 sts, and 54 ÷ 6 = 9 repeats exactly, so the scallops close evenly with no half scallop. Rnd 53 puts 12 sc on each 7-dc scallop (1 + 10 + 1) plus 1 sl st between scallops, so the total is 9 × 13 = 117.
Towel Ring Trim
With black, ch 26.
Row 1: Sc in 2nd ch from hook and in each ch across, turn. (25)
Row 2: Ch 1, sc in first st, *skip 2 sts, scallop in next st, skip 2 sts, sc in next st; repeat from * 3 more times. (4 scallops: 5 sc + 28 dc = 33 sts)
Fasten off black. Join red in the first sc.
Row 3: *Sl st in sc, sc in next dc, inc in each of next 5 dc, sc in next dc; repeat from * 3 more times, sl st in last sc. (5 sl st + 48 sc = 53 sts)
Why the math works: 25 = 1 + (4 × 6), so the row starts and ends on an sc. The trim is 5.6 in (14.2 cm) long. Center it along the bottom outer curve of the ring and sew Row 1 to the cover.
Final Blocking
- Weave in all remaining tails.
- Lightly mist the wings and both scalloped trims with water.
- Pin each wing flat to its pointed shape, 3.5 in (8.9 cm) by 9.5 in (24.1 cm).
- Open out each scallop with your fingers so the curves sit evenly.
- Hold a steam iron just above the body and the ring without pressing down, then shape them by hand.
- Don’t steam the stuffed heads hard; just reshape them into rounds.
- Let everything dry completely before hanging.
Final Quality-Control Checklist
- The body has 54 sts at the hem and 9 even scallops.
- The head sits straight, with 30 sts matched to 30 sts.
- Both heads are firm, with no stuffing showing.
- Eyes and smiles are level and centered.
- The wings are mirror images, with 5 spots each.
- The antennae curl outward evenly.
- The ring cover seam faces the inside of the ring.
- The ring trim is centered on the bottom curve.
- Both loops are sewn on securely through several rounds.
Troubleshooting
Body flares or ripples: Your increases are too close together or your gauge is loose. Use a smaller hook.
Body is too narrow for bags: Your gauge is tight. Use a larger hook and recheck the Rnd 30 checkpoint.
Scallops look cupped: Rnd 52 is skipping too few sts. Make sure you skip 2 sts on each side of every scallop.
Wing tips are blunt: Check that the edging has exactly 3 sc in each tip.
Ring cover won’t close: Use less fiberfill, or add 2 rows to the strip.
Head tilts forward: Sew it on again, matching every body st to a head st with none skipped.
Care
Hand wash in cool water with mild soap, roll in a towel to press out the water and dry flat. Reshape the heads and scallops while still damp.
Final Notes
The measurements build on each other. At a gauge of 4.5 sts per 1 in (2.5 cm), the 30-st top of the body matches the 30-st head round. The 54-st body is 6 in (15.2 cm) wide when laid flat, and its 54-st hem divides into 9 scallops. The 66-row cover fits the 4.5 in (11.4 cm) ring, and the 25-st trim divides into 4 scallops. Check each number as you go and both ladybugs will come out the right size.
Happy crocheting!