
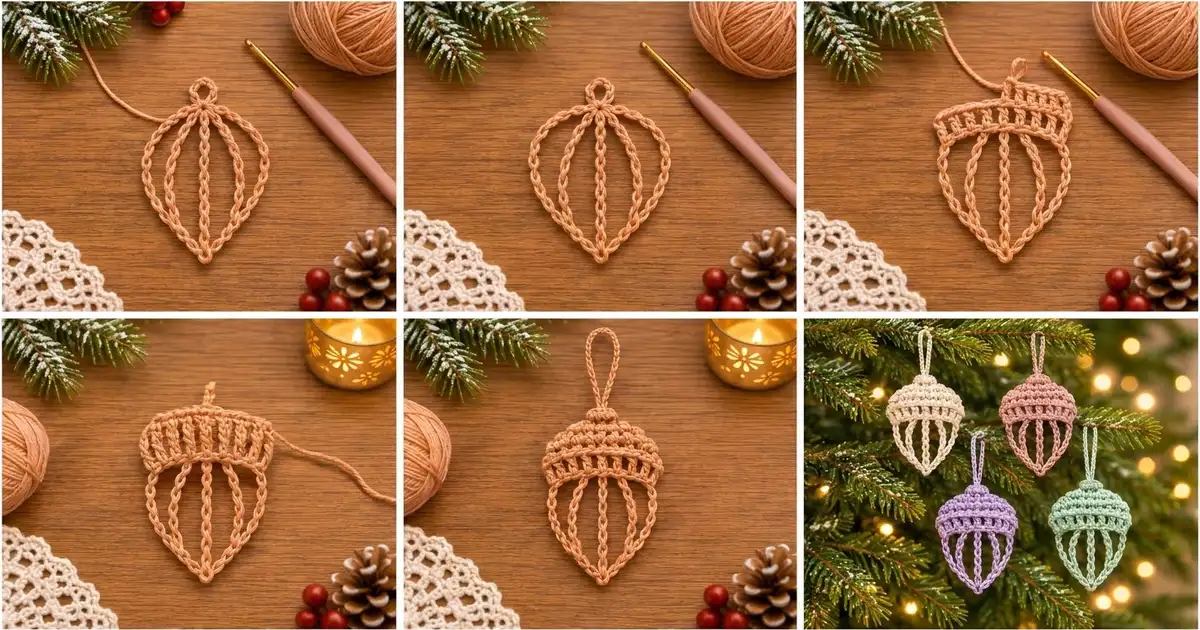
This little acorn is mostly open space. The body is made of five slip-stitch cords that fan out from a pointed tip, and a solid, textured domed cap holds them together. It reads as an acorn even from across the room, and it uses only a few grams of yarn.
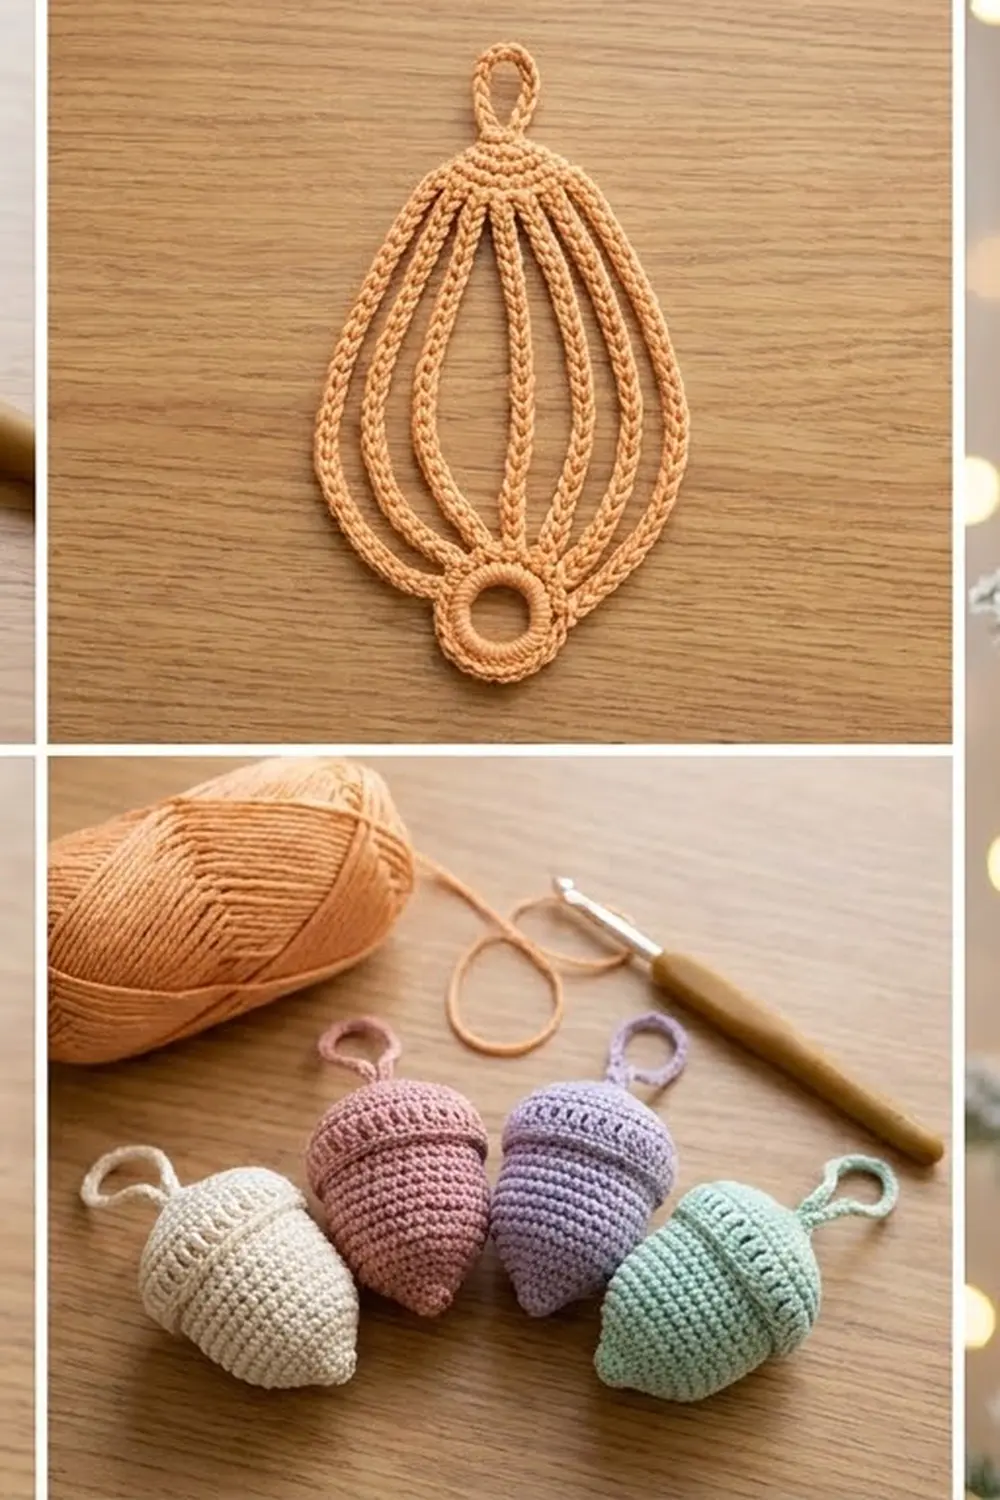
The sample is worked in a soft apricot cotton, which gives a warm, natural look that suits both autumn and Christmas. The same pattern also looks lovely in cream, dusty pink, lavender and mint if you want a pastel set for the tree. Each ornament uses one color from start to finish.
The pattern is written in US crochet terms. The finished acorn measures about 2.75 in (7.0 cm) wide and 4 in (10.2 cm) tall, plus a 1.5 in (3.8 cm) hanging loop. That makes it about 5.5 in (14.0 cm) long when hanging.
Construction is simple. First you make the frame: a tiny ring at the bottom tip with five slip-stitch cords growing out of it. Then you join new yarn at the top of the cords and work the cap in flat rows, catching all five cords in the first row. The cap ends in a small nub and a firm, corded hanging loop.
Finished Size and Construction
- Finished size: 2.75 in (7.0 cm) wide x 4 in (10.2 cm) tall, without loop
- Hanging loop: about 1.5 in (3.8 cm)
- Skill level: Easy-intermediate
- Terminology: US crochet terms
- Yarn weight: DK (#3) cotton or cotton blend
- Hook: 3.5 mm (E-4)
- Number of pieces: 1
- Layout: single flat ornament, worked in one color
- Piece size: 2.75 in (7.0 cm) x 4 in (10.2 cm)
- Size before border: same, 2.75 in (7.0 cm) x 4 in (10.2 cm)
- Border depth: none, 0 in (0 cm). The cords and cap rim are the finished edges.
Materials
Choose a smooth, tightly plied cotton. Mercerized cotton gives crisp, well-defined cords like the ones in the photo, while fuzzy yarns blur the lines. Any DK cotton that meets the gauge below will work. Avoid very stretchy blends, because the cords need to hold their curves.
- Apricot (main sample): 5 g, about 11 m
- Optional colorways, per ornament: Cream 5 g (11 m), Dusty Pink 5 g (11 m), Lavender 5 g (11 m), Mint 5 g (11 m)
Tools:
- 3.5 mm (E-4) crochet hook
- Tapestry needle
- Scissors
- Rust-proof pins and a blocking mat or folded towel
- Spray bottle with water
- Optional: fabric stiffener or starch
Quantities include a small safety margin. One ornament actually uses closer to 4 g (about 9 m).
Abbreviations (US Terms)
- ch: chain
- sl st: slip stitch
- sc: single crochet
- dc: double crochet
- sc2tog: single crochet 2 together
- sp: space
- st(s): stitch(es)
- sk: skip
Special stitch: slip-stitch cord. Chain the number given, then sl st in the 2nd ch from the hook and in each remaining ch back to the start. Work each sl st into the back bump of the chain. The skipped chain sits at the top of the cord and becomes the point where you attach the cap later. This gives each line of the body its firm, slightly twisted look.
Gauge and Checkpoints
Gauge matters here for proportion rather than fit, but it keeps the cords and cap in balance.
- Slip-stitch cord: 6 sl sts = 1 in (2.5 cm)
- Single crochet: 7 sc and 8 rows = 1 in (2.5 cm)
Make one test cord of 15 sl sts first. It should measure 2.5 in (6.4 cm). If it is longer, go down to a 3.25 mm hook. If it is shorter, go up to a 3.75 mm hook. Slip stitches tend to tighten, so keep them relaxed and the same size as your chains.
To check single crochet gauge, chain 15, work 8 rows of 14 sc, and measure the middle 7 stitches. They should measure 1 in (2.5 cm).
Checkpoints:
- Frame: center cord 2.5 in (6.4 cm), inner cords 2.8 in (7.1 cm), outer cords 3.3 in (8.4 cm).
- Cap Row 1: 2.4 in (6.1 cm) across.
- Cap Row 2: 2.75 in (7.0 cm) across.
- After Cap Row 4: cap band about 0.75 in (1.9 cm) tall.
- Finished acorn: 2.75 in (7.0 cm) x 4 in (10.2 cm), plus the loop.
If the cap is too wide, the cords will hang loose and straight, so drop a hook size for the cap only. If the cap is too narrow, the outer curves will pucker, so go up a hook size for the cap only.
Part 1: Body Frame
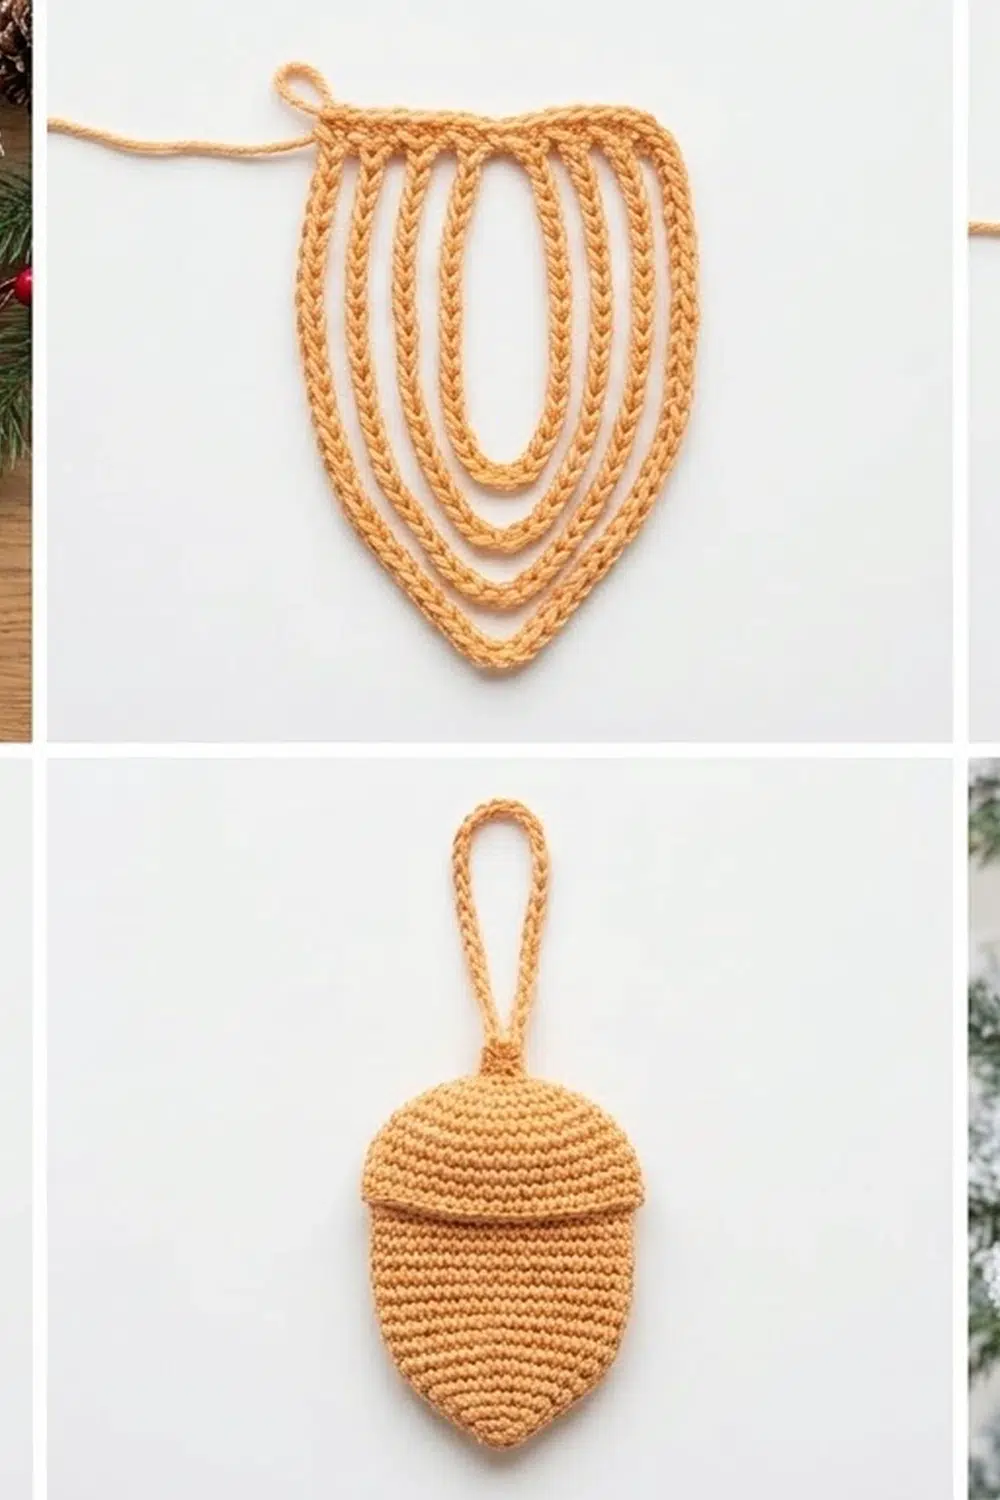
The frame starts at the bottom tip, and all five cords grow from the same small ring. Before you begin, leave a 4 in (10.2 cm) starting tail. You will use it later to close the ring. Work every cord back toward the ring, so your hook always ends at the tip.
Tip ring: Ch 4, sl st in first ch to form a ring.
Outer cord 1: Ch 21, sl st in 2nd ch from hook and in each ch back down (20 sl sts), sl st in ring.
Inner cord 1: Ch 18, sl st in 2nd ch from hook and in each ch back down (17 sl sts), sl st in ring.
Center cord: Ch 16, sl st in 2nd ch from hook and in each ch back down (15 sl sts), sl st in ring.
Inner cord 2: Ch 18, sl st in 2nd ch from hook and in each ch back down (17 sl sts), sl st in ring.
Outer cord 2: Ch 21, sl st in 2nd ch from hook and in each ch back down (20 sl sts), sl st in ring.
Fasten off, leaving a 4 in (10.2 cm) tail. Thread the starting tail through the ring and pull gently to close it into a neat point. Weave in both tails.
Frame count check: You should have 5 cords on one ring, in the order 20 – 17 – 15 – 17 – 20 sl sts. Lay the frame flat and fan the cords out in that order with no twists. The top of each cord is its skipped chain, and you will crochet into it in Cap Row 1.
Part 2: Cap
The cap is worked flat in rows from bottom to top, directly on the cord tops. Turn at the end of every row. The ch 1 at the start of sc rows does not count as a stitch.
Before you join, place a stitch marker in the top chain of each cord so you can find it easily. Insert your hook under both strands of that top chain, not just one, so the cord is held firmly.
Row 1 (anchor row): Join yarn with sc in the top ch of the first outer cord. [Ch 3, sc in top ch of next cord] 4 times, ending in the second outer cord. (5 sc + 4 ch-3 sps = 17 sts)
Check: Row 1 measures 2.4 in (6.1 cm). The center cord should hang straight, and the other four should start to curve outward.
Row 2 (rim, conversion row): Ch 1, turn. 2 sc in first sc, [3 sc in next ch-3 sp, sc in next sc] 3 times, 3 sc in last ch-3 sp, 2 sc in last sc. (17 sts worked 1-per-existing-stitch + 2 extra sc = 19 sc)
The two extra stitches at the ends make the cap stick out slightly past the outer cords. Check: Row 2 measures 2.75 in (7.0 cm) across.
Row 3 (post band): Ch 4 (counts as dc + ch 1), turn. Sk next sc, [dc in next sc, ch 1, sk next sc] 8 times, dc in last sc. (10 dc + 9 ch-1 sps = 19 sts)
This row makes the band of upright posts with small gaps that gives the cap its texture.
Row 4: Ch 1, turn. Sc in each dc and each ch-1 sp across, ending with sc in 3rd ch of turning ch. (19 sc)
Check: the cap band is about 0.75 in (1.9 cm) tall from the cord tops.
Row 5: Ch 1, turn. Sc2tog, sc in next 15 sts, sc2tog. (17 sc)
Row 6: Ch 1, turn. Sc2tog, sc in next 13 sts, sc2tog. (15 sc)
Row 7: Ch 1, turn. [Sc2tog] twice, sc in next 7 sts, [sc2tog] twice. (11 sc)
Row 8: Ch 1, turn. [Sc2tog] twice, sc in next 3 sts, [sc2tog] twice. (7 sc)
Row 9: Ch 1, turn. Sc2tog, sc in next 3 sts, sc2tog. (5 sc)
Row 10: Ch 1, turn. Sc2tog, sc in next st, sc2tog. (3 sc)
Row 11 (nub): Ch 1, turn. Sc in each st across. (3 sc)
Rows 5 to 9 round off the dome, and Rows 10 and 11 form the small nub at the top.
Hanging loop: Ch 18, sl st in the center sc of Row 11 to form a loop. Sl st in each of the 18 ch around the loop, then sl st again in the center sc. Fasten off and weave in all ends along the cap edges.
Cap count check: 17 – 19 – 19 – 19 – 17 – 15 – 11 – 7 – 5 – 3 – 3. The cap is about 1.5 in (3.8 cm) tall. The cord tops sit at the base of the cap, so the acorn measures about 2.5 in (6.4 cm) + 1.5 in (3.8 cm) = 4 in (10.2 cm) tall.
Border
This design has no added border round. The cords and the cap rim are the finished edges, and an extra round would close up the open body and hide the cords.
- Border gauge: not needed. The edges follow the cord gauge of 6 sl sts = 1 in (2.5 cm) and the sc gauge of 7 sc = 1 in (2.5 cm).
- Left edge of the body: outer cord 1, 20 sl sts.
- Right edge of the body: outer cord 2, 20 sl sts.
- Bottom edge of the cap: Row 2, 19 sc.
Why the math works: The two outer cords both have 20 sl sts, so the acorn is symmetrical. Each outer cord is 3.3 in (8.4 cm) long, which is longer than the straight distance from the tip to the cap corner. That extra length bows outward into the rounded curve. The cap rim (19 sc) is 0.35 in (0.9 cm) wider than Row 1, so the cap sticks out by the same small amount on both sides.
Final Blocking
- Spray the ornament until it is damp all the way through, or soak it briefly.
- Lay it flat on the blocking mat, right side up.
- Pin the tip ring at the bottom center.
- Pin the cap corners so Row 2 measures 2.75 in (7.0 cm).
- Pin the top of the center cord straight below the nub, so the acorn is 4 in (10.2 cm) tall.
- Shape the inner cords into gentle curves, then the outer cords into wider curves. Use 2 to 3 pins per cord.
- Check that the widest part of the body is about 2.5 in (6.4 cm).
- Optional: brush on fabric stiffener for crisper cords.
- Pin the loop straight up and let everything dry completely before unpinning.
Final Quality-Control Checklist
- Five cords, in the order 20 – 17 – 15 – 17 – 20 sl sts
- No twisted cords, and all curves are smooth
- Tip ring pulled closed into a neat point
- Cap Row 1 catches each cord in its top chain
- Cap Row 2 has 19 sc and measures 2.75 in (7.0 cm)
- Post band shows 10 upright dc with even gaps
- Dome decreases match on the left and right
- Nub is centered, and the loop is corded and firmly attached
- Finished size is 2.75 in (7.0 cm) x 4 in (10.2 cm), plus a 1.5 in (3.8 cm) loop
- All ends are woven in and invisible
Troubleshooting
Cords look thin and floppy. Your slip stitches are too loose. Work them into the back bump of each chain and keep your tension even.
Cords are too short and the body puckers. Your slip stitches are too tight. Relax your grip, or go up half a hook size for the frame only.
The acorn leans to one side. Count the cords. The two outer cords must match each other, and so must the two inner cords.
A cord pulls loose from the cap. You probably worked into only one strand of the top chain. Undo Row 1 and work under both strands.
Cap ruffles. Check Row 2. It should have exactly 19 sc, and more than that will make the cap flare.
Dome looks pointed rather than round. Make sure Rows 7 and 8 have two decreases at each end.
Gaps in the post band close up. Keep each ch 1 loose, about the same height as a sc.
Loop stretches. Work the round of slip stitches around the loop chain, which makes the cord firm.
Care
Hand wash in cool water with mild soap, roll the ornament in a towel to remove water, and re-block it flat to dry. Store it flat or hanging, away from heavy ornaments that could crush the cap.
Final Notes
Here is how the measurements build on each other. A gauge of 6 sl sts per 1 in (2.5 cm) gives a center cord of 2.5 in (6.4 cm), inner cords of 2.8 in (7.1 cm) and outer cords of 3.3 in (8.4 cm). Cap Row 1 spans 2.4 in (6.1 cm), and Row 2 widens to 19 sc and 2.75 in (7.0 cm). The dome adds 1.5 in (3.8 cm) of height, giving a finished acorn of 2.75 in (7.0 cm) x 4 in (10.2 cm). With the 1.5 in (3.8 cm) loop, it hangs about 5.5 in (14.0 cm) long.
Make one in apricot, then try a whole pastel set for the tree. Happy crocheting!