

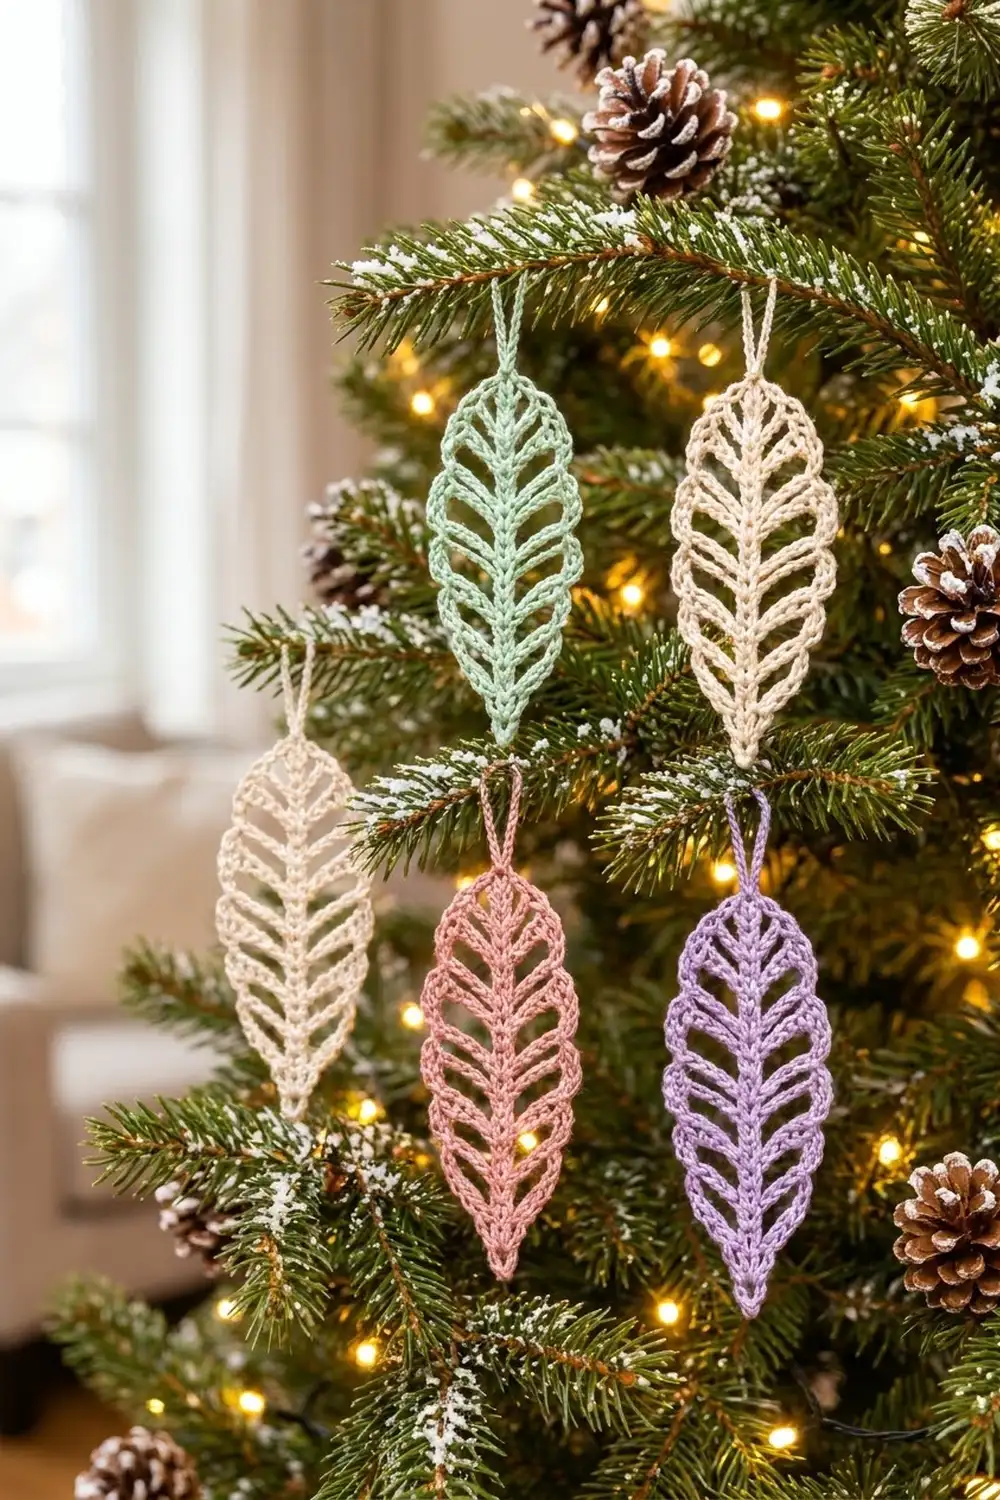
The Winter Vein Leaf is a light, lacy ornament with a solid center spine and open, angled veins on each side. A scalloped single crochet edge outlines the leaf, and a slim chain loop at the tip lets it hang from a tree branch, gift tag or window hook.
The sample is shown in four soft colors: cream, mint green, dusty pink and lavender. Each leaf is one color. Fine mercerized cotton gives crisp stitch definition and blocks into a clean shape, so a group of leaves in mixed pastels looks calm and wintry.
This pattern uses US crochet terms. The finished leaf measures 5 in (12.7 cm) tall and 2 in (5.1 cm) wide, not counting the hanging loop. The loop adds 1.25 in (3.2 cm), so the total height is 6.25 in (15.9 cm).
Construction is simple. You chain a foundation and work one row of single crochet to form the spine. Next, you work chain arches of graded lengths along both sides of the spine. Finally, you cover every arch with single crochet and add a pointed base and a hanging loop in the same round. The leaf is one piece with only two ends to weave in.
Finished Size and Construction
- Finished size: 5 in (12.7 cm) tall × 2 in (5.1 cm) wide
- With hanging loop: 6.25 in (15.9 cm) tall
- Skill level: Easy
- Terminology: US crochet terms
- Yarn weight: Fingering-weight (1, super fine) mercerized cotton or size 3 crochet thread
- Hook: 2.25 mm (US B-1)
- Number of pieces: 1
- Layout: Single vertical leaf, hanging loop at the tip, point at the base
- Piece size: 5 in (12.7 cm) × 2 in (5.1 cm)
- Size before border: 4.5 in (11.4 cm) × 1.5 in (3.8 cm)
- Border depth: 0.25 in (0.6 cm) on each side and end
Materials
Yarn: Use a smooth, tightly plied mercerized cotton in fingering weight (about 170 m per 50 g). Cotton holds the open veins in shape after blocking. Fuzzy or very soft yarns hide the chain arches and won’t hold a sharp point.
Each leaf uses about 3 g. Amounts per color:
- Cream: 5 g (17 m)
- Mint green: 5 g (17 m)
- Dusty pink: 5 g (17 m)
- Lavender: 5 g (17 m)
You only need one color per leaf. These quantities include a margin for a gauge swatch and tails.
Tools:
- 2.25 mm (US B-1) crochet hook
- Tapestry needle
- Scissors
- Blocking mat or folded towel
- Rust-proof pins
- Spray bottle with water
- Optional: liquid fabric stiffener or starch
Abbreviations (US Terms)
- ch – chain
- sc – single crochet
- sl st – slip stitch
- st(s) – stitch(es)
- sp – space
- sk – skip
- rnd – round
- [ ] – repeat the instructions inside the brackets as directed
Special technique – free loops of foundation chain: After Row 1, turn the work so the foundation chain is on top. Work into the single loop of each chain that is not already holding a stitch. Each free loop sits directly below a Row 1 sc, so both sides have the same number of stitches.
Gauge and Checkpoints
Gauge: 14 sc = 2 in (5.1 cm) in the spine row, worked with a 2.25 mm hook.
Make one leaf as your test piece before you commit to a full set. A leaf takes less thread than a standard swatch and shows you the real gauge, the arch tension and the blocked shape.
Checkpoints:
- After Row 1: The spine of 31 sc measures about 4.4 in (11.2 cm).
- After Round 1: Pinned flat, the leaf measures 4.5 in (11.4 cm) long and 1.5 in (3.8 cm) at the widest point.
- After Round 2: Blocked, the leaf measures 5 in (12.7 cm) × 2 in (5.1 cm), and the hanging loop stands 1.25 in (3.2 cm) above the tip.
If your spine is too long: Switch down to a 2.0 mm hook.
If your spine is too short: Switch up to a 2.5 mm hook.
Keep the arch chain counts unchanged. The leaf’s shape depends on those counts relative to each other, so change the hook size rather than the number of chains.
Pattern
Foundation and Spine
Foundation: Leave a 6 in (15.2 cm) tail and ch 32.
Row 1 (spine): Sc in the 2nd ch from the hook and in each ch across. Do not turn yet. (31 sc)
Stitch 1 is the first sc you worked, at the base end. Stitch 31 is the last sc, at the tip end. Your hook is now at the tip.
Checkpoint: The spine measures about 4.4 in (11.2 cm).
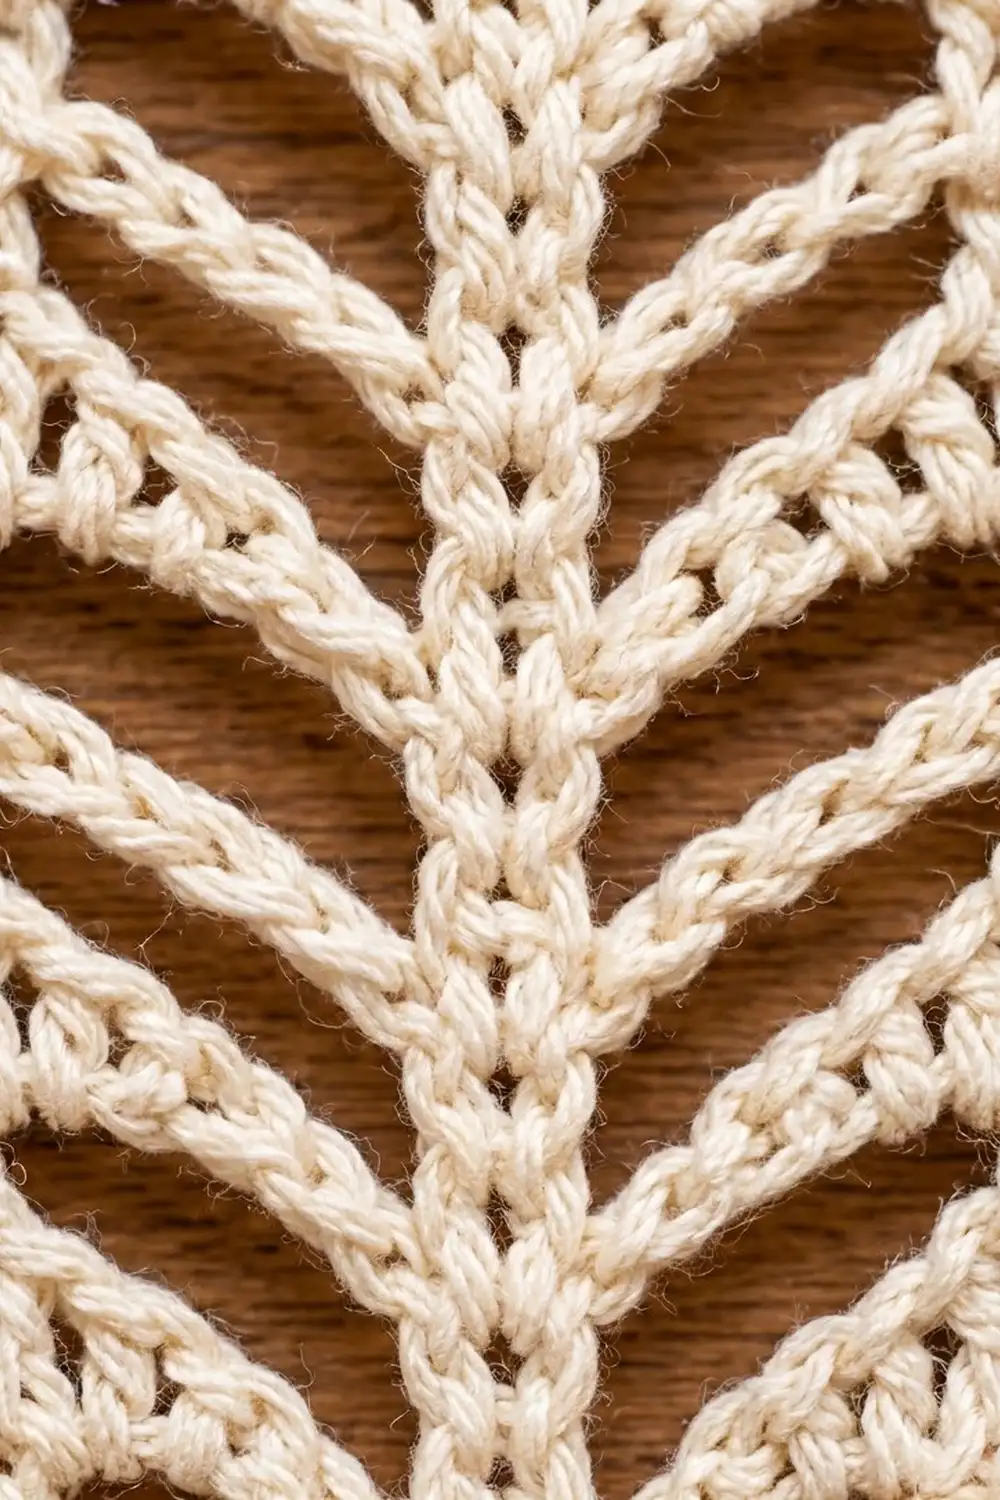
Round 1 – Vein Arches
In this round you work 10 chain arches down one side of the spine and 10 arches up the other side. The arches are short near the ends and long in the middle, which gives the almond shape.
Arch sequence for each side (in working order): ch 5, ch 7, ch 9, ch 11, ch 11, ch 11, ch 11, ch 9, ch 7, ch 5.
Side 1 (tip to base, along the tops of the Row 1 sc):
Ch 1, turn. Sc in st 31 (tip). Then work the following 10 times, using the next chain length in the sequence each time: [ch X, sk 2 sts, sc in next st]. Your last sc lands in st 1 (base).
The sc land in sts 31, 28, 25, 22, 19, 16, 13, 10, 7, 4 and 1. That is 11 sc and 10 arches.
Base point: Ch 3, then rotate the work to the foundation chain.
Side 2 (base to tip, along the free loops of the foundation chain):
Sc in the free loop below st 1. Then work the following 10 times, using the sequence again: [ch X, sk 2 loops, sc in next loop]. Your last sc lands in the free loop below st 31 (tip).
Tip: Ch 3, then sl st to the first sc of the round.
Stitch count for Round 1:
- 22 sc (11 per side)
- 172 arch chains (86 per side: 5 + 7 + 9 + 11 + 11 + 11 + 11 + 9 + 7 + 5 = 86)
- 2 ch-3 end spaces (1 at the base, 1 at the tip)
Checkpoint: Lay the leaf flat and pin it lightly. It should measure 4.5 in (11.4 cm) long and 1.5 in (3.8 cm) wide. The 4 middle ch-11 arches set the widest point.
Round 2 – Scalloped Border and Hanging Loop
Round 2 is the border; its gauge and math are covered in the Border section below. Work it now, without fastening off.
Border
Border gauge: Work 1 sc for each chain of the arch, placed into the arch space rather than into the individual chains. A ch-11 arch therefore gets 11 sc. This ratio keeps the outline flat. More sc ruffles the edge, and fewer sc pulls the arch into a cupped shape.
Round 2:
Side 1: Ch 1. Work 5 sc in the first ch-5 arch, then sl st in the next spine sc. Continue down the side, working the matching number of sc in each arch and 1 sl st in each spine sc between arches:
5 sc, sl st, 7 sc, sl st, 9 sc, sl st, 11 sc, sl st, 11 sc, sl st, 11 sc, sl st, 11 sc, sl st, 9 sc, sl st, 7 sc, sl st, 5 sc.
That is 86 sc and 9 sl st on side 1.
Base point: Sk the end sc. In the base ch-3 sp, work (sc, ch 3, sc). Sk the next end sc.
Side 2: Repeat the side 1 sequence up the second side. That is 86 sc and 9 sl st.
Tip and hanging loop: Sk the end sc. In the tip ch-3 sp, work (sc, ch 20, sc). Sl st to the first sc of the round. Fasten off and leave a 6 in (15.2 cm) tail.
Stitch count for Round 2 (a trim round):
- sc: 172 (1 per existing arch chain) + 4 (2 in each end space) = 176 sc
- sl st: 18 (9 per side, at the spine junctions)
- ch: 3 at the base point and 20 for the hanging loop
Why the math works: Each side has 86 arch chains and gets 86 sc, so every arch is covered evenly with no extra fullness. The 9 sl st per side hold each pair of arches tight against the spine. This creates the V-shaped junctions that read as veins. The base and tip spaces each get 2 sc, which builds out the ends by the same 0.25 in (0.6 cm) as the sides. As a result, the 4.5 in (11.4 cm) × 1.5 in (3.8 cm) body grows to exactly 5 in (12.7 cm) × 2 in (5.1 cm).
The ch-20 hanging loop folds in half and stands about 1.25 in (3.2 cm) tall. Twist it gently a few times before blocking to get the corded look shown in the photo.
Final Blocking
- Weave in the ends. Run each tail through the spine stitches for about 1 in (2.5 cm), then back the other way. Trim close.
- Dampen the leaf. Mist it thoroughly or soak it for 5 minutes, then press it in a towel. Don’t wring it.
- Pin the spine. Lay the leaf on the mat and pin the tip and base points 5 in (12.7 cm) apart. Keep the spine perfectly straight.
- Pin the width. Place a pin at the outer edge of each middle ch-11 arch so that the leaf measures 2 in (5.1 cm) across.
- Angle the veins. Pin the outer peak of each arch about 0.25 in (0.6 cm) toward the tip. This slants every vein upward, as on a real leaf.
- Shape the loop. Pin the hanging loop straight up from the tip, 1.25 in (3.2 cm) tall.
- Stiffen (optional). Brush on or spray fabric stiffener while the leaf is pinned. This is helpful for ornaments that will be handled a lot.
- Dry completely. Leave the leaf pinned for at least 12 hours before you unpin it.
Final Quality-Control Checklist
- Row 1 has 31 sc, and the spine is straight.
- Each side has 10 arches in the sequence 5, 7, 9, 11, 11, 11, 11, 9, 7, 5.
- Each side has 86 sc and 9 sl st in Round 2.
- The base point has a ch-3 tip, and the hanging loop has 20 ch.
- The blocked leaf measures 5 in (12.7 cm) × 2 in (5.1 cm).
- The hanging loop stands 1.25 in (3.2 cm) tall.
- The two halves are mirror images, and the veins slant toward the tip.
- Ends are woven in securely and nothing pokes through on either face.
Troubleshooting
The leaf twists or curls along the spine. Your foundation chain is probably tighter than your sc. Chain a little more loosely, or chain with one hook size larger and switch back for Row 1.
The edges ruffle. You’re adding extra sc in the arches. Count again: the number of sc should equal the arch’s chain count.
The arches cup inward or the leaf puckers. You have too few sc, or your sc are packed tightly. Work the sc a touch looser and spread them along the full arch.
One side is wider than the other. You probably skipped the wrong number of stitches in Round 1. Each side must land its sc 3 sts apart, ending exactly at st 1 or st 31.
The base point looks blunt. Make sure you skipped the end sc on both sides of the base ch-3 sp in Round 2. Pin the point sharply during blocking.
The hanging loop leans to one side. Center it in the tip space and block it straight. A small amount of stiffener at the base of the loop helps.
Care
Hand wash in cool water with mild soap, press dry in a towel and re-block flat. If you used stiffener, re-apply it after washing.
Final Notes
The whole leaf rests on a short measurement chain:
- 14 sc = 2 in (5.1 cm)
- A 31-sc spine measures 4.4 in (11.2 cm)
- Round 1 brings the leaf to 4.5 in (11.4 cm) × 1.5 in (3.8 cm)
- The 0.25 in (0.6 cm) border brings it to 5 in (12.7 cm) × 2 in (5.1 cm)
- The ch-20 loop adds 1.25 in (3.2 cm), for a total height of 6.25 in (15.9 cm)
If you check your gauge at the spine, the rest falls into place. Make one leaf in cream, then try mint, pink and lavender for a soft pastel set on your tree.
Happy crocheting!