

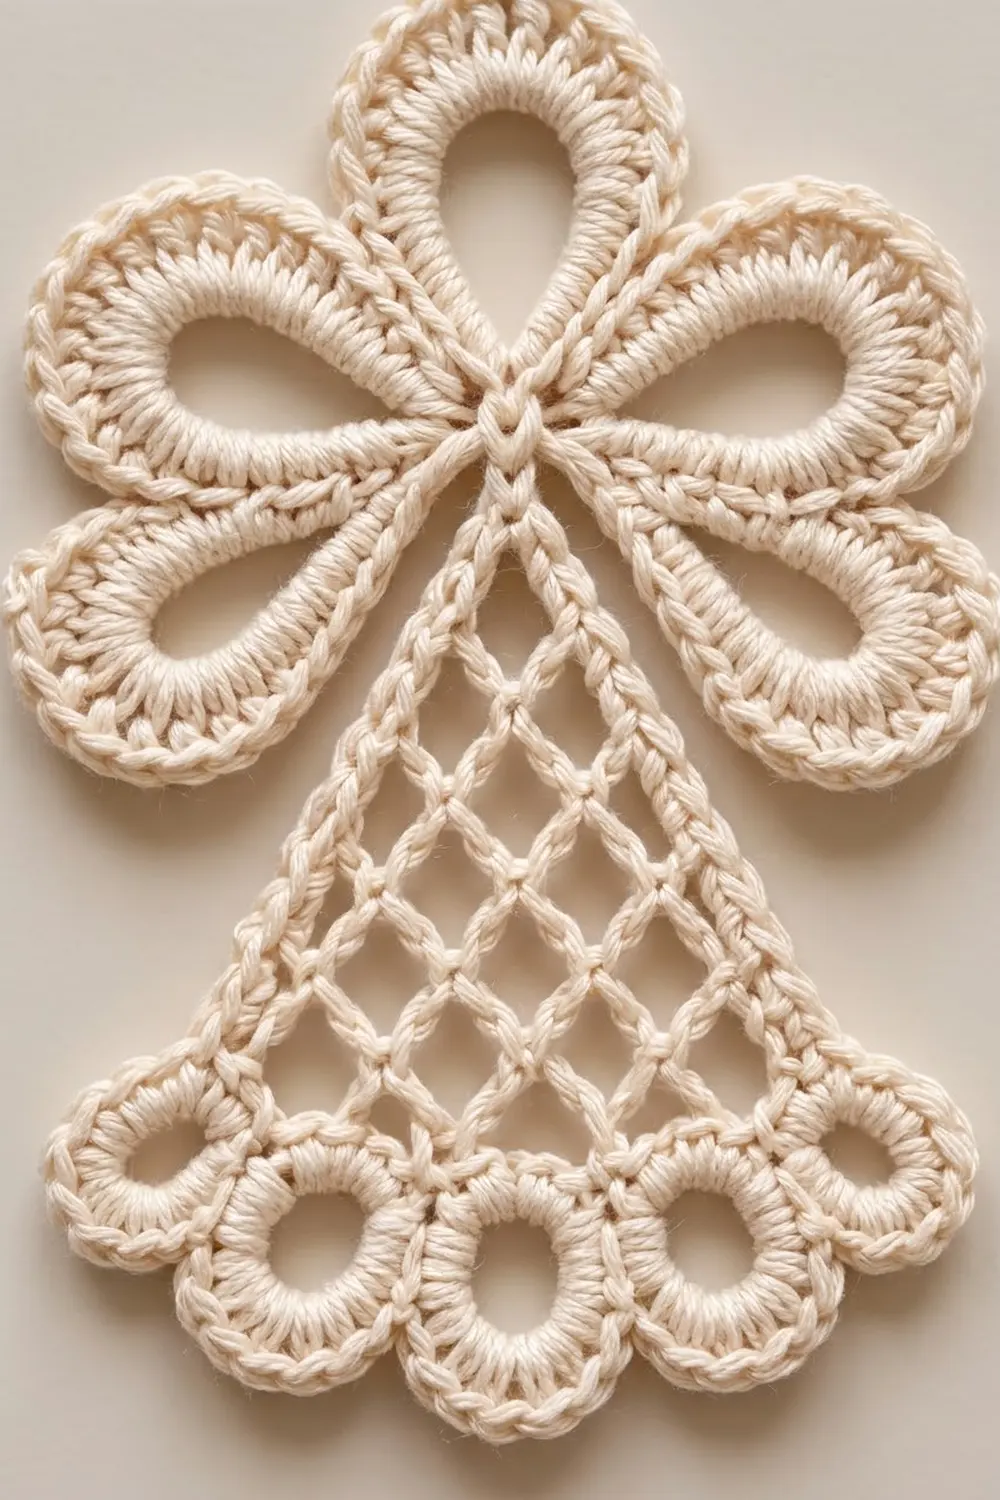
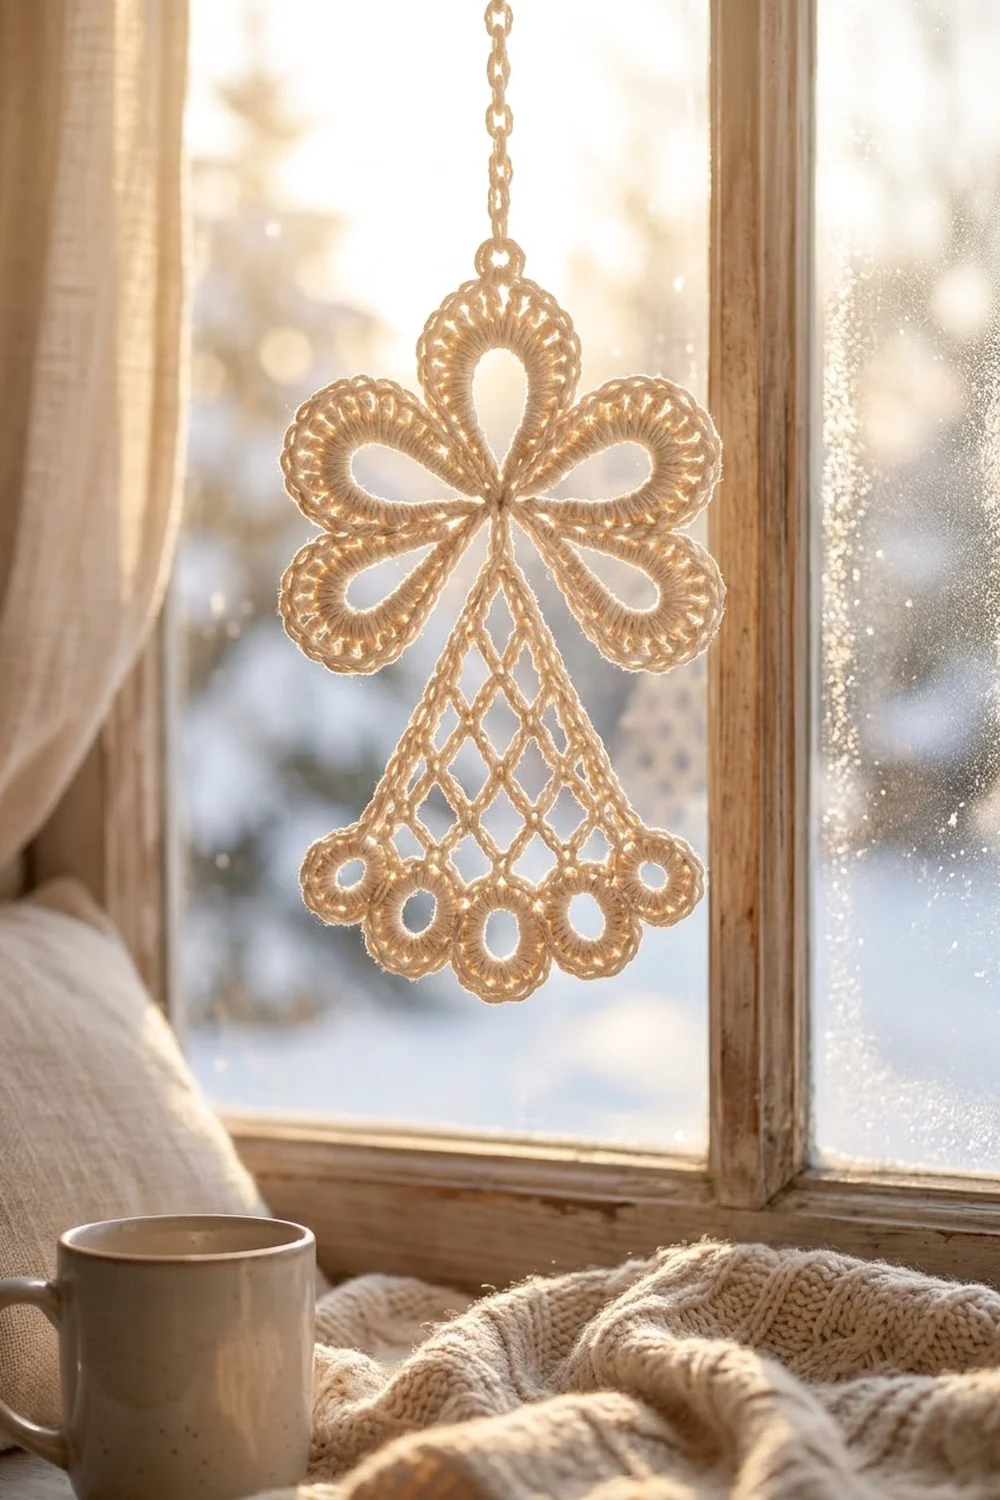
The Lattice Angel is a lacy angel motif in one color, with a soft vintage feel. Five rounded petal loops form the head and wings. An open diamond-mesh skirt flares below, and a row of five small rings finishes the hem like a scalloped lace border.
The sample is worked in cream cotton, which gives the crisp, carved look of old thread lace. Any light neutral works well: ivory, white, ecru, or pale gold. Solid colors show the mesh and the raised petal outlines best.
This pattern uses US crochet terms. The finished angel measures 3.75 in (9.5 cm) wide across the wings and 5 in (12.7 cm) tall from the head tip to the bottom of the rings. This does not include the hanging loop.
Construction is simple and done in one piece. You work a small center ring, add five chain petal loops, cover them in single crochet, and outline them with half double crochet. Then you work the skirt in rows straight down from the bottom of the center, add the ring hem, and finish with side edging and a hanging loop.
Finished Size and Construction
- Finished size: 3.75 in (9.5 cm) wide x 5 in (12.7 cm) tall
- Skill level: Intermediate (covering chain loops and working mesh rows)
- Terminology: US crochet terms
- Yarn weight: Fingering weight (Super Fine, #1) mercerized cotton, or size 3 crochet thread
- Hook: 2.0 mm (US B-1 or steel size 0)
- Number of pieces: 1 single motif
- Layout: One vertical angel, with the head and wings on top and the skirt below
- Piece size: 3.75 in (9.5 cm) x 5 in (12.7 cm)
- Size before border: 3.75 in (9.5 cm) x 5 in (12.7 cm). The side edging does not change the overall width or height.
- Border depth: about 0.15 in (0.4 cm) along each diagonal skirt side
- Hanging loop: adds about 0.75 in (1.9 cm) above the head
Materials
Yarn: Choose a smooth, tightly plied mercerized cotton. It gives clean stitch definition, holds the rings open, and takes starch well. Avoid fuzzy or loosely spun yarns, because they blur the diamond mesh.
- Cream (one color only): 10 g, about 34 m (37 yd) per angel
This quantity includes a margin of about 30 percent for your gauge test and tails. One 50 g ball of fingering cotton usually makes four or five angels.
Tools:
- 2.0 mm crochet hook
- Tapestry needle with an eye small enough for thread
- Small sharp scissors
- Stitch markers (at least 2)
- Ruler or tape measure in inches and cm
- Rust-proof pins and a foam blocking mat
- Spray bottle; optional fabric starch
Abbreviations (US Terms)
- ch = chain
- sl st = slip stitch
- sc = single crochet
- hdc = half double crochet
- BLO = back loop only
- st(s) = stitch(es)
- sp = space
- rep = repeat
Special stitches:
- Petal loop: (sc, ch the stated number, sc) all in the same stitch. The chain forms a loose loop anchored at one point.
- Ring foundation: (sc, ch 9, sc) all in the same ch-5 space. The ch-9 hangs below the work and becomes a ring once it is covered.
Gauge and Checkpoints
Gauge: 10 sc = 1.25 in (3.2 cm) with a 2.0 mm hook. Gauge is not critical for an ornament, but it controls the final size and how open the mesh looks.
Make one complete angel first and measure it before you make more. Use these checkpoints:
- After Rnd 1: the center ring measures 0.5 in (1.3 cm) across.
- After Rnd 4: each wing petal measures about 1.5 in (3.8 cm) from the center to the tip. The head petal measures about 1.25 in (3.2 cm). The wingspan measures 3.75 in (9.5 cm).
- After Row 8: the skirt measures about 2.5 in (6.4 cm) from the center to the last row, and about 3.25 in (8.3 cm) across its bottom edge.
- After Row 10: each ring measures about 0.6 in (1.5 cm) across, and the hem measures about 3.5 in (8.9 cm) wide.
- Finished: 3.75 in (9.5 cm) x 5 in (12.7 cm).
If your angel is too big, go down to a 1.75 mm hook. If it is too small, go up to a 2.25 mm hook. Do not change the stitch counts. The counts below keep the petals smooth and the hem flat.
Pattern: Head, Wings, and Center
The center is a 12-st round. Think of it as a clock face:
- St 1 is at 12 o’clock and carries the head.
- Sts 3 and 11 carry the upper wings.
- Sts 5 and 9 carry the lower wings.
- Sts 6, 7, and 8 are the skirt base at the bottom.
Rnd 1: Ch 5, sl st in first ch to form a ring. Ch 1, work 12 sc in the ring. Sl st in first sc to join. (12 sc)
Place a marker in the first sc. This is st 1, the head position.
Rnd 2 (petal loops): Ch 1. Petal loop with ch 16 in st 1 (head). Sc in st 2. Petal loop with ch 20 in st 3 (upper wing). Sc in st 4. Petal loop with ch 20 in st 5 (lower wing). Sc in sts 6, 7, and 8 (skirt base). Petal loop with ch 20 in st 9 (lower wing). Sc in st 10. Petal loop with ch 20 in st 11 (upper wing). Sc in st 12. Sl st in first sc to join.
Count: 17 sc in total (2 sc in each of the 5 petal sts = 10, plus 7 single sc). You also have 1 ch-16 loop and 4 ch-20 loops.
Keep the chain loops loose and even. If they twist, flatten them before you continue.
Rnd 3 (cover the loops): Ch 1. Sc in first sc, 22 sc in the ch-16 loop, sc in next sc. Sc in next sc (the single sc between petals), sc in next sc, 28 sc in ch-20 loop, sc in next sc. Rep from * once more. Sc in next 3 sc (skirt base). Sc in next sc, 28 sc in ch-20 loop, sc in next sc, sc in next sc (the single sc between petals). Rep from ** once more. Sl st in first sc to join.
Count: 151 sc (17 sc worked one in each existing sc, plus 22 sc in the head loop, plus 28 sc in each of the 4 wing loops = 112).
Pack the sc tightly along each chain so no chain shows through. Each petal should form a smooth, open teardrop.
Rnd 4 (petal outline): Work all hdc in BLO. The unused front loops form a fine ridge line inside each outline, as seen in the photo.
Sl st in first sc. Head petal: hdc in next 9 sts, 2 hdc in each of next 4 sts, hdc in next 9 sts. (26 hdc)
Sl st in each of next 3 sc (head base, single sc, wing base). Upper wing: hdc in next 12 sts, 2 hdc in each of next 4 sts, hdc in next 12 sts. (32 hdc)
Sl st in each of next 3 sc. Lower wing: work as for the upper wing. (32 hdc)
Sl st in each of next 5 sc (wing base, 3 skirt-base sc, wing base). Lower wing: work as before. (32 hdc)
Sl st in each of next 3 sc. Upper wing: work as before. (32 hdc)
Sl st in each of next 2 sc (wing base, last single sc). Join with sl st in first sl st. Fasten off.
Count: 171 sts (151 sts worked one in each existing st, plus 20 extra hdc from the 4 increases at each of the 5 petal tips). That is 17 sl sts and 154 hdc.
Checkpoint: the wingspan is now 3.75 in (9.5 cm).
Pattern: Lattice Skirt
The skirt is worked in rows below the center. Each row adds one ch-5 loop, which creates the triangle shape. Each sc goes into the center of a loop in the row below, which forms the diamonds.
Row 1: With the right side facing you and the head pointing away from you, join yarn with sc in the first of the 3 skirt-base sl sts of Rnd 4. Work under both loops of the sl st. [Ch 5, sc in next skirt-base st] twice. Turn. (3 sc, 2 ch-5 loops)
Row 2: Ch 5, sc in first ch-5 loop. Ch 5, sc in next ch-5 loop. Ch 5, sc in last sc of the previous row. Turn. (3 ch-5 loops)
Rows 3–8: Ch 5, sc in first ch-5 loop. [Ch 5, sc in next ch-5 loop] across. Ch 5, sc in last sc of the previous row. Turn.
Each row has one more loop than the row before:
- Row 3: 4 ch-5 loops
- Row 4: 5 ch-5 loops
- Row 5: 6 ch-5 loops
- Row 6: 7 ch-5 loops
- Row 7: 8 ch-5 loops
- Row 8: 9 ch-5 loops
Every row from Row 2 to Row 8 leaves one ch-5 loop on each diagonal edge. That gives 7 edge loops per side, which you will use for the border.
Checkpoint: the skirt is about 2.5 in (6.4 cm) long and 3.25 in (8.3 cm) across the bottom.
Pattern: Ring Hem
Row 9 (ring foundations): Ch 1. Ring foundation in first ch-5 loop. 5 sc in next ch-5 loop, ring foundation in next ch-5 loop. Rep from * 3 more times. Turn.
Count: 30 sc (2 sc in each of the 5 ring loops = 10, plus 5 sc in each of the 4 loops between them = 20). You also have 5 ch-9 rings, in loops 1, 3, 5, 7, and 9.
Row 10 (cover the rings): Ch 1. Sc in first sc, 16 sc in ch-9 ring, sc in next sc. Sc in next 5 sc, sc in next sc, 16 sc in ch-9 ring, sc in next sc. Rep from * 3 more times. Do not turn or fasten off.
Count: 110 sc (30 sc worked one in each existing sc, plus 16 sc in each of the 5 rings = 80).
Spread the 16 sc evenly around each ring so it lies round with an open center. Neighboring rings should just touch, forming the scalloped hem.
Border: Skirt Side Edging and Hanging Loop
Border gauge: 8 sc = 1 in (2.5 cm), the same as the main gauge. Each diagonal skirt side measures about 3.4 in (8.6 cm) from the hem to the lower wing, so it needs about 27 sc.
Side 1: Continue from the end of Row 10 without turning. Ch 1. Work 1 sc over the end of Row 10 and 1 sc over the end of Row 9. (2 sc)
Work up the diagonal edge loops, starting at Row 8: [4 sc in next edge loop, 3 sc in next edge loop] 3 times, 4 sc in last edge loop (Row 2). (25 sc)
Sl st in the nearest Rnd 4 sl st at the base of the lower wing. Fasten off.
Side 1 total: 27 sc.
Side 2: Join yarn with sc over the end of Row 10 on the opposite side. Sc over the end of Row 9. (2 sc) Work the edge loops exactly as for Side 1. (25 sc) Sl st in the Rnd 4 sl st at the base of the other lower wing. Fasten off.
Side 2 total: 27 sc.
Why the math works: The 7 edge loops alternate 4, 3, 4, 3, 4, 3, 4 sc, which gives 16 + 9 = 25 sc. Add 2 sc for the hem row ends and each side has 27 sc. At 8 sc per inch, 27 sc covers 3.375 in (8.6 cm), which matches the side length. Working 4 sc in every loop would give 30 sc and make the edge ruffle. Working 3 sc in every loop would give 23 sc and pull the skirt narrow. The 4, 3, 4 sequence reads the same from either end, so both sides match.
Hanging loop: Join yarn with sl st in the center hdc at the tip of the head petal, between the 4th and 5th increase hdc. Ch 12, sl st in the same st. Fasten off. The loop stands about 0.75 in (1.9 cm) tall.
Weave all tails through solid sc areas, not through the mesh, so the diamonds stay clean.
Final Blocking
- Soak the angel in cool water for 5 minutes. Then press out the water in a towel. Do not wring it.
- Lay it right side up on the blocking mat.
- Pin the head tip first. Then pin the center of the hem 5 in (12.7 cm) below it.
- Pin the 4 wing tips so the span is 3.75 in (9.5 cm) and the left and right wings match.
- Pin the skirt diamonds open by placing a pin in each sc of Row 8. The hem should be 3.5 in (8.9 cm) wide.
- Put a pin through the center of each ring to keep it round.
- Spray with starch if you want a stiff ornament. Use a light mist for a softer piece.
- Let it dry completely before you remove the pins.
Final Quality-Control Checklist
- The center ring is closed, with no gap at the join.
- All five petal loops are covered, with no chain showing through.
- The petal outlines are smooth, with a visible BLO ridge line.
- The wings are symmetrical: the upper pair matches and the lower pair matches.
- The skirt has 8 mesh rows and 9 loops at the bottom.
- The five rings are round and open, with 16 sc each.
- Each skirt side has 27 sc of edging.
- The hanging loop is centered on the head tip.
- The angel measures 3.75 in (9.5 cm) x 5 in (12.7 cm).
- All tails are woven in and trimmed.
Troubleshooting
- Petals cup or curl: The Rnd 3 sc are too crowded, or the Rnd 4 hdc are too tight. Relax your tension on Rnd 4 and block firmly.
- Petals look lumpy: The chain loops were twisted in Rnd 2. Untwist them before you cover them.
- Skirt slants to one side: You missed the final “sc in last sc” on a row. Check the loop count on each row against the list.
- Mesh looks stringy: The chains are too loose. Go down a hook size for the skirt only.
- Rings are oval: The sc are bunched on one side of the ring. Spread all 16 sc evenly, then pin each ring round when blocking.
- Skirt edges ruffle: You worked 4 sc in every edge loop. Rework the edging with the 4, 3 alternation.
- Hem is wider than the skirt: Your Row 9 sc counts are too high. Check for exactly 5 sc between rings.
Care
Hand wash in cool water with mild soap, press dry in a towel, and reshape flat. Starch again after washing if you use the angel as a stiff ornament.
Final Notes
The measurements build on each other in this order. A 0.5 in (1.3 cm) center ring grows into wing petals of 1.5 in (3.8 cm) and a head petal of 1.25 in (3.2 cm). That gives a 3.75 in (9.5 cm) wingspan. The skirt adds 2.5 in (6.4 cm) of mesh and ends in a 3.25 in (8.3 cm) bottom edge. The 0.6 in (1.5 cm) rings bring the hem to 3.5 in (8.9 cm) and the total height to 5 in (12.7 cm). Each skirt side has 27 sc of edging.
Check your sizes at each of these points and your angel will match the sample. The piece is quick to make, so it’s easy to test a new yarn or color.
Happy crocheting!