

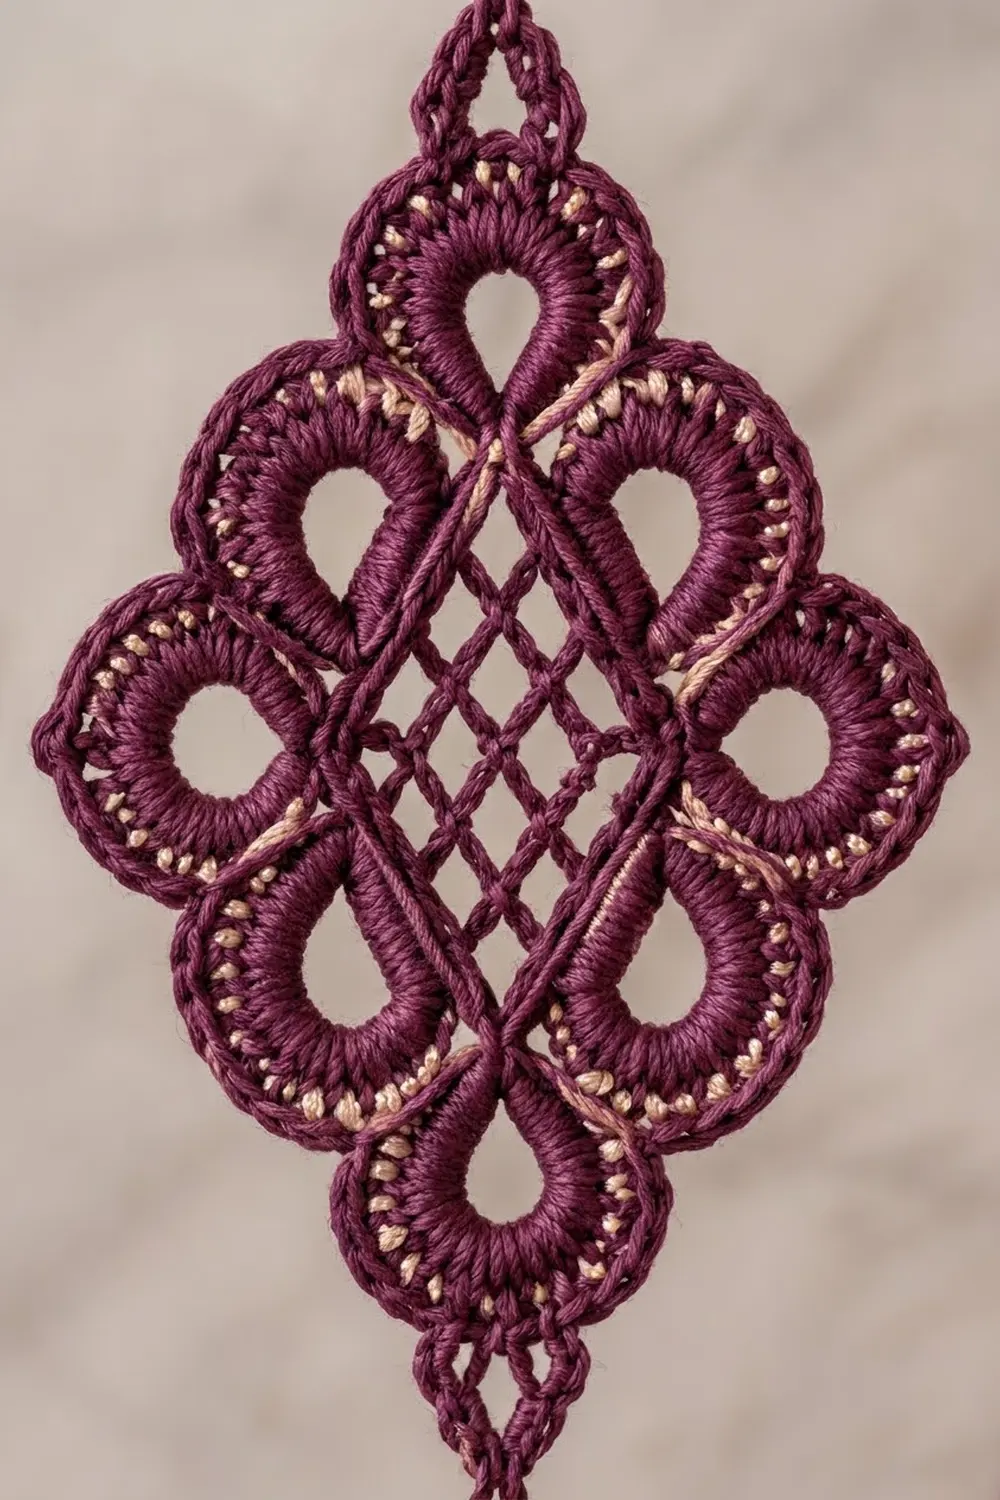
The Plum Lattice Diamond is a single lace motif with a lot of presence. A square of open filet mesh sits on point in the center. Twelve padded loops frame it: long teardrops at the top and bottom, small round rings at the left and right points, and paired teardrops along each slanted edge.
The motif is worked in a deep plum mercerized cotton with one thin round of pale blush cream. That cream round shows as a fine dotted line just inside the plum rim and gives the loops a soft, embroidered look. The style draws on vintage Irish lace, but the techniques are plain chains, single crochet, and double crochet.
This pattern uses US crochet terms. The finished motif measures 4.5 in (11.4 cm) wide and 5.75 in (14.6 cm) tall, or 6.25 in (15.9 cm) tall including the small hanging rings at the top and bottom points.
Construction is simple. You work a mesh square in rows and frame it with single crochet. Then you add twelve chain loops in one round, pad the loops with single crochet, and close the outline with a two-round border, cream first and plum last.
Finished Size and Construction
- Finished size: 4.5 in (11.4 cm) wide x 5.75 in (14.6 cm) tall; 6.25 in (15.9 cm) tall including hanging rings
- Skill level: Intermediate
- Terminology: US crochet terms
- Yarn weight: Super fine (#1) fingering-weight mercerized cotton
- Hook: 2.25 mm (US B-1)
- Number of pieces: 1 single motif
- Layout: Square mesh turned on point, 12 padded loops around it
- Mesh square: 2 in (5.1 cm) per side; 2.25 in (5.7 cm) per side after the frame round
- Size before border: 4 in (10.2 cm) wide x 5.25 in (13.3 cm) tall
- Border depth: 0.25 in (0.6 cm) on every edge
Materials
Choose a smooth, tightly twisted mercerized cotton in fingering weight, roughly 175 m per 50 g. Mercerized cotton gives crisp loops, a clear mesh, and a slight sheen that suits the padded rings. Avoid fuzzy or very soft yarns, because the lattice will blur.
- Color A, Plum: 6 g (21 m)
- Color B, Blush Cream: 2 g (7 m)
These quantities include a comfortable margin for a test motif and for weaving in ends.
Tools:
- 2.25 mm (US B-1) crochet hook
- Tapestry needle
- 2 locking stitch markers
- Rustproof pins and a foam blocking mat
- Spray bottle and optional light spray starch
- Ruler or tape measure
Abbreviations (US Terms)
- ch – chain
- sl st – slip stitch
- sc – single crochet
- dc – double crochet
- sk – skip
- sp(s) – space(s)
- st(s) – stitch(es)
- RS – right side
Special stitch – Anchored loop (AL-n): (sc, ch n, sc) all in the same stitch or space. Each anchored loop adds 2 sc and one ch-n loop.
Gauge and Checkpoints
Gauge matters because every later round is sized to the mesh. Make one test motif first and measure it at each stage before you make more.
Gauge: 6 mesh spaces and 6 mesh rows = 2 in (5.1 cm) square, unblocked but lightly patted flat.
Checkpoints:
- After the mesh (Row 6): 2 in (5.1 cm) per side.
- After Round 1 (frame): 2.25 in (5.7 cm) per side. Turned on point, the square measures about 3.2 in (8.1 cm) corner to corner.
- After Round 3 (padded loops): 4 in (10.2 cm) wide x 5.25 in (13.3 cm) tall.
- After Border Round 2: 4.5 in (11.4 cm) wide x 5.75 in (14.6 cm) tall.
If your mesh is too big: go down to a 2 mm hook, or keep the ch-1 spaces firmer.
If your mesh is too small: go up to a 2.5 mm hook. Do not add mesh spaces, because the loop placement depends on exactly 12 sc per side.
Pattern
Part 1: Center Mesh Square
With Color A, ch 16.
Row 1 (RS): Dc in 6th ch from hook (the 5 skipped ch count as dc, ch 1, and one skipped ch), ch 1, sk 1 ch, dc in next ch; repeat from * 4 more times. Turn. (7 dc counting the beginning chain as a dc, 6 ch-1 sps)*
Row 2: Ch 4 (counts as dc and ch 1), sk first ch-1 sp, dc in next dc, ch 1, sk next ch-1 sp, dc in next dc; repeat from * across, working the last dc in the top of the beginning chain. Turn. (7 dc, 6 ch-1 sps)*
Rows 3–6: Repeat Row 2, working the last dc of each row in the 3rd ch of the turning ch-4. (7 dc, 6 ch-1 sps in each row)
Do not fasten off. Checkpoint: the square measures 2 in (5.1 cm) per side, with 36 open spaces in a 6 x 6 grid.
Part 2: Frame Round
Round 1: Ch 1. Working down the first row-end edge, work 2 sc around each of the 6 row-end posts (12 sc), ch 2 for the corner. Working across the foundation chain, 2 sc in each of the 6 ch-1 sps (12 sc), ch 2. Working up the second row-end edge, 2 sc around each of the 6 row-end posts (12 sc), ch 2. Working across Row 6, 2 sc in each of the 6 ch-1 sps (12 sc), ch 2. Join with sl st to first sc. (48 sc: 12 sc per side, plus 4 ch-2 corner sps)
The corners here are ch-2 spaces, not stitches. Each side’s 12 sc stand alone, with no shared corner stitches.
Checkpoint: 2.25 in (5.7 cm) per side. Turn the square on point and place a marker in one corner ch-2 sp. That corner is now the top point. Going clockwise, the next corners are the right point, bottom point, and left point.
Part 3: Loop Round
Round 2: Sl st into the top-point ch-2 sp. Ch 1.
- Top point: AL-16 in the ch-2 sp.
- Upper-right side: sc in next 3 sc, AL-12 in next sc, sc in next 4 sc, AL-12 in next sc, sc in next 3 sc.
- Right point: AL-10 in the ch-2 sp.
- Lower-right side: repeat the side sequence.
- Bottom point: AL-16 in the ch-2 sp.
- Lower-left side: repeat the side sequence.
- Left point: AL-10 in the ch-2 sp.
- Upper-left side: repeat the side sequence.
Join with sl st to first sc.
Stitch count: each side uses all 12 frame sc and produces 3 + 2 + 4 + 2 + 3 = 14 sc. Each point adds 2 sc. Total: (14 x 4) + (2 x 4) = 64 sc, plus 12 chain loops (two ch-16, two ch-10, eight ch-12).
Part 4: Padded Loops
Round 3: Sl st in each sc, and work into each chain loop as follows:
- 26 sc in each ch-16 loop (top and bottom)
- 16 sc in each ch-10 loop (left and right)
- 20 sc in each ch-12 loop (sides)
Push the sc snugly together as you go so the loops look padded and full. Join with sl st to the first sl st. Fasten off Color A.
Stitch count: 64 sl st and 244 sc (52 + 32 + 160).
The long top and bottom loops fall naturally into teardrops pointing toward the mesh. The short left and right loops stay round. The side loops form paired teardrops along each slanted edge.
Checkpoint: 4 in (10.2 cm) wide x 5.25 in (13.3 cm) tall, with the mesh visible and flat in the center.
Border
Border gauge: each border round adds about 0.125 in (0.3 cm) beyond the loop tips, for a total of 0.25 in (0.6 cm) per edge.
The border is worked only into the outer arc of each loop. The first 4 sc and the last 4 sc of every loop sit tucked against the anchors, so they are skipped. Each loop therefore contributes its total sc minus 8:
- Top and bottom loops: 26 – 8 = 18 sc
- Left and right loops: 16 – 8 = 8 sc
- Side loops: 20 – 8 = 12 sc
For counting, each border edge holds one point loop plus the two side loops that follow it clockwise.
Border Round 1 (Color B): Join Color B in the 5th sc of the top loop. Ch 1, sc in same st and in next 17 sc, ch 1. *Sk last 4 sc of this loop, all sl sts in the valley, and first 4 sc of the next loop; sc in each outer-arc sc of the next loop, ch 1; repeat from * around, ending with the ch 1 after the last side loop. Join with sl st to first sc. Fasten off Color B.
- Upper-right edge: 18 + 12 + 12 = 42 sc, 3 ch-1 sps
- Lower-right edge: 8 + 12 + 12 = 32 sc, 3 ch-1 sps
- Lower-left edge: 18 + 12 + 12 = 42 sc, 3 ch-1 sps
- Upper-left edge: 8 + 12 + 12 = 32 sc, 3 ch-1 sps
- Total: 148 sc and 12 ch-1 sps
The ch-1 bridges pull neighboring loops together, so the outline becomes one continuous scalloped edge.
Border Round 2 (Color A): Join Color A in the first sc of the top loop. Ch 1, sc in same st and in next 8 sc, ch 6, sl st in first ch of the ch-6 (top hanging ring made), sc in next 9 sc, sl st in next ch-1 sp. *Sc in each sc of the next loop, sl st in next ch-1 sp; repeat from * around. On the bottom loop, make a second hanging ring the same way between the 9th and 10th sc. Join with sl st to first sc. Fasten off.
- Upper-right edge: 42 sc, 3 sl st, 1 hanging ring
- Lower-right edge: 32 sc, 3 sl st
- Lower-left edge: 42 sc, 3 sl st, 1 hanging ring
- Upper-left edge: 32 sc, 3 sl st
- Total: 148 sc, 12 sl st, 2 hanging rings
Why the math works: Border Round 2 is a 1-to-1 round, with one sc in each of the 148 Round 1 sc, so every edge keeps exactly its Round 1 count. The 12 ch-1 valleys become 12 sl sts, which keeps the valleys tight and the scallops crisp. The hanging rings sit between stitches, so they add no sc. Because nothing is increased, the motif grows evenly by 0.25 in (0.6 cm) on every edge: from 4 in (10.2 cm) to 4.5 in (11.4 cm) wide, and from 5.25 in (13.3 cm) to 5.75 in (14.6 cm) tall. Each hanging ring adds about 0.25 in (0.6 cm), giving 6.25 in (15.9 cm) total height.
Final Blocking
- Weave in all ends along the back of the padded loops, never through the mesh.
- Soak the motif in cool water for 10 minutes. Roll it in a towel to remove excess water.
- Draw a diamond template on paper, 4.5 in (11.4 cm) wide and 5.75 in (14.6 cm) tall. Place it under clear plastic on your blocking mat.
- Pin the top and bottom points first, then the left and right points.
- Pin the mesh square so its 36 spaces sit open and even, with straight grid lines.
- Shape each loop with a pin through its center: teardrops at the top, bottom, and slanted edges, round rings at the left and right points.
- Mist with light starch if you want a stiffer motif for hanging.
- Let it dry completely, at least 12 hours, before unpinning.
Final Quality-Control Checklist
- Mesh has 6 x 6 open spaces with no missed ch-1 sps.
- Frame round has 12 sc per side and 4 ch-2 corners.
- 12 loops total: 2 long teardrops, 2 round rings, 8 side teardrops.
- Border Round 1 has 148 cream sc and 12 ch-1 bridges.
- Border Round 2 has 148 plum sc, 12 sl st, and 2 hanging rings.
- Blocked size is 4.5 in (11.4 cm) x 5.75 in (14.6 cm).
- Ends are woven in invisibly and trimmed.
Troubleshooting
The mesh leans or skews. Your turning chains are probably loose. Keep the ch-4 snug, and block the grid square with pins in every corner.
The loops look thin instead of padded. Add 2 sc per loop in Round 3. Keep skipping 4 sc at each end in the border, and add those 2 sc to each outer-arc count.
The loops ruffle or twist. Check that no chain loop was twisted before padding, and recount the sc in each loop.
The edge looks gappy between loops. Pull each ch-1 bridge in Border Round 1 snug. The valley should close fully.
The cream line disappears. Work Border Round 1 with slightly firmer tension so the cream sits on top of the edge.
The motif is lopsided. Recount Round 2. The top and bottom must be AL-16, and the left and right must be AL-10.
Care
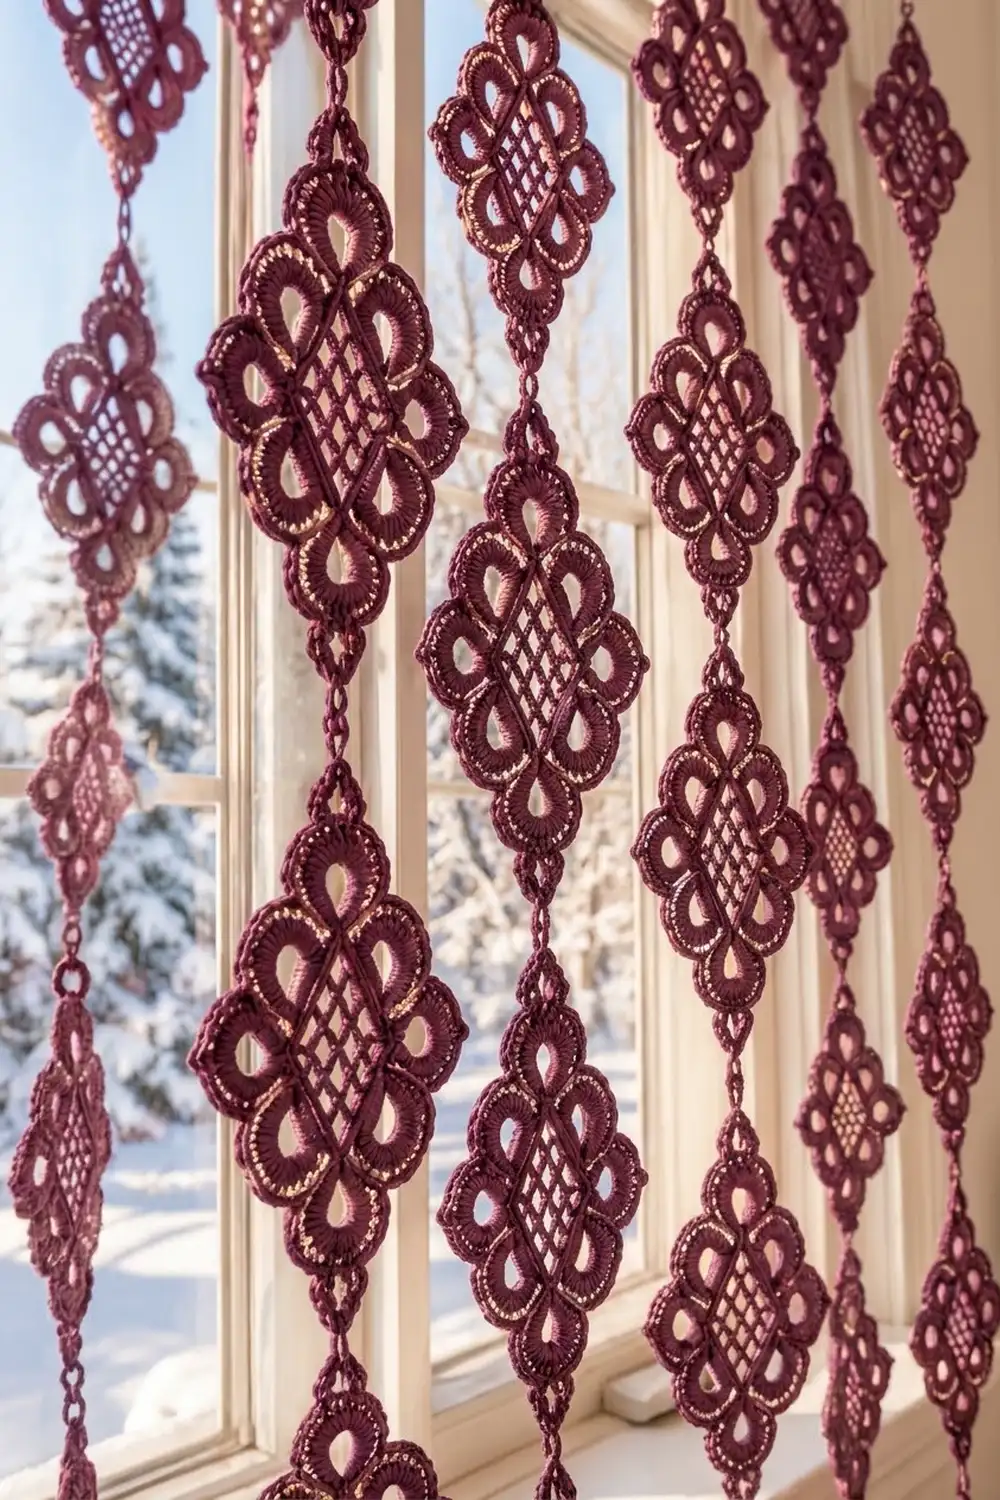
Hand wash in cool water with a mild detergent and lay flat to dry, re-pinning to shape if needed. Re-starch after washing if the motif is used as a hanging piece.
Final Notes
The measurement chain is short and reliable. The mesh square is 2 in (5.1 cm). The frame takes it to 2.25 in (5.7 cm), or about 3.2 in (8.1 cm) on point. The padded loops bring it to 4 in (10.2 cm) x 5.25 in (13.3 cm). The two border rounds finish it at 4.5 in (11.4 cm) x 5.75 in (14.6 cm), and the hanging rings reach 6.25 in (15.9 cm). Check each stage, and your motif will match every time.
Happy crocheting!