

Plastic grocery bags pile up fast, and this hanging holder keeps them in one tidy place. The Lattice Lantern is a single tube of cream cotton. It has a solid band at the top, an open diamond mesh through the middle, a solid band at the bottom and a strap for hanging it on a hook. Bags go in at the top and come out of the bottom opening one at a time.
The design uses one color, a soft cream or natural cotton. The mesh is made of chain loops anchored with single crochet, which gives a crisp lattice that shows the white bags through the gaps. The chain loops get longer toward the middle and shorter again near the top. That makes the holder swell out like a lantern without any stitch increases.
The pattern uses US crochet terms. Laid flat and empty, the finished holder is about 6 in (15.2 cm) wide at the bands, about 9 in (22.9 cm) wide at the widest part of the mesh and about 14 in (35.6 cm) tall without the strap. On the hook, with the strap peaking about 4 in (10.2 cm) above the top band, it hangs about 18 in (45.7 cm) long.
Construction is seamless:
- Start at the bottom with a chain ring.
- Work a solid single crochet band in joined rounds.
- Switch to chain-loop mesh rounds.
- Change back to a solid band at the top.
- Work the strap straight off the top band and slip stitch its end to the opposite side.
Finished Size and Construction
- Finished size (flat, empty): 6 in (15.2 cm) wide at the bands, 9 in (22.9 cm) wide at the widest point, 14 in (35.6 cm) tall
- Hanging length with strap: about 18 in (45.7 cm)
- Skill level: Easy
- Terminology: US crochet terms
- Yarn weight: Worsted (weight 4) cotton
- Hook: 5.0 mm (H-8)
- Number of pieces: 1 (the strap is worked directly onto the body)
- Layout: one vertical tube made of a bottom band, the mesh body, a top band and the strap
- Band size: 48 sts around, 12 in (30.5 cm) around, 6 in (15.2 cm) flat width
- Size before border: 6 in (15.2 cm) flat width at both rims, 14 in (35.6 cm) tall
- Border depth: one slip stitch round on each rim, which adds no measurable height
Materials
Choose a smooth worsted-weight cotton or cotton blend. Cotton holds the diamond shape well, stretches less than acrylic under the weight of the bags and washes easily. Avoid fuzzy or splitty yarns. The chain loops are the whole design, and they need clean definition.
- Cream / natural: about 85 g used. Have 100 g on hand, about 180 m (197 yd).
The quantity includes a margin of about 15 percent for your gauge check, the strap join and the yarn tails.
Tools:
- 5.0 mm (H-8) crochet hook
- 1 stitch marker
- Tapestry needle
- Scissors
- Measuring tape
- Pins and a spray bottle for blocking
- A rolled towel or a few plastic bags to stuff the holder while it dries
Abbreviations (US Terms)
- ch: chain
- sc: single crochet
- sl st: slip stitch
- st(s): stitch(es)
- sk: skip
- sp: space
- rnd: round
- rep: repeat
Special stitch: Mesh Round (ch-N). To start the round, sl st in each ch until you reach the middle of the first loop from the previous round:
- ch-5 or ch-6 loops: 3 sl sts
- ch-7 or ch-8 loops: 4 sl sts
- ch-9 loops: 5 sl sts
Ch 1, sc in same loop, ch N, sc in next loop. Rep from * 10 more times, ch N, then sl st in the first sc to join. Each Mesh Round has 12 sc and 12 ch-N loops. Each new sc sits in the center of a loop below, and that is what forms the diamonds.
Gauge and Checkpoints
Gauge: 16 sc and 20 rnds = 4 in (10.2 cm) in sc worked in joined rounds.
This is a single piece, so the bottom band doubles as your gauge test. Work Rnds 1–5, lay the band flat without stretching it and measure.
- After Rnd 5: flat width 6 in (15.2 cm), height 1 in (2.5 cm).
- After Rnd 10: flat width about 7 in (17.8 cm), total height about 4.4 in (11.2 cm).
- After Rnd 16: flat width about 9 in (22.9 cm), total height about 10 in (25.4 cm).
- After Rnd 20: total height about 13 in (33.0 cm).
- After Rnd 25: total height about 14 in (35.6 cm), top band flat width 6 in (15.2 cm).
Measure the mesh while the piece hangs or with a light lengthwise tug. Loose mesh collapses when it lies flat and reads too short.
If the band is too wide (over 6.25 in / 15.9 cm flat), switch to a 4.5 mm hook and start again. If it is too narrow (under 5.75 in / 14.6 cm flat), switch to a 5.5 mm hook. Do not change the chain count. The mesh repeat needs a stitch count that divides by 4, and 48 does.
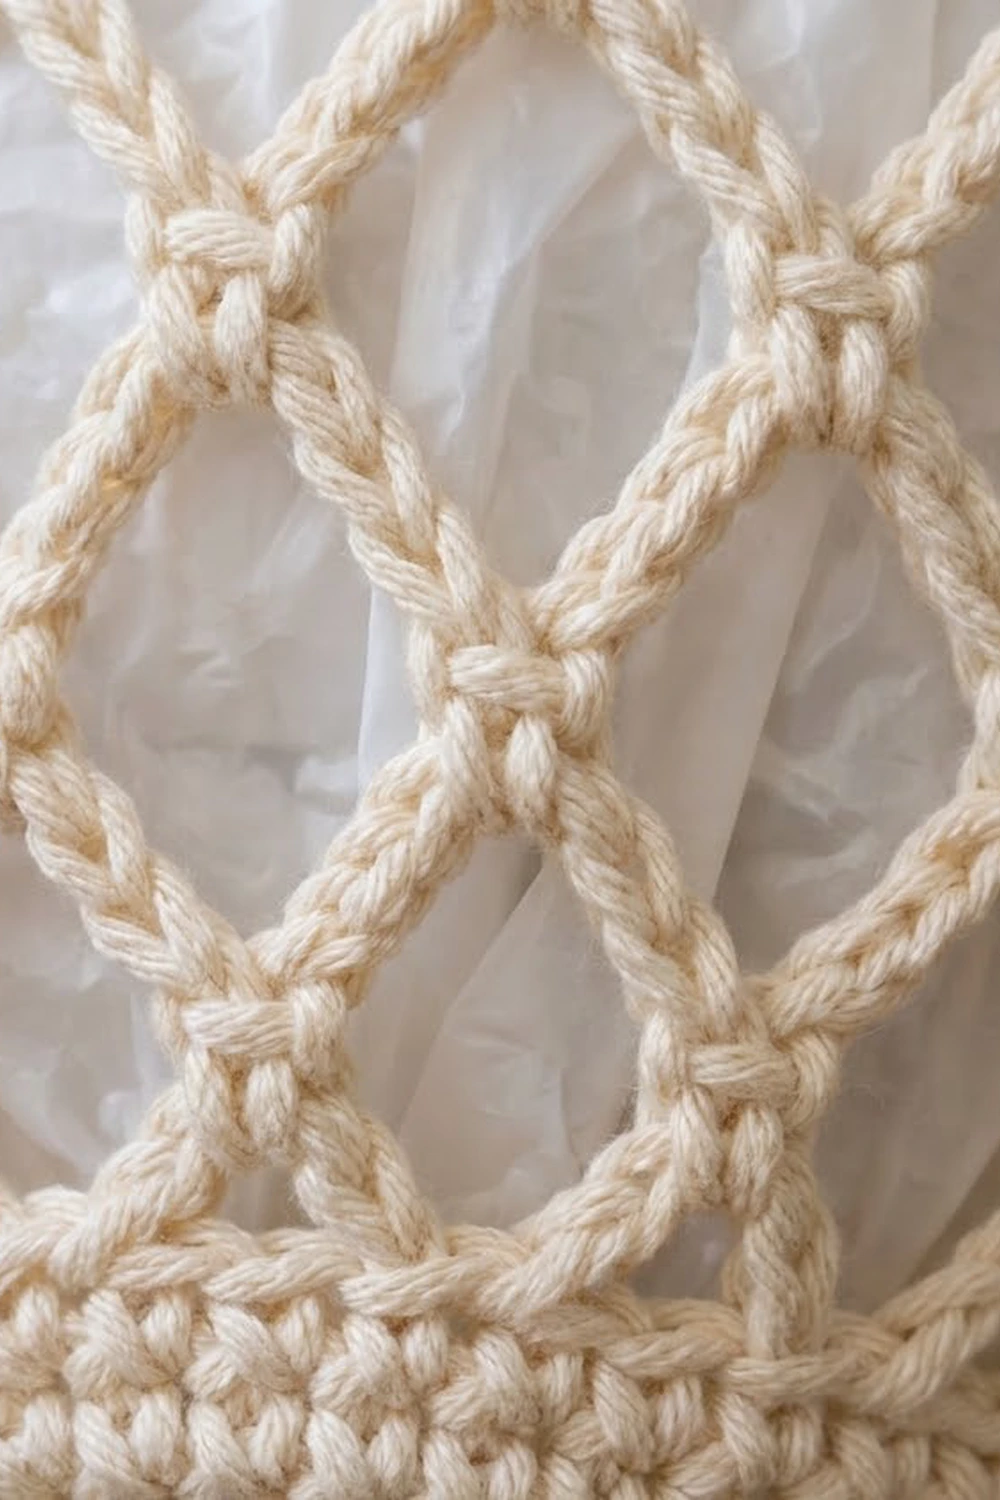
Bottom Band
Ch 48. Make sure the chain is not twisted, then sl st in the first ch to form a ring. Place a marker in the first st of each round and move it up as you go.
Rnd 1: Ch 1, sc in each ch around, sl st in first sc to join. (48 sts)
Rnds 2–5: Ch 1, sc in each st around, sl st in first sc to join. (48 sts)
Checkpoint: the band is a firm tube 6 in (15.2 cm) wide flat and 1 in (2.5 cm) tall. This is the bottom opening the bags come out of. It measures about 3.8 in (9.7 cm) across when round.
Mesh Body
Rnd 6 (conversion to mesh): Ch 1, sc in first st, ch 5, sk 3 sts, sc in next st. Rep from * 10 more times, then ch 5, sk the last 3 sts and sl st in the first sc to join. (12 sc, 12 ch-5 loops)
Each repeat uses 4 band sts: 1 sc and 3 skipped sts under the loop. 12 repeats × 4 sts = 48 sts.
Rnd 7: Mesh Round (ch-5). (12 sc, 12 ch-5 loops)
Rnds 8–9: Mesh Round (ch-6). (12 sc, 12 ch-6 loops each round)
Rnd 10: Mesh Round (ch-7). (12 sc, 12 ch-7 loops)
Checkpoint: the mesh is starting to flare. It measures about 7 in (17.8 cm) wide flat.
Rnd 11: Mesh Round (ch-7). (12 sc, 12 ch-7 loops)
Rnds 12–13: Mesh Round (ch-8). (12 sc, 12 ch-8 loops each round)
Rnds 14–16: Mesh Round (ch-9). (12 sc, 12 ch-9 loops each round)
Checkpoint: this is the widest part of the lantern. It measures about 9 in (22.9 cm) wide flat, and the total height is about 10 in (25.4 cm).
Rnd 17: Mesh Round (ch-8). (12 sc, 12 ch-8 loops)
Rnd 18: Mesh Round (ch-7). (12 sc, 12 ch-7 loops)
Rnd 19: Mesh Round (ch-6). (12 sc, 12 ch-6 loops)
Rnd 20: Mesh Round (ch-5). (12 sc, 12 ch-5 loops)
The loops shrink faster near the top than they grew near the bottom. That gives the teardrop shape: a long, gentle swell from the bottom and a shorter shoulder at the top.
Checkpoint: the total height is about 13 in (33.0 cm). Every round should have exactly 12 loops. If you count 11 or 13, you probably skipped or doubled a loop in the round where the chain length changed.
Top Band
Rnd 21 (conversion to solid): Sl st in next 3 ch to reach the center of the first loop and ch 1. Then 3 sc in the ch-5 sp, sc in next sc. Rep from * around and sl st in the first sc to join. (48 sts)
Count: 12 sc worked 1 per existing sc + 36 sc added in the loops (3 in each of the 12 ch-5 sps) = 48 sts.
Rnds 22–25: Ch 1, sc in each st around, sl st in first sc to join. (48 sts)
Checkpoint: the top band should match the bottom band at 6 in (15.2 cm) flat and 1 in (2.5 cm) tall. Fold the holder flat and compare the two bands side by side. If the top band flares, the 3 sc in each loop were worked too loosely. If it pulls in, they were too tight.
Do not fasten off.
Hanging Strap
The strap is worked in rows straight off the top band. Fold the holder flat so the round’s join sits at one side fold. St 1 is the first st of Rnd 25, and st 25 sits directly opposite it. The strap starts at sts 1–4 and ends at sts 25–28.
Row 1: Ch 1, sc in each of sts 1–4, turn. (4 sts)
Rows 2–40: Ch 1, sc in each st across, turn. (4 sts)
Checkpoint: the strap is 1 in (2.5 cm) wide and 8 in (20.3 cm) long, measured from the top edge of the band.
Joining the strap end:
- Check that the strap is not twisted.
- Hold the end of Row 40 against sts 25–28 of Rnd 25, right sides facing out.
- Working through both layers, sl st through each of the 4 pairs of sts. (4 sl sts)
- Fasten off, leaving a 6 in (15.2 cm) tail.
The two ends of the strap sit 24 sts apart, which is exactly half of the 48-st band. With 24 sts on each side, the holder hangs evenly and does not tilt on the hook.
Border: Rim Finishing
The border is one slip stitch round on each rim. It firms up the edge, keeps the openings from stretching and gives the bands a neat, rounded look.
Border gauge: 1 sl st per sc. Work loosely enough that each rim still measures 6 in (15.2 cm) flat.
Top rim:
- Join yarn with a sl st in st 5 of Rnd 25, the first st after the strap.
- Sl st in each st across to st 24. (20 sl sts)
- Pass behind the strap end and sl st in each of sts 29–48. (20 sl sts)
- Fasten off.
Total for the top rim: 20 + 20 = 40 sl sts, plus 4 sts under each strap end (8 sts) = 48 sts.
Bottom rim: Join yarn with a sl st in the free loop of any foundation ch on the bottom edge of Rnd 1. Sl st in each free loop around. (48 sl sts) Join with a sl st in the first sl st and fasten off.
Why the math works: each rim has 48 sts. The mesh repeat is 4 sts (1 sc + 3 skipped), and 48 ÷ 4 = 12 repeats. The top conversion round puts back exactly 4 sts per repeat (1 + 3), so 12 × 4 = 48. The border adds 1 sl st per existing st, so it changes no counts and does not widen either rim.
Weave in all ends through the solid bands rather than the mesh, where they would show.
Final Blocking
- Wet the holder thoroughly in cool water and gently squeeze out the excess. Do not wring it.
- Roll it in a towel to remove more water.
- Stuff the body loosely with plastic bags or a rolled towel to give it its lantern shape.
- Working from bottom to top, gently tug each diamond into an even shape.
- Shape both bands into neat circles. Check that each measures 6 in (15.2 cm) flat.
- Pin the strap flat and straight at 8 in (20.3 cm) long.
- Let it dry completely, either on its side or hanging from a hook, still stuffed.
- Remove the stuffing and check the final measurements.
Final Quality-Control Checklist
- Both bands have 48 sts and measure 6 in (15.2 cm) flat.
- Every mesh round has 12 sc and 12 loops.
- The diamonds line up in neat vertical columns with no spiral drift.
- The widest point, in the ch-9 rounds, measures about 9 in (22.9 cm) flat.
- The body is about 14 in (35.6 cm) tall without the strap.
- The strap is 1 in (2.5 cm) wide, 8 in (20.3 cm) long and not twisted.
- The strap ends sit exactly opposite each other, 24 sts apart.
- The holder hangs straight on a hook.
- All ends are hidden in the solid bands.
Troubleshooting
The diamonds spiral around the tube. You are not starting each mesh round at the center of a loop. Use the exact sl st count from the Mesh Round definition every time.
The bottom opening is too loose and bags fall out. Add a second sl st round to the bottom rim, or rework the bottom band with a 4.5 mm hook.
The bottom opening is too tight to pull bags through. Rework the bottom band with a 5.5 mm hook and keep 48 sts.
The top band ruffles. Undo back to Rnd 20 and rework the top band with a 4.5 mm hook. Keep 3 sc in each loop so the count stays at 48.
The mesh sags when the holder is full. Cotton relaxes under weight. Change the ch-9 rounds to ch-8, or work only 2 ch-9 rounds instead of 3.
The holder tilts on the hook. The strap is not centered. Count the band sts again. The strap should run from sts 1–4 to sts 25–28.
Care
Hand wash, or machine wash on a gentle cycle in cool water, then reshape and dry flat or stuffed. Do not tumble dry, because heat can shrink cotton and distort the mesh.

Final Notes
The whole design follows one chain of measurements:
- A gauge of 16 sc = 4 in (10.2 cm) gives a 48-st band that is 6 in (15.2 cm) wide flat.
- The 48 sts divide into 12 mesh repeats of 4 sts each.
- Twelve loops that grow from ch-5 to ch-9 and back widen the body to about 9 in (22.9 cm) and bring it to about 13 in (33.0 cm) tall.
- The top conversion round puts back exactly 48 sts for a matching band, so the body finishes at 14 in (35.6 cm).
- The strap ends sit 24 sts apart, so the holder hangs straight.
Check your bottom band first and count your loops every round, and the rest falls into place.
Happy crocheting!