

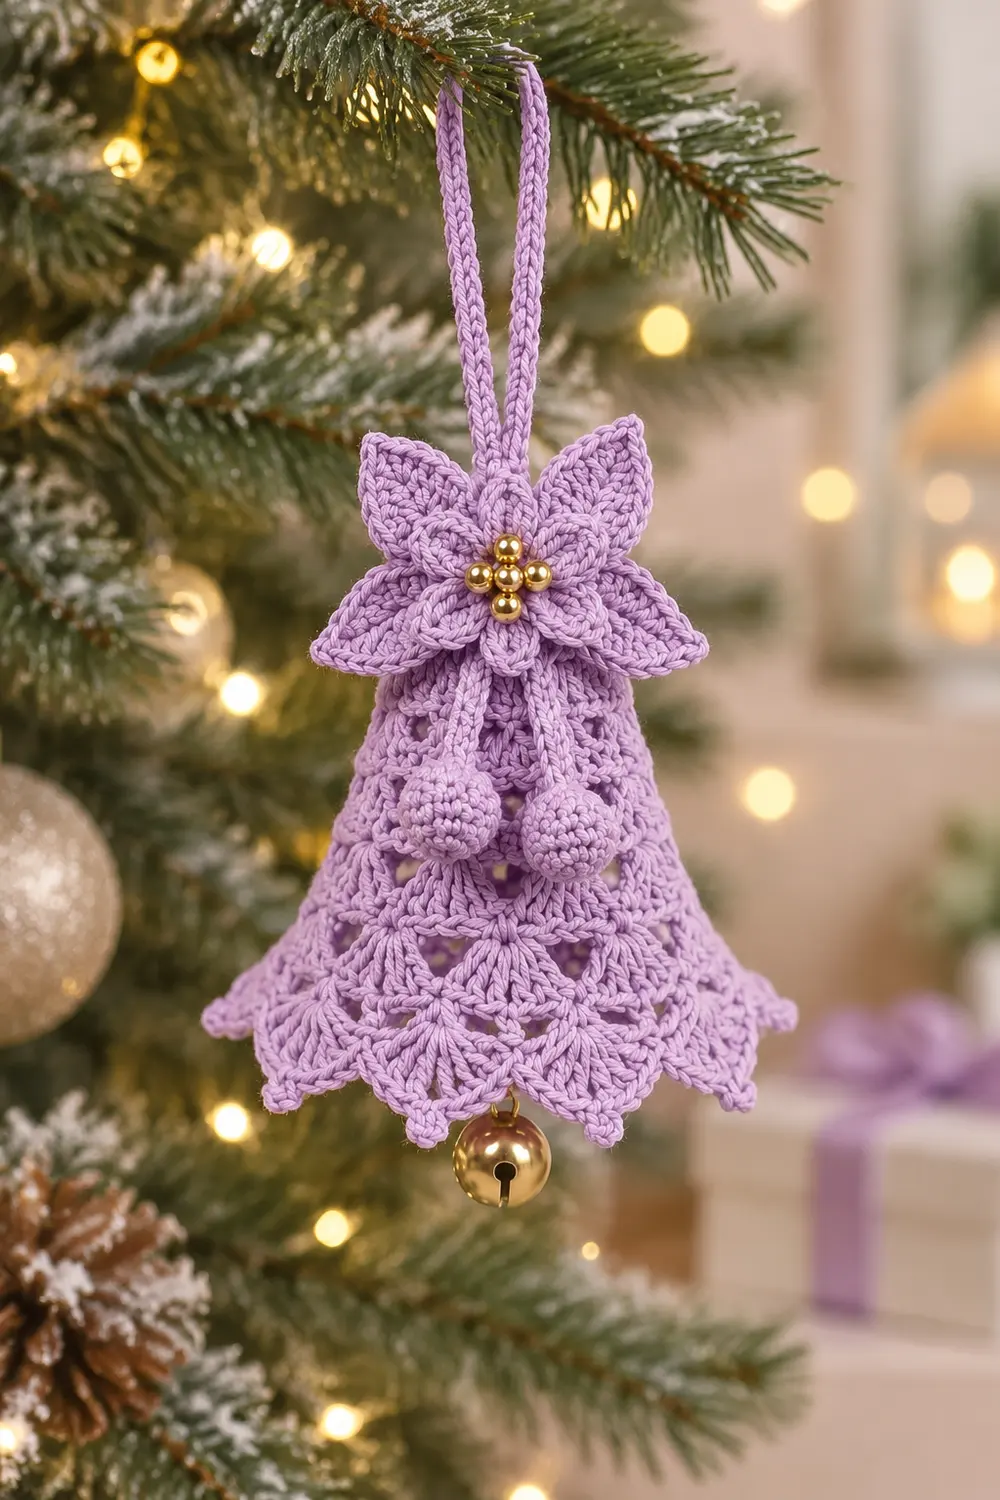
This little bell ornament is soft, lacy, and festive. Stacked tiers of shell stitches give the lavender body a graduated, flared shape that widens toward the bottom. The hem ends in a scalloped shell trim with tiny pointed picots.
A four-petaled flower sits at the top of the bell, with a cluster of gold beads at its center. A twisted cord loop rises from the flower for hanging. Two small lavender berries dangle at the sides of the bell, and a gold bell charm hangs from the very bottom point.
The pattern uses US crochet terms. The bell body is about 3.25 in (8.3 cm) tall and about 4 in (10.2 cm) across the hem. The full ornament, from the top of the loop to the bottom of the charm, is about 6.5 in (16.5 cm).
Construction overview: The bell is worked top-down in joined rounds, from a small closed cap through shell and fan tiers, ending with a two-round scalloped border. The flower, two berries, twisted cord, and charm are made separately and attached, so you finish with one complete ornament.
Finished Size and Construction
- Finished size: bell body 3.25 in (8.3 cm) tall, 4 in (10.2 cm) across the hem; full ornament about 6.5 in (16.5 cm) long
- Skill level: Intermediate
- Terminology: US crochet terms
- Yarn weight: Sport weight (2) mercerized cotton
- Hook: 2.75 mm (US C-2)
- Number of pieces: One ornament made from joined sections: 1 bell body, 1 flower, 2 berries, 1 twisted cord, 1 charm
- Layout: Cord loop on top, flower at the top of the bell, berries at the sides, charm below the hem
- Piece size (bell body): slant length from top center to hem 3.6 in (9.1 cm)
- Size before border: slant length 3.0 in (7.6 cm) after Rnd 8
- Border depth: 0.6 in (1.5 cm), 2 rounds
Materials
Yarn advice: Choose a smooth, mercerized cotton. It shows shell texture clearly and holds its shape well after stiffening. Avoid fuzzy or very stretchy yarns, because the bell needs to stay crisp.
- Lavender (one color only): 20 g / about 62 m (68 yd) of sport weight cotton
Tools:
- 2.75 mm (US C-2) crochet hook
- Tapestry needle
- Beading needle and gold or lavender sewing thread
- 5 gold beads, 4 mm
- 1 gold jingle bell charm, 0.5 in (1.3 cm)
- Small pinch of polyester fiberfill
- Fabric stiffener or heavy spray starch
- A bell-shaped form, such as a small plastic cup or cone about 4 in (10.2 cm) across at the wide end
- Rust-proof pins, scissors, and a stitch marker
The yarn quantity includes a margin of about 25% for swatching and tension differences.
Abbreviations (US Terms)
- ch – chain
- sl st – slip stitch
- sc – single crochet
- hdc – half double crochet
- dc – double crochet
- sc2tog – single crochet 2 together
- sp – space
- MR – magic ring
- st(s) – stitch(es)
- rep – repeat
Special stitches:
- Shell: (2 dc, ch 2, 2 dc) in the same st or sp. A large shell is (3 dc, ch 2, 3 dc).
- Fan: 7 dc or 9 dc worked into one sp, as stated in the round.
- Picot: ch 3, sl st in 3rd ch from hook.
Gauge and Checkpoints
Gauge: 6 dc = 1 in (2.5 cm), and one dc round = 0.4 in (1.0 cm) tall. For sc: 7 sc = 1 in (2.5 cm).
Work Rnds 1–2 of the bell first as your test piece. This small cap tells you almost everything about your gauge.
Checkpoints:
- After Rnd 2: cap measures 1.25 in (3.2 cm) across, lying flat.
- After Rnd 5: slant length from top center measures 1.8 in (4.6 cm).
- After Rnd 8: slant length measures 3.0 in (7.6 cm).
- After Rnd 10: slant length measures 3.6 in (9.1 cm), and the hem is about 4 in (10.2 cm) across.
If your piece is too big, switch to a 2.5 mm hook. If it is too small, switch to a 3.0 mm hook. Re-check the Rnd 2 cap before you continue.
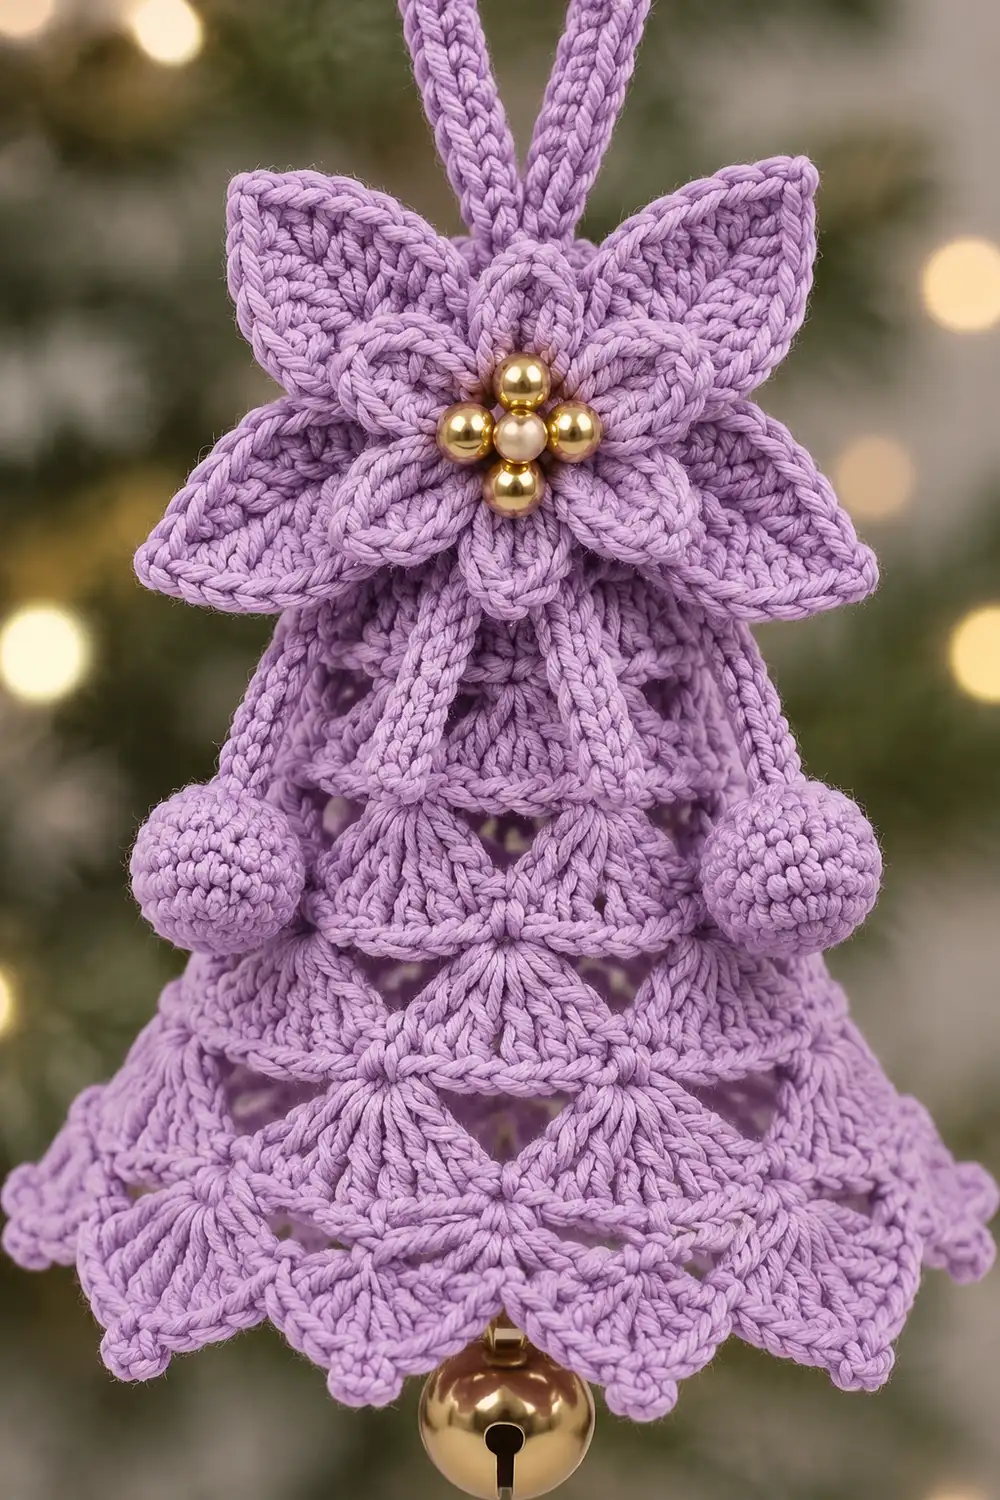
Bell Body
The bell is worked top-down in joined rounds with the right side facing. A beginning ch 3 counts as the first dc throughout.
Rnd 1: MR, ch 3, 11 dc in ring, sl st to top of ch-3. Pull the ring closed tightly. (12 dc)
Rnd 2: Ch 3, dc in same st, 2 dc in each st around, sl st to top of ch-3. (24 dc)
Checkpoint: 1.25 in (3.2 cm) across.
Rnd 3: Sl st in next st, ch 3, (dc, ch 2, 2 dc) in same st, skip 2 sts, shell in next st, skip 2 sts; rep from * 6 more times, sl st to top of ch-3. (8 shells: 32 dc, 8 ch-2 sps)*
Here, 24 sts ÷ 3 sts per repeat = 8 repeats. Every tier from here on keeps those 8 repeats.
Rnd 4: Sl st in next dc and into ch-2 sp, ch 3, (dc, ch 2, 2 dc) in same sp, ch 1, shell in next ch-2 sp, ch 1; rep from * around, sl st to top of ch-3. (8 shells: 32 dc, 8 ch-2 sps, 8 ch-1 sps)*
The ch-1 spaces open the fabric so the bell begins to flare.
Rnd 5: Sl st in next dc and into ch-2 sp, ch 3, (2 dc, ch 2, 3 dc) in same sp, ch 1, sc in next ch-1 sp, ch 1, large shell in next ch-2 sp, ch 1, sc in next ch-1 sp, ch 1; rep from * around, sl st to top of ch-3. (8 large shells: 48 dc, 8 sc, 8 ch-2 sps, 16 ch-1 sps)*
Checkpoint: slant length 1.8 in (4.6 cm).
Rnd 6: Sl st in next 2 dc and into ch-2 sp, ch 3, 6 dc in same sp, ch 1, sc in next sc, ch 1, 7 dc in next ch-2 sp, ch 1, sc in next sc, ch 1; rep from * around, sl st to top of ch-3. (8 fans: 56 dc, 8 sc)*
Rnd 7: Sl st in next 3 dc so you are in the 4th (center) dc of the fan. Ch 1, sc in same st, ch 1, shell in next sc, ch 1, sc in center dc of next fan, ch 1, shell in next sc, ch 1; rep from * around, sl st to first sc. (8 shells: 32 dc, 8 sc)*
This round shifts the motifs by half a repeat. The new shells sit above the gaps between the fans, which creates the stacked, staggered look.
Rnd 8: Sl st in next ch-1 sp, next 2 dc, and into ch-2 sp. Ch 3, 8 dc in same sp, ch 1, sc in next sc, ch 1, 9 dc in next ch-2 sp, ch 1, sc in next sc, ch 1; rep from * around, sl st to top of ch-3. (8 fans: 72 dc, 8 sc)*
Checkpoint: slant length 3.0 in (7.6 cm). This is your size before the border.
Border
The border is worked at the same yarn and hook as the body. It is measured at 7 sc = 1 in (2.5 cm) along the scalloped edge. Because the bell is round, the border has no sides. Each “side” below is one of the 8 repeats around the hem.
Rnd 9 (scallop tier): Sl st in next 4 dc so you are in the 5th (center) dc of the fan. Ch 1, sc in same st, ch 1, 9 dc in next sc, ch 1, *sc in center dc of next fan, ch 1, 9 dc in next sc, ch 1; rep from * around, sl st to first sc.
- Per repeat: 1 sc + 9 dc + 2 ch-1 sps
- Total: 8 scallops: 72 dc, 8 sc, 16 ch-1 sps
Rnd 10 (picot trim): This is a conversion round. Ch 1, sc in same sc, *sc in next ch-1 sp, sc in next 4 dc, sc in next dc, picot, sc in next 4 dc, sc in next ch-1 sp, sc in next sc; rep from * around. On the last repeat, skip the final sc and sl st to the first sc instead. Fasten off and weave in the end.
- Per repeat: 1 (ch-1 sp) + 4 + 1 + 4 + 1 (ch-1 sp) + 1 (sc) = 12 sc + 1 picot
- Total: (72 sc into existing dc + 16 sc into ch-1 sps + 8 sc into existing sc) = 96 sc + 8 picots
Why the math works: The cap ends at 24 sts, which divides evenly into 8 repeats of 3. Every tier keeps exactly 8 repeats. The fans use odd counts (7 and 9 dc), so each one has a single center dc. That center dc anchors the offset round above it. In Rnd 10, 96 sc ÷ 8 = 12 sc per scallop, so the picot lands on the center (5th) dc of every scallop. That gives you 8 even points around the hem.
The edge is 96 sc at 7 sc per inch, which is about 13.7 in (34.8 cm) of edge length. The scallop curves take up the extra length, so the hem sits at about 4 in (10.2 cm) across.
Checkpoint: slant length 3.6 in (9.1 cm); border depth 0.6 in (1.5 cm).
Four-Petal Flower
Rnd 1: MR, ch 1, 8 sc in ring, sl st to first sc. (8 sc)
Rnd 2: Ch 6, skip 1 st, sl st in next st; rep from * 3 more times. (4 ch-6 loops)*
Rnd 3 (petals): In each ch-6 loop, work (sc, hdc, 3 dc, picot, 3 dc, hdc, sc), then sl st in the next sl st. (4 pointed petals)
Fasten off and leave a 12 in (30.5 cm) tail for sewing. The flower measures about 2.5 in (6.4 cm) across, point to point.
Beads: With the beading needle and thread, sew 4 beads in a cross around the ring and 1 bead in the center. Knot the thread securely on the back.
Berries (Make 2)
Rnd 1: MR, 6 sc in ring. (6 sc)
Rnd 2: 2 sc in each st. (12 sc)
Rnd 3: Sc in each st. (12 sc)
Rnd 4: Sc2tog 6 times. (6 sc)
Stuff the berry lightly with fiberfill.
Stem: Ch 10, then sl st in 2nd ch from hook and in each ch back to the berry. Fasten off and leave a 6 in (15.2 cm) tail. Each berry is about 0.6 in (1.5 cm) across, and each stem is about 1.25 in (3.2 cm) long.
Twisted Cord and Assembly
Twisted cord: Cut a 30 in (76.2 cm) length of yarn and fold it in half. Anchor the fold, then twist the ends until the yarn kinks back on itself. Fold the yarn in half again and let it twist together. Knot the ends. The finished cord is about 7 in (17.8 cm) long.
Assembly:
- Cord: Fold the cord into a loop and sew both ends to the top of the bell, at Rnd 1. The loop should stand 2.5 in (6.4 cm) above the bell top.
- Flower: Center the flower over the cord ends, covering them. Sew around the flower’s Rnd 1 through the bell cap.
- Berries: Sew one stem to each side of the bell, just under the flower’s lower petals. The berries should dangle freely down the lower sides of the bell.
- Charm: Join yarn inside the bell at the center of Rnd 1. Chain until the chain measures 3.5 in (8.9 cm). Sew the charm to the end of the chain. The charm should hang just below the hem at the bottom point. Adjust the chain length if needed.
Final Blocking
- Remove the charm temporarily, or tuck it up out of the way.
- Soak the bell body in fabric stiffener, or mist it heavily with spray starch. Keep the flower and berries dry.
- Slip the bell over your form, with the cap on the narrow end.
- Pull the shell tiers gently downward so the flare is even all around.
- Pin each of the 8 picots to shape the scalloped hem. Check that the hem measures 4 in (10.2 cm) across.
- Shape the flower petals flat with your fingers.
- Let everything dry completely, for 12–24 hours.
- Remove the form and re-hang the charm.
Final Quality-Control Checklist
- Cap measured 1.25 in (3.2 cm) after Rnd 2.
- Each tier has exactly 8 repeats.
- Rnd 10 has 96 sc and 8 picots, with one picot centered on each scallop.
- Bell is 3.25 in (8.3 cm) tall and 4 in (10.2 cm) across the hem.
- Flower is centered and covers the cord ends.
- All 5 beads are sewn on securely.
- Berries hang evenly, one on each side.
- Charm hangs from the bottom point, just below the hem.
- All ends are woven in and hidden.
Troubleshooting
The bell ruffles instead of flaring smoothly. Your tension is loose in the fan rounds. Go down 0.25 mm and redo Rnds 6–8.
The bell looks like a tube. Your ch-1 spaces are too tight. Relax your tension on the chains.
The picots don’t line up with the scallop centers. Recount Rnd 10. Each repeat needs 5 sc before the picot and 7 sc after it, counting the sc in the next sc.
The flower petals curl. Steam them lightly and pin them flat to dry.
The charm swings off-center. Re-anchor the chain at the exact center of Rnd 1.
The berries look lumpy. You used too much stuffing. Remove a little before closing.
Care
Spot clean only with a damp cloth. Store the ornament flat or hanging so the stiffened bell keeps its shape.
Final Notes
Your measurement chain runs like this:
- Cap of 1.25 in (3.2 cm) after Rnd 2
- Slant length of 1.8 in (4.6 cm) after Rnd 5
- Slant length of 3.0 in (7.6 cm) after Rnd 8
- Slant length of 3.6 in (9.1 cm) after the border
That gives a finished bell 3.25 in (8.3 cm) tall and 4 in (10.2 cm) across. If each checkpoint matches, the flower, berries, and charm will sit exactly where they should.
Optional: For a coordinated set, make several bells in different pastel cottons.
Happy crocheting!