

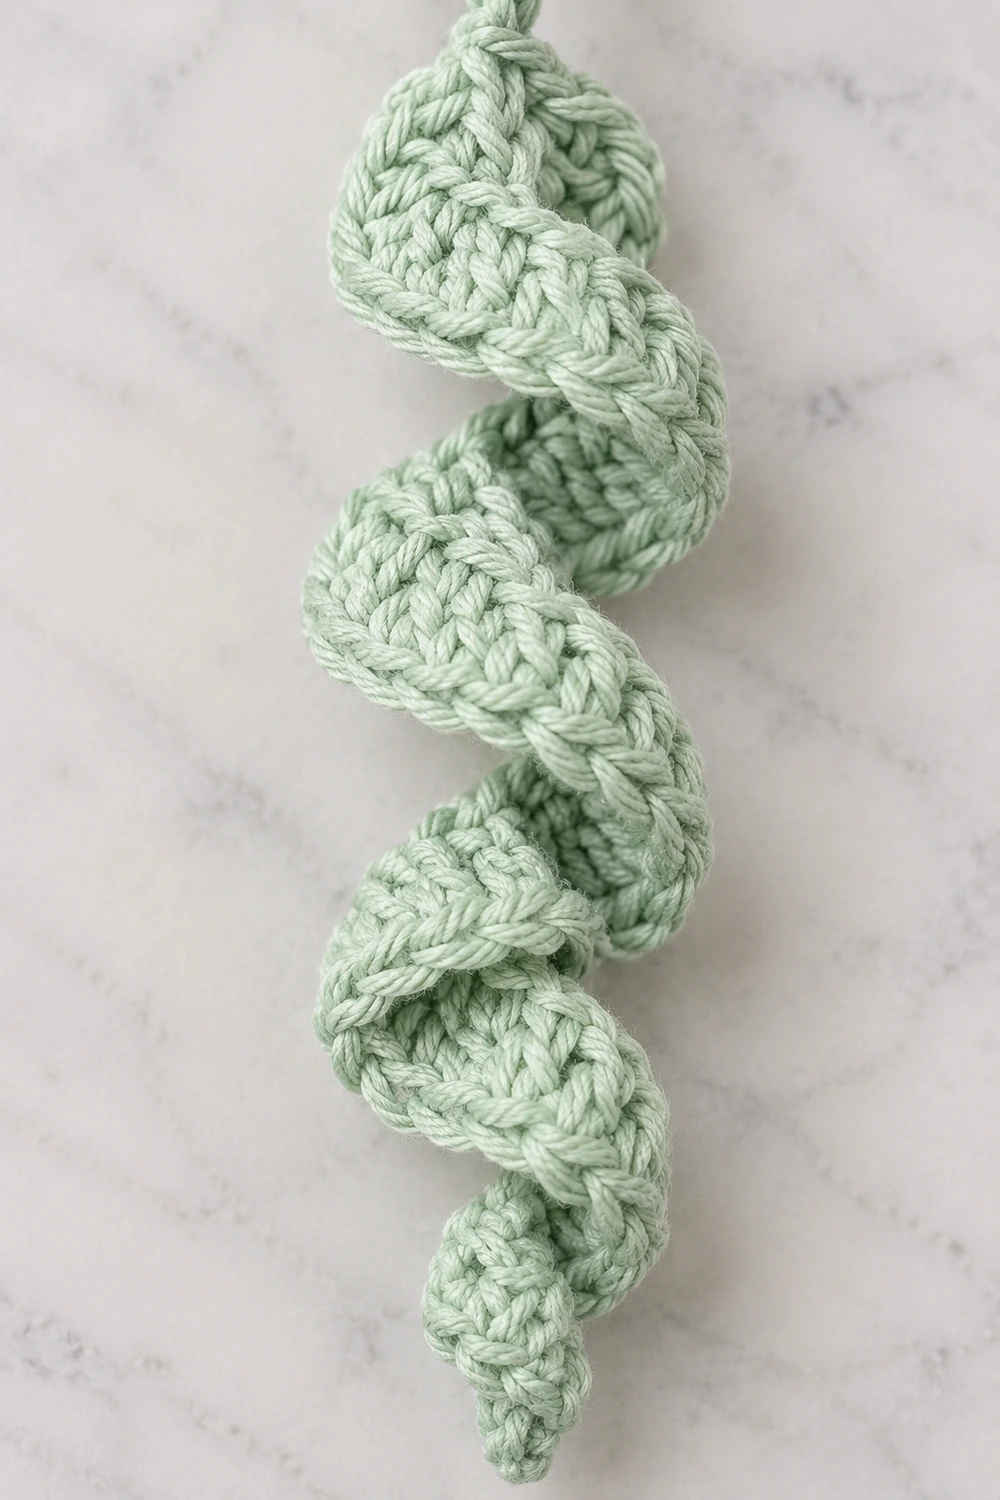
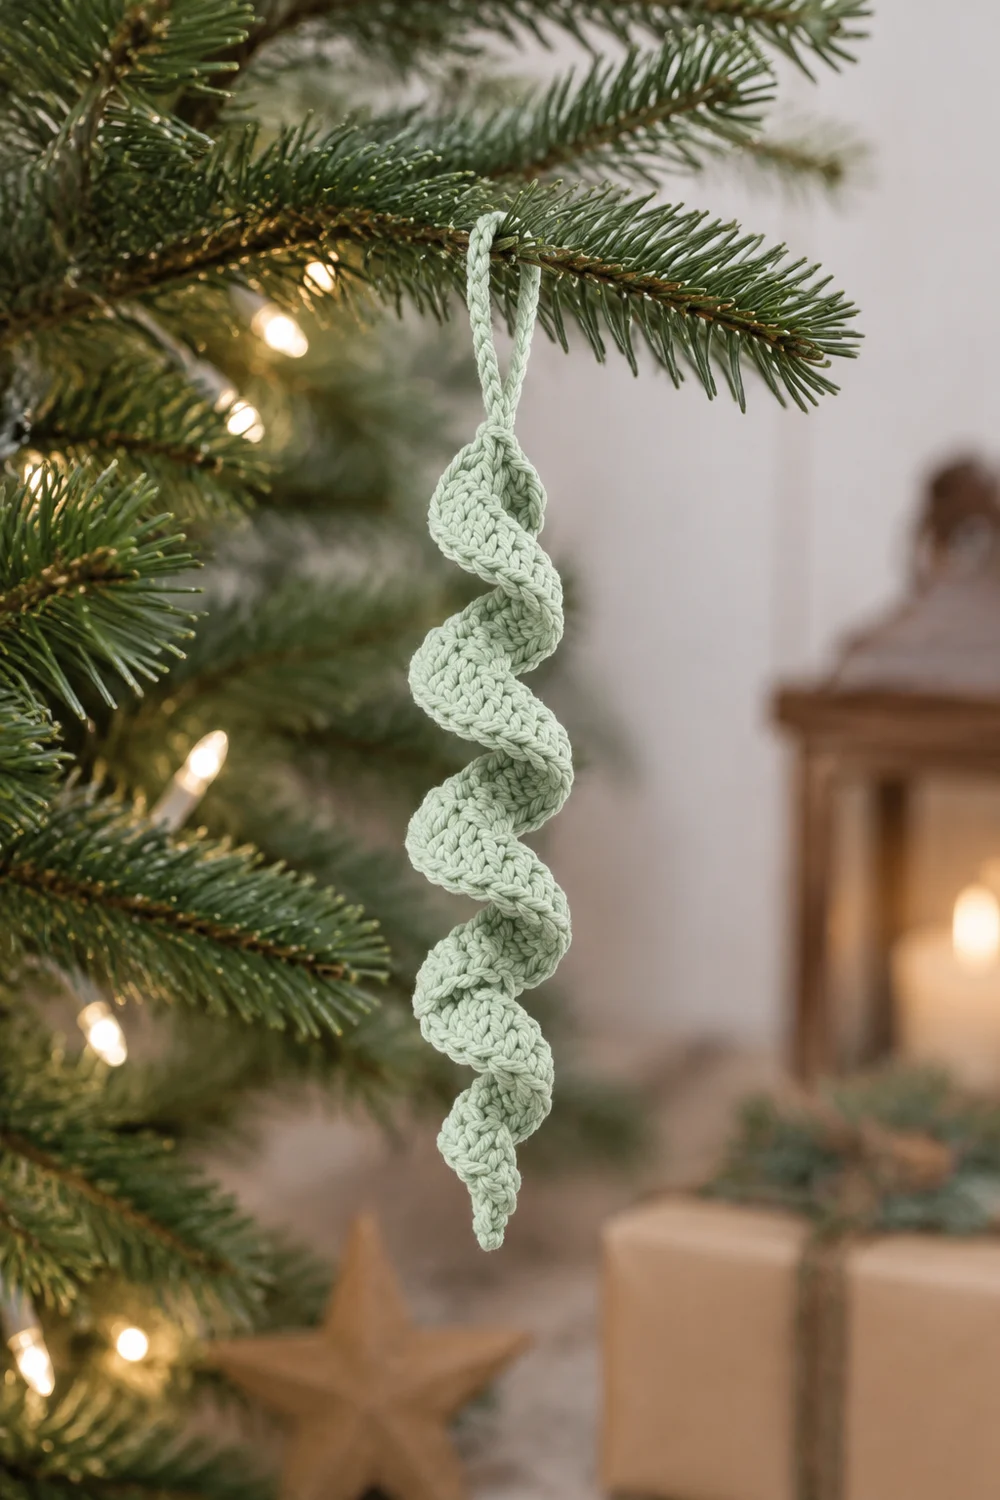
The Sage Twist is a small corkscrew ornament with a soft, sculptural shape. It twists down from a slim chain loop at the top to a fine, tapered point at the bottom. Each coil is fuller near the top and narrows toward the tip, so the finished piece looks like a twisted icicle or a tiny swirled tree.
The sample is worked in pale sage green cotton. The color pairs well with greenery, pinecones, and neutral holiday decor, and the matte cotton shows off the hdc texture clearly. Any solid color works. Mint, cream, and dusty pink all look lovely.
This pattern uses US crochet terms. The finished ornament measures about 4.5 in (11.4 cm) long including the hanging loop. The spiral body is 3.5 in (8.9 cm) long and the widest coil is 1.25 in (3.2 cm) across.
Construction is quick. You make a foundation chain, work one row of graded stitches back along it, and then work a second row with heavy increases. The extra stitches on the outer edge force the strip to twist into a spiral on its own. A short chain loop at the top finishes the piece. It is one piece, two rows, and has no sewing.
Finished Size and Construction
- Finished size: 4.5 in (11.4 cm) long including loop; widest coil 1.25 in (3.2 cm)
- Skill level: Easy
- Terminology: US crochet terms
- Yarn weight: DK / light (#3) cotton
- Hook: 3.5 mm (E-4)
- Number of pieces: 1
- Layout: Single vertical spiral, loop at top, point at bottom
- Piece size: Spiral body 3.5 in (8.9 cm) long + loop about 1 in (2.5 cm) tall
- Flat strip before twisting: about 7.5 in (19.1 cm) long and 0.75 in (1.9 cm) wide
- Size before border: Same as finished size (no separate border round)
- Border depth: 0 in (0 cm). Row 2 forms the finished outer edge.
Materials
Yarn advice: Choose a smooth, mercerized or matte cotton in DK weight. Cotton holds the twist crisply and shows stitch definition well. Acrylic works but gives a softer, looser spiral. Avoid fuzzy or very splitty yarns, because the increases sit close together and fuzz hides the texture.
Yarn:
– Sage green, DK cotton: 6 g, about 13 m (14 yd)
Tools:
– 3.5 mm (E-4) crochet hook
– Tapestry needle
– Scissors
– Stitch marker (optional, to mark the start of Row 2’s 3-hdc section)
– Pencil, chopstick, or knitting needle about 0.25 in (0.6 cm) thick, for blocking
– Spray bottle with water
Note: Yarn quantities include a margin of about 30% for your gauge swatch, tails, and small tension differences. One 50 g ball makes several ornaments.
Abbreviations (US Terms)
- ch – chain
- sl st – slip stitch
- sc – single crochet
- hdc – half double crochet
- st(s) – stitch(es)
- RS – right side
Special technique: 2-hdc and 3-hdc increases. Work 2 hdc (or 3 hdc) into the same stitch. These clustered increases make the outer edge much longer than the inner edge, and that difference is what creates the spiral.
Gauge and Checkpoints
Gauge: 16 hdc and 12 rows = 4 in (10.2 cm), worked flat in rows with a 3.5 mm hook.
Gauge matters less for an ornament than for a garment. Still, it controls both the length and the tightness of the twist. Make one ornament first and check it against the measurements below before you make a batch.
Checkpoint 1, after Row 1: Lay the strip flat without stretching. It should measure about 7.5 in (19.1 cm) long, give or take 0.25 in (0.6 cm).
Checkpoint 2, after Row 2: The strip should already be twisting by itself into 4 to 5 coils. If you let it hang, the body should measure about 3.5 in (8.9 cm) long.
Checkpoint 3, after the loop: The total length is about 4.5 in (11.4 cm), and the loop is about 1 in (2.5 cm) tall.
If your piece is too big: If Row 1 is over 7.75 in (19.7 cm), go down to a 3.25 mm hook. Loose tension also makes a weaker twist.
If your piece is too small: If Row 1 is under 7.25 in (18.4 cm), go up to a 3.75 mm hook. Very tight stitches make the spiral stiff and compressed.
Change the hook, not the stitch counts. The counts set the shape of the spiral.
Pattern
Foundation Chain
Leave a 6 in (15.2 cm) tail. This tail ends up at the tip of the ornament and helps you tidy the point later.
Ch 32.
Orientation: the slipknot end of the chain becomes the tip, and the end nearest your hook becomes the top.
Row 1 (Graded Foundation Row)
This row tapers the strip. Tall stitches at the top give a wide base, and short stitches at the tip give a fine point.
Hdc in the 3rd ch from hook (the 2 skipped ch do not count as a stitch). Hdc in each of the next 24 ch. You now have 25 hdc.
Sc in each of the next 3 ch.
Sl st in each of the last 2 ch.
Stitch count: 30 sts (25 hdc + 3 sc + 2 sl st).
Chain check: 2 skipped + 25 + 3 + 2 = 32 ch used. ✓
Take Checkpoint 1 now. The strip should be about 7.5 in (19.1 cm) long.
Row 2 (Twist Row)
This is a growth row. Each section adds new stitches, and the number of stitches per base stitch rises toward the top. That makes the coils fuller at the top and slimmer at the tip.
Ch 1 (does not count as a stitch). Turn.
Sl st in each of the first 2 sl st. (2 sts)
2 sc in each of the next 3 sc. (6 sts)
2 hdc in each of the next 10 hdc. (20 sts)
Place a marker here if you like.
3 hdc in each of the last 15 hdc. (45 sts)
Stitch count: 73 sts (2 sl st + 6 sc + 20 hdc + 45 hdc).
Base check: 2 + 3 + 10 + 15 = 30 stitches of Row 1 used. ✓
As you work the 3-hdc section, the strip will start to curl and twist. Let it twist. Do not try to hold it flat. You finish this row at the top of the ornament.
Take Checkpoint 2 now. You should see 4 to 5 coils.
Hanging Loop
With the working yarn still at the top corner, ch 10.
Sl st into the same stitch as the last hdc of Row 2 to close the loop.
Sl st into the top of the first hdc of Row 1 directly below. This anchors the loop across both rows so it sits straight.
Fasten off, leaving a 6 in (15.2 cm) tail.
The 10-ch loop folds in half to a finished height of about 1 in (2.5 cm).
Finishing the Tip and Top
At the top, weave the tail down through the base of the loop and into the first few hdc. Pass it through the loop chain once more to reinforce it.
At the tip, use the starting tail to make one small stitch that pulls the 2 sl st and the first sc together into a neat point. Then weave the tail up inside the inner edge of the spiral.
Trim both tails close.
Border
This ornament has no separate border round. Row 2 is the finished outer edge. Its plain sl st, sc, and hdc tops give a smooth, defined rim. An extra round of edging would tighten the outer edge and weaken the twist, so none is added.
Here is how the edge math works.
Edge gauge: Measured flat, the outer edge works at the same gauge as the body, about 4 sts per inch (16 sts = 4 in / 10.2 cm).
Inner edge (foundation side): 30 sts, or about 7.5 in (19.1 cm) if laid flat.
Outer edge (Row 2): 73 sts, or about 18.25 in (46.4 cm) if it could lie flat.
Why the math works: The outer edge is about 2.4 times longer than the inner edge. That much extra length cannot lie flat, so it wraps around the shorter inner edge and forms a corkscrew. The ratio is not even along the strip, and that is intentional:
- Top section: 15 base sts become 45 sts (3:1). This gives the fullest, widest coils.
- Middle section: 10 base sts become 20 sts (2:1). The coils here are medium width.
- Tip section: 3 base sts become 6 sc (2:1), but sc is a shorter stitch, so the coil stays small. The 2 sl st stay 1:1 to form the point.
The graded ratio creates the taper, and the plain stitches keep the edge smooth.
Final Blocking
Cotton holds its shape well after light blocking. Do not press the ornament flat.
- Lightly spritz the ornament with water until it is damp, not soaking.
- Hold the ornament by the loop and let it hang so the coils settle evenly.
- Wrap the spiral gently around a pencil, chopstick, or knitting needle about 0.25 in (0.6 cm) thick. Start at the top and follow the natural twist down to the tip.
- Spread the coils so the spacing looks even. The body should measure about 3.5 in (8.9 cm) along the pencil.
- Pinch the tip into a neat point and straighten the loop.
- Let it dry completely on the pencil, which usually takes a few hours.
- Slide the ornament off and check the final length: 4.5 in (11.4 cm) including the loop.
Final Quality-Control Checklist
- [ ] Row 1 has 30 sts: 25 hdc, 3 sc, 2 sl st
- [ ] Row 2 has 73 sts: 2 sl st, 6 sc, 20 hdc, 45 hdc
- [ ] Flat strip measured about 7.5 in (19.1 cm) before twisting
- [ ] Spiral has 4 to 5 even coils
- [ ] Coils are fuller at the top and taper toward the tip
- [ ] Tip is a neat, closed point
- [ ] Loop is about 1 in (2.5 cm) tall, sits straight, and is securely anchored
- [ ] Total length is about 4.5 in (11.4 cm)
- [ ] All ends are woven in and none are visible from the outside
Troubleshooting
The strip will not twist. Your tension is probably too loose, or a section has fewer increases than written. Recount Row 2: it should have 73 sts. Then try a hook 0.25 mm smaller.
The spiral is too tight and stiff. Your stitches are too tight. Go up 0.25 mm, or relax your grip on the yarn during the 3-hdc section.
The coils are uneven. This usually comes from a miscount where the 2-hdc section meets the 3-hdc section. Use a marker at that point next time. Blocking around a pencil also evens out small differences.
The tip is floppy or blunt. Pull the starting tail snug through the sl st and first sc before you weave it in.
The loop leans to one side. Make sure you anchored it into both Row 2 and Row 1. Re-block the ornament while it hangs from the loop.
The ornament is too long. Check Row 1 against Checkpoint 1. If the strip is longer than 7.75 in (19.7 cm), go down a hook size.
Care
Hand wash in cool water and lay the ornament flat to dry. Reshape it around a pencil if needed. Store it loosely so the coils are not crushed.
Final Notes
Each measurement in this pattern leads to the next one:
- A gauge of 16 hdc = 4 in (10.2 cm) gives a 30-stitch Row 1 that measures about 7.5 in (19.1 cm).
- Row 2 grows that strip to 73 sts on the outer edge, a ratio of about 2.4:1. That extra edge length twists the strip into 4 to 5 tapered coils, about 3.5 in (8.9 cm) long.
- A 10-ch loop adds about 1 in (2.5 cm), for a finished ornament of about 4.5 in (11.4 cm).
If one checkpoint is off, adjust your hook and the rest of the measurements will follow. Optional: once you have the twist down, try a few in different colors to hang together on a branch.
Happy crocheting!