
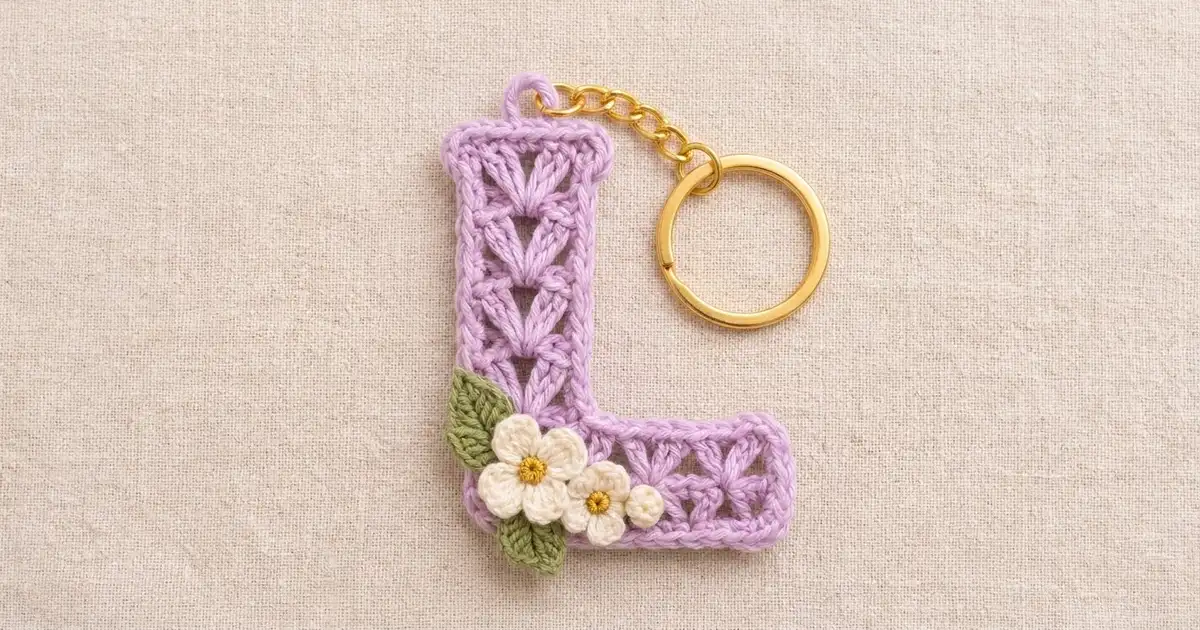
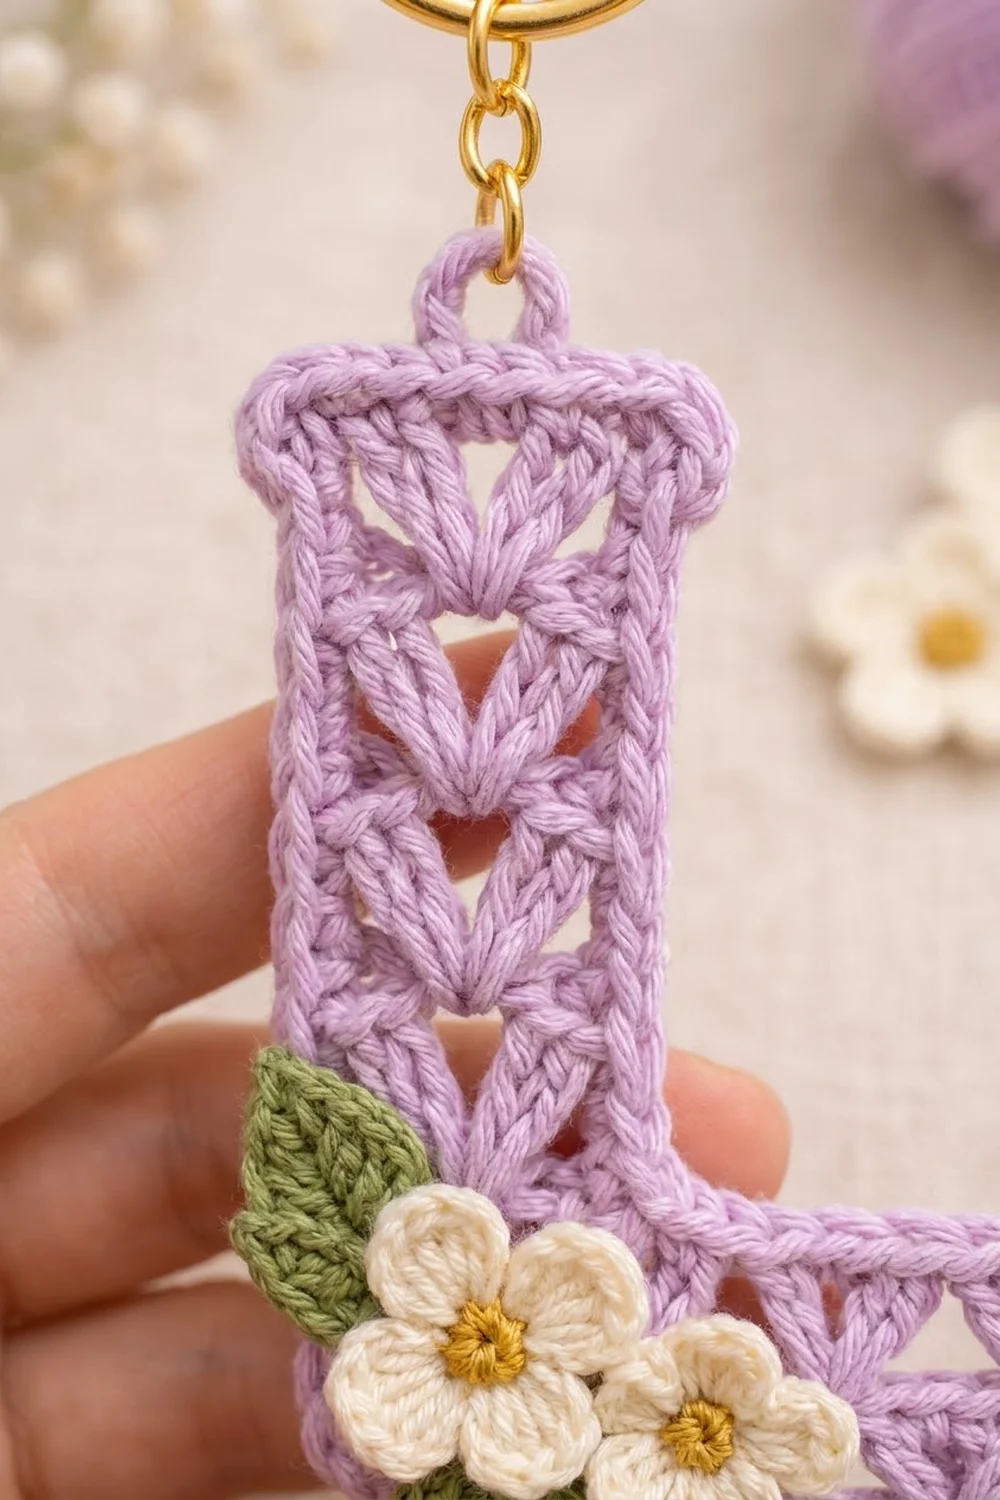
This little letter L keychain is a sweet, personal accessory that works up in an evening. The letter is worked in soft lavender cotton with a lacy shell texture. Stacked V-shaped shells run up the stem and across the foot with small triangular openings between them, and a smooth single crochet edge frames the whole shape.
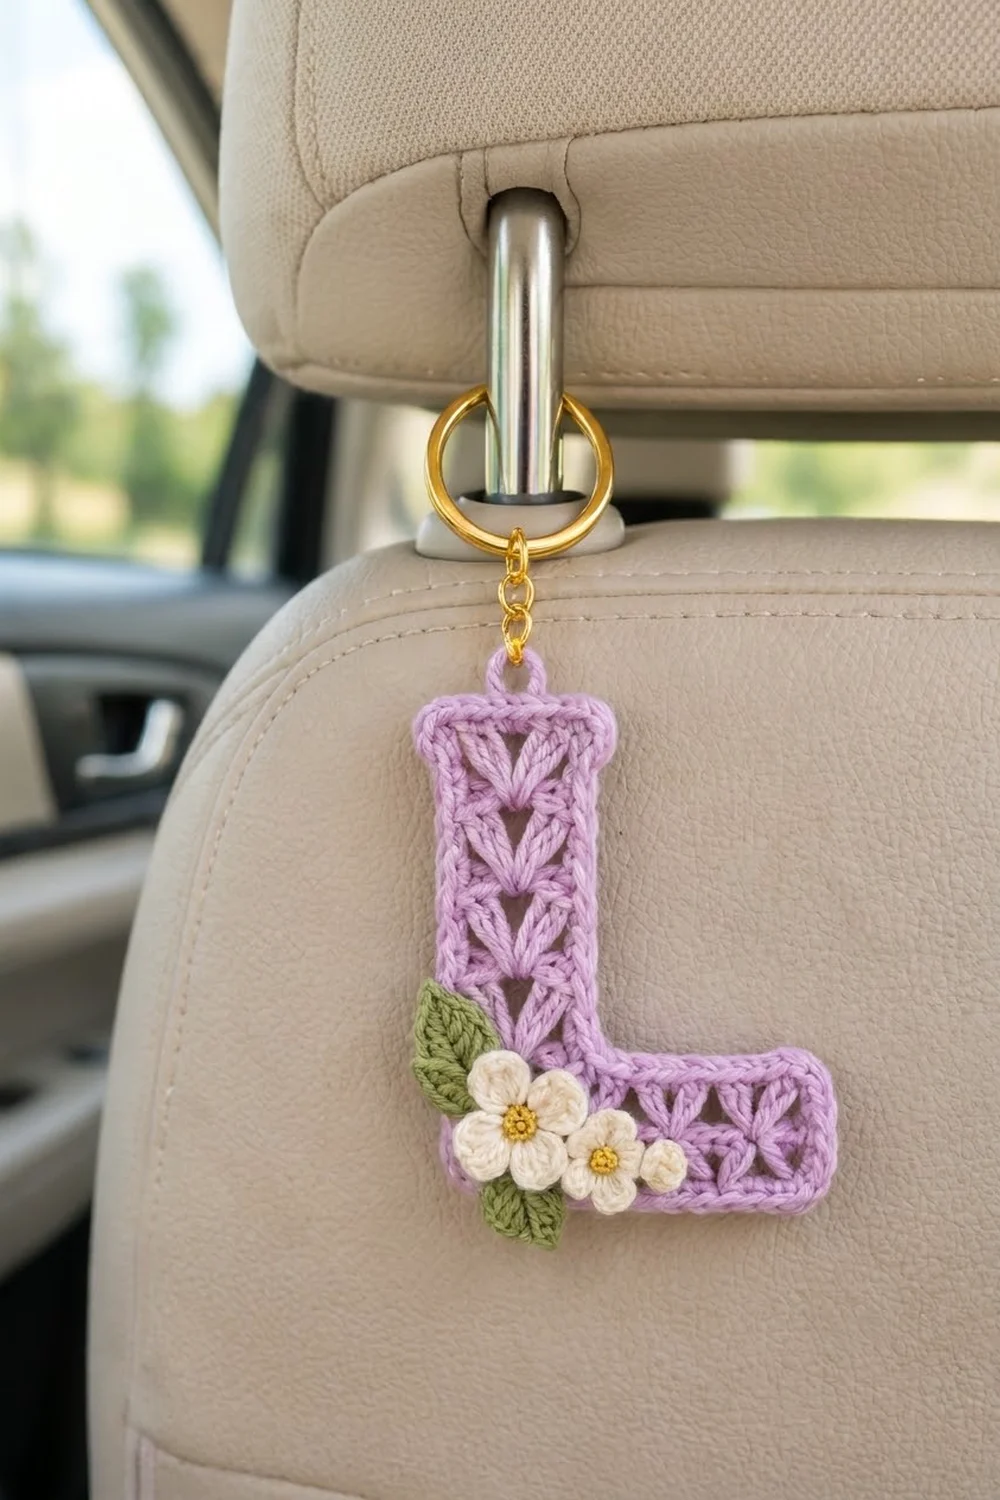
At the inner bottom-left corner, two cream five-petal flowers with golden-yellow centers sit on a pair of moss-green leaves. A slightly flared cap tops the stem, and a small crochet loop holds a gold jump ring, a short chain, and a split key ring. The style is soft, feminine, and cottage-inspired, which makes it a good gift for anyone whose name starts with L.
The pattern uses US crochet terms. The finished letter measures about 4 in (10.2 cm) tall and 3.25 in (8.3 cm) wide. That size doesn’t include the loop or the hardware.
Construction is simple. You work the foot in rows across its full width, then continue the stem in rows over only the first 7 stitches. Next you finish the top with a flared half double crochet cap, add one round of single crochet border, and make the hanging loop. Last, you make the flowers and leaves as small separate appliqués and sew them on.
Finished Size and Construction
- Finished size: 4 in (10.2 cm) tall x 3.25 in (8.3 cm) wide
- Skill level: Easy to intermediate
- Terminology: US
- Yarn weight: Sport (#2) cotton
- Hook: 2.75 mm (C-2)
- Number of pieces: 1 letter piece, plus 4 small appliqués (2 flowers, 2 leaves) sewn on
- Layout: A single letter; no joining of letter pieces
- Piece size before border: 3.75 in (9.5 cm) tall x 3 in (7.6 cm) wide
- Stem width before border: 1.1 in (2.8 cm)
- Border depth: 0.125 in (0.3 cm) per side, 1 round of sc
Materials
Choose a smooth, mercerized sport-weight cotton. It shows the shell texture clearly, holds its shape on a keychain, and resists pilling. Acrylic works, but the lace will look softer and less defined.
- Lavender (A): 10 g, about 30 m
- Cream (B): 2 g, about 6 m
- Golden yellow (C): 1 g, about 3 m
- Moss green (D): 2 g, about 6 m
These quantities include extra yarn for the gauge check and for weaving in ends.
Tools:
- 2.75 mm (C-2) crochet hook
- Tapestry needle
- Scissors
- Stitch marker
- Blocking board and rust-proof pins
- Spray bottle
- Gold split key ring, 1 in (2.5 cm)
- Gold jump ring, about 8 mm, and a short gold chain of 3 to 4 links
- 2 pairs of flat-nose pliers
Abbreviations (US Terms)
- ch: chain
- sl st: slip stitch
- sc: single crochet
- hdc: half double crochet
- dc: double crochet
- sc2tog: single crochet 2 together
- sp: space
- st(s): stitch(es)
- MR: magic ring
- RS / WS: right side / wrong side
Special stitch:
- Shell: (2 dc, ch 1, 2 dc) all in the same stitch.
Gauge and Checkpoints
The foot of the letter doubles as your test piece. Work Rows 1 to 5, then stop and measure before you go on.
- Width gauge: 19 sts = 3 in (7.6 cm) across Row 5.
- Row gauge: 1 shell row + 1 sc row = 0.5 in (1.3 cm).
Checkpoints:
- After Row 5, the foot measures 3 in (7.6 cm) wide and 1.1 in (2.8 cm) tall.
- After Row 15, the left edge measures 3.6 in (9.1 cm) from the bottom.
- After Row 16 (the cap), the piece measures 3.75 in (9.5 cm) tall.
- After the border, the letter measures 4 in (10.2 cm) x 3.25 in (8.3 cm).
If the foot is wider than 3 in (7.6 cm), go down 0.25 mm in hook size and start again. If it is narrower, go up 0.25 mm.
Gauge matters more than usual on a letter. The stem has to look in proportion to the foot, and a small difference across 19 stitches is easy to see.
Letter Pattern
With A, ch 20.
Foot
Row 1 (RS): Sc in 2nd ch from hook and in each ch across, turn. (19 sc)
Row 2 (WS): Ch 3 (counts as dc), *skip 2 sts, shell in next st, skip 2 sts, dc in next st; repeat from * 2 more times, turn. (3 shells; 16 dc and 3 ch-1 sps)
Each repeat uses 6 stitches, so the row uses 1 + (3 x 6) = 19 stitches of Row 1.
Row 3 (RS): Ch 1, sc in first dc, *sc in next 2 dc, sc in ch-1 sp, sc in next 2 dc, sc in next dc; repeat from * 2 more times, working the last sc in the top of the turning ch, turn. (19 sc)
This sc row turns each shell back into 5 stitches (4 dc + 1 sp) and adds 1 sc over each single dc. The count returns to 1 + (3 x 6) = 19.
Row 4 (WS): Repeat Row 2. Each new shell lands in the sc above the previous ch-1 sp, so the shells stack into neat V columns. (3 shells; 16 dc and 3 ch-1 sps)
Row 5 (RS): Repeat Row 3. (19 sc)
Checkpoint: the foot measures 3 in (7.6 cm) x 1.1 in (2.8 cm). Don’t fasten off.
Stem
From here you work over only the first 7 stitches. Row 5 ended at the left edge (as seen from the RS), so the stem rises from the left end of the foot. It sits directly above the first shell column.
Row 6 (WS): Ch 3 (counts as dc), skip 2 sts, shell in next st, skip 2 sts, dc in next st, turn. Leave the remaining 12 sts unworked. (1 shell; 5 dc and 1 ch-1 sp)
Row 7 (RS): Ch 1, sc in first dc, sc in next 2 dc, sc in ch-1 sp, sc in next 2 dc, sc in top of turning ch, turn. (7 sc)
Rows 8 to 15: Repeat Rows 6 and 7 four more times. (5 stem shells total; 7 sc after Row 15)
Checkpoint: the left edge measures 3.6 in (9.1 cm), and the stem is 1.1 in (2.8 cm) wide.
Flared Cap
Row 16 (WS): Ch 2 (does not count as a st), 2 hdc in first sc, hdc in next 5 sc, 2 hdc in last sc. (9 hdc)
This is a growth row: the 7 stitches below become 9 hdc. The extra stitch at each end flares the cap to about 1.4 in (3.6 cm), which gives the letter its serif. Don’t fasten off.
Border
Border gauge: 1 sc per sc row end, 2 sc per dc row end, 1 sc per hdc row end, and 3 sc in each outer corner stitch.
Round 1 (RS): Ch 1, turn so the RS faces you. You are now at the top-right corner of the cap.
- Top: 3 sc in first hdc, sc in next 7 hdc, 3 sc in last hdc. (13 sc)
- Left side: Working down the row ends, 1 sc in the side of Row 16. Then work 1 sc in each sc row end and 2 sc in each dc row end down to Row 1. (8 sc rows + 7 dc rows = 8 + 14 = 22, plus 1 = 23 sc)
- Bottom: Working into the underside of the foundation ch, 3 sc in first ch, sc in next 17 ch, 3 sc in last ch. (23 sc)
- Foot right end: 1 sc in each sc row end and 2 sc in each dc row end for Rows 1 to 5. (3 + 4 = 7 sc)
- Foot top-right corner: 3 sc in the last st of Row 5. (3 sc)
- Foot top: Sc in next 10 sts of Row 5. Then sc2tog over the next st (the 8th st of Row 5, counted from the left) and the lower half of the Row 6 row end. (11 sts)
- Stem inner edge: 1 sc in the remaining half of the Row 6 row end. Then work 1 sc in each sc row end and 2 sc in each dc row end for Rows 7 to 15, then 1 sc in the side of Row 16. (1 + 5 + 8 + 1 = 15 sc)
Join with sl st to first sc. (95 sts)
Total check: 13 + 23 + 23 + 7 + 3 + 11 + 15 = 95.
Why the math works: A dc row is about twice as tall as an sc row. Working 2 sc per dc row end and 1 sc per sc row end keeps the sides straight, so they neither ruffle nor pull in. The 3 sc at each of the five outer corners let the edge turn the corner while staying flat. The single sc2tog at the inner corner removes the fullness where the foot meets the stem, so that corner stays crisp instead of puckering.
Hanging Loop
Count to the 7th of the 13 top-edge sc (the center) and sl st across to it. Ch 8, then sl st in the same st. Work 12 sc into the ch-8 loop and sl st in the base st. Fasten off and weave in ends.
Flowers (Make 2)
Large flower:
Round 1: With C, MR, 5 sc in ring, join with sl st to first sc. (5 sc) Fasten off.
Round 2: Join B in any sc. *(Sl st, ch 2, 3 dc, ch 2, sl st) in next sc; repeat from * 4 more times. (5 petals) Fasten off, leaving a 6 in (15.2 cm) tail.
Finished size: about 0.9 in (2.3 cm) across.
Small flower: Work as for the large flower, but make each petal (sl st, ch 1, 3 hdc, ch 1, sl st). (5 petals) Finished size: about 0.75 in (1.9 cm) across.
Leaves (Make 2)
With D, ch 7.
Round 1: Sl st in 2nd ch from hook, sc in next ch, hdc in next ch, dc in next ch, hdc in next ch, (sc, ch 2, sc) in last ch for the tip. Working along the other side of the chain, hdc in next ch, dc in next ch, hdc in next ch, sc in next ch, sl st in next ch. (12 sts and 1 ch-2 tip)
Fasten off, leaving a 6 in (15.2 cm) tail. Each leaf measures about 1 in (2.5 cm) long.
Assembly of Appliqués
Lay the letter RS up. Place one leaf at the left edge of the stem, just above the foot, pointing up and out so its tip reaches slightly past the border. Place the second leaf below it at the bottom-left corner, pointing down and out.
Place the large flower over the base of the stem so it overlaps both leaf bases. Place the small flower to its right on the foot, touching the large flower. Sew the leaves on first, then the flowers. Use small stitches through the flower centers so the petal edges stay free.
Open the jump ring with the two pliers, thread it through the hanging loop and the chain, and close it. Attach the split key ring to the top of the chain.
Final Blocking
- If possible, block the letter before you sew on the appliqués.
- Pin the letter RS up on a blocking board to 4 in (10.2 cm) x 3.25 in (8.3 cm).
- Pin the five outer corners first, then the inner corner.
- Pin along the sides so the stem stays an even 1.35 in (3.4 cm) wide.
- Mist lightly with water until damp, not soaked.
- Gently open each shell and each triangular gap with your fingertip.
- Let it dry completely, which takes at least 2 to 3 hours.
- Unpin, sew on the appliqués, and add the hardware.
Final Quality-Control Checklist
- The foot measured 3 in (7.6 cm) wide before the border.
- The stem has 5 stacked shells, lined up with the first shell column of the foot.
- The cap has 9 hdc and flares evenly on both sides.
- The border round has 95 sts.
- The letter measures 4 in (10.2 cm) x 3.25 in (8.3 cm).
- The inner corner is sharp, not puckered.
- The hanging loop is centered on the cap.
- The flowers and leaves are secure, with no loose tails.
- The jump ring is fully closed.
Troubleshooting
The stem leans or twists. Check that every stem row has exactly 7 sts and that Row 6 started at the left edge. Block firmly.
The shells don’t stack. Make sure each shell goes into the sc above the previous ch-1 sp, not the sc beside it.
The edges ruffle. Your border tension is loose. Work the border with a hook 0.25 mm smaller and keep the same counts.
The edges pull in. Loosen your border tension, or work the border only with a hook 0.25 mm larger.
The inner corner puckers. Redo the sc2tog so it catches both the Row 5 stitch and the Row 6 row end.
The flowers cup. Mist them, pin them flat, and let them dry before sewing.
Care
Hand wash in cool water with mild soap, press the water out in a towel, and dry flat. If you can, take the metal hardware off first.
Final Notes
The measurements build in a short chain that’s easy to track. The foot sets the width at 3 in (7.6 cm). The stem reaches 3.6 in (9.1 cm), and the cap brings the piece to 3.75 in (9.5 cm). The 95-stitch border adds 0.125 in (0.3 cm) per side, for a finished letter of 4 in (10.2 cm) x 3.25 in (8.3 cm). If you check each stage, the letter will come out square and balanced, ready for its flowers.
Happy crocheting!