
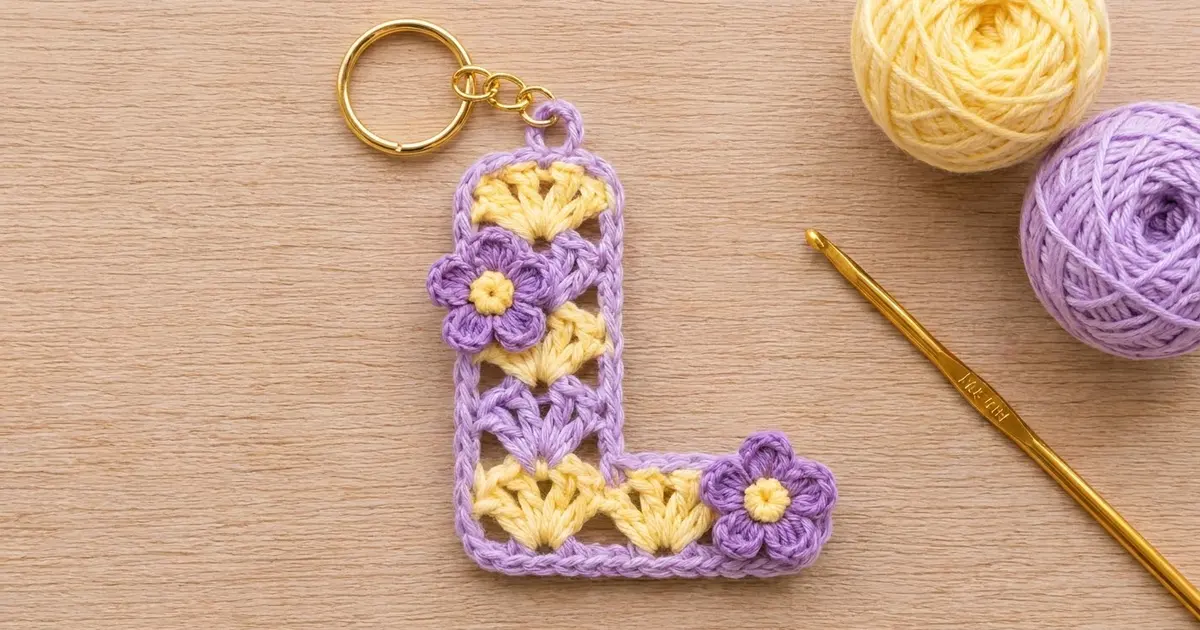
This little letter L keychain is made from stacked fan shells in soft lavender and pale lemon yellow, with a crisp lavender outline. Two tiny five-petal flowers finish it off. It’s a quick, personal gift, and it looks good clipped to a tote bag, a pencil case, or a set of keys.
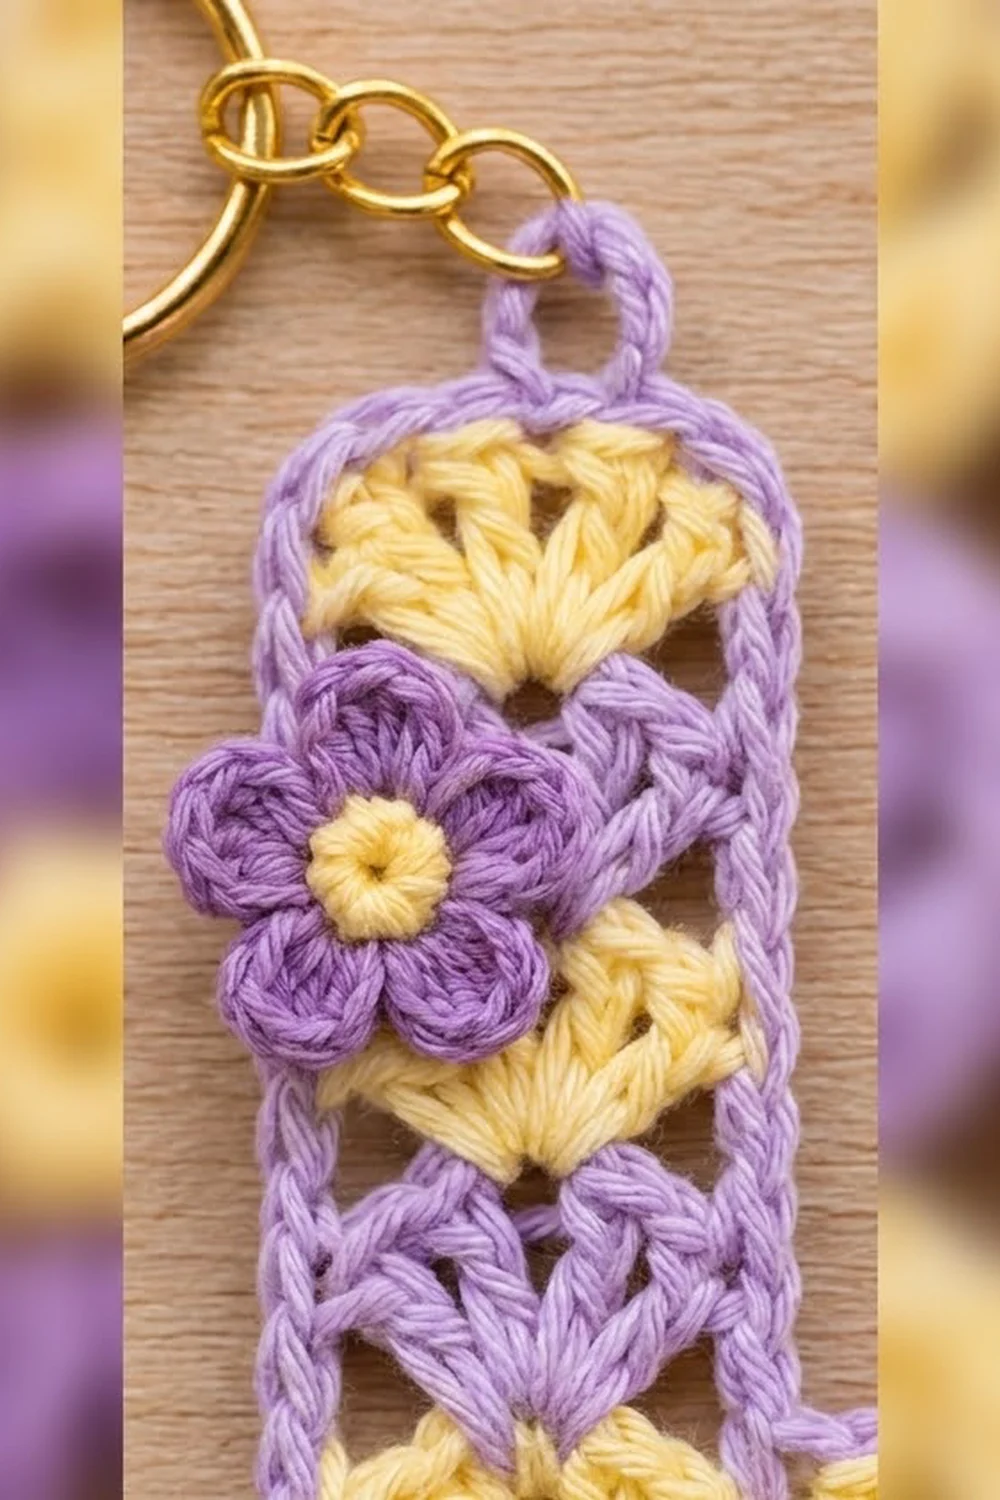
The look is sweet and a little vintage. The shells alternate yellow and lavender up the column, and the outline gives the letter a clean, readable shape. The yellow flower centers repeat the shell color, so the whole piece looks coordinated.
This pattern uses US crochet terms. The finished letter measures 3.25 in (8.3 cm) wide by 3.75 in (9.5 cm) tall. With the hanging loop it is 4.25 in (10.8 cm) tall.
Construction is simple. You start with one row of three shells for the horizontal arm. Then you keep working rows over the leftmost shell only, which builds the column straight up from the corner. One outline round goes around the whole L, then you add a hanging loop, make two flowers, sew them on, and attach the hardware.
Finished Size and Construction
- Finished size: 3.25 in (8.3 cm) wide × 3.75 in (9.5 cm) tall, plus a 0.5 in (1.3 cm) loop
- Skill level: Easy / advanced beginner
- Terminology: US
- Yarn weight: Sport (#2) cotton
- Hook: 3.0 mm (US C/2 or D/3)
- Number of pieces: 1 main L piece plus 2 flower appliqués
- Layout: Column of 5 shells; the bottom shell is shared with a horizontal arm of 3 shells
- Piece size before outline: 3 in (7.6 cm) wide × 3.5 in (8.9 cm) tall; column 1 in (2.5 cm) wide; arm 0.7 in (1.8 cm) tall
- Outline depth: 0.125 in (0.3 cm) per side
- Flower size: 1 in (2.5 cm) across
Materials
Use a smooth mercerized or combed cotton in sport weight. Cotton holds the shell shape and doesn’t fuzz much, which matters for something that gets handled every day. Any similar sport-weight cotton works if it matches the gauge below.
- Lavender: 5 g / about 10 m (11 yd)
- Pale yellow: 3 g / about 6 m (6.5 yd)
These quantities include a generous margin for the gauge swatch and weaving in ends.
Tools:
– 3.0 mm crochet hook
– Tapestry needle
– Scissors
– 1 in (2.5 cm) gold split key ring with a short 3-link chain and jump ring
– Small flat-nose pliers
– Rustproof pins and a foam blocking mat
– Optional: fabric stiffener or diluted craft glue
Abbreviations (US Terms)
- ch – chain
- sl st – slip stitch
- sc – single crochet
- hdc – half double crochet
- dc – double crochet
- sc2tog – single crochet 2 together
- sk – skip
- st(s) – stitch(es)
- RS / WS – right side / wrong side
Shell: 7 dc worked into the same stitch.
Color change: Work the last stitch in the old color until 2 loops remain on the hook. Yarn over with the new color and pull through. Cut the old color, leaving a 4 in (10.2 cm) tail.
Gauge and Checkpoints
The finished size depends on the gauge, so test with the actual piece. Row 1 is quick and works as your swatch.
- Shell width: 1 shell repeat (6 foundation ch) = 1 in (2.5 cm)
- Shell row height: 1 shell row = 0.7 in (1.8 cm), measured from the base sc to the top of the center dc
Checkpoints:
– After Row 1: the arm measures 3 in (7.6 cm) wide and 0.7 in (1.8 cm) tall.
– After Row 3: the column measures 2.1 in (5.3 cm) from the foundation edge.
– After Row 5: the column measures 3.5 in (8.9 cm) tall and 1 in (2.5 cm) wide.
– After the outline: the L measures 3.25 in (8.3 cm) × 3.75 in (9.5 cm).
You have about 0.125 in (0.3 cm) of tolerance either way. If Row 1 measures over 3.25 in (8.3 cm), go down to a 2.75 mm hook. If it measures under 2.75 in (7.0 cm), go up to a 3.25 mm hook. If only the height is off, check your dc height: pull up the first loop of each dc to the same height every time.
Main Pattern: The L Piece
Row 1 – Arm (3 shells)
Start in lavender. Ch 20.
Row 1 (RS): Sc in the 2nd ch from the hook, sk 2 ch, shell in the next ch, sk 2 ch, sc in the next ch, changing to yellow on the last step. (This sc stays lavender.) Sk 2 ch, shell in the next ch, sk 2 ch, sc in the next ch; repeat from * once more. On the last sc, change to lavender. Do not cut the lavender yet.
Count: 25 sts (4 sc + 21 dc). That’s 3 shells.
You work Row 1 from right to left. The shells read lavender, yellow, yellow from right to left, which is yellow, yellow, lavender when viewed left to right. The leftmost yellow shell is the corner shell.
The foundation uses 19 ch (1 + 3 × 6), plus 1 turning ch, for 20 total.
Rows 2–5 – Column (worked over the corner shell only)
Each row stacks one new shell on the center dc of the shell below it. That’s what gives the column its tidy, centered fans.
Row 2 (WS, lavender): Ch 1, turn. Sc in the first sc, sk 3 dc, shell in the next dc (the 4th, center dc), sk 3 dc, sc in the next sc. On the last sc, change to yellow. Leave the remaining 16 sts of Row 1 unworked.
Count: 9 sts (2 sc + 7 dc).
Row 3 (RS, yellow): Ch 1, turn. Sc in the first sc, sk 3 dc, shell in the center dc, sk 3 dc, sc in the last sc. Change to lavender.
Count: 9 sts.
Row 4 (WS, lavender): Repeat Row 3, changing to yellow at the end.
Count: 9 sts.
Row 5 (RS, yellow): Repeat Row 3. Fasten off yellow.
Count: 9 sts.
Every column row works from 9 sts into 9 sts: 1 sc + 3 skipped + 1 shell base + 3 skipped + 1 sc. Because of that, the column stays exactly one shell, 1 in (2.5 cm), wide.
The column now reads, from the bottom: yellow (corner), lavender, yellow, lavender, yellow.
Checkpoint: The column should be 3.5 in (8.9 cm) tall, and the arm 3 in (7.6 cm) wide. Weave in the color-change tails along the side edges, where the outline will cover them.
Flowers (make 2)
Rnd 1 (yellow): Make a magic ring, ch 1, work 10 sc into the ring, and sl st to the first sc. Pull the ring tight. Fasten off.
Count: 10 sc.
Rnd 2 (lavender): Join lavender in any sc. Sl st in the next sc, then (hdc, 2 dc, hdc) in the next sc; repeat from * 4 more times. Sl st to the join. Fasten off, leaving a 12 in (30.5 cm) tail for sewing.
Count: 5 petals, 25 sts (5 sl st + 20 petal sts).
Each flower measures about 1 in (2.5 cm) across.
Border: The Lavender Outline
Border gauge
The outline is worked with about 6–7 sc per 1 in (2.5 cm) along stitch tops and the foundation chain. Along row-ends it uses 4 sc per 0.7 in (1.8 cm) shell row. Each outer corner gets 3 sc in one stitch, and the one inner corner uses sc2tog. In the counts below, corner groups are listed separately from side counts and aren’t counted twice.
Rnd 1 (lavender)
Work counterclockwise with the RS facing. Join lavender in the outermost (first) dc of the Row 5 shell, at the top-right of the column.
- Top-right column corner: 3 sc in the joining dc. (3)
- Column top: sc in each of the next 5 dc. (5)
- Top-left column corner: 3 sc in the last dc of the shell. (3)
- Column left edge: working down the row-ends, 4 sc in each row-end of Rows 5–1. (20)
- Bottom-left corner: 3 sc in the first foundation ch. (3)
- Bottom edge: working into the underside of the foundation ch, sc in each of the next 17 ch. (17)
- Bottom-right corner: 3 sc in the last foundation ch, the base of the first sc of Row 1. (3)
- Arm right end: 4 sc evenly up the row-end of Row 1. (4)
- Arm top-right corner: 3 sc in the outermost dc of the right (lavender) shell. (3)
- Arm top: sc in each of the next 6 dc, hdc in the valley sc, sc in each of the first 6 dc of the middle shell. (13)
- Inner corner: sc2tog over the last dc of the middle shell and the first row-end of Row 2. (1)
- Column right edge: 3 sc in the rest of the Row 2 row-end, then 4 sc in each row-end of Rows 3–5. (15)
Sl st to the first sc.
Total: 3 + 5 + 3 + 20 + 3 + 17 + 3 + 4 + 3 + 13 + 1 + 15 = 90 sts.
Why the math works
- Bottom edge: 3 + 17 + 3 = 23 sts. Those 23 sts sit in the 19 foundation ch: 17 single sts plus 2 corner groups of 3, one in each end ch. One st per ch keeps the 3 in (7.6 cm) arm flat. The extra corner sts add the 0.125 in (0.3 cm) outline on each end, for 3.25 in (8.3 cm).
- Arm top: the 2 unworked shells have 14 dc. One dc goes into the corner group, 12 dc get sc, and 1 dc is absorbed in the sc2tog. The hdc fills the dip of the valley so the edge stays level.
- Column edges: 4 sc per 0.7 in (1.8 cm) row matches the sc height closely enough that the sides don’t ripple or pull in.
Hanging loop
Fasten off the outline. Join lavender in the center (3rd) sc of the 5 column-top sc. Ch 10 and sl st in the same st to form a loop. Work 14 sc into the ch-10 loop, then sl st in the base st. Fasten off.
The loop stands about 0.5 in (1.3 cm) tall.
Assembly
- Place one flower on the left edge of the column, centered on Row 4, so about a third of it overhangs the outline.
- Place the second flower over the right end of the arm, centered on the Row 1 lavender shell, also slightly overhanging.
- Whipstitch around the yellow center with the lavender tail, then tack each petal tip once.
- Open the jump ring with pliers, thread it through the hanging loop and the end chain link, and close it firmly.
Final Blocking
- Wet the piece in cool water and gently press out the excess in a towel. Don’t wring it.
- Lay it RS up on a blocking mat.
- Pin the outer corners to 3.25 in (8.3 cm) wide by 3.75 in (9.5 cm) tall. Check that the column measures 1.25 in (3.2 cm) wide and the arm 0.95 in (2.4 cm) tall.
- Use your fingertip to open each shell into an even fan, with the center dc straight up.
- Pin each flower petal out flat.
- Let it dry completely.
- Optional: brush on a light coat of fabric stiffener, then let it dry again before adding the ring.
Final Quality-Control Checklist
- Arm has 3 shells and column has 5, with the corner shell shared
- Colors in the column, from the bottom: Y, L, Y, L, Y. Colors in the arm, from the left: Y, Y, L.
- Outline Rnd 1 has 90 sts, with no gaps at the inner corner
- Size is 3.25 in (8.3 cm) × 3.75 in (9.5 cm)
- Loop is centered and firmly anchored
- Both flowers are 1 in (2.5 cm) wide and stitched securely
- All tails are woven under the outline
- Jump ring is fully closed
Troubleshooting
- Column leans: You probably didn’t land on the center (4th) dc. Count the 3 skipped dc carefully every row.
- Shells cup or ruffle: Your dc are too loose. Go down a hook size, or tighten the yarn over before each dc.
- Outline ripples on the sides: Work 3 sc per row-end instead of 4.
- Outline pulls the sides in: Add a 5th sc on every other row-end.
- Hole at the inner corner: Work the sc2tog tighter, or close the hole with the tail when you weave in.
- Flowers flop: Add one more tack stitch at each petal tip.
Care
Hand wash in cool water with mild soap, press flat, and air dry. Remove the metal hardware before washing to prevent tarnish marks.

Final Notes
Each measurement builds on the one before. Row 1 sets the 3 in (7.6 cm) arm, and four stacked 9-stitch rows bring the column to 3.5 in (8.9 cm). A 90-stitch outline adds 0.125 in (0.3 cm) all around, for a finished 3.25 in (8.3 cm) × 3.75 in (9.5 cm) letter. Check your size at each checkpoint, and every keychain will come out the same.
Happy crocheting!