

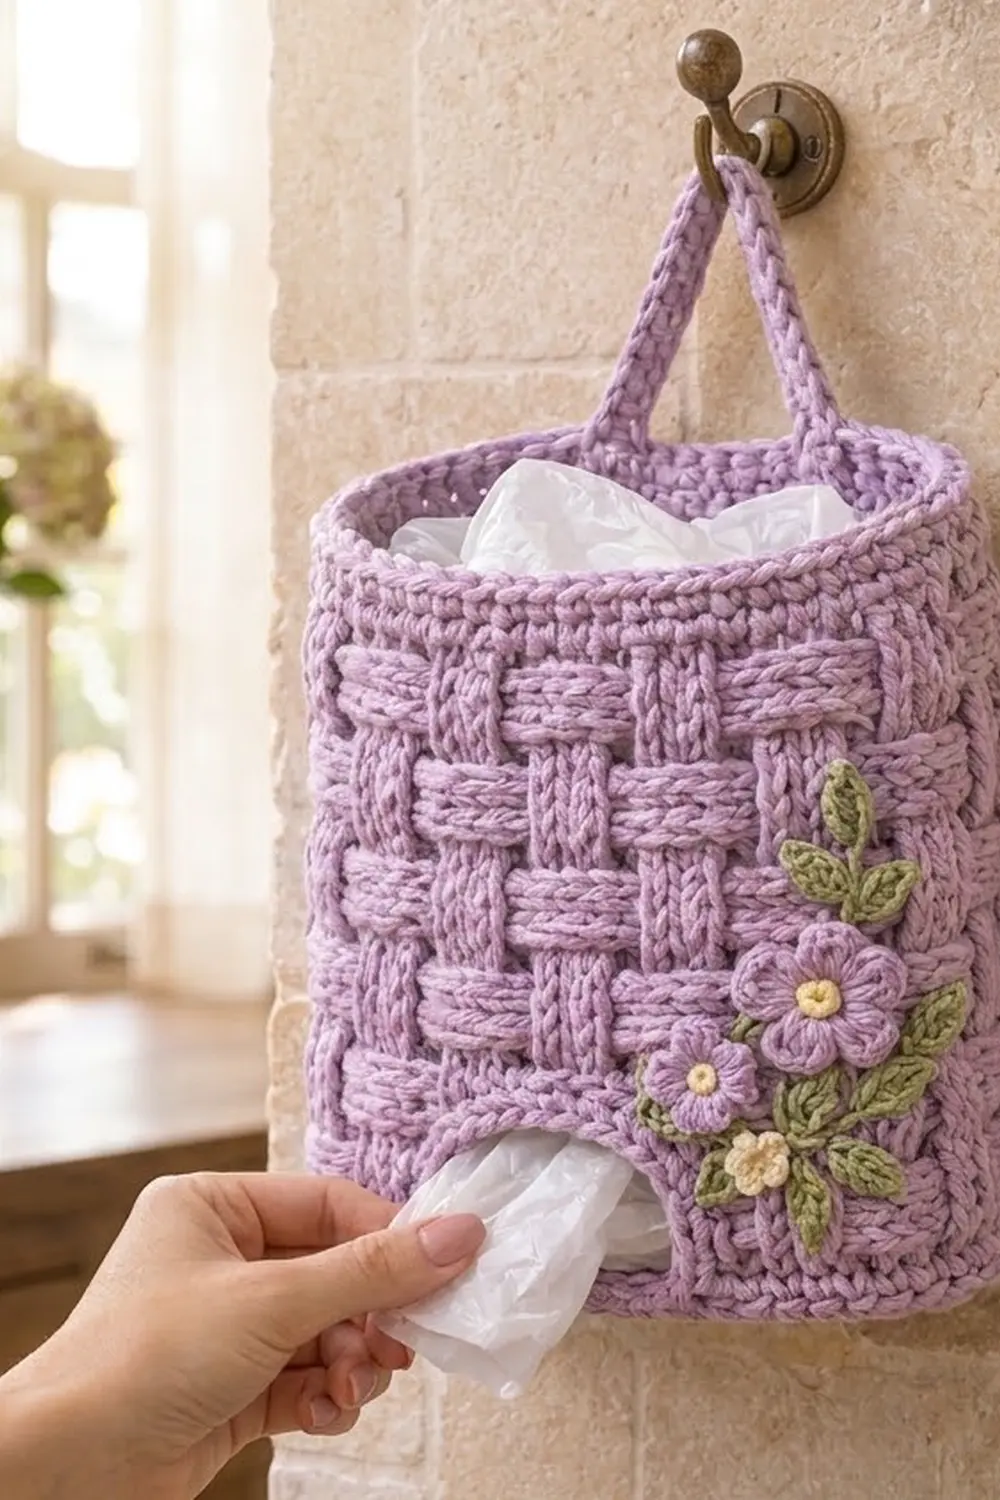
Plastic grocery bags pile up fast, and this holder turns that clutter into something pretty. The Lavender Meadow Bag Holder is a sturdy basketweave pouch. You stuff bags in at the open top and pull them out one at a time through a small opening at the bottom front.
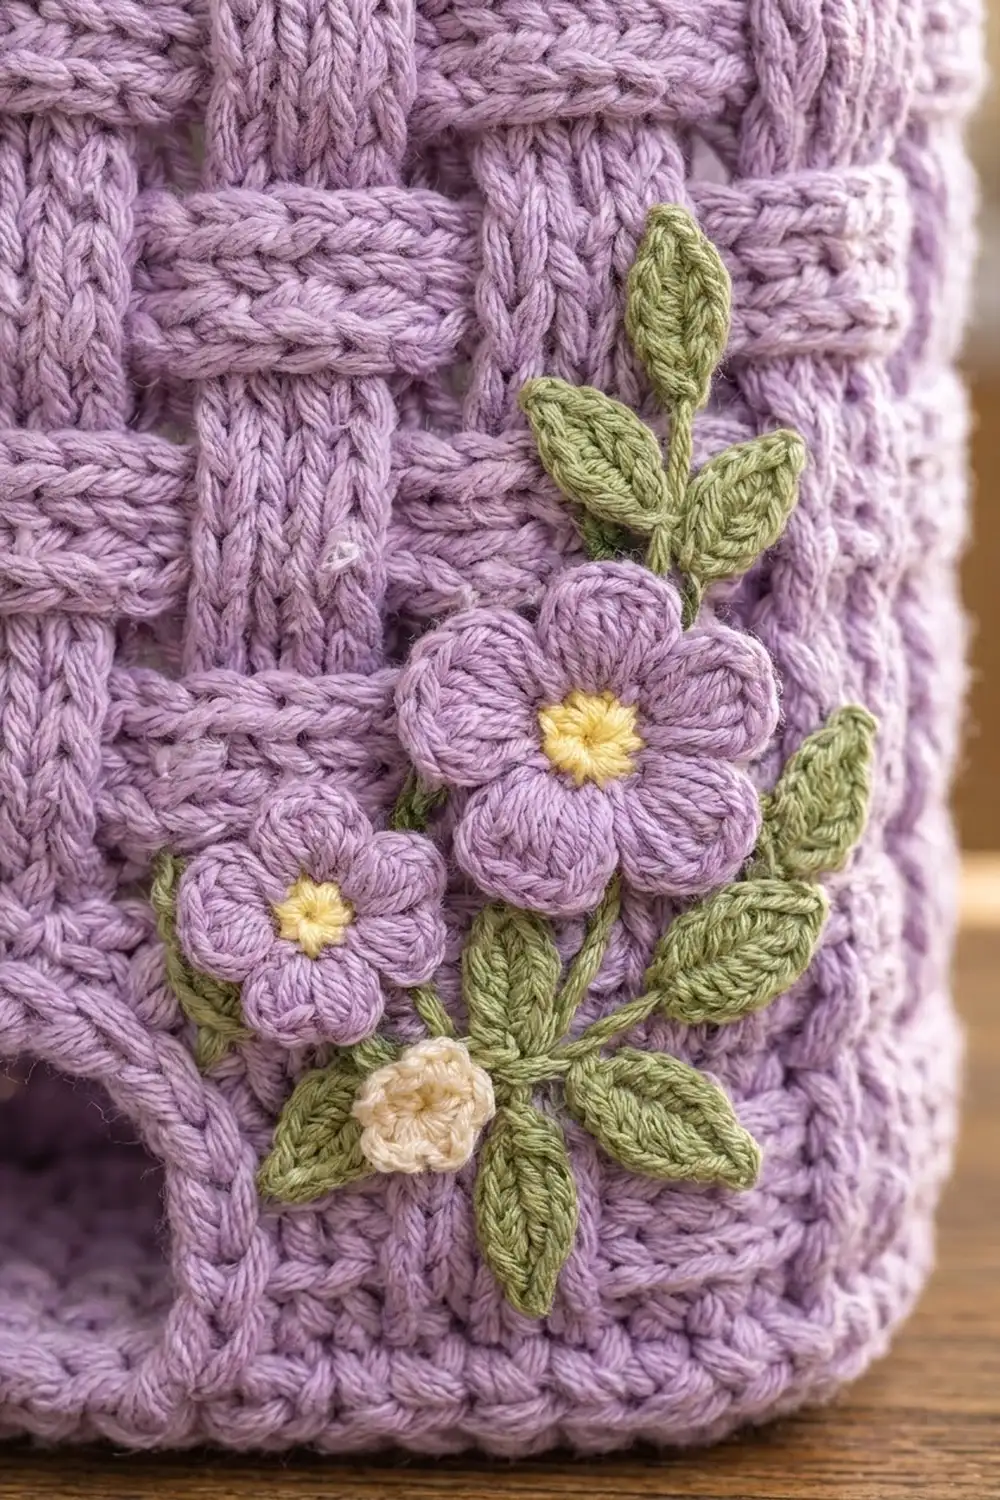
The body is soft lavender with a deep, woven texture made from front-post and back-post double crochet blocks. A small sprig of lavender and cream flowers with sage-green leaves decorates the lower right corner. A narrow strap at the back hangs the holder from a hook or cabinet knob.
The pattern uses US crochet terms. The finished holder measures 10 in (25.4 cm) wide when laid flat and 9 in (22.9 cm) tall, plus a hanging loop that rises about 3.5 in (8.9 cm) above the rim.
You start with a flat oval base, turn it up with a back-loop round, and work the basketweave in joined rounds. To make the dispenser opening, you work 3 short rows back and forth and then close the gap with a chain. A single-crochet rim, an edged opening, a strap and the appliqués finish it.
Finished Size and Construction
- Finished size: 10 in (25.4 cm) wide flat × 9 in (22.9 cm) tall
- Base: oval, about 8.8 in × 1.8 in (22.4 cm × 4.6 cm)
- Skill level: Intermediate
- Terminology: US
- Yarn weight: Worsted (#4)
- Hook: 5.0 mm (H-8) for body and strap; 4.0 mm (G-6) for appliqués
- Number of pieces: 1 holder (body, plus a strap and 8 small appliqués sewn on)
- Layout: seamless tube, 80 stitches around (40 front, 40 back)
- Body size before border: 8.4 in (21.3 cm) tall from the base fold
- Border (rim) depth: 0.6 in (1.5 cm), 3 rounds of sc
- Dispenser opening: 3 in × 1.3 in (7.6 cm × 3.3 cm) before edging; about 2.5 in × 1 in (6.4 cm × 2.5 cm) after edging
Materials
Choose a smooth worsted yarn that shows stitches clearly. Cotton or a cotton blend keeps the basketweave crisp and helps the holder stand upright. Acrylic also works but gives a softer, slouchier pouch. The amounts below assume about 180 m per 100 g.
- Lavender (main): 150 g / 270 m
- Sage green (leaves, stems): 10 g / 18 m
- Pale yellow (flower centers): 5 g / 9 m
- Cream (small flower): 5 g / 9 m
Post stitches use a lot of yarn, so all amounts include an extra margin of about 15%.
Tools:
- 5.0 mm (H-8) and 4.0 mm (G-6) hooks
- 4 locking stitch markers
- Tapestry needle
- Scissors
- Measuring tape
- Pins and a blocking surface
- Spray bottle
Abbreviations (US Terms)
- ch: chain
- sl st: slip stitch
- sc: single crochet
- hdc: half double crochet
- dc: double crochet
- BLO: back loop only
- FPdc: front post double crochet
- BPdc: back post double crochet
- sc2tog: single crochet 2 together
- st(s): stitch(es)
- RS / WS: right side / wrong side
- rep: repeat
Special stitches:
- FPdc: Yo, insert hook from front to back to front around the post of the stitch below, yo, pull up a loop, (yo, pull through 2) twice.
- BPdc: Yo, insert hook from back to front to back around the post of the stitch below, then finish as a dc.
- FP4 / BP4: Work 1 FPdc (or BPdc) in each of the next 4 sts.
Round notes: The ch 2 at the start of each round or row does not count as a stitch. Join every round with a sl st to the top of the first stitch.
Gauge and Checkpoints
Gauge: 16 sts and 9 rounds = 4 in (10.2 cm) in basketweave worked in the round with the 5.0 mm hook. That is 4 sts and 2.25 rounds per inch.
Make the base first and use it to check your gauge. It only takes 2 rounds.
Checkpoints:
- After Rnd 2: 80 sts; base about 8.8 in × 1.8 in (22.4 cm × 4.6 cm); perimeter 20 in (50.8 cm).
- After Rnd 9: body about 3.1 in (7.9 cm) tall from the base fold.
- After Rnd 15: about 5.8 in (14.7 cm) tall.
- After Rnd 21: about 8.4 in (21.3 cm) tall; width laid flat 10 in (25.4 cm).
- After rim: 9 in (22.9 cm) tall.
If your base is too big, go down half a hook size. If it is too small, go up half a size. Don’t change the stitch count, because the basketweave needs a multiple of 8.
Pattern
Base
With lavender and the 5.0 mm hook, ch 32.
Rnd 1: 6 dc in 3rd ch from hook (end A), dc in next 28 ch, 6 dc in last ch (end B). Rotate and work along the free loops of the chain: dc in next 28 ch. Join. (68 sts)
Rnd 2: Ch 2, 2 dc in each of next 6 sts, dc in next 28 sts, 2 dc in each of next 6 sts, dc in next 28 sts. Join. (80 sts)
Number the stitches of Rnd 2 from 1 to 80, starting at the joining point:
- Sts 1–12 are end A.
- Sts 13–40 are side 1.
- Sts 41–52 are end B.
- Sts 53–80 are side 2.
The front is sts 7–46 (40 sts). The back is sts 47–80 and 1–6 (40 sts). Place markers at sts 7, 46, 21 and 32. The opening goes over sts 21–32, the middle 12 sts of the front.
Turning Round
Rnd 3: Ch 2, dc in BLO of each st around. Join. (80 sts)
The unworked front loops form a ridge that gives the base a crisp edge.
Basketweave Body
Each block is 4 sts wide and 3 rounds tall. Every 3 rounds the blocks swap, so raised blocks sit over sunken ones.
Rnd 4: Ch 2, FP4, BP4; rep from * 10 times. Join. (80 sts)* Fasten off.
Dispenser opening (Rows 5–7). These rows skip sts 21–32 and are worked back and forth over the other 68 sts.
Row 5 (RS): Join lavender in st 33. Ch 2, FP4, BP4; rep from * 8 times, FP4. Stop at st 20. Turn. (68 sts)*
Row 6 (WS): Ch 2, BP4, FP4, BP4; rep from * 8 times. Turn. (68 sts)*
A BPdc worked from the WS stands out on the RS, so the blocks carry on without a break.
Row 7 (RS): Ch 2, BP4, FP4; rep from * 8 times, BP4. Do not turn. (68 sts)*
Ch 12, then sl st in the top of the first st of Row 7 (st 33). This chain is the top edge of the opening.
Rnd 8: Ch 2, BP4, FP4; rep from * 8 times, BP4 (68 sts, ending at st 20), then dc in each of the 12 ch. Join. (80 sts: 68 post sts + 12 dc)*
From now on, every round starts at st 33.
Rnd 9: Ch 2, BP4, FP4; rep from * 10 times. Join. (80 sts)*
The 12 dc over the opening now follow the regular pattern.
Rnds 10–12: Ch 2, FP4, BP4; rep from * 10 times. Join. (80 sts)*
Rnds 13–15: Ch 2, BP4, FP4; rep from * 10 times. Join. (80 sts)*
Rnds 16–18: Rep Rnds 10–12. (80 sts)
Rnds 19–21: Rep Rnds 13–15. (80 sts)
You now have 6 bands of blocks. Check that the body is 8.4 in (21.3 cm) tall.
Hanging Strap
With lavender and the 5.0 mm hook, ch 41.
Row 1: Sc in 2nd ch from hook and each ch across. Turn. (40 sts)
Row 2: Ch 1, sc in each st across. (40 sts) Fasten off, leaving a 12 in (30.5 cm) tail.
The strap measures 10 in × 0.5 in (25.4 cm × 1.3 cm).
Flower Appliqués
Use the 4.0 mm hook. Leave a 10 in (25.4 cm) tail on each piece for sewing.
Large flower (make 1): With yellow, make a magic ring, ch 1, work 5 sc in the ring, join. Fasten off. Join lavender in any sc. (Ch 2, 2 dc, ch 2, sl st) in same st, sl st in next st; rep from * 4 more times, so each sc holds one petal. (5 petals)* About 1.75 in (4.4 cm) across.
Small flower (make 1): Work as for the large flower, but make each petal (ch 1, 2 hdc, ch 1, sl st). (5 petals) About 1.25 in (3.2 cm) across.
Cream flower (make 1): Work as for the small flower, all in cream. Add a yellow French knot in the center. About 1 in (2.5 cm) across.
Leaf (make 5): With green, ch 6. Sc in 2nd ch from hook, hdc in next ch, dc in next ch, hdc in next ch, sc in last ch, ch 1. Rotate and work in the free loops: sc, hdc, dc, hdc, sc. Join to first sc. (10 sts plus tip ch) About 1.25 in (3.2 cm) long.
Border
The border has two parts: the rim and the edging around the opening.
Border gauge: 4 sc per inch around, the same as the body, so 80 sc still measure 20 in (50.8 cm).
Rim
Rnd 22: With lavender, ch 1, sc in each st around. Join. (80 sts: 40 front, 40 back)
Rnds 23–24: Ch 1, sc in each st around. Join. (80 sts) Fasten off.
The rim adds 0.6 in (1.5 cm), which brings the height to 9 in (22.9 cm).
Opening Edging
Rnd 1: With RS facing, join lavender at the lower right corner of the opening. Work around the opening in 4 sections:
- Bottom: sc 12 into the tops of Rnd 4 sts 21–32.
- First side: 5 sc evenly up the row ends of Rows 5–7.
- Top: along the free loops of the ch-12, sc2tog, sc in next 8 ch, sc2tog (10 sts).
- Second side: 5 sc evenly down the other side.
Join. (32 sts: 12 + 5 + 10 + 5)
Rnd 2: Sl st in each st around. (32 sl sts) Fasten off.
Why the math works:
- The rim takes exactly 1 sc per body stitch, 40 per side. The top keeps the body’s 20 in (50.8 cm) circumference, so it doesn’t ruffle or pull in.
- On the opening, the 12 bottom stitches match the 12 skipped stitches.
- Each side gets 5 sc over 3 dc row ends instead of 6, which keeps the sides firm.
- The two sc2tog at the top round off the corners into a soft arch.
Finishing
- Center the strap on the back. Pin each end 1 in (2.5 cm) down inside the rim, with the inner edges 3 in (7.6 cm) apart. Sew securely through both rim layers.
- On the front, place the large flower about 3.5 in (8.9 cm) above the base and 1 in (2.5 cm) from the right edge. Place the small flower lower and to the left, and the cream flower below it, just above the base.
- Tuck the leaves between and beside the flowers, tips pointing out. Sew each piece down around its outer edge.
- With green, embroider short chain-stitch stems that link the leaves and flowers into one sprig.
Final Blocking
- Weave in all ends on the inside.
- Mist the holder until it is damp but not wet.
- Stuff it firmly with a folded towel to fill out the oval base.
- Shape the body to 9 in (22.9 cm) tall, with straight sides.
- Pat the opening into its rounded arch and flatten the appliqués.
- Let it dry fully before removing the towel.
Don’t steam the post stitches flat, because the raised texture is the point of the design.
Final Quality-Control Checklist
- 80 sts in every round from Rnd 2 to Rnd 24
- Blocks alternate cleanly, with no broken block around the opening
- Opening sits at center front, with 14 sts on each side
- Body is 10 in (25.4 cm) wide flat and 9 in (22.9 cm) tall
- Strap ends are 3 in (7.6 cm) apart and sewn through both layers
- Appliqués lie flat and no tails show
- Holder hangs straight without tilting
Troubleshooting
- Base cups or ruffles: The end stitches are off. Recount Rnd 2; each end should have 12 sts.
- Blocks drift sideways: You missed a stitch at the join. Count each round, and always skip the ch 2.
- Blocks reversed beside the opening: On Row 6 (WS), front and back posts swap. Recheck that row.
- Opening gapes: Use fewer sc on the sides or tighten the sl st round.
- Rim flares: Go down one hook size for the rim only.
- Holder slumps: Use cotton yarn or crochet more tightly, and block it with the towel inside.
Care
Hand wash in cool water. Lay flat to dry and reshape it around a towel. Do not tumble dry.
Final Notes
Every measurement follows from your gauge. At 16 sts = 4 in (10.2 cm), the 80-stitch base has a 20 in (50.8 cm) perimeter. That perimeter becomes a body 10 in (25.4 cm) wide when laid flat. Nineteen dc rounds bring the body to 8.4 in (21.3 cm), and the 0.6 in (1.5 cm) rim finishes it at 9 in (22.9 cm). Check your base, keep the count at 80, and the rest follows.
Happy crocheting!