

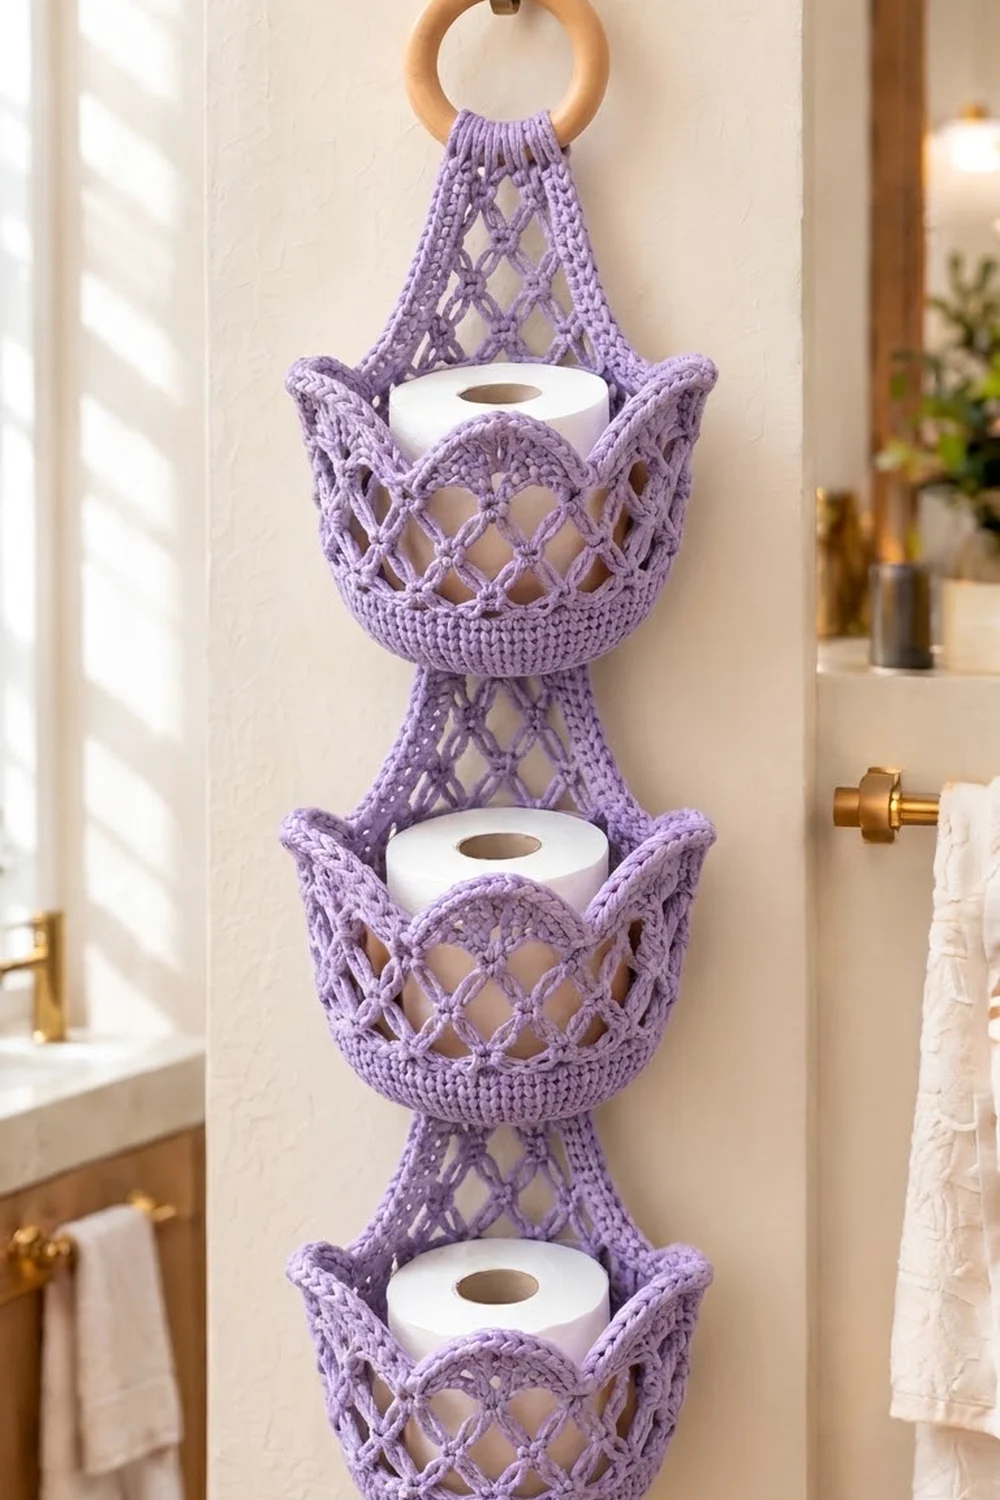
This hanging organizer stores three rolls of toilet paper in one narrow column. Three open-net baskets are sewn onto a lattice back strap, and the strap hangs from a wooden ring. Each basket has a rounded tulip rim with five petals, so the piece looks decorative rather than plain.
The sample uses one soft lavender cotton yarn. Cotton holds its shape, survives bathroom humidity and keeps the lattice crisp. The look is light and airy, with a bit of a boho feel, and it works on a door, a wall hook or the side of a cabinet.
The pattern uses US crochet terms. The finished organizer is about 4.5 in (11.4 cm) wide at the strap and 6.5 in (16.5 cm) wide across the petals. It hangs about 28 in (71.1 cm) long, including the ring.
You’ll crochet three baskets in joined rounds from the base up, then a flat lattice strap in rows. You sew the baskets to the strap, add a two-round border around the strap, and finally gather the top of the strap through the ring.
Finished Size and Construction
- Finished size: 4.5 in (11.4 cm) wide strap; 28 in (71.1 cm) total hanging length, ring included
- Skill level: Intermediate
- Terminology: US crochet terms
- Yarn weight: Worsted (#4) cotton
- Hook: 5.0 mm (H-8)
- Number of pieces: 4 (1 strap and 3 baskets)
- Layout: 3 baskets stacked in 1 vertical column on the strap
- Piece size (one basket): 6 in (15.2 cm) across the opening, 5.75 in (14.6 cm) tall to the petal tips
- Strap size before border: 3.75 in × 26 in (9.5 cm × 66.0 cm)
- Border depth: 3/8 in (1.0 cm) per side
Materials
Yarn: Use a smooth, firm worsted-weight cotton or cotton blend. Pure acrylic stretches under the weight of the rolls, so the baskets will sag over time.
- Lavender: 200 g / 300 m (328 yd)
Tools:
– 5.0 mm (H-8) crochet hook
– 3 in (7.6 cm) wooden ring
– Tapestry needle
– Stitch markers (at least 6)
– Locking pins or clips
– Tape measure
– Blocking mats and rust-proof pins
– Spray bottle
These quantities include about a 25% margin for your gauge swatch, sewing tails and any frogging.
Abbreviations (US Terms)
- ch – chain
- sl st – slip stitch
- sc – single crochet
- hdc – half double crochet
- dc – double crochet
- tr – treble crochet
- BLO – back loop only
- sk – skip
- sp – space
- st(s) – stitch(es)
- rev sc – reverse single crochet (crab stitch)
Special stitch – knot join: Work a sc into the chain space, then pull the working loop snug before you start the next chain. This tight sc forms the small raised knot at each intersection of the net.
Gauge and Checkpoints
Gauge: 16 sc and 18 rounds = 4 in (10.2 cm) in sc.
Make one basket before anything else. It’s your real gauge test, because it uses every stitch in the pattern.
Checkpoints for one basket:
– After Rnd 10: the base measures 4.75 in (12.1 cm) across.
– After Rnd 15: the solid wall stands 1.1 in (2.8 cm) tall.
– After Rnd 23: the basket is 4.5 in (11.4 cm) tall and 6 in (15.2 cm) across the opening.
– After Rnd 25: it is 5.75 in (14.6 cm) tall to the petal tips.
Checkpoints for the strap: It should be 15 sts = 3.75 in (9.5 cm) wide, and 2 mesh rows should measure 1 in (2.5 cm).
If your piece is too big, go down a hook size, for example to 4.5 mm. If it is too small, or a roll won’t fit, go up to 5.5 mm. A standard roll is about 4.25 in (10.8 cm) wide, so check the base against a roll before you start the net.
Basket (Make 3)
Base
Work in joined rounds. Start every round with ch 1 (it does not count as a stitch), and join each round with a sl st to the first sc.
Rnd 1: In a magic ring, work 6 sc. Join. (6 sts)
Rnd 2: 2 sc in each st around. (12 sts)
Rnd 3: Sc in next st, 2 sc in next st; repeat around. (18 sts)
Rnd 4: Sc in next 2 sts, 2 sc in next st; repeat around. (24 sts)
Rnd 5: Sc in next 3 sts, 2 sc in next st; repeat around. (30 sts)
Rnd 6: Sc in next 4 sts, 2 sc in next st; repeat around. (36 sts)
Rnd 7: Sc in next 5 sts, 2 sc in next st; repeat around. (42 sts)
Rnd 8: Sc in next 6 sts, 2 sc in next st; repeat around. (48 sts)
Rnd 9: Sc in next 7 sts, 2 sc in next st; repeat around. (54 sts)
Rnd 10: Sc in next 8 sts, 2 sc in next st; repeat around. (60 sts)
The base should now measure 4.75 in (12.1 cm) across. Its circumference is 15 in (38.1 cm).
Solid Wall
Rnd 11: Sc in BLO of each st around. (60 sts) This forms the ridge where the base turns up into the wall.
Rnds 12–15: Sc in each st around. (60 sts)
The wall is now 1.1 in (2.8 cm) tall.
Diamond Net
Rnd 16: Ch 1, sc in the first st, ch 5, sk 3 sts, sc in next st; repeat 13 more times, then ch 5, sk 3 sts, and join to the first sc. (15 ch-5 loops) Each repeat uses 4 sts, and 15 × 4 = 60.
Rnd 17: Sl st in the first 3 ch to reach the center of the loop. Ch 1, then work a knot join in the same loop. Ch 5, knot join in the next ch-5 sp; repeat 13 more times. Ch 5 and join to the first sc. (15 loops)
Rnd 18: Repeat Rnd 17. (15 loops)
Rnds 19–21: Repeat Rnd 17, but work ch 6 instead of ch 5. (15 ch-6 loops) The longer chains make the basket flare toward the top.
The basket should now be about 4.1 in (10.4 cm) tall.
Rim and Tulip Petals
Rnd 22 (conversion): Ch 1, sc in the same st as the join, 4 sc in the next ch-6 sp, sc in the next sc, 4 sc in the next ch-6 sp; repeat around. Join. (75 sts = 15 sc worked 1-per-existing-sc + 60 sc worked into the 15 spaces)
Rnd 23: Sc in each st around. (75 sts)
The basket now measures 4.5 in (11.4 cm) tall and 6 in (15.2 cm) across. The rim circumference is 18.75 in (47.6 cm).
Rnd 24 (petals): Each petal is worked over 15 sts. Work the following in the next 15 sts:
sl st, sc, hdc, dc, 2 dc in next st, 2 tr in next st, 2 tr in next st, 3 tr in next st (this is the center), 2 tr in next st, 2 tr in next st, 2 dc in next st, dc, hdc, sc, sl st.
Repeat 4 more times for 5 petals. Join. Each petal has 23 sts, for 115 sts total (75 worked into + 40 extra, which is 8 extra per petal).
Rnd 25 (outline): Sl st in each sl st and sc in each other st, but work 3 sc in the center tr of each petal. Join and fasten off. Each petal now has 25 sts, for 125 sts total (115 worked into + 10 extra).
Where the sl sts of two petals meet, they form a dip between the petals. The extra sc at each tip rounds it off, and this raised outline gives the petal its framed edge. The finished basket is 5.75 in (14.6 cm) tall.
Back Strap (Make 1)
Work in rows and turn at the end of each row. In mesh rows, the ch 3 at the start counts as the first dc.
Foundation: Ch 16.
Row 1: Sc in the 2nd ch from the hook and in each ch across. (15 sts)
Row 2 (Mesh B): Ch 3, dc in the next st, ch 4, sk 3 sts, sc in the next st; repeat 2 more times, then dc in the last st. (2 dc, 3 ch-4 loops, 2 sc, 2 dc at the end)
Here’s how the 15 sts are used: 2 dc + 3 repeats of 4 sts + 1 dc = 15.
Row 3 (Mesh A): Ch 3, dc in the next dc, ch 2, knot join in the first ch-4 sp, ch 4, knot join in the next ch-4 sp; repeat once more. Ch 2, dc in the last dc, and dc in the top of the turning ch. (Edge: 2 dc each side; 2 ch-4 loops in the center)
Row 4 (Mesh B): Ch 3, dc in the next dc, ch 4, knot join in the first ch-4 sp, ch 4, knot join in the next ch-4 sp, ch 4, sk the ch-2 sp, dc in the last dc, and dc in the top of the turning ch. (3 ch-4 loops)
Rows 5–52: Alternate Mesh A and Mesh B, so that odd rows are A and even rows are B. Row 52 is a Mesh B row.
Row 53: Ch 1, sc in the first 2 dc, 3 sc in the next ch-4 sp, sc in the next sc; repeat once more, then 3 sc in the last ch-4 sp and sc in the last 2 sts. (15 sts = 2 + 3 + 1 + 3 + 1 + 3 + 2)
The strap now measures 3.75 in × 26 in (9.5 cm × 66.0 cm). That’s 51 mesh rows at 0.5 in (1.3 cm) each, plus 2 sc rows at 0.25 in (0.6 cm) each. Fasten off and leave a 20 in (50.8 cm) tail at Row 53 for gathering later.
Make All Pieces
One color makes everything:
- Lavender: 3 baskets + 1 strap = 4 pieces
Layout, back view, with Row 53 at the top:
   [ ring ]
      |
 [ strap top - gathered ]
 [ BASKET 1 ]  16–21.75 in from bottom
 [ gap 1.75 in ]
 [ BASKET 2 ]  8.5–14.25 in from bottom
 [ gap 1.75 in ]
 [ BASKET 3 ]  1–6.75 in from bottom
 [ strap bottom ]
In centimeters, the positions are: Basket 3 at 2.5–17.1 cm, Basket 2 at 21.6–36.2 cm, and Basket 1 at 40.6–55.2 cm, with gaps of 4.4 cm.
Joining
Method: Whipstitch with a tapestry needle and the same yarn.
- Lay the strap flat with the Row 1 end at the bottom. Mark the base line of each basket using the measurements in the layout.
- Flatten one basket so the joins of its rounds face the strap. Pin it with the Rnd 11 ridge on its base line, centered across the strap.
- Lower seam: Choose 12 back sts of Rnd 15, which span 3 in (7.6 cm). Whipstitch them across the strap with one stitch per basket stitch, catching the nearest mesh strand or edge dc behind each one.
- Upper seam: Choose 15 back sts of Rnd 23, which span 3.75 in (9.5 cm). Whipstitch them straight across the full strap width, again one stitch per basket stitch. Tack the back petal tip down flat with 2 small stitches.
- Repeat for the other 2 baskets.
Tension: Pull each stitch just snug enough to close the gap. If you sew too tightly, the strap puckers and the basket tips forward. If you sew too loosely, the basket droops once a roll is inside.
Size checkpoint: The gaps between baskets should be 1.75 in (4.4 cm). The strap should still lie flat and measure 3.75 in (9.5 cm) wide behind every basket.
Border
Border gauge: 4 sc = 1 in (2.5 cm). The border is worked around the strap only, and the baskets stay out of the way.
Rnd 1: Join the yarn at the top right corner. Work around the whole strap and join with a sl st at the end.
- Short sides (Row 53 and Row 1): Work 3 sc in the corner st, sc in each of the next 13 sts, and 3 sc in the other corner st. That’s 15 sts per side, counting the 2 corner center sts.
- Long sides: Work 2 sc in each dc row-end of Rows 2–52, for 102 sts between the corners. That’s 104 sts per side, counting the 2 corner center sts.
- Round total: 2 × 13 + 2 × 10² + 4 corners × 3 = 242 sts
Rnd 2: Ch 1 and rev sc in each st around. Join and fasten off. (242 sts)
Why the math works: A sc is 0.25 in (0.6 cm) wide, and each mesh row is 0.5 in (1.3 cm) tall. So 2 sc per row-end exactly fill each row, and the long edges neither ruffle nor pull in. On the short sides, the border uses 1 sc per stitch, so the width stays at 3.75 in (9.5 cm). The 3-sc groups add the extra length the corners need to turn.
After the border, the strap measures 4.5 in × 26.75 in (11.4 cm × 67.9 cm).
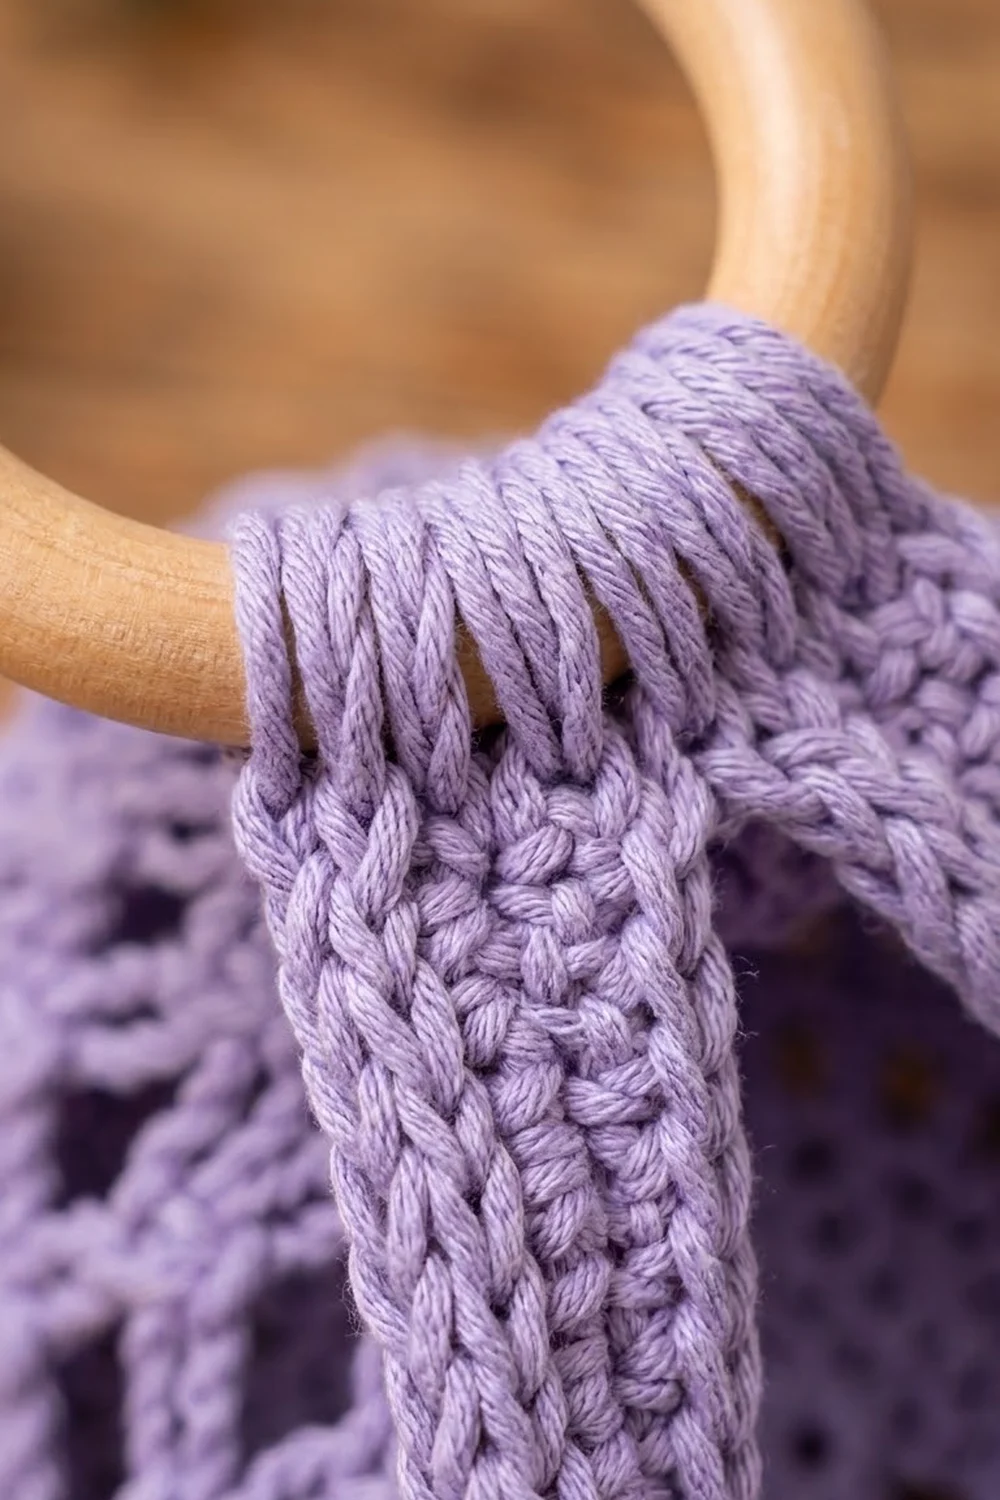
Hanging ring:
- Thread the 20 in (50.8 cm) tail through every border stitch along the top edge.
- Pull the tail to gather that edge down to 1 in (2.5 cm).
- Fold the top 1.5 in (3.8 cm) of the strap over the ring toward the back, and sew it down securely with several passes.
The gathered top now tapers into a point. With the ring included, the organizer hangs 28 in (71.1 cm) long.
Final Blocking
- Spray the whole organizer until it is damp but not dripping.
- Lay it flat on the mats and pin the strap to 4.5 in × 26.75 in (11.4 cm × 67.9 cm).
- Push a rolled towel or a spare toilet roll into each basket so the base stays round at 4.75 in (12.1 cm).
- Shape each petal outward by hand and pin the tips so the opening measures 6 in (15.2 cm).
- Open up the diamonds in the net so the knots line up.
- Let everything dry completely, which takes 12–24 hours.
Final Quality-Control Checklist
- Each basket has 15 net loops in every round and 5 even petals.
- The bases measure 4.75 in (12.1 cm) and hold a roll without stretching.
- The strap is 4.5 in (11.4 cm) wide, and its border has 242 sts.
- The baskets sit at 1, 8.5 and 16 in (2.5, 21.6 and 40.6 cm) from the bottom.
- Both seams on each basket are secure, and all back petals are tacked down.
- The ring is stitched firmly, and the gathered top is centered.
- All tails are woven in through solid stitches, not through the mesh.
Troubleshooting
- The base cups or ruffles. Cupping means your tension is tight, so go up a hook size. Ruffling means it’s loose, so go down a size.
- The net slants. Make sure you start each round at the center of a loop (after the 3 sl sts in Rnd 17 onward).
- Petals are uneven. Count 15 sts per petal before you start Rnd 24, and mark each petal start.
- The strap edges wave. You’ve worked more than 2 sc per mesh row-end. Rip back and recount.
- A basket tips forward. Re-sew the upper seam with more stitches across the strap.
- The strap stretches when loaded. Use firmer cotton or a smaller hook for the strap.
Care
Hand wash in cool water and lay flat to dry, reshaping the petals while damp. Don’t hang it to dry while wet, because the strap will stretch.
Final Notes
Here is the full measurement chain:
- Each basket: 16 sc to 4 in (10.2 cm) gives a 60-st base of 4.75 in (12.1 cm). That base carries 15 net loops, a 75-st rim of 6 in (15.2 cm) and 5 petals, for a basket 5.75 in (14.6 cm) tall.
- Strap: 15 sts by 53 rows gives 3.75 × 26 in (9.5 × 66.0 cm). The 242-st border brings it to 4.5 × 26.75 in (11.4 × 67.9 cm).
- Whole organizer: With the ring, it hangs 28 in (71.1 cm) long.
If you check each number as you reach it, the organizer will come together straight and strong.
Happy crocheting!