

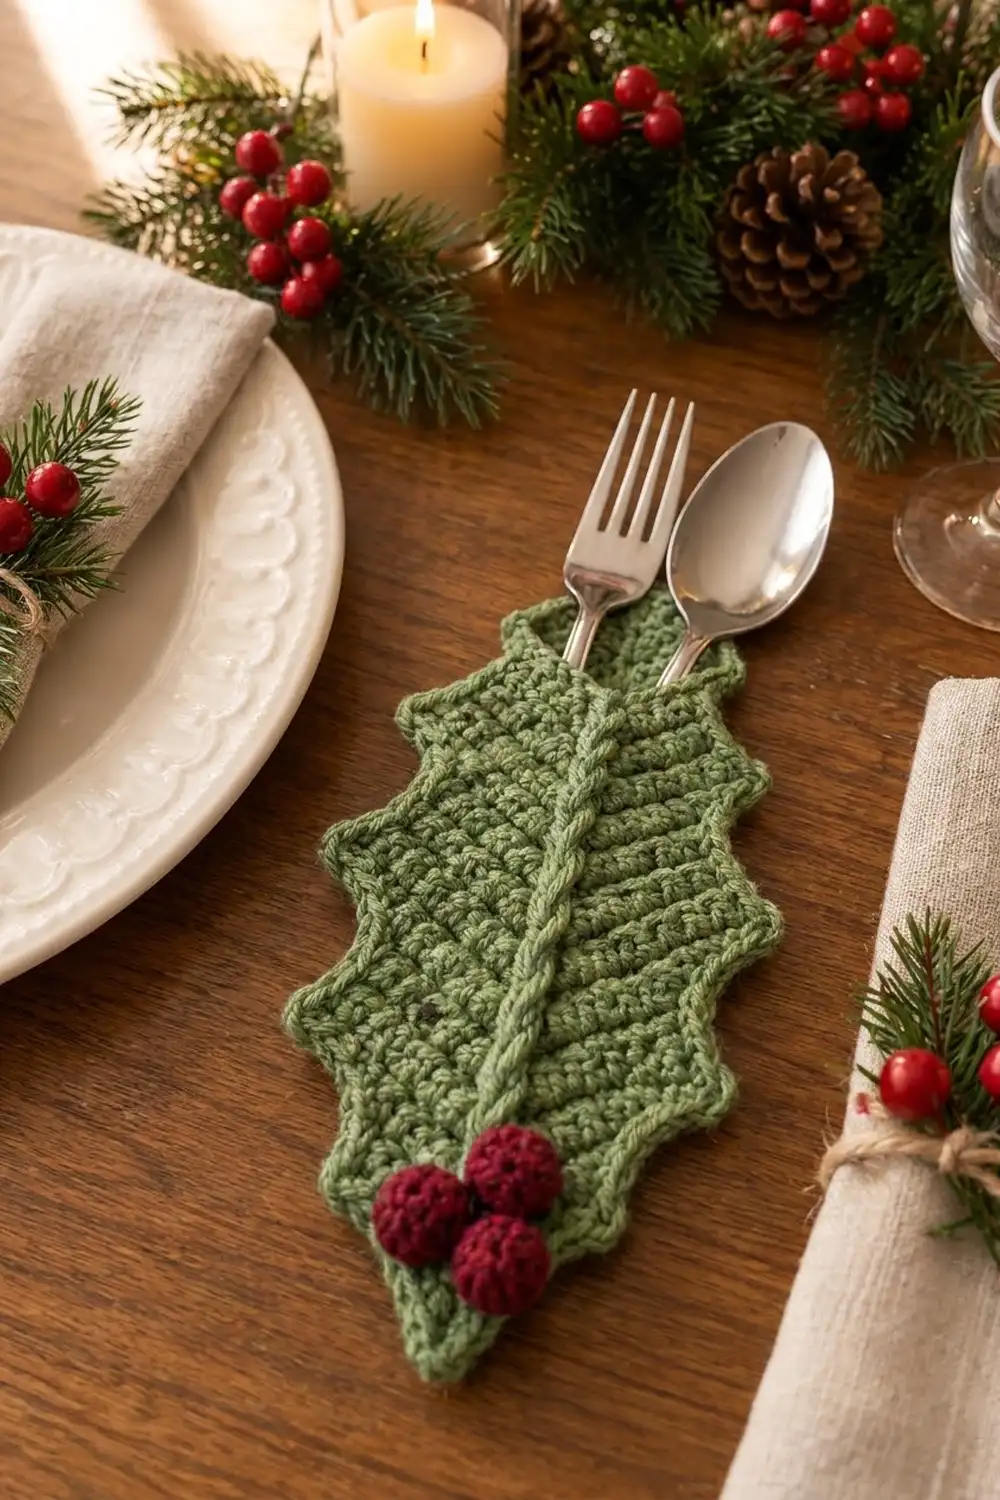
The Evergreen Holly Leaf Cutlery Holder is a small leaf-shaped pocket that holds a fork and spoon and lies flat on a holiday table. The leaf is sage green and has a raised, braided-looking center vein. Holly points run all the way around the edge, and three deep burgundy berries sit near the tip.
The fabric is plain single crochet worked in chevron rows. Each row increases at the center and decreases at the edges, so the rows form soft V-shaped ridges that slant up and out from the vein, much like the veins of a real leaf. The pattern uses US crochet terms throughout.
The finished holder measures about 4 in (10.2 cm) wide at the points and 8.75 in (22.2 cm) long from the back’s top corners to the tip.
You make two leaf panels from the top down: a shorter front and a taller back, each closing into a pointed tip. Next you add a surface slip stitch vein to the front. Then you join the panels with a single crochet round and finish with a holly-point border. The three berries are sewn on last.
Finished Size and Construction
- Finished size: about 4 in (10.2 cm) wide x 8.75 in (22.2 cm) long
- Skill level: Easy intermediate
- Terminology: US crochet terms
- Yarn weight: DK (#3), cotton or cotton blend
- Hook: 3.5 mm (E-4)
- Number of pieces: 5 (1 front panel, 1 back panel, 3 berries)
- Layout: front panel stacked on the back panel with the tips aligned; the back rises 1.5 in (3.8 cm) above the front
- Front panel before border: 3.1 in (7.9 cm) wide x 6.5 in (16.5 cm) long
- Back panel before border: 3.1 in (7.9 cm) wide x 8 in (20.3 cm) long
- Border depth: about 0.45 in (1.1 cm) per side
Materials
Choose a smooth DK cotton, either mercerized or matte. Cotton keeps the holly points crisp and washes well after a dinner party. Avoid fuzzy yarns, because they blur the chevron ridges and the vein.
- Color A, sage green: 22 g / 53 m (leaf panels, vein, joining, and border)
- Color B, burgundy: 3 g / 7 m (berries)
Tools:
- 3.5 mm (E-4) crochet hook
- Tapestry needle
- 4 stitch markers
- A pinch of fiberfill or yarn scraps for the berries
- Rust-proof pins and a blocking mat or folded towel
- Spray bottle and scissors
Quantities are for one holder and include a margin of about 15 percent.
Abbreviations (US Terms)
- ch – chain
- sl st – slip stitch
- sc – single crochet
- hdc – half double crochet
- dc – double crochet
- sc2tog – single crochet 2 together
- sc3tog – single crochet 3 together
- MR – magic ring
- RS / WS – right side / wrong side
- st(s) – stitch(es)
Special stitches:
- Picot: Ch 3, then sl st in the 3rd ch from the hook.
- Holly point (HP): (Dc, picot, dc) all in the same stitch.
- Surface sl st: Hold the yarn behind the work. Insert the hook from front to back through the fabric, pull up a loop, and draw it through the loop on the hook.
Gauge and Checkpoints
Flat sc gauge: 18 sts and 20 rows = 4 in (10.2 cm). In the chevron panel, rows stack at about 4 rows = 1 in (2.5 cm), measured straight up a side edge.
Make the front panel first and use it as your test piece. It is the shortest piece, and every other measurement depends on it.
- After Row 1: The 21-st foundation row measures 4.7 in (11.9 cm) laid straight.
- After Row 8: The panel is 3.1 in (7.9 cm) wide, with a clear V along the top edge.
- After Row 16: The side edges are 4 in (10.2 cm) long.
- After Row 26: The front measures 6.5 in (16.5 cm) from top corner to tip.
If the panel is wider than 3.3 in (8.4 cm), go down half a hook size. If it is narrower than 2.9 in (7.4 cm), go up half a size. Don’t change the stitch counts, because the border math depends on them.
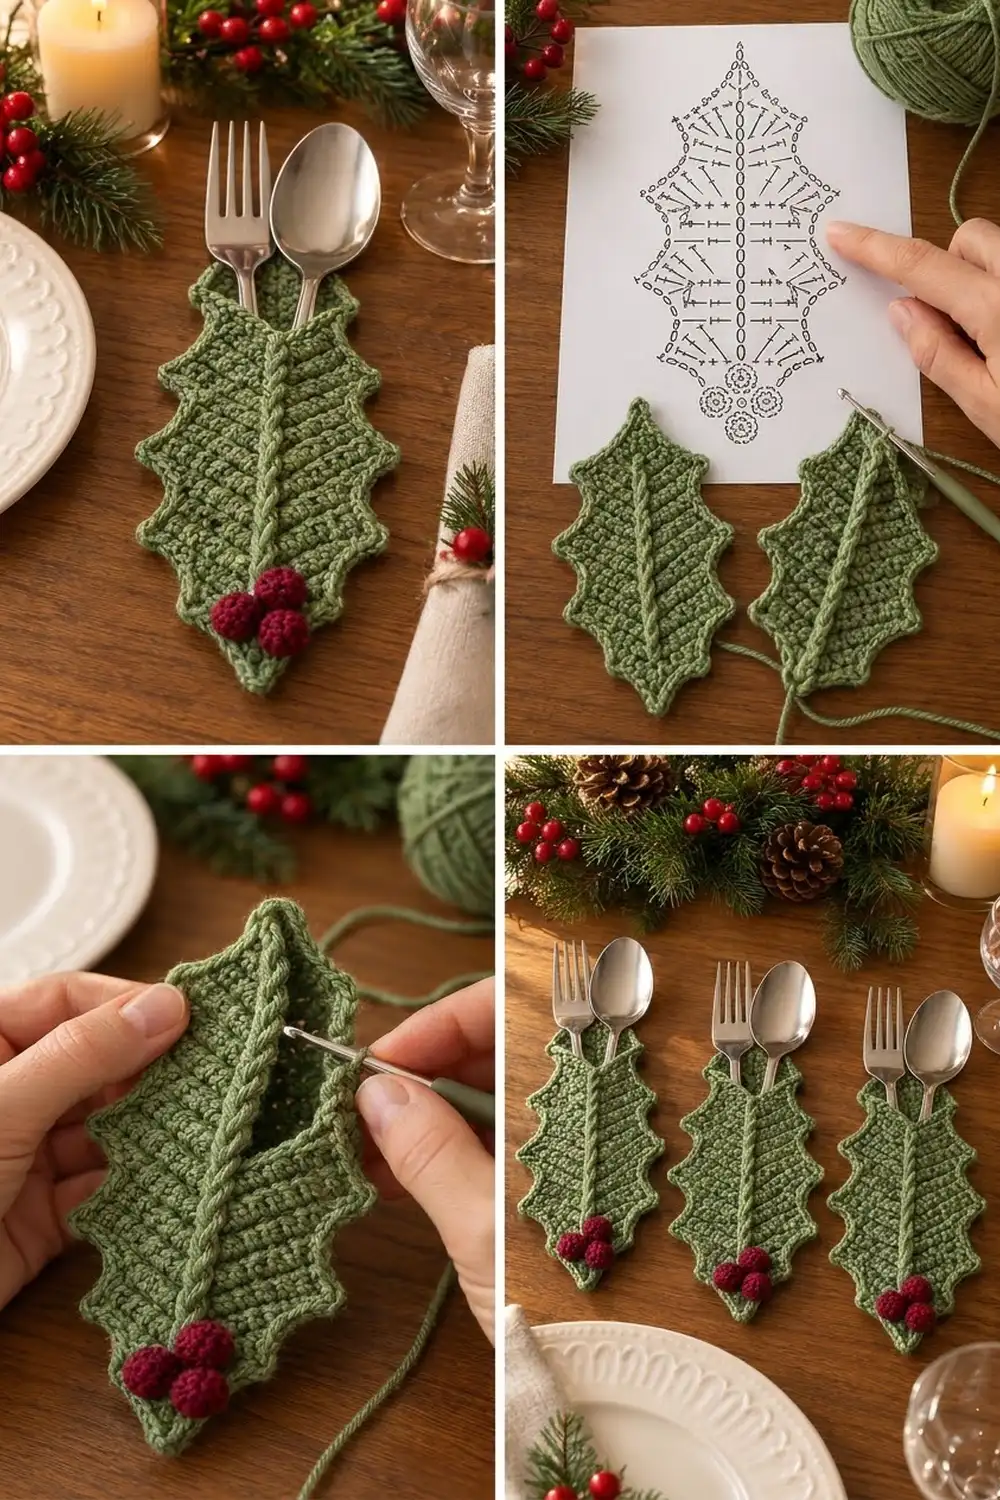
Front Panel
You work the panel from the top edge down to the tip. The center stitch is always the middle sc of the previous row’s 3-sc group, so keep a marker in it and move it up every row.
With Color A, ch 22.
Row 1 (RS): Sc in the 2nd ch from the hook and in each ch across, turn. (21 sts)
Row 2: Ch 1 (does not count as a st, here and throughout). Sc2tog, sc in the next 8 sts, 3 sc in the next st (the center), sc in the next 8 sts, sc2tog, turn. (21 sts)
Check the math: You work into 2 + 8 + 1 + 8 + 2 = 21 sts and make 1 + 8 + 3 + 8 + 1 = 21 sts. The center increase pushes each row down into a V, and the edge decreases keep the sides straight.
Rows 3–16: Repeat Row 2. (21 sts in each row)
Tip shaping: Each tip row follows the same sequence: sc3tog, sc to the center, 3 sc in the center, sc to the last 3 sts, sc3tog. Each end loses 2 sts and the center gains 2, so every row has 2 fewer sts than the row before.
Row 17: Ch 1, sc3tog, sc in the next 7 sts, 3 sc in the center, sc in the next 7 sts, sc3tog, turn. (19 sts)
Row 18: Ch 1, sc3tog, sc in the next 6 sts, 3 sc in the center, sc in the next 6 sts, sc3tog, turn. (17 sts)
Row 19: Ch 1, sc3tog, sc in the next 5 sts, 3 sc in the center, sc in the next 5 sts, sc3tog, turn. (15 sts)
Row 20: Ch 1, sc3tog, sc in the next 4 sts, 3 sc in the center, sc in the next 4 sts, sc3tog, turn. (13 sts)
Row 21: Ch 1, sc3tog, sc in the next 3 sts, 3 sc in the center, sc in the next 3 sts, sc3tog, turn. (11 sts)
Row 22: Ch 1, sc3tog, sc in the next 2 sts, 3 sc in the center, sc in the next 2 sts, sc3tog, turn. (9 sts)
Row 23: Ch 1, sc3tog, sc in the next st, 3 sc in the center, sc in the next st, sc3tog, turn. (7 sts)
Row 24: Ch 1, sc3tog, 3 sc in the center, sc3tog, turn. (5 sts)
Row 25: Ch 1, sc2tog, sc in the center, sc2tog, turn. (3 sts)
Row 26: Ch 1, sc3tog. (1 st) Fasten off, leaving a 6 in (15.2 cm) tail.
Front top edging: With the RS facing, join Color A in the first foundation loop at one top corner. Sc in each of the 21 foundation loops. (21 sts) Fasten off. This row gives the V-shaped pocket opening a firm, neat edge.
Center vein: With the RS facing, join Color A at the tip. Work surface sl sts up the right side of the center column (the stacked center stitches) until you reach the bottom of the V on the top edge, then fasten off. Work a second line up the left side of the same column, keeping the two lines touching so they look like a twisted cord. Keep your tension relaxed so the panel doesn’t pucker. Weave all ends into the WS.
Back Panel
With Color A, ch 22.
Row 1 (RS): Sc in the 2nd ch from the hook and in each ch across, turn. (21 sts)
Rows 2–22: Work as for front Row 2. (21 sts in each row)
Rows 23–30: Work as for front Rows 17–24. (19, 17, 15, 13, 11, 9, 7, then 5 sts)
Row 31: Work as for front Row 25. (3 sts)
Row 32: Work as for front Row 26. (1 st) Fasten off.
Checkpoint: The back is 3.1 in (7.9 cm) wide and 8 in (20.3 cm) long. It has exactly 6 more rows than the front, so it rises 1.5 in (3.8 cm) above it. The back has no edging or vein of its own; the border finishes its top edge.
Berries (Make 3)
With Color B:
Rnd 1: 6 sc in a MR. (6 sts)
Rnd 2: 2 sc in each st around. (12 sts)
Rnd 3: Sc in each st around. (12 sts)
Rnd 4: Sc2tog 6 times. (6 sts) Stuff firmly.
Fasten off, leaving an 8 in (20.3 cm) tail. Weave the tail through the front loops of the last 6 sts and pull it closed. Each berry is about 0.75 in (1.9 cm) across.
Make All Pieces
For one holder:
- Color A: 1 front panel (26 rows) and 1 back panel (32 rows)
- Color B: 3 berries
Layout (front view, tips aligned):
   /\  BACK top corners  /\
   |  back Rows 1-6 only  |
   |\  FRONT top edge   / |
   | \       V        /   |
   |  front + back      |
   |   (vein at center) |
    \      (o)(o)      /
     \      (o)       /
      \     tip      /
Joining
Hold the front on top of the back with WS together, so the RS faces out on both pieces. Line up the tips and both side edges. Back Row 7 sits level with front Row 1, and from there the rows match one-to-one down to the tip, where back Row 32 meets front Row 26. Pin both sides.
Border Rnd 1 (joining round): With the front facing you, join Color A in the first foundation loop at the back’s top right corner.
- Top edge: 3 sc in the first loop (corner), sc in the next 19 loops, 3 sc in the last loop (corner). (25 sts)
- Side 1: Work 1 sc in the end of each back row from Row 2 to Row 31. Work Rows 2–6 through the back only. Work Rows 7–31 through both layers, inserting the hook through the front row end first and then the back row end. (30 sts)
- Tip: Work 3 sc through both tip stitches. (3 sts)
- Side 2: Work 1 sc in each row end from Row 31 back up to Row 2. Go through both layers up to back Row 7, then through the back only. (30 sts)
- Sl st in the first sc to join. (88 sts: 25 + 30 + 3 + 30)
Work these sc firmly but not tightly. If they’re too tight, the sides curl inward; if they’re too loose, they leave gaps where a fork tine can catch. Leave the front’s top edge free, because it is the pocket opening.
Checkpoint: The joined piece measures about 3.5 in (8.9 cm) wide and 8.4 in (21.3 cm) long.
Holly-Point Border
Border gauge: One holly repeat uses 6 sts of Rnd 1 and covers about 1.5 in (3.8 cm) of side edge.
Border Rnd 2: Ch 1.
- Top corner 1 (3 sts): Sc in the first st, (hdc, HP, hdc) in the next st, sc in the next st.
- Top edge (19 sts): Sc in each st.
- Top corner 2 (3 sts): Sc in the next st, (hdc, HP, hdc) in the next st, sc in the next st.
- Side 1 (30 sts): *Sl st in the next st, sc in the next st, hdc in the next st, HP in the next st, hdc in the next st, sc in the next st; repeat from * 4 more times. (5 points)
- Tip (3 sts): Sl st in the next st, (hdc, HP, hdc) in the next st, sl st in the next st.
- Side 2 (30 sts): *Sc in the next st, hdc in the next st, HP in the next st, hdc in the next st, sc in the next st, sl st in the next st; repeat from * 4 more times. (5 points)
- Sl st in the first sc to join. Fasten off.
Why the math works: Each side has 30 sts, and 30 ÷ 6 = 5 full repeats, so there are no leftover stitches. Side 2 mirrors Side 1, which puts the sl st valleys next to the corners and the tip on both sides. Each 3-st corner and the 3-st tip makes one centered point. That gives 13 points in total: 5 on each side, 1 at the tip, and 2 at the back’s top corners.
Final Blocking
- Weave in all remaining ends on the inside of the pocket.
- Lay the holder front side up on a blocking mat.
- Pin it to 4 in (10.2 cm) wide at the points and 8.75 in (22.2 cm) long.
- Pin each picot outward to sharpen the holly points.
- Shape the front’s V opening and the back’s two top corners.
- Mist evenly until damp, without soaking.
- Let it dry completely, then remove the pins.
- Sew the berries in a triangle over the lower vein, about 1 in (2.5 cm) above the tip. Sew through the front panel only, then weave the tails inside.
Final Quality-Control Checklist
- Every straight panel row has 21 sts.
- The front has 26 rows and the back has 32.
- Border Rnd 1 has 88 sts (25 + 30 + 3 + 30).
- There are 5 holly points per side, 1 at the tip, and 2 at the top corners.
- The vein runs straight from the tip to the bottom of the V.
- The pocket opening is clear, and a fork and spoon slide in easily.
- The berries are secure and evenly clustered.
Troubleshooting
- The sides slant instead of running straight: You missed an edge sc2tog or a center increase. Count to 21 sts every row.
- The V drifts off center: Keep your marker in the middle sc of each 3-sc group.
- The vein puckers: Redo it with a larger hook or looser surface sl sts.
- The holly points flop: Pin the picots firmly and block again with a slightly heavier mist.
- The side edges ripple: Go down a hook size for Rnd 1 only.
- The side edges pull in: Go up a hook size for Rnd 1 only.
- The berries look flat: Add more stuffing before you close them.
Care
Hand wash in cool water with mild soap, roll the holder in a towel to press out the water, and dry it flat. Reshape the holly points while it is still damp.
Final Notes
The measurements build in a short chain:
- Each panel is 21 sts and 3.1 in (7.9 cm) wide.
- The front is 6.5 in (16.5 cm) long and the back is 8 in (20.3 cm) long.
- Border Rnd 1 has 88 sts and brings the width to 3.5 in (8.9 cm).
- The holly points bring the holder to its finished 4 in x 8.75 in (10.2 x 22.2 cm).
Check each stage as you go, and the finished holder will lie flat with even points.
Happy crocheting!