
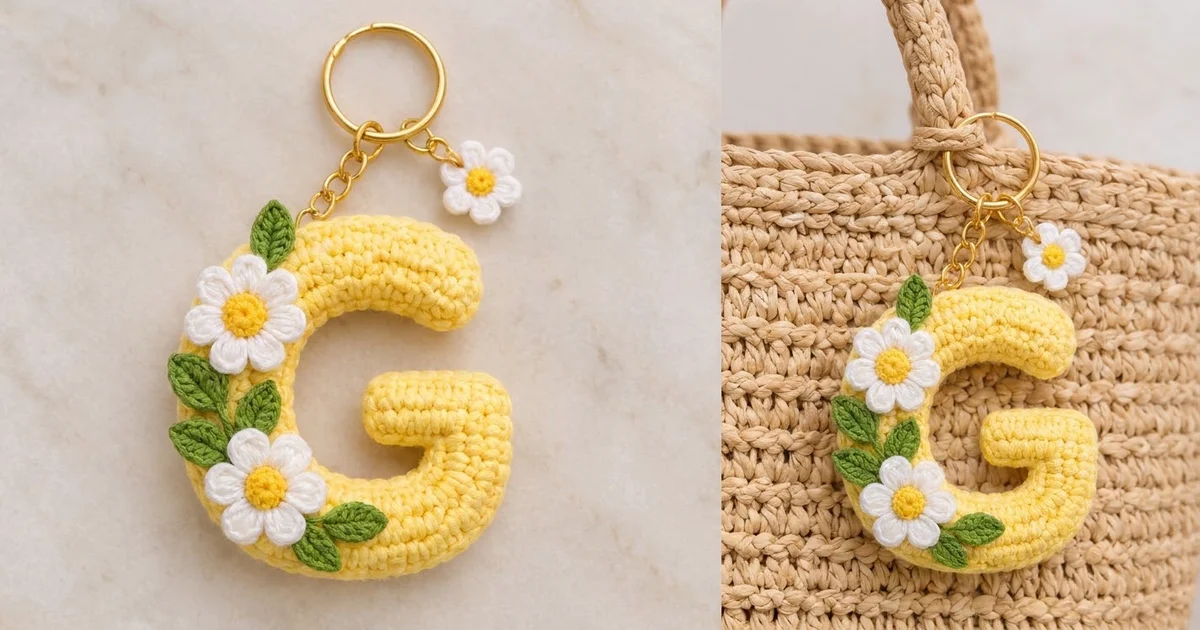
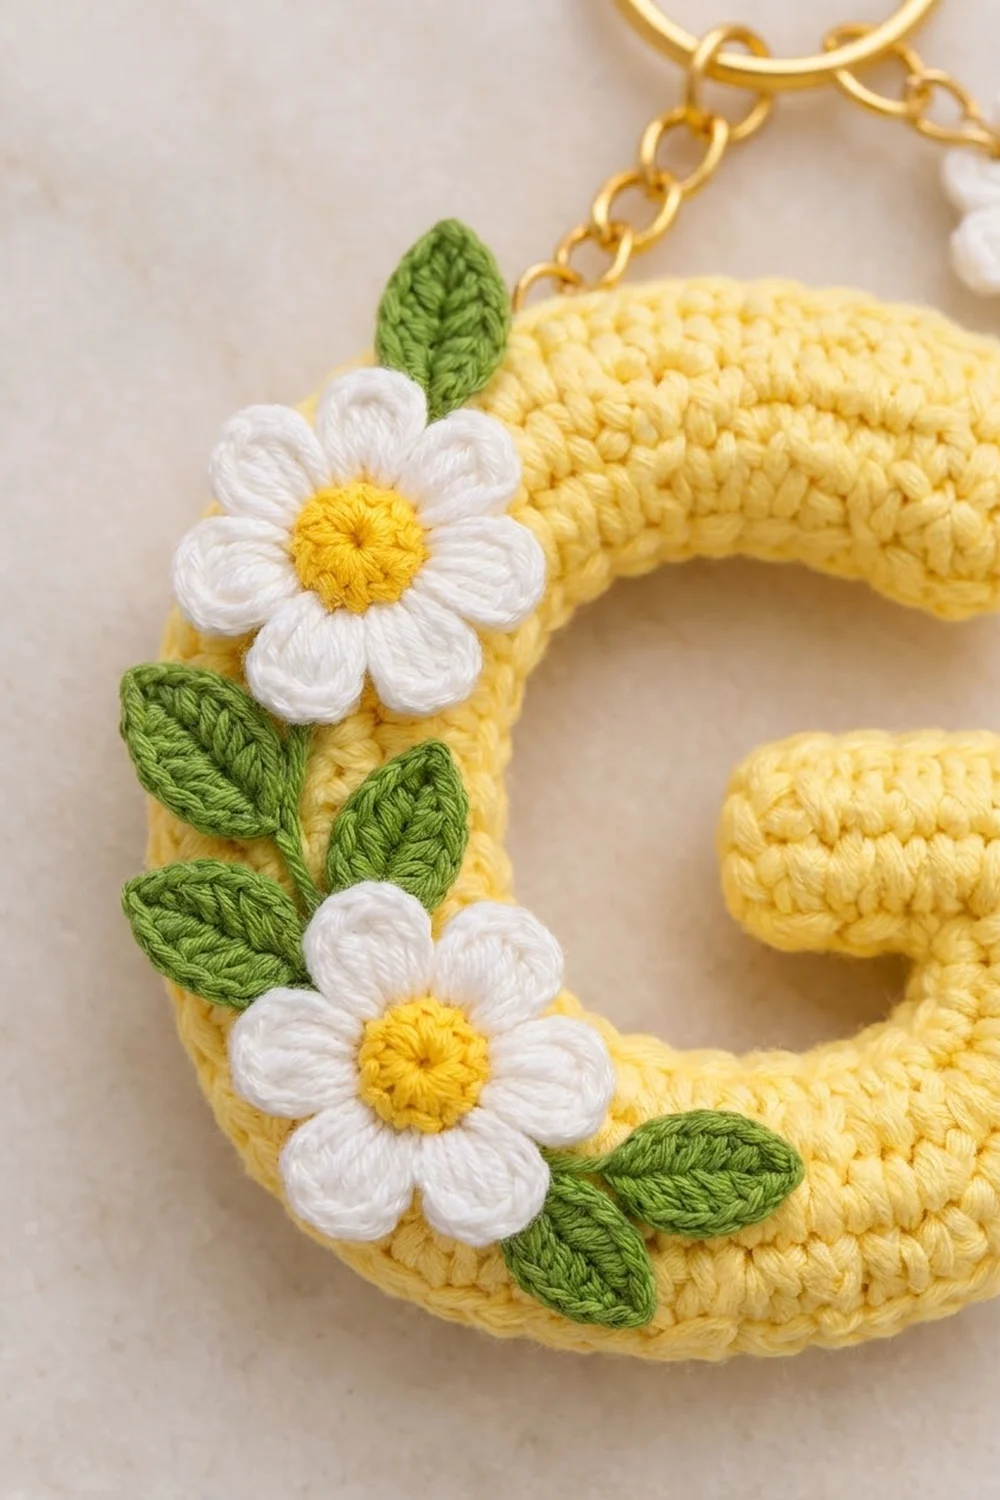
This puffy letter G keychain has a soft, rounded shape in pale lemon yellow. Two white daisies with bright yellow centers sit on the left curve of the letter, framed by six small green leaves. A tiny matching daisy charm hangs next to the letter from a gold split ring and chain.
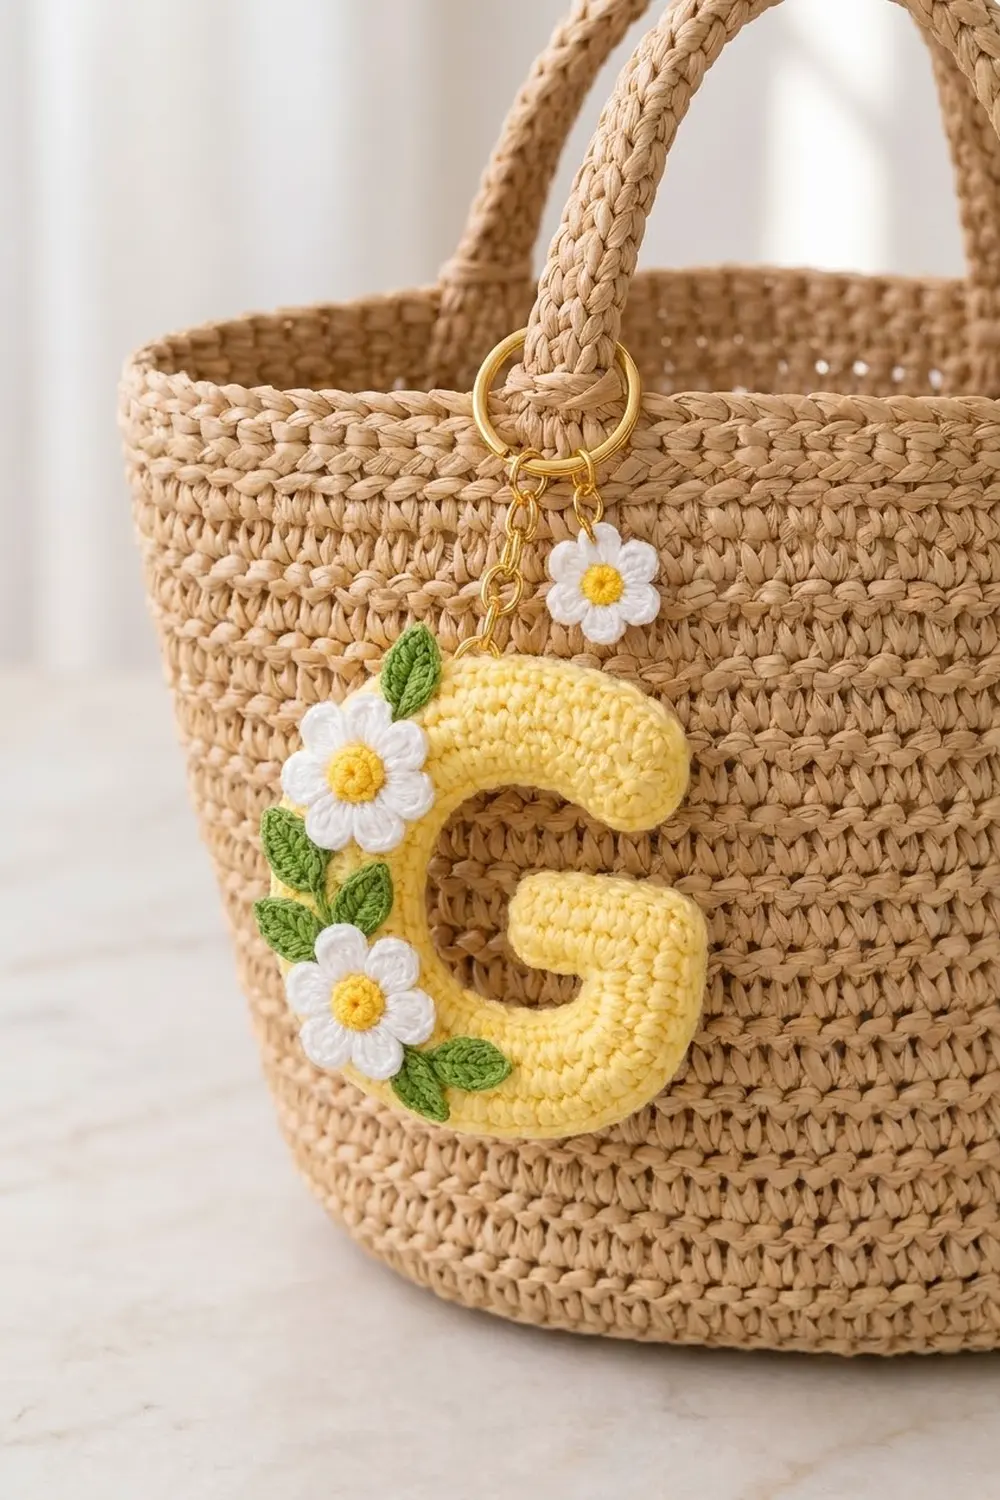
The style is fresh and simple: compact single crochet, a smooth stuffed shape, and a little cluster of flowers. It works as a bag charm, a gift for anyone whose name starts with G, or a quick spring project.
This pattern uses US crochet terms. The finished letter measures about 3.5 in (8.9 cm) wide, 3.75 in (9.5 cm) tall, and 0.75 in (1.9 cm) thick. The hardware adds about 2.25 in (5.7 cm) of drop.
Construction is straightforward. You crochet two flat G panels in rows. The front panel gets an edging round and a short side gusset, which is the “border” of this pattern. You sew the flowers and leaves onto the front, then join the gusset to the back panel with single crochet, stuffing as you go. Last, you add the hardware and the small charm.
Finished Size and Construction
- Finished size: about 3.5 in (8.9 cm) wide x 3.75 in (9.5 cm) tall x 0.75 in (1.9 cm) thick
- Skill level: Easy-intermediate
- Terminology: US crochet terms
- Yarn weight: DK / light worsted (weight 3) cotton
- Hook: 3.5 mm (E-4)
- Number of pieces: one finished keychain, made from 2 letter panels, 2 large daisies, 6 leaves, and 1 small daisy charm
- Layout: single stuffed letter; flowers cascade down the left curve
- Panel size: 3.4 in (8.6 cm) wide x 3.6 in (9.1 cm) tall
- Size before border: 3.4 in x 3.6 in (8.6 x 9.1 cm) flat panel
- Border depth: edging adds about 0.1 in (0.3 cm) per side; gusset is about 0.75 in (1.9 cm) deep
Materials
Choose a smooth mercerized or combed cotton in DK weight. Cotton keeps the stitches crisp and holds the letter shape well. Avoid fuzzy yarn, which blurs the stitch definition.
- Pale yellow (main color, MC): 15 g, about 36 m
- White (petals): 4 g, about 10 m
- Bright yellow (flower centers): 2 g, about 5 m
- Green (leaves): 3 g, about 7 m
Quantities are based on a cotton with roughly 120 m per 50 g and include a small margin.
Tools:
- 3.5 mm (E-4) crochet hook
- Polyester fiberfill, about 5 g
- Tapestry needle
- Stitch markers (3-4)
- Gold split key ring, 1 in (2.5 cm)
- Gold curb chain: one 1 in (2.5 cm) piece and one 0.6 in (1.5 cm) piece
- 3 gold jump rings and 2 pairs of flat-nose pliers
- Scissors and a ruler
Abbreviations (US Terms)
- ch – chain
- sl st – slip stitch
- sc – single crochet
- hdc – half double crochet
- dc – double crochet
- sc2tog – single crochet 2 together
- BLO – back loop only
- MR – magic ring
- st(s) – stitch(es)
- RS – right side
Special stitch – Daisy petal: (sl st, ch 2, 2 dc, ch 2, sl st) all in the same stitch.
Gauge and Checkpoints
Gauge: 20 sc and 22 rows = 4 in (10.2 cm) in sc rows. That is 5 sc and 5.5 rows per 1 in (2.5 cm).
Test one piece first. Make the back panel completely, then measure it before you start the front.
Checkpoints:
- After Row 5: 3.4 in (8.6 cm) wide x 0.9 in (2.3 cm) tall
- After Row 9 (left stem): about 1.6 in (4.1 cm) tall
- Finished panel (Row 20): 3.4 in (8.6 cm) wide x 3.6 in (9.1 cm) tall
- After edging Round 1: about 3.6 in (9.1 cm) wide x 3.8 in (9.7 cm) tall
If your panel is too big, go down to a 3.25 mm hook. If it is too small, go up to a 3.75 mm hook. Tight stitches matter here because stuffing should not show through, so when in doubt, go down a size rather than up.
Letter Panels (Make 2)
Use MC. The ch 1 at the start of each row does not count as a stitch. Single crochet looks nearly the same on both sides, so you choose which long edge is the “left” edge in Row 6.
Bottom bar
Row 1: Ch 14, sc in 2nd ch from hook and in each ch across. (13 sc)
Row 2: Ch 1, turn, 2 sc in first st, sc in next 11 sts, 2 sc in last st. (15 sc)
Row 3: Ch 1, turn, 2 sc in first st, sc in next 13 sts, 2 sc in last st. (17 sc)
Rows 4-5: Ch 1, turn, sc in each st. (17 sc)
The increases in Rows 2-3 round off both lower corners.
Left stem
Row 6: Ch 1, turn, sc in first 5 sts; leave remaining 12 sts unworked. (5 sc) The edge where this row began is now the outer left edge of the G.
Rows 7-14: Ch 1, turn, sc in each st. (5 sc)
Row 14 ends at the inner edge of the stem. Do not fasten off.
Top bar
Row 15: Ch 13, turn, sc in 2nd ch from hook and in next 11 ch, sc in each of the 5 stem sts. (17 sc: 12 on the chain + 5 on the stem)
Rows 16-18: Ch 1, turn, sc in each st. (17 sc)
Row 19: Ch 1, turn, sc2tog, sc in next 13 sts, sc2tog. (15 sts)
Row 20: Ch 1, turn, sc2tog, sc in next 11 sts, sc2tog. (13 sts)
Fasten off.
Right stem and crossbar
Turn the panel so Row 5 is at the bottom, with the left stem on your left. Count 7 unworked sts of Row 5 from the left stem; these stay empty. Join MC in the next st (the 13th st of Row 5).
Row 6R: Ch 1, sc in same st and in next 4 sts. (5 sc)
Rows 7R-9R: Ch 1, turn, sc in each st. (5 sc)
Row 9R ends at the inner (left) edge of the right stem.
Row 10: Ch 5, turn, sc in 2nd ch from hook and in next 3 ch, sc in each of the 5 stem sts. (9 sc: 4 on the chain + 5 on the stem)
Rows 11-12: Ch 1, turn, sc in each st. (9 sc)
Fasten off and weave in ends.
You now have a G with a 3-st opening between the crossbar tip and the left stem, and a 2-row opening between the crossbar and the top bar. Make a second identical panel.
Flowers and Leaves
Large daisy (make 2)
Round 1: With bright yellow, 8 sc in MR. Pull tight, join with sl st to first sc. (8 sc) Fasten off.
Round 2: Join white in any sc. Work 1 Daisy petal in each sc around. (8 petals) Join with sl st to base of first petal and fasten off, leaving a 12 in (30.5 cm) tail.
Each daisy is about 1.25 in (3.2 cm) across.
Small daisy charm (make 1)
Round 1: With bright yellow, 6 sc in MR, join. (6 sc) Fasten off.
Round 2: Join white. In each sc: (sl st, ch 2, 2 hdc, ch 2, sl st). (6 petals) Fasten off and weave in ends.
The charm is about 0.9 in (2.3 cm) across.
Leaf (make 6)
With green, ch 7. Sl st in 2nd ch from hook, sc in next ch, hdc in next ch, dc in next ch, hdc in next ch, sc in last ch. Ch 1 at the tip, then work along the other side of the chain: sc, hdc, dc, hdc, sc, sl st. (12 sts plus tip ch) Fasten off, leaving an 8 in (20.3 cm) tail.
Each leaf is about 1 in (2.5 cm) long. The chain spine reads as a center vein.
Arranging on the front panel
Lay one panel flat; this is the front. Place one daisy on the upper left curve, where the top bar meets the stem. Place the second daisy lower on the stem, about 0.5 in (1.3 cm) above the bottom curve. Arrange the leaves around them:
- one above the top daisy
- two below the top daisy, on the left edge
- two to the left of the lower daisy
- one to the right of the lower daisy, pointing toward the bottom bar
Let leaves and petals hang slightly past the left edge. Sew each piece down through its center and base only, so the petal tips stay lifted. Sew only into the front panel.
Border (Edging and Gusset)
The border is worked around the panel’s outline, which is one continuous closed edge. Border gauge is the same as the panel: 5 sc per 1 in (2.5 cm) along the stitch edges and 1 sc per row end along the sides.
Round 1 (both panels): Join MC at the bottom left corner of Row 1. With RS facing, work counterclockwise around the G: 1 sc in each st and in each row end, adding 1 extra sc at 4 sharp corners. Join with sl st to first sc.
Counts per section, in order:
- Bottom edge (Row 1 foundation loops): 13 sc
- Right edge, row ends of Rows 1-12: 12 sc, with 2 sc in the Row 12 end (+1)
- Top of crossbar (Row 12): 9 sc, with 2 sc in the last st at the tip (+1)
- Crossbar tip, row ends of Rows 12-10: 3 sc, with 2 sc in the Row 10 end (+1)
- Underside of crossbar (chain loops): 4 sc
- Inner side of right stem, row ends of Rows 9-6: 4 sc
- Top of Row 5 in the gap: 7 sc
- Inner side of left stem, row ends of Rows 6-14: 9 sc
- Underside of top bar (chain loops): 12 sc
- Right end of top bar, row ends of Rows 15-20: 6 sc, with 2 sc in the Row 15 end (+1)
- Top edge (Row 20): 13 sc
- Left edge, row ends of Rows 20-1: 20 sc
Total: 112 sc (1 per existing st or row end) + 4 corner sc = 116 sc
On the back panel, fasten off after Round 1. On the front panel, with the flowers attached, continue.
Round 2: Ch 1, sc in BLO of each st around, join. (116 sc) The BLO creates a clean fold so the gusset stands up.
Rounds 3-4: Ch 1, sc in each st around, join. (116 sc)
Do not fasten off.
Why the math works:
- Every stitch and row end on the outline gets exactly 1 sc, which gives 112.
- The 4 extra sc go only on the 4 square outer corners, where the edge needs more length to turn.
- The inner corners get no extra. The rounded corners already curve gently because of the stepped increases and decreases.
- Rounds 2-4 are worked even, so the gusset stays at 116 sts.
- The back panel’s Round 1 also has 116 sts, so the join is exactly 1:1.
Round 5 (joining): Place the back panel under the front panel. Both panels should face the same way, with the outlines matching exactly. Ch 1 and sc through each gusset st and the matching Round 1 st on the back panel together. (116 sc)
Stuff firmly as you go. Use small pieces of fiberfill and the end of your hook to push it into the stem, crossbar, and top bar tip. Stop about 1.5 in (3.8 cm) before the end, stuff the last section, and finish the round. Join, fasten off, and hide the tail inside.
Keep your tension even in Round 5. Pulling too tight puckers the outline, and loose stitches show the stuffing.
Size checkpoint: the stuffed letter should be about 3.5 in (8.9 cm) wide and 3.75 in (9.5 cm) tall. Stuffing pulls the edges in slightly from the flat edging size.
Hardware and Charm
Open a jump ring and pass it through 2 stitches of the Round 5 seam at the top left of the G, about 0.6 in (1.5 cm) in from the left edge. Attach the 1 in (2.5 cm) chain and close the ring.
Pass a second jump ring through the back of the small daisy at its center, attach the 0.6 in (1.5 cm) chain, and close. Attach both chains to the split ring with the third jump ring.
Final Blocking
- Lightly mist the flowers and leaves with water.
- Shape each petal with your fingertips so the tips curl up slightly.
- Smooth the leaves flat and pinch the tips into points.
- Roll the stuffed letter gently between your palms to even out lumps.
- Press the gusset edges with your fingers so the sides look straight.
- Pin the small daisy flat on a towel.
- Let everything dry completely, about 6 hours.
Do not steam the letter, because heat can flatten the stuffing.
Final Quality-Control Checklist
- Each panel measures 3.4 in x 3.6 in (8.6 x 9.1 cm) before the border
- Round 1 has exactly 116 sc on both panels
- Gusset Rounds 2-4 each have 116 sc
- Openings: 3 sts between the crossbar and stem, 2 rows above the crossbar
- No stuffing shows between stitches
- Both daisies have 8 petals; the charm has 6
- All 6 leaves are sewn securely at the base
- Jump rings are fully closed with no gaps
- The finished letter is about 3.5 in x 3.75 in (8.9 x 9.5 cm)
Troubleshooting
Gusset ripples: Round 1 has too many stitches. Recount each section against the list.
Gusset pulls the panel into a bowl: Round 1 is short. Check that you worked 1 sc in every row end.
Inner corners bunch: This is normal before stuffing. Firm stuffing smooths them out.
Crossbar flops: Stuff it first, and more firmly than the rest.
Stuffing shows: Go down a hook size, or whipstitch any loose spots with matching yarn.
Petals look flat: Mist them with water again and curl the tips.
Letter looks reversed: For Round 5, hold the panels facing the same way, not face to face.
Care
Spot clean with a damp cloth and mild soap, then air dry flat. Do not machine wash, because that can damage the hardware and the stuffing.
Final Notes
Here is how the measurements connect. A gauge of 5 sc and 5.5 rows per 1 in (2.5 cm) gives a 17-st x 20-row panel of 3.4 in x 3.6 in (8.6 x 9.1 cm). Round 1 turns that outline into 116 sc. The gusset keeps 116 sts for 0.75 in (1.9 cm) of depth, and the joining round matches 116 to 116. Once stuffed, the letter finishes at about 3.5 in x 3.75 in (8.9 x 9.5 cm).
Check your gauge on the first panel and count Round 1 carefully, and the rest falls into place.
Happy crocheting!