

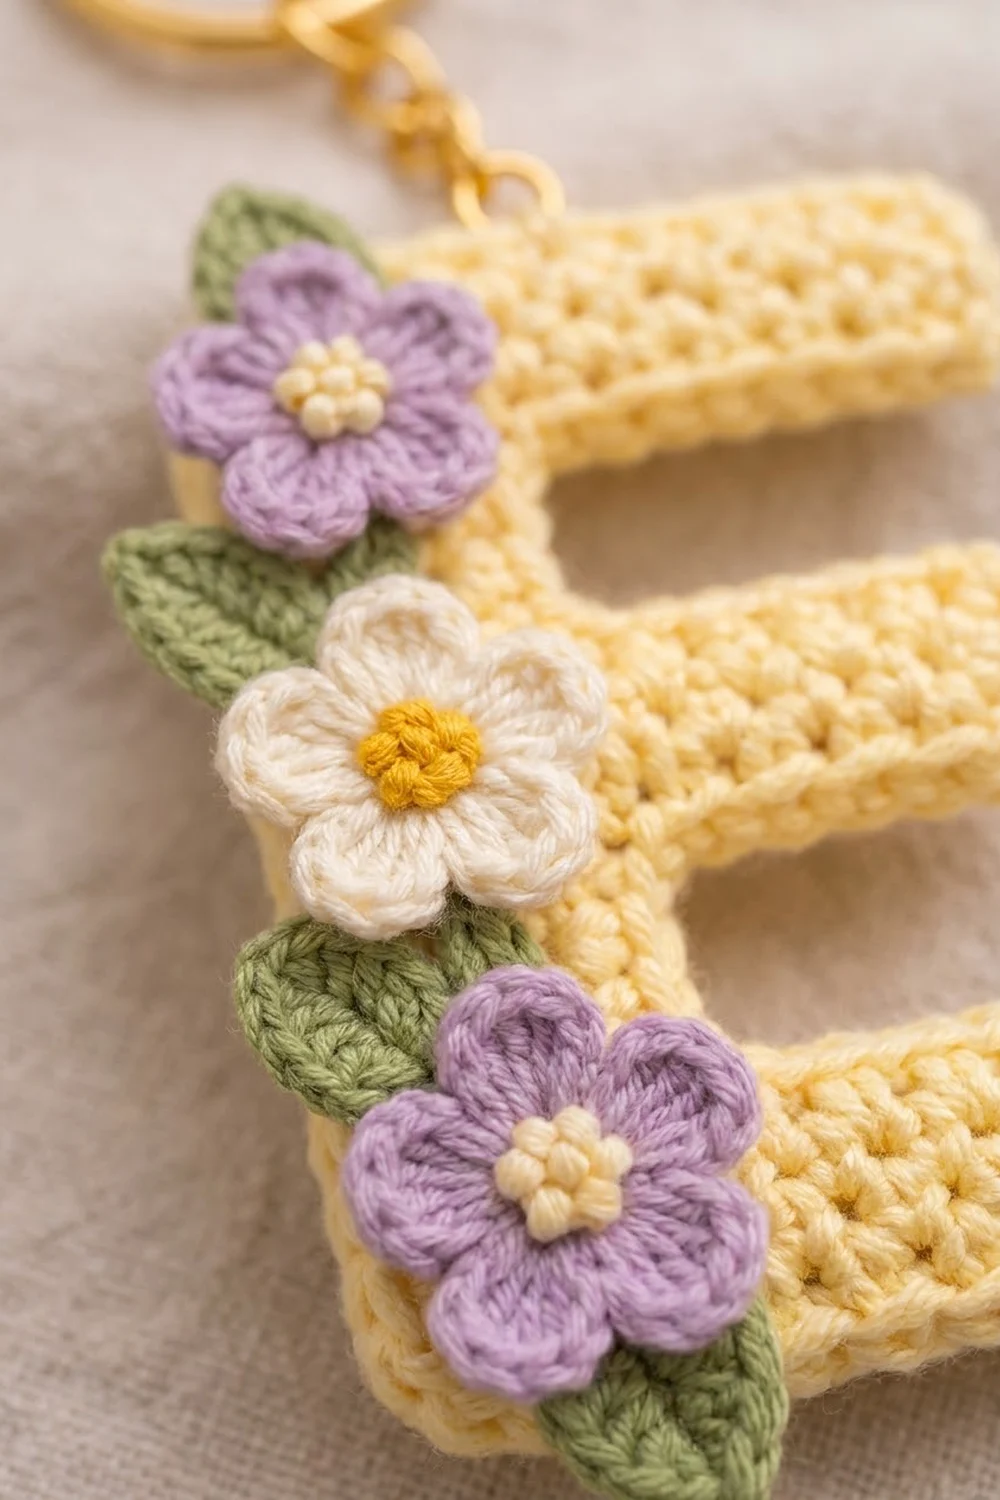
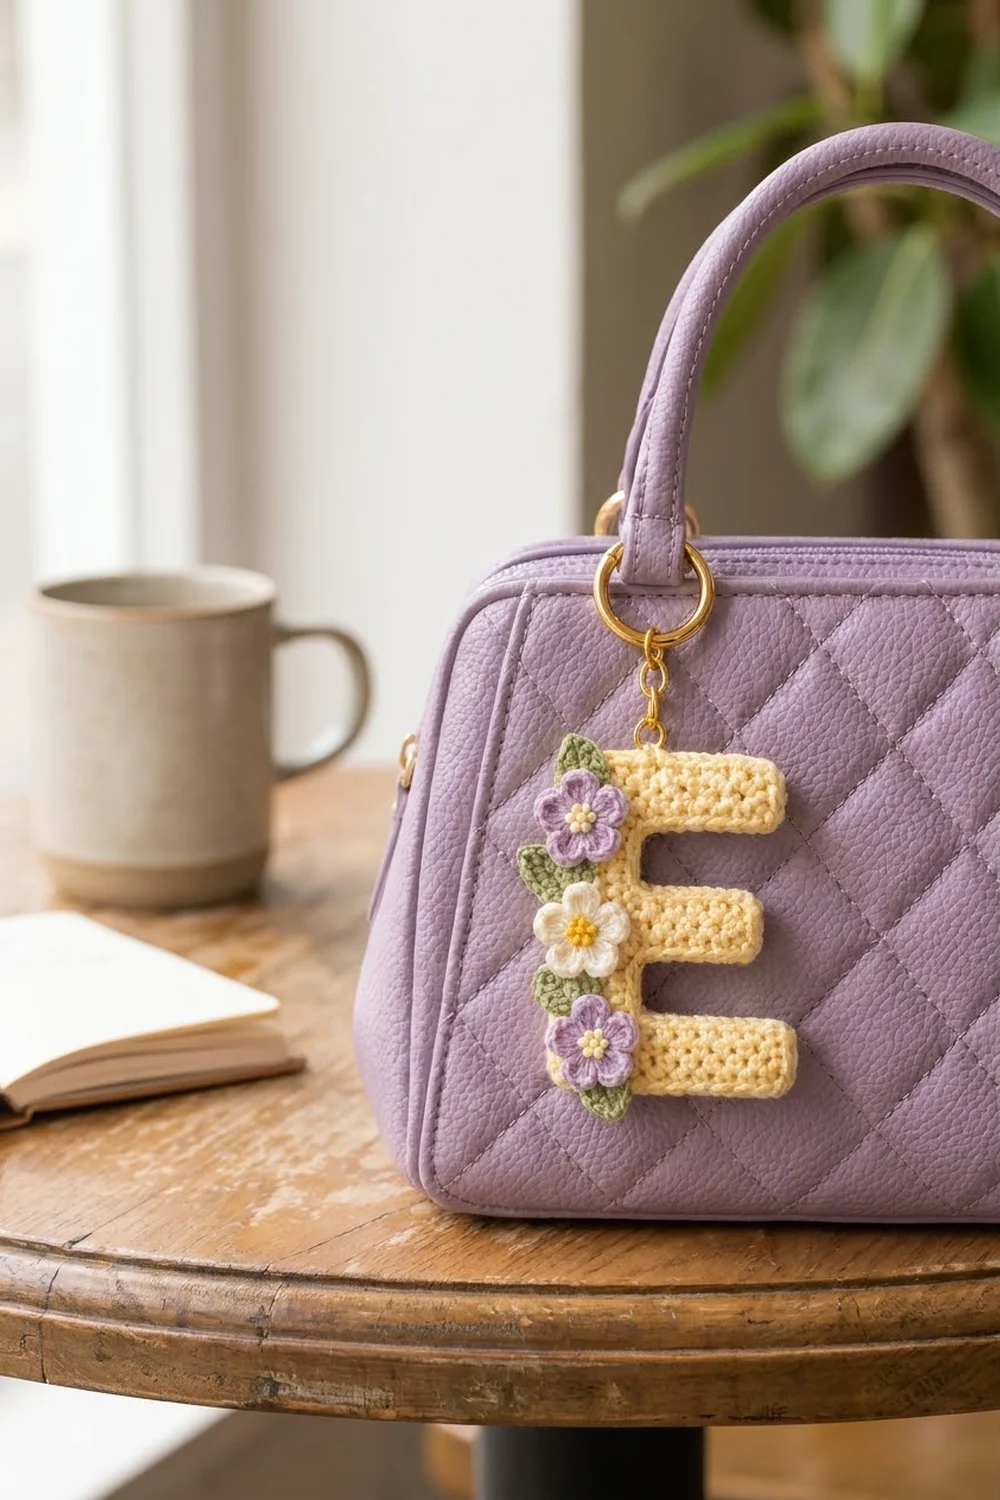
This little monogram charm is a soft butter-yellow capital E with flowers running down its spine. Two lilac blossoms and one cream blossom sit in a column along the left edge, with small sage-green leaves tucked between them. A gold key ring finishes it, ready to clip onto a bag or a set of keys.
The style is sweet and tidy. The letter is worked in firm single crochet, so it holds a crisp shape. One round of edging gives it a smooth, cushioned rim. The flowers and leaves are tiny, quick appliqués that you sew on after blocking.
This pattern uses US crochet terms. The finished letter is 4.4 in (11.2 cm) tall and 2.8 in (7.1 cm) wide, not counting the hardware.
You work the letter flat in rows from the bottom arm to the top arm. The arms are lengthened with foundation single crochet, so there are no separate pieces to join. Then you work one edging round, make three flowers and four leaves, block the letter, and sew everything together.
Finished Size and Construction
- Finished size: 4.4 in tall x 2.8 in wide (11.2 cm x 7.1 cm)
- Skill level: Easy
- Terminology: US crochet terms
- Yarn weight: DK (#3), cotton or cotton blend
- Hook: 3.5 mm (E-4) for the letter; 3.0 mm for the appliqués
- Number of pieces: 1 letter, plus 3 flowers and 4 leaves sewn on as appliqués
- Layout: a single letter E, with one vertical column of appliqués along the left spine
- Letter body before edging: 4.0 in x 2.4 in (10.2 cm x 6.1 cm)
- Edging depth: 0.2 in (0.5 cm) on every side
- Flower size: 1.1 in (2.8 cm) across
- Leaf size: 1.0 in x 0.5 in (2.5 cm x 1.3 cm)
Materials
Choose a smooth DK cotton. It keeps the letter’s corners sharp and won’t fuzz on a bag that gets handled a lot.
- Color A, Butter Yellow (letter): 8 g, about 18 m
- Color B, Lilac (2 flowers): 3 g, about 7 m
- Color C, Cream (lilac flower centers and cream flower petals): 2 g, about 5 m
- Color D, Golden Yellow (cream flower center): 1 g, about 2 m
- Color E, Sage Green (leaves): 2 g, about 5 m
All quantities include a margin for a gauge swatch and sewing tails.
Tools:
– 3.5 mm (E-4) and 3.0 mm crochet hooks
– Tapestry needle
– 1 gold split key ring, 1 in (2.5 cm), with a short chain
– 1 gold jump ring, about 7 mm
– 2 pairs of flat-nose pliers
– Stitch marker
– Blocking board, rustproof pins, and a spray bottle
– Scissors and a ruler
Abbreviations (US Terms)
- ch: chain
- sl st: slip stitch
- sc: single crochet
- hdc: half double crochet
- dc: double crochet
- sc2tog: single crochet 2 together
- st(s): stitch(es)
- RS / WS: right side / wrong side
- MR: magic ring
Special stitch: foundation single crochet (fsc). Insert the hook into the base of the last stitch you made. Yarn over and pull up a loop (2 loops on hook). Yarn over and pull through 1 loop; this makes the “chain.” Yarn over and pull through both loops. To make the next fsc, work into that chain. Each fsc adds 1 stitch to the row and builds its own bottom edge at the same time.
Gauge and Checkpoints
Gauge: 5 sc and 5 rows = 1 in (2.5 cm) with the 3.5 mm hook.
This square gauge matters. The edging puts 1 sc into every row end, and that only lies flat when your stitches and rows are the same size.
Test first. Ch 11 and work 10 rows of 10 sc. Your swatch should measure 2.0 in (5.1 cm) square.
Checkpoints:
– After Row 4: 2.4 in x 0.8 in (6.1 cm x 2.0 cm)
– After Row 8: 1.6 in (4.1 cm) tall
– After Row 12: 2.4 in (6.1 cm) tall; the middle arm is 2.0 in (5.1 cm) long
– After Row 16: 3.2 in (8.1 cm) tall
– After Row 20: 4.0 in x 2.4 in (10.2 cm x 6.1 cm)
– After edging: 4.4 in x 2.8 in (11.2 cm x 7.1 cm)
Too big? Go down to a 3.25 mm or 3.0 mm hook. Too small? Go up to a 3.75 mm hook. If only the height is off, adjust your tension instead of the stitch counts. The letter’s proportions depend on keeping 12 stitches and 20 rows.
Part 1: Letter Body
Use Color A and the 3.5 mm hook. The turning ch 1 never counts as a stitch.
Bottom arm
Row 1: Ch 13. Sc in 2nd ch from hook and in each ch across. (12 sc)
Rows 2–4: Ch 1, turn. Sc in each st across. (12 sc)
Checkpoint: 2.4 in x 0.8 in (6.1 cm x 2.0 cm).
Lower spine
Row 5: Ch 1, turn. Sc in the first 5 sts. Leave the remaining 7 sts unworked. (5 sc)
These 5 stitches form the spine. Hold the piece so the spine is on the left, and mark the side facing you as the RS.
Rows 6–8: Ch 1, turn. Sc in each st across. (5 sc)
Row 8 ends at the outer (left) edge of the spine.
Middle arm
Row 9: Ch 1, turn. Sc in each of the 5 spine sts, then work 5 fsc, starting from the base of the last sc. (10 sts: 5 sc + 5 fsc)
Rows 10–12: Ch 1, turn. Sc in each st across. (10 sc)
Checkpoint: 2.4 in (6.1 cm) tall. The middle arm is 2.0 in (5.1 cm) long.
Upper spine
Row 13: Ch 1, turn. Starting at the outer spine edge, sc in the first 5 sts. Leave the remaining 5 sts unworked. (5 sc)
Rows 14–16: Ch 1, turn. Sc in each st across. (5 sc)
Checkpoint: 3.2 in (8.1 cm) tall.
Top arm
Row 17: Ch 1, turn. Sc in each of the 5 spine sts, then work 7 fsc. (12 sts: 5 sc + 7 fsc)
Rows 18–20: Ch 1, turn. Sc in each st across. (12 sc)
Fasten off and weave in the ends.
Checkpoint: 4.0 in x 2.4 in (10.2 cm x 6.1 cm). Each gap between the arms should measure 0.8 in (2.0 cm).
Part 2: Flowers (Make 3)
Use the 3.0 mm hook. Make 2 lilac flowers (center in C, petals in B) and 1 cream flower (center in D, petals in C).
Round 1 (center color): MR, ch 1, work 10 sc in the ring. Sl st to the first sc and pull the ring tightly closed. (10 sc) Fasten off.
Round 2 (petal color): Join the petal color with a sl st in any sc; call this st 1. Work (hdc, 2 dc, hdc) in the next st, then sl st in the next st. Repeat from * 4 more times. The last sl st lands in st 1. (5 petals; 20 petal sts + 5 sl sts)
Fasten off, leaving an 8 in (20.3 cm) tail. Each flower measures 1.1 in (2.8 cm) across.
Part 3: Leaves (Make 4)
Use Color E and the 3.0 mm hook.
Ch 7. Sc in the 2nd ch from the hook. Then work hdc in the next ch, dc in each of the next 2 ch, and hdc in the next ch. Work 3 sc in the last ch to make the rounded base. Rotate the leaf to work along the other side of the chain: hdc in the next ch, dc in each of the next 2 ch, hdc in the next ch, and sc in the next ch. Sl st in the skipped ch to form the pointed tip. (13 sts + 1 sl st)
Fasten off, leaving an 8 in (20.3 cm) tail. Each leaf measures 1.0 in x 0.5 in (2.5 cm x 1.3 cm).
Border: Single Crochet Edging
Border gauge: The edging uses the body gauge, with 1 sc per stitch and 1 sc per row end. Work with Color A and the 3.5 mm hook, RS facing.
The outline of the E has 8 outside corners and 4 inside corners.
- Outside corners: Work 3 sc in the corner stitch. That group also covers the corner stitch’s row end, so don’t work into that row end separately.
- Inside corners (where the spine meets an arm): Sc2tog over the last edge spot before the corner and the first edge spot after it.
Edging round: Join with a sl st in the top-right corner st of Row 20, then ch 1. Work counterclockwise:
- Top edge: 3 sc in the corner st, sc in the next 10 sts, 3 sc in the last st. (16 sc)
- Left spine edge: Sc in the row ends of Rows 19 down to 2. (18 sc)
- Bottom edge: Working into the foundation ch, 3 sc in the first ch, sc in the next 10 ch, 3 sc in the last ch. (16 sc)
- Bottom arm, right end: Sc in the row ends of Rows 2 and 3. (2 sc)
- Bottom arm, top: 3 sc in the corner st of Row 4, sc in the next 5 sts, then sc2tog over the last Row 4 st and the Row 5 row end. (9 sts)
- Lower inner spine: Sc in the row ends of Rows 6 and 7, then sc2tog over the Row 8 row end and the first fsc of Row 9. (3 sts)
- Middle arm, underside: Sc in the next 3 fsc, then 3 sc in the last fsc. (6 sc)
- Middle arm, right end: Sc in the row ends of Rows 10 and 11. (2 sc)
- Middle arm, top: 3 sc in the corner st of Row 12, sc in the next 3 sts, then sc2tog over the last Row 12 st and the Row 13 row end. (7 sts)
- Upper inner spine: Sc in the row ends of Rows 14 and 15, then sc2tog over the Row 16 row end and the first fsc of Row 17. (3 sts)
- Top arm, underside: Sc in the next 5 fsc, then 3 sc in the last fsc. (8 sc)
- Top arm, right end: Sc in the row ends of Rows 18 and 19. (2 sc)
Sl st to the first sc to join. Fasten off.
Total: 16 + 18 + 16 + 2 + 9 + 3 + 6 + 2 + 7 + 3 + 8 + 2 = 92 sts.
Why the math works: The outline has 80 edge spots, counting both stitches and row ends. The edging round breaks down like this:
- 72 sts worked 1 per edge spot (this includes the 8 corner centers)
- 16 extra sts, 2 at each outside corner
- 4 sc2tog, each covering 2 edge spots
That makes 72 + 16 + 4 = 92 sts, and it covers 72 + 8 = 80 edge spots.
The extra corner stitches keep the outside corners from cupping, and the sc2tog keep the inside corners from rippling. The edging adds 0.2 in (0.5 cm) on every side, so the letter grows from 4.0 in to 4.4 in (10.2 cm to 11.2 cm) tall and from 2.4 in to 2.8 in (6.1 cm to 7.1 cm) wide. Each gap between the arms closes from 0.8 in to 0.4 in (2.0 cm to 1.0 cm). Each arm grows from 0.8 in to 1.2 in (2.0 cm to 3.0 cm) tall.
Final Blocking
- Lay the letter RS up on a blocking board, using the grid to square the spine.
- Pin the 8 outside corners to 4.4 in x 2.8 in (11.2 cm x 7.1 cm).
- Pin the inside corners so each gap between the arms is 0.4 in (1.0 cm).
- Mist the letter until it is damp and pat it flat without stretching. Let it dry completely.
- Mist the flowers and leaves lightly, shape the petals and leaf tips with your fingers, and let them dry flat.
- Place the flowers along the spine so about 0.3 in (0.8 cm) of each one extends past the left edge. Line the top lilac flower up with the top arm, the cream flower with the middle arm, and the bottom lilac flower with the bottom arm. Put one leaf above the top flower, angled outward. Add one leaf between each pair of flowers and one below the bottom flower.
- Sew on the leaves first, then the flowers over the leaf bases, using each piece’s tail. Stitch only through the front half of the letter’s thickness so nothing shows on the back.
- Twist the jump ring open sideways with the pliers. Pass it through the top edging, about 0.4 in (1.0 cm) in from the top-left corner. Hook on the key ring chain and close the jump ring.
Final Quality-Control Checklist
- The letter measures 4.4 in x 2.8 in (11.2 cm x 7.1 cm).
- The edging has 92 sts, and all 8 outside corners are sharp.
- The inside corners lie flat.
- The middle arm is 0.6 in (1.5 cm) shorter than the top and bottom arms.
- There are 3 flowers with 5 even petals each, and 4 pointed leaves.
- The appliqués form a straight column and overlap the left edge evenly.
- All ends are woven in securely, and the jump ring is fully closed.
Troubleshooting
- The letter leans: You probably missed or added a stitch at a turn. Spine rows should always have 5 sts.
- The fsc edge is tight: Work the fsc more loosely.
- The left side ruffles: Your rows are taller than your stitches. Skip 1 row end in every 5, and check your gauge next time.
- There are holes at the inside corners: Pull each sc2tog firmly, then weave a tail across the corner on the WS.
- The petals are floppy: Use a smaller hook and pull the magic ring tight.
Care
Spot clean with mild soap and cool water, press out the water in a towel, and dry flat. Take off the key ring before any deeper wash.
Final Notes
At a square gauge of 5 sc and 5 rows per 1 in (2.5 cm), 12 sts and 20 rows give a body of 4.0 in x 2.4 in (10.2 cm x 6.1 cm). The 92-stitch edging adds 0.2 in (0.5 cm) on every side, for a finished letter of 4.4 in x 2.8 in (11.2 cm x 7.1 cm). Three 1.1 in (2.8 cm) flowers and four 1.0 in (2.5 cm) leaves finish the spine.
Happy crocheting!