

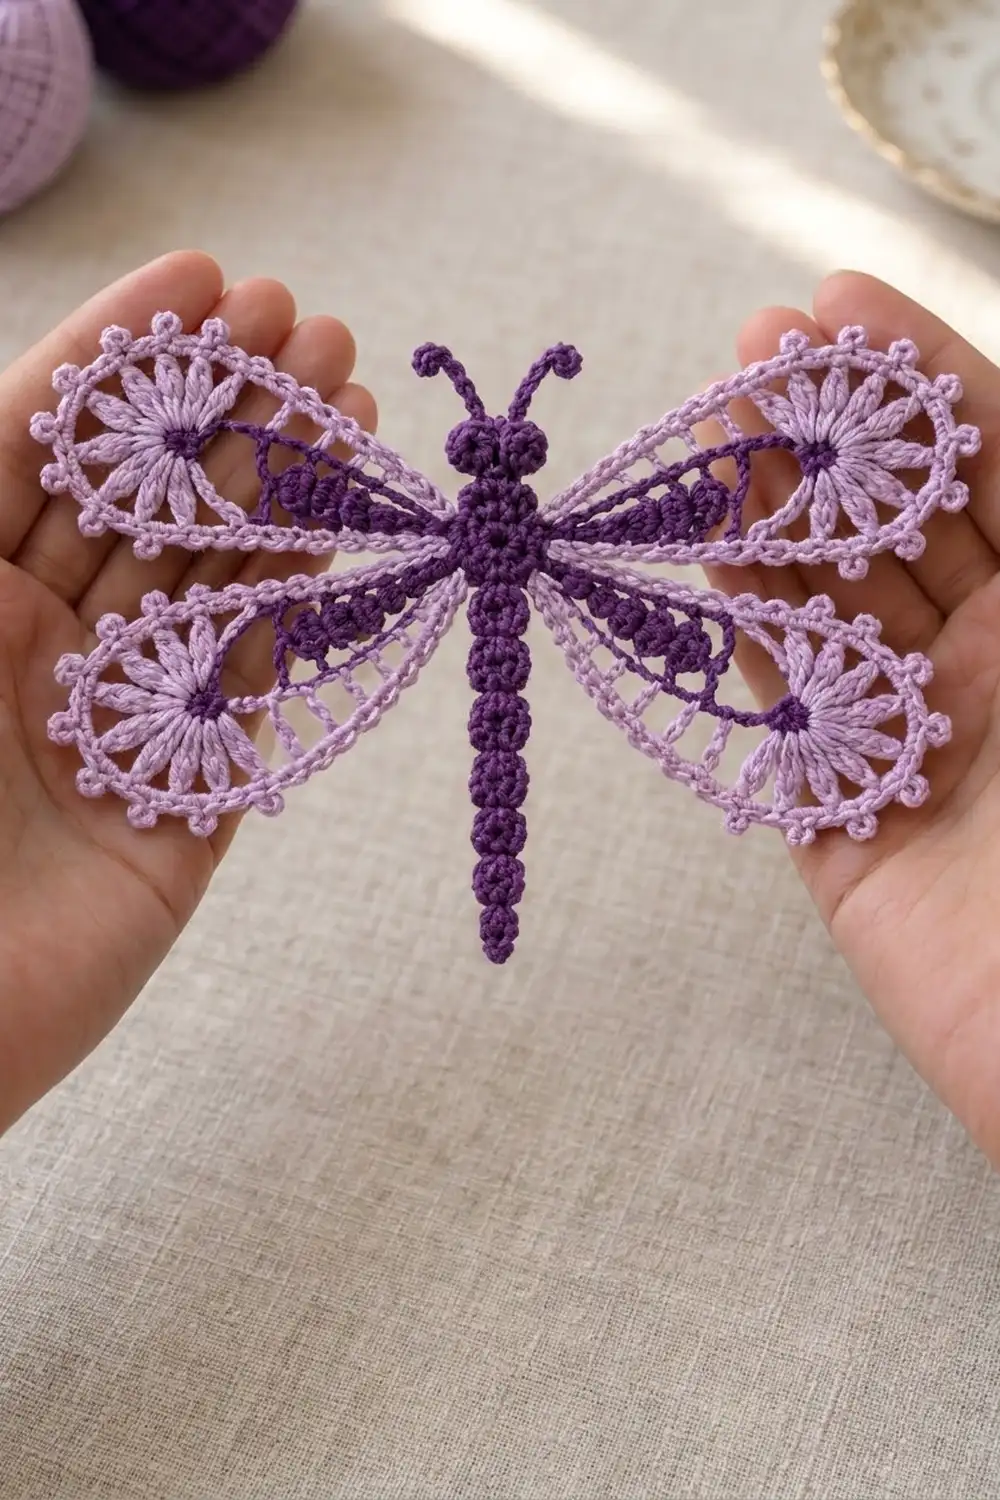
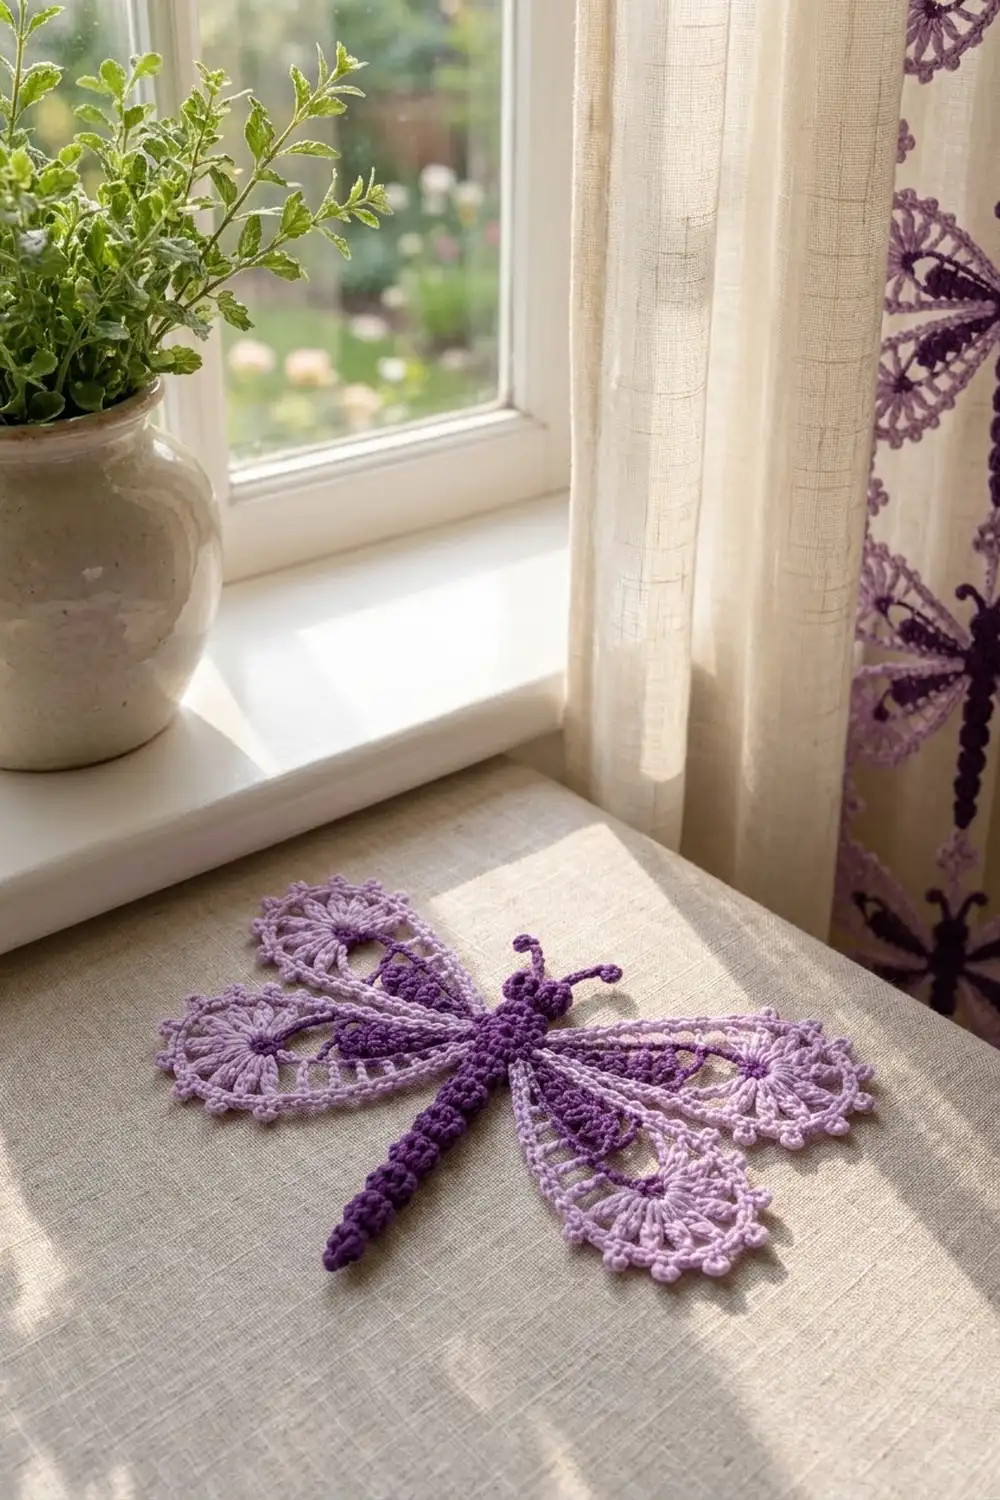
The Lilac Lace Dragonfly is one lacy motif. It has a beaded dark purple body and four open, teardrop-shaped wings in soft lavender. Each wing has a small flower near its tip, a solid purple panel near the body, and a fine picot edge.
The colors are simple. Deep violet is used for the body, wing panels, and flower centers. Pale lavender is used for the flower petals, wing frames, and picots. The look is vintage and airy, a bit like Irish-crochet appliqué, but the motif uses only basic stitches.
This pattern uses US crochet terms. The finished dragonfly is about 7.25 in (18.4 cm) across the wings and 5.5 in (14.0 cm) from head to tail. With the antennae, it is 6.25 in (15.9 cm) long.
Each part is made separately: a round thorax, a round head with antennae, a beaded abdomen worked straight off the thorax, and four wings. Each wing starts as a flower. Then you add a purple panel and vein, a chain frame, and a picot edging. Last, you sew the wings and head to the thorax and block the motif flat.
Finished Size and Construction
- Finished size: 7.25 in (18.4 cm) wingspan x 5.5 in (14.0 cm) body length
- Skill level: Intermediate
- Terminology: US crochet terms
- Yarn weight: Sport (#2) mercerized cotton
- Hook: 3.0 mm (US C/2 or D/3)
- Number of pieces: 1 finished motif (made from 7 parts: thorax, head, abdomen, 4 wings)
- Layout: The body runs vertically; 2 upper wings and 2 slightly smaller lower wings spread out to the sides
- Piece size: Upper wing 3.25 in (8.3 cm) long x 1.75 in (4.4 cm) wide; lower wing 3 in (7.6 cm) long x 1.5 in (3.8 cm) wide
- Size before border: Upper wing 3 in (7.6 cm) long; lower wing 2.75 in (7.0 cm) long; wingspan 6.75 in (17.1 cm)
- Border depth: The picot edging adds about 0.25 in (0.6 cm) at the wing tip
Materials
Use a smooth, mercerized cotton. It shows the stitches clearly, keeps picots crisp, and blocks flat. A sport cotton with about 155 m per 50 g works well. Avoid fuzzy or very stretchy yarn, because the open frames will sag.
- Color A, lavender: 10 g (about 31 m / 34 yd): flower petals, wing frames, picot edging
- Color B, dark purple: 8 g (about 25 m / 27 yd): thorax, head, antennae, abdomen, flower centers, wing panels and veins
These amounts include about 25% extra for testing and weaving in.
Tools:
- 3.0 mm crochet hook
- Tapestry needle
- Scissors
- 4 stitch markers
- Rustproof pins and a blocking mat
- Spray bottle with water
- Ruler or tape measure
Abbreviations (US Terms)
- ch: chain
- sl st: slip stitch
- sc: single crochet
- hdc: half double crochet
- dc: double crochet
- MR: magic ring
- sp(s): space(s)
- st(s): stitch(es)
- PC: popcorn
- CL: cluster
Popcorn (PC): Work 5 dc in the stitch given. Take the hook out of the loop, put it through the top of the first dc from front to back, pick up the dropped loop, and pull it through. Ch 1 to close. A PC counts as 1 st.
4-dc PC: Same as above, with 4 dc.
3-dc cluster (3-dc CL): (Yarn over, insert hook in st, pull up a loop, yarn over, pull through 2 loops) 3 times in the same st; yarn over, pull through all 4 loops.
Picot: Ch 3, sl st in the 3rd ch from hook.
Gauge and Checkpoints
For a motif, you check gauge with the parts themselves instead of a swatch. Make one upper wing first and measure it before going on.
- Flower (Rnds 1–2): 1.5 in (3.8 cm) across
- Thorax (Rnds 1–3): 1.25 in (3.2 cm) across
- Head (Rnds 1–2): 0.75 in (1.9 cm) across
- Upper wing before edging: 3 in (7.6 cm) from body tip to outer tip
- Upper wing after edging: 3.25 in (8.3 cm) x 1.75 in (4.4 cm)
If your flower is larger than 1.5 in (3.8 cm), switch to a 2.75 mm hook. If it is smaller, switch to a 3.25 mm hook. Measure the flower again before making the frame, because every chain length in the wing is sized to fit it.
Thorax
With B, make a MR.
Rnd 1: Ch 1, 8 sc in ring, sl st to first sc. (8 sts)
Rnd 2: Ch 1, 2 sc in each st around, sl st to first sc. (16 sts)
Rnd 3: Ch 1, sc in next st, 2 sc in next st; repeat from * 8 times total, sl st to first sc. (24 sts)
Fasten off and leave a 6 in (15.2 cm) tail. Check: 1.25 in (3.2 cm) across.
Number the Rnd 3 sts 1 to 24, with st 1 at the top center. St 13 is the bottom center. Put markers in sts 5, 9, 17, and 21. These mark where the wings go.
Abdomen
You work the abdomen straight off the bottom of the thorax as a string of popcorn “beads.”
Hold the thorax with the right side facing you. Join B with a sl st in st 13.
Segments 1–5: Ch 4, PC in 4th ch from hook; repeat from * 5 times total. (5 PCs)
Segment 6: Ch 4, 4-dc PC in 4th ch from hook. (6 PCs)
Segment 7: Ch 3, 3-dc CL in 3rd ch from hook. (6 PCs + 1 CL)
Tail tip: Ch 3, sl st in 2nd ch from hook, sl st in next ch.
Fasten off and weave in the end. The beads get smaller toward the tail, which tapers the abdomen. Check: about 3.5 in (8.9 cm) from the thorax edge to the tail tip. Segments 1–5 are each about 0.5 in (1.3 cm) wide.
Head and Antennae
With B, make a MR.
Rnd 1: Ch 1, 6 sc in ring, sl st to first sc. (6 sts)
Rnd 2: Ch 1, 2 sc in each st around, sl st to first sc. (12 sts)
Don’t fasten off. Number the sts 1 to 12, with st 1 at the join. St 1 is the bottom of the head and st 7 is the top center.
First antenna: Sl st in sts 2–6. Ch 8, 3 sc in 2nd ch from hook (this makes the curled knob), sl st in next 6 ch, sl st in st 6 of the head again.
Second antenna: Sl st in sts 7 and 8. Ch 8, 3 sc in 2nd ch from hook, sl st in next 6 ch, sl st in st 8 of the head again.
Fasten off and leave an 8 in (20.3 cm) tail for sewing. Check: the head is 0.75 in (1.9 cm) across and the antennae are about 0.75 in (1.9 cm) long.
Wings
Make 2 upper wings and 2 lower wings. The flower is the same for all four. The lower wings have shorter panel and frame chains.
Flower (all wings)
With B, make a MR.
Rnd 1: Ch 1, 8 sc in ring, sl st to first sc. (8 sts) Fasten off B.
Rnd 2: Join A in any sc. Ch 3 (counts as dc), dc in same st, ch 1, 2 dc in next st, ch 1; repeat from * 7 more times, sl st to top of ch-3. (16 dc, 8 ch-1 sps)
Fasten off A. Number the ch-1 sps 1 to 8, going counterclockwise and starting with the sp just after the beginning ch-3. Check: 1.5 in (3.8 cm) across.
Panel and Vein (B)
The panel is a tapered strip. It is widest at the body end and thins into a slip-stitch vein that meets the flower.
Upper wing: Join B with a sl st in sp 1. Ch 12. Work back along the chain toward the flower: dc in 4th ch from hook (the 3 skipped ch count as a dc), dc in next ch, hdc in next 2 ch, sc in next 2 ch, sl st in last 3 ch, ending at sp 1. (10 sts: 3 dc, 2 hdc, 2 sc, 3 sl st)
Lower wing: Join B with a sl st in sp 1. Ch 10. Dc in 4th ch from hook, hdc in next ch, sc in next 2 ch, sl st in last 3 ch, ending at sp 1. (8 sts: 2 dc, 1 hdc, 2 sc, 3 sl st)
Fasten off B. The top of the beginning ch-3 is the body tip.
Frame (A)
Upper wing: Join A with a sl st in the body tip. Ch 1, sc in same st, ch 11, sc in sp 2 of the flower, ch 5, sc in next sp; repeat from * 6 times total (ending in sp 8), ch 11, sl st to first sc. (8 sc, 2 ch-11 sps, 6 ch-5 sps)
Lower wing: Work the same as the upper wing, but use ch 9 instead of ch 11 for both long chains. (8 sc, 2 ch-9 sps, 6 ch-5 sps)
The two long chains run along both sides of the panel and meet the flower at sps 2 and 8. This opens the wing into a teardrop, with lacy open space around the purple panel.
Check before edging: the upper wing is 3 in (7.6 cm) long and the lower wing is 2.75 in (7.0 cm) long.
Border (Picot Edging)
The picot round is the only border on the motif. You work it around each wing frame.
Border gauge: About 7 sc and 1 picot per 1 in (2.5 cm) along the edge.
Upper wing edging: Don’t fasten off after the frame. Ch 1, sc in the body-tip sc. In the first ch-11 sp, work (4 sc, picot, 3 sc, picot, 4 sc). In each of the 6 ch-5 sps, work (3 sc, picot, 3 sc). In the last ch-11 sp, work (4 sc, picot, 3 sc, picot, 4 sc). Sl st to first sc.
- Long sides: 11 sc + 2 picots each
- Rounded end: 6 sps x 6 sc = 36 sc + 6 picots
- Total: 1 + 11 + 36 + 11 = 59 sc, 10 picots
Lower wing edging: Work the same way, but in each ch-9 sp work (3 sc, picot, 3 sc, picot, 3 sc).
- Long sides: 9 sc + 2 picots each
- Rounded end: 36 sc + 6 picots
- Total: 1 + 9 + 36 + 9 = 55 sc, 10 picots
Fasten off and leave a 10 in (25.4 cm) tail on each wing for sewing.
Why the math works: On the straight sides, you work 1 sc per chain (11 sc into a ch-11, 9 sc into a ch-9). That keeps the edge flat without tightening the teardrop. On the rounded end, you work 6 sc into each ch-5 sp. These extra stitches give the curve enough length to lie flat instead of cupping. The picots stick out past the edge and add about 0.25 in (0.6 cm) at the tip.
Assembly
Lay the thorax flat, right side up, with st 1 at the top.
- Upper wings: Lay each upper wing’s body tip over marked st 5 (right) and st 21 (left), overlapping the thorax edge by 0.25 in (0.6 cm). Angle them slightly upward.
- Lower wings: Lay the lower wings’ body tips over st 9 (right) and st 17 (left), with the same 0.25 in (0.6 cm) overlap. Angle them slightly downward.
- Using the A tails, whipstitch each wing tip to the thorax through both layers. Keep the stitches small so the panel hides them.
- Head: Place the head above the thorax so that head st 1 touches thorax st 1 and the antennae point up. Sew it on with the B tail.
- Check the wingspan: 2 x 3.25 in (8.3 cm) + 1.25 in (3.2 cm) − 2 x 0.25 in (0.6 cm) overlap = 7.25 in (18.4 cm).
Weave all ends into the body parts or along the frame chains.
Final Blocking
- Soak the motif in cool water for 10 minutes. Press the water out in a towel; don’t wring it.
- Lay it on a blocking mat, right side up.
- Pin the center of the thorax first. Then straighten the abdomen into a 3.5 in (8.9 cm) line with the beads centered.
- Pin each wing tip so the wingspan is 7.25 in (18.4 cm) and the left and right wings mirror each other.
- Pin the frame chains into smooth teardrop curves. Put one pin in each picot on the rounded ends.
- Use your fingers to shape the antenna knobs into small outward curls.
- Let it dry completely, about 12 hours. Remove the pins only once it is fully dry.
Final Quality-Control Checklist
- The wingspan is 7.25 in (18.4 cm).
- The body is 5.5 in (14.0 cm) from the top of the head to the tail tip.
- The upper wings are 3.25 in (8.3 cm) long; the lower wings are 3 in (7.6 cm).
- Each upper wing has 59 sc and 10 picots; each lower wing has 55 sc and 10 picots.
- The abdomen has 5 full PCs, 1 smaller PC, 1 CL, and a tail tip.
- All four panels have their wide end toward the body.
- The left and right wings sit at matching angles.
- There are no loose ends or visible sewing stitches.
Troubleshooting
The wing cups or curls: The edging is too tight. Redo the rounded end more loosely, or work 7 sc in each ch-5 sp.
The wing frame ruffles: There are too many stitches on the long sides. Check that you worked 11 sc (upper) or 9 sc (lower).
The panel sticks out past the frame: The panel chain is too loose. Make it again with a tighter chain.
The popcorns twist around the chain: This is normal. Straighten them and pin each bead in line when you block.
The antennae flop: Work the sl sts firmly back down the chain, and stiffen the knobs with a little spray starch.
Care
Hand wash in cool water with mild soap and dry flat, pinning again if needed. A light spray starch keeps the picots and frames crisp.
Final Notes
The size of this dragonfly comes from a few checkpoints. The 1.5 in (3.8 cm) flower sets the wing size. The frame brings the upper wing to 3 in (7.6 cm) and the lower wing to 2.75 in (7.0 cm). The picot edging adds 0.25 in (0.6 cm), so the wings finish at 3.25 in (8.3 cm) and 3 in (7.6 cm). The 1.25 in (3.2 cm) thorax joins everything into a 7.25 in (18.4 cm) wingspan, and the head and 3.5 in (8.9 cm) abdomen make a 5.5 in (14.0 cm) body.
If you measure at each stage, your finished dragonfly will match.
Happy crocheting!