

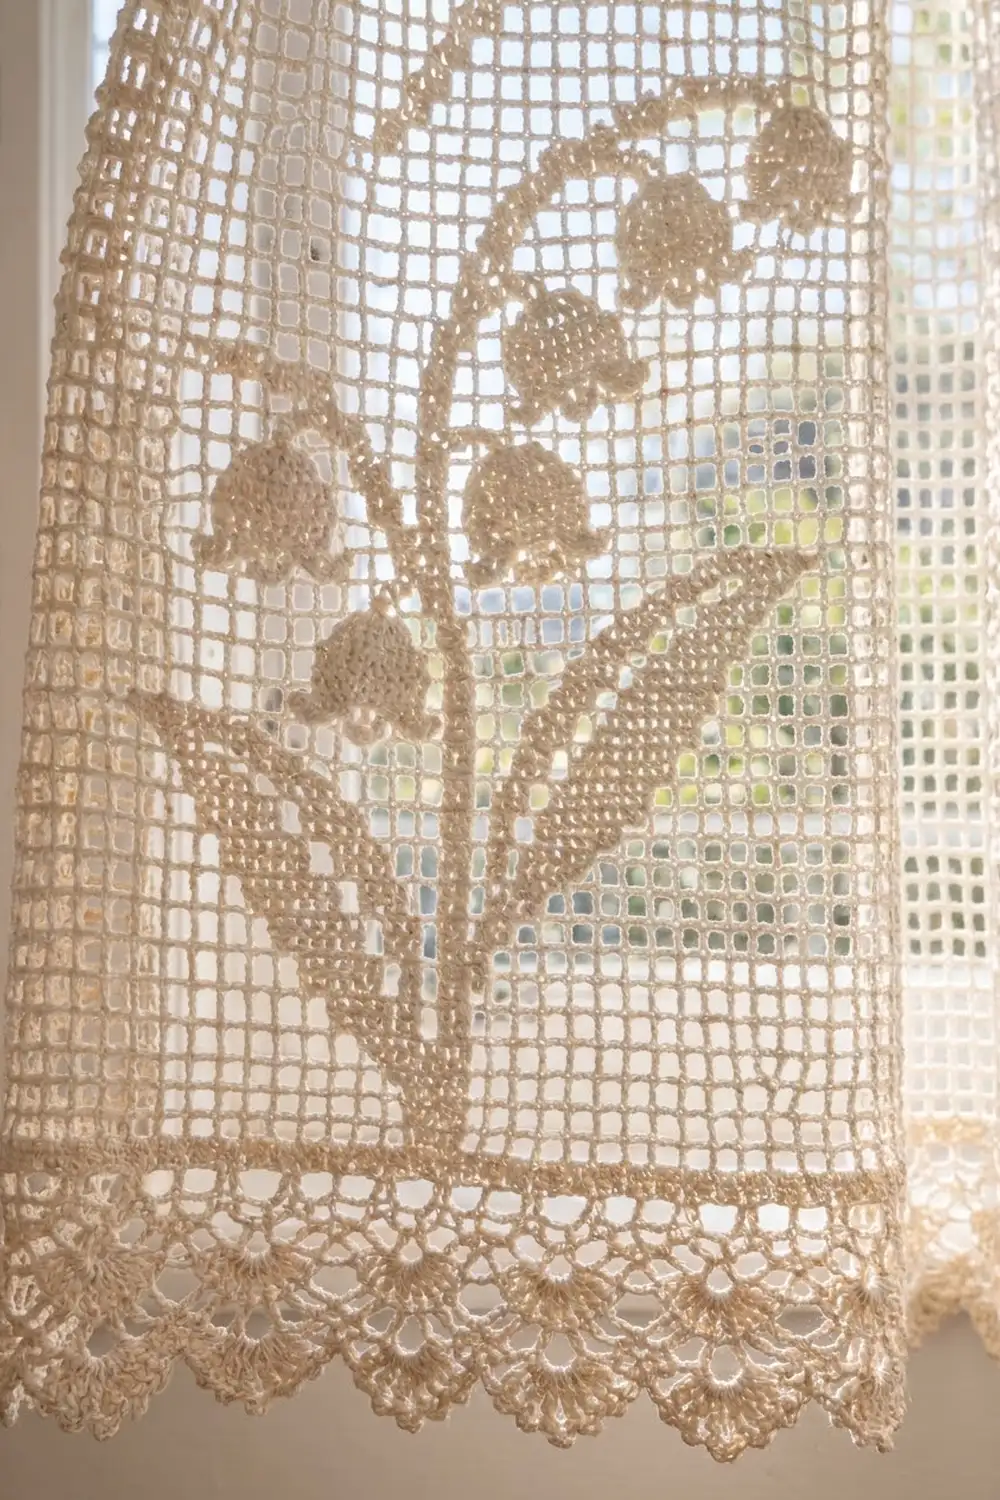
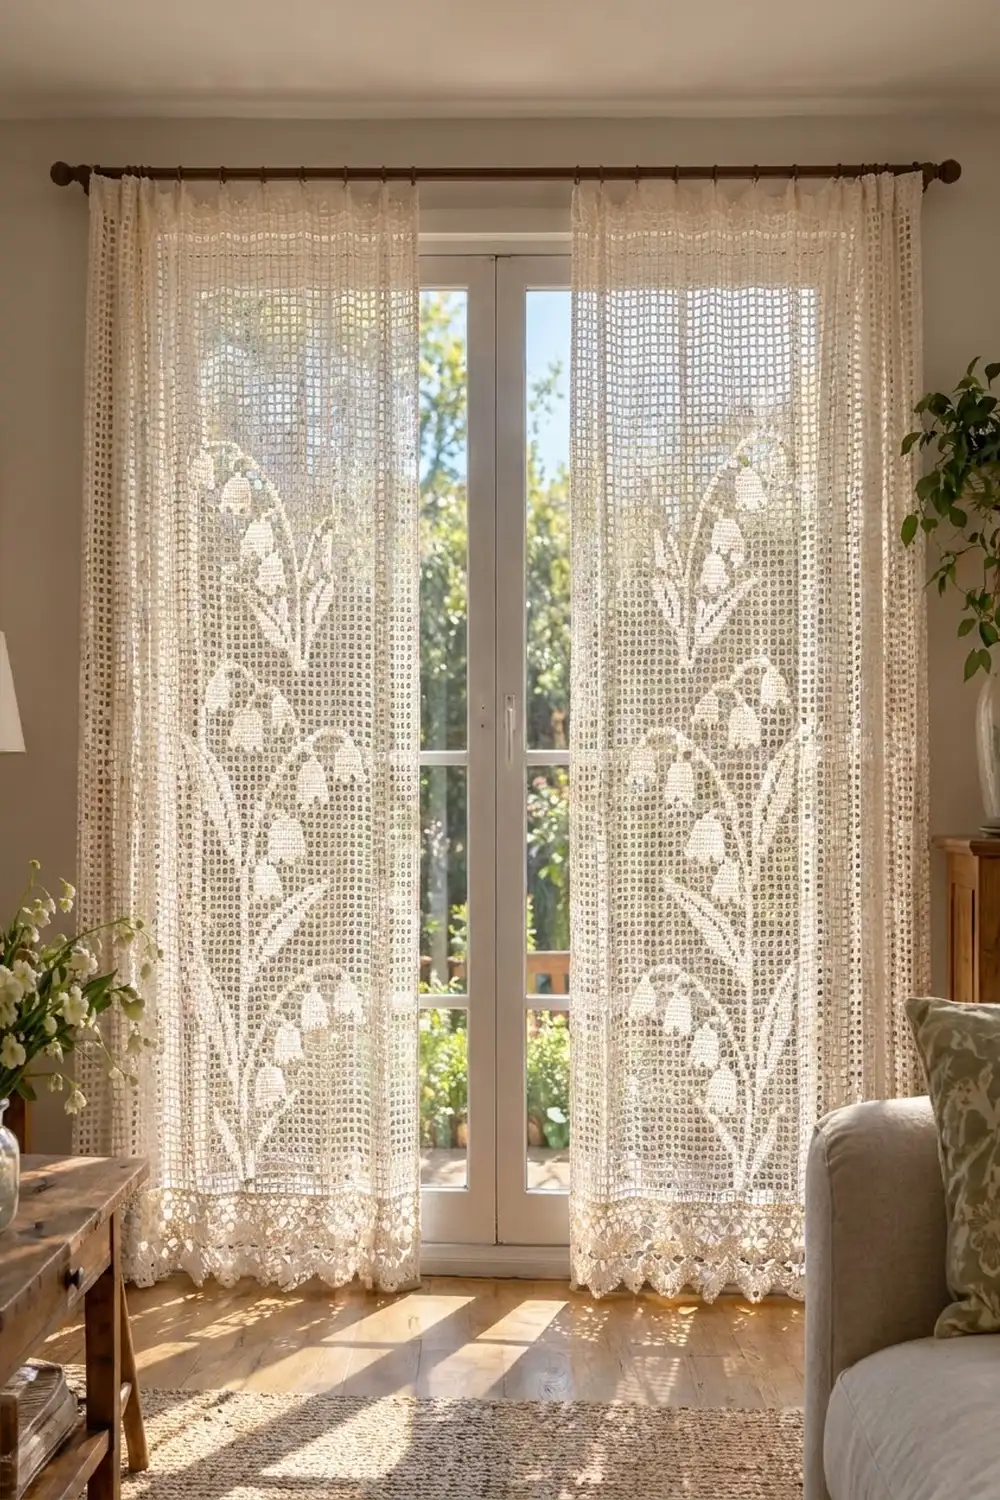
This curtain panel is made in classic filet crochet: an airy grid of open mesh with a tall lily of the valley spray worked in solid blocks. Two long leaves rise from the base, and a curving center stem sends out four arching side stems. Nine small bell flowers hang along them. The motif is worked twice up the panel, and a scalloped picot edging finishes the bottom edge.
The whole panel is one color, a soft cream or ivory cotton. In front of a sunny window, the solid blocks look slightly darker against the light coming through the mesh, so the flowers show clearly without a second color.
The pattern uses US crochet terms. One finished panel measures 30 in (76.2 cm) wide and 81 in (205.7 cm) long, including the folded rod pocket and the bottom border. The pattern makes a pair: two identical, separate panels that hang side by side on one rod.
Each panel is worked flat from the bottom up in rows of filet mesh. You place the blocks using written row-by-row positions. Then you work a solid double crochet heading that folds into a rod pocket, and add the scalloped border along the foundation edge.
Finished Size and Construction
- Finished size (each panel): 30 in x 81 in (76.2 cm x 205.7 cm)
- Skill level: Intermediate (simple stitches, careful counting)
- Terminology: US crochet terms
- Yarn weight: Fingering (super fine #1) mercerized cotton or size 3 crochet thread
- Hook: 2.5 mm
- Number of pieces: 2 identical panels, never joined to each other
- Layout: 2 panels side by side on one curtain rod
- Mesh grid: 75 mesh wide x 190 mesh rows, plus 10 heading rows
- Piece size before border: 30 in x 78 in (76.2 cm x 198.1 cm) with the heading folded
- Border depth: 3 in (7.6 cm) at the scallop points
Materials
Choose a smooth, mercerized cotton with good stitch definition. It holds the square shape of the mesh, washes well, and holds up to sunlight better than acrylic. Cream, ivory, or natural white all give the look shown.
- Cream: 400 g / 1,400 m per panel; 800 g / 2,800 m for the pair
These amounts assume a yarn of about 350 m per 100 g. Quantities include a margin of about 10% for the gauge swatch and small differences in tension.
Tools:
– 2.5 mm crochet hook
– Tapestry needle
– Stitch markers (at least 4)
– Tape measure
– Rust-proof pins and a large blocking surface (foam mats or towels on the floor)
– Spray bottle
Abbreviations (US Terms)
- ch: chain
- sl st: slip stitch
- sc: single crochet
- dc: double crochet
- sp: space
- sk: skip
- st(s): stitch(es)
- RS / WS: right side / wrong side
Special stitches:
– Space (open mesh): ch 2, sk 2 sts (or the next ch-2 sp), dc in next dc.
– Block (solid mesh): over a space, 2 dc in the ch-2 sp, dc in next dc. Over a block, dc in next 3 dc.
– Picot: ch 3, sl st in 3rd ch from hook.
Every mesh, open or solid, is 3 sts wide, and every row has 76 dc posts. A full row always counts as 226 sts (76 dc + 75 mesh x 2).
Gauge and Checkpoints
Gauge: 10 mesh and 10 rows = 4 in (10.2 cm). One mesh = 0.4 in (1.0 cm) square.
Test first. Ch 41 and work 12 rows of open mesh, 12 mesh wide. Wet the swatch, let it dry flat, and measure 10 mesh across the center. Your mesh must be square. Width and height matter equally, or the bells and leaves will look stretched.
- Too big: go down to a 2.25 mm hook.
- Too small: go up to a 2.75 mm hook.
- Width correct but rows too short: pull up your dc loops slightly taller.
Checkpoints:
– After Row 4: 30 in (76.2 cm) wide, 1.6 in (4.1 cm) tall
– After Row 94 (Motif A done): 37.6 in (95.5 cm) tall
– After Row 188 (Motif B done): 75.2 in (191.0 cm) tall
– After Row 190: 76 in (193.0 cm) tall
– After Row 200: 80 in (203.2 cm) tall, unfolded
Mesh Numbering
Mesh positions are fixed. With the RS facing, mesh 1 is at the right edge and mesh 75 is at the left edge. Odd rows are RS rows and start at mesh 1. Even rows are WS rows and start at mesh 75, so read the positions in reverse as you go.
After Row 4, place markers in meshes 27 and 48. Every block in the design falls between them, so you can count from a marker instead of from the edge.
The Panel
Foundation: Ch 230.
Row 1 (RS): Dc in 8th ch from hook (first space made), ch 2, sk 2 ch, dc in next ch; rep from * 73 more times. Turn. (75 spaces, 226 sts)*
Row 2 (WS): Ch 5 (counts as dc + ch 2), sk first ch-2 sp, dc in next dc, ch 2, dc in next dc; rep from * across, working the last dc in the 3rd ch of the turning ch. Turn. (75 spaces, 226 sts)*
Rows 3–4: Repeat Row 2. (226 sts)
Rows 5–94 (Motif A): Work motif rows 1–90 below (panel row = motif row + 4).
Rows 95–98: Open mesh, as Row 2.
Rows 99–188 (Motif B): Work motif rows 1–90 again (panel row = motif row + 98).
Rows 189–190: Open mesh.
Every row from 2 to 190 begins with ch 5 and ends with a dc in the 3rd ch of the turning ch. Each row stays at 226 sts; only the block positions change.
Motif in Words (Motif Rows 1–90)
Work the listed meshes as blocks. Every other mesh in the row is a space.
Main stem:
– Rows 1–80: meshes 37–38
– Rows 81–86: mesh 38
– Rows 87–88: mesh 39
– Row 89: meshes 39–43 (top arch)
– Row 90: no blocks
Right leaf:
– Rows 1–6: 35–36
– Rows 7–14: 33–36
– Rows 15–22: 31–35
– Rows 23–30: 29–33
– Rows 31–38: 28–31
– Rows 39–44: 27–29
– Rows 45–48: 27–28
Left leaf:
– Rows 1–6: 39–40
– Rows 7–14: 39–42
– Rows 15–22: 40–44
– Rows 23–30: 42–46
– Rows 31–38: 44–47
– Rows 39–44: 46–48
– Rows 45–48: 47–48
– Rows 49–50: 48 (leaf tip)
From Row 15 on, the open meshes at 36 and 39 separate each leaf from the stem.
Right spray (start row R): Each spray is an arching stem with one bell under the arch (bell X) and one bell at the drooping end (bell Y).
- R−3: 27, 29 (bell Y tips)
- R−2: 27–29 (bell Y body)
- R−1: 27–29 (bell Y body); 31, 33 (bell X tips)
- R: 28 (Y cap); 31–33 (X body); 36 (spray stem)
- R+1: 28 (Y stalk); 31–33 (X body); 36
- R+2: 28 (droop); 32 (X cap); 35
- R+3: 29 (droop); 32 (X stalk); 35
- R+4: 30–35 (arch)
Left spray (start row R) is the mirror image:
- R−3: 46, 48
- R−2: 46–48
- R−1: 46–48; 42, 44
- R: 47; 42–44; 39
- R+1: 47; 42–44; 39
- R+2: 47; 43; 40
- R+3: 46; 43; 40
- R+4: 40–45
The open center mesh in each tip row splits the bell rim into two points, which gives each bell its flared shape.
Spray placement:
– Right spray, R = 56 (motif rows 53–60)
– Left spray, R = 62 (rows 59–66)
– Right spray, R = 70 (rows 67–74)
– Left spray, R = 76 (rows 73–80)
Top bell (hangs from the Row 89 arch):
– Row 84: 42, 44
– Rows 85–86: 42–44
– Rows 87–88: 43
That makes 9 bells and 2 leaves per motif. The motif fills meshes 27–48, which is 8.8 in (22.4 cm) wide. It is 90 rows, or 36 in (91.4 cm), tall.
Rod Pocket Heading
Row 191 (RS): Ch 3 (counts as dc), 2 dc in next ch-2 sp, dc in next dc; rep from * across, working the last dc in the 3rd ch of the turning ch. Turn. (1 + 75 x 3 = 226 dc)*
Rows 192–200: Ch 3 (counts as dc), dc in each dc across. Turn. (226 dc each row)
The heading is 10 rows, 4 in (10.2 cm). Fasten off with a 100 in (254.0 cm) tail. Fold Rows 196–200 to the WS and whipstitch the top of Row 200 to the back of the top of Row 191. This makes a 2 in (5.1 cm) rod pocket with open ends.
Make All Pieces
Make 2 panels the same way. Each uses about 400 g / 1,400 m of cream.
Layout on the rod, as seen from the room:
[ Panel 1 ] [ Panel 2 ]
The panels are never joined. Hang both with the RS facing the room so the leaves and bells point the same way on each panel.
Border (Bottom Edge)
The border goes along the foundation edge only. The sides and top get no edging.
Border gauge: 7.5 sc = 1 in (2.5 cm). One scallop = 15 sts = 2 in (5.1 cm).
Row 1 (RS): With RS facing and the foundation edge at the top, join the yarn at the right corner. Ch 1. Along the foundation, sc in the base of each dc and 2 sc in each ch-2 sp. Turn. (76 + 75 x 2 = 226 sc)
Row 2 (WS): Ch 1, sc in first sc, ch 5, sk 4 sc, sc in next sc; rep from * across. Turn. (46 sc, 45 ch-5 loops)*
Row 3 (RS): Ch 1, sc in first sc, ch 3, sc in next loop, 9 dc in next loop, sc in next loop, ch 3, sc in next sc; rep from * 14 more times. Turn. (15 fans of 9 dc = 135 dc)*
Row 4 (WS): Ch 1, sc in first sc, ch 4, (dc in next dc of fan, ch 1) 8 times, dc in 9th dc, ch 4, sc in the sc between fans; rep from * across. Turn. (15 fans, each with 9 dc and 8 ch-1 sps)*
Row 5 (RS): Ch 1, sc in first sc, 4 sc in ch-4 sp, sc in next dc, [(dc, picot, dc) in next ch-1 sp, sc in next dc] 8 times, 4 sc in next ch-4 sp, sc in next sc; rep from * across. Fasten off. (each scallop: 18 sc, 16 dc, 8 picots; total 271 sc, 240 dc, 120 picots)*
Why the math works: Row 1 has 226 sc, which is 15 x 15 + 1. Row 2 uses 5 sts per loop, so 225 ÷ 5 = 45 loops, or 3 per scallop. Row 3 uses exactly 3 loops per fan, which gives 15 fans, each 2 in (5.1 cm) wide. 15 x 2 in = 30 in (76.2 cm), which matches the panel width, so the border lies flat without pulling in or ruffling.
Final Blocking
- Weave in all ends along solid blocks, where they hide best.
- Soak the panel in cool water with a little gentle wash for 15 minutes.
- Press out the water gently and roll the panel in towels. Do not wring.
- Lay it flat, RS up, on mats or towels.
- Pin the sides straight to 30 in (76.2 cm) wide.
- Pin the length to 78 in (198.1 cm) from the rod pocket fold to the foundation edge.
- Pin each of the 15 scallops at its center point, 3 in (7.6 cm) below the foundation edge.
- Straighten any crooked mesh squares with your fingers, and mist the bells and leaves to flatten them.
- Let the panel dry completely before unpinning.
Final Quality-Control Checklist
- Each row has 76 dc posts and 75 mesh.
- Both motifs have 2 leaves, 4 sprays and 9 bells.
- Each bell has two tip blocks with an open center.
- The panel is 30 in (76.2 cm) wide along its whole length.
- The rod pocket is 2 in (5.1 cm) deep and open at both ends.
- The border has 15 scallops and 120 picots.
- Both panels are the same size, within 0.5 in (1.3 cm).
Troubleshooting
- Panel narrows as you go: You are probably missing the last dc into the turning ch. Count posts every 10 rows.
- Mesh is rectangular, not square: Adjust your dc height (see Gauge) before you start the motif.
- A block lands in the wrong mesh on WS rows: Count from your markers at meshes 27 and 48 rather than from the start of the row.
- Bells look like squares: Check that the tip row has an open center mesh.
- Border ruffles: Row 1 has extra sc. It must be exactly 226.
- Border pulls in: Loosen the ch-5 loops in Row 2, or go up one hook size for the border only.
Care
Hand wash in cool water and dry flat, re-pinning if needed. Keep the panels out of hot dryers, which can shrink cotton and distort the mesh.
Final Notes
The measurement chain is simple. One mesh is 0.4 in (1.0 cm), so 75 mesh = 30 in (76.2 cm) and 190 rows = 76 in (193.0 cm). The 10-row heading folds to 2 in (5.1 cm), giving 78 in (198.1 cm) before the border. The 3 in (7.6 cm) scalloped border brings each panel to 30 in x 81 in (76.2 cm x 205.7 cm). Check your gauge and count your posts, and the pair will hang evenly.
Happy crocheting!