

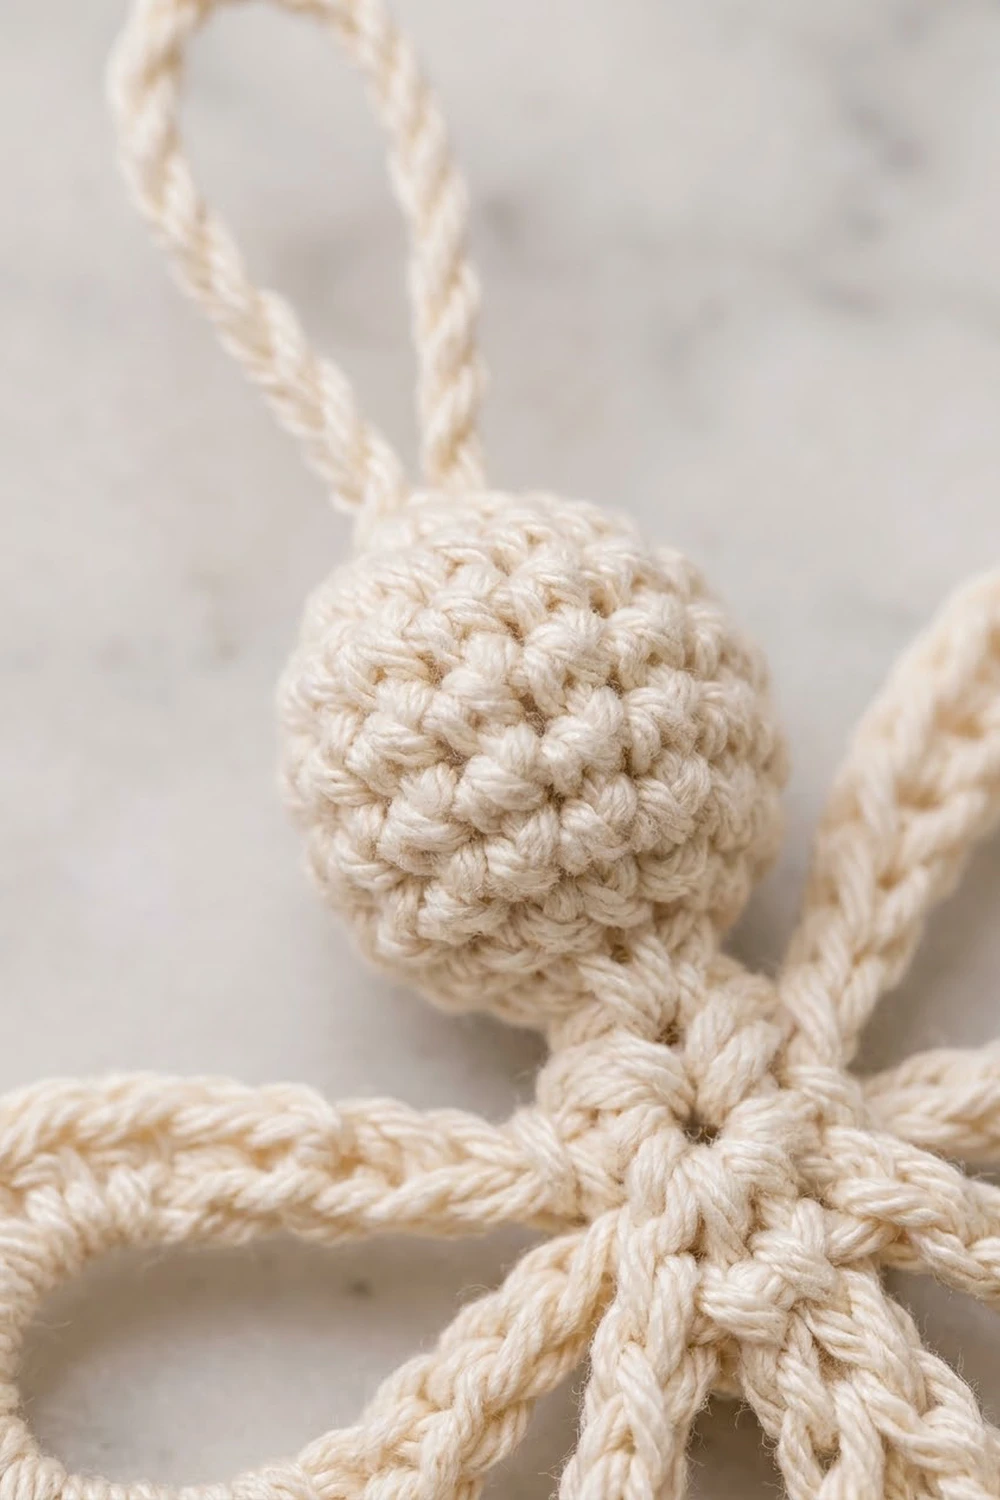
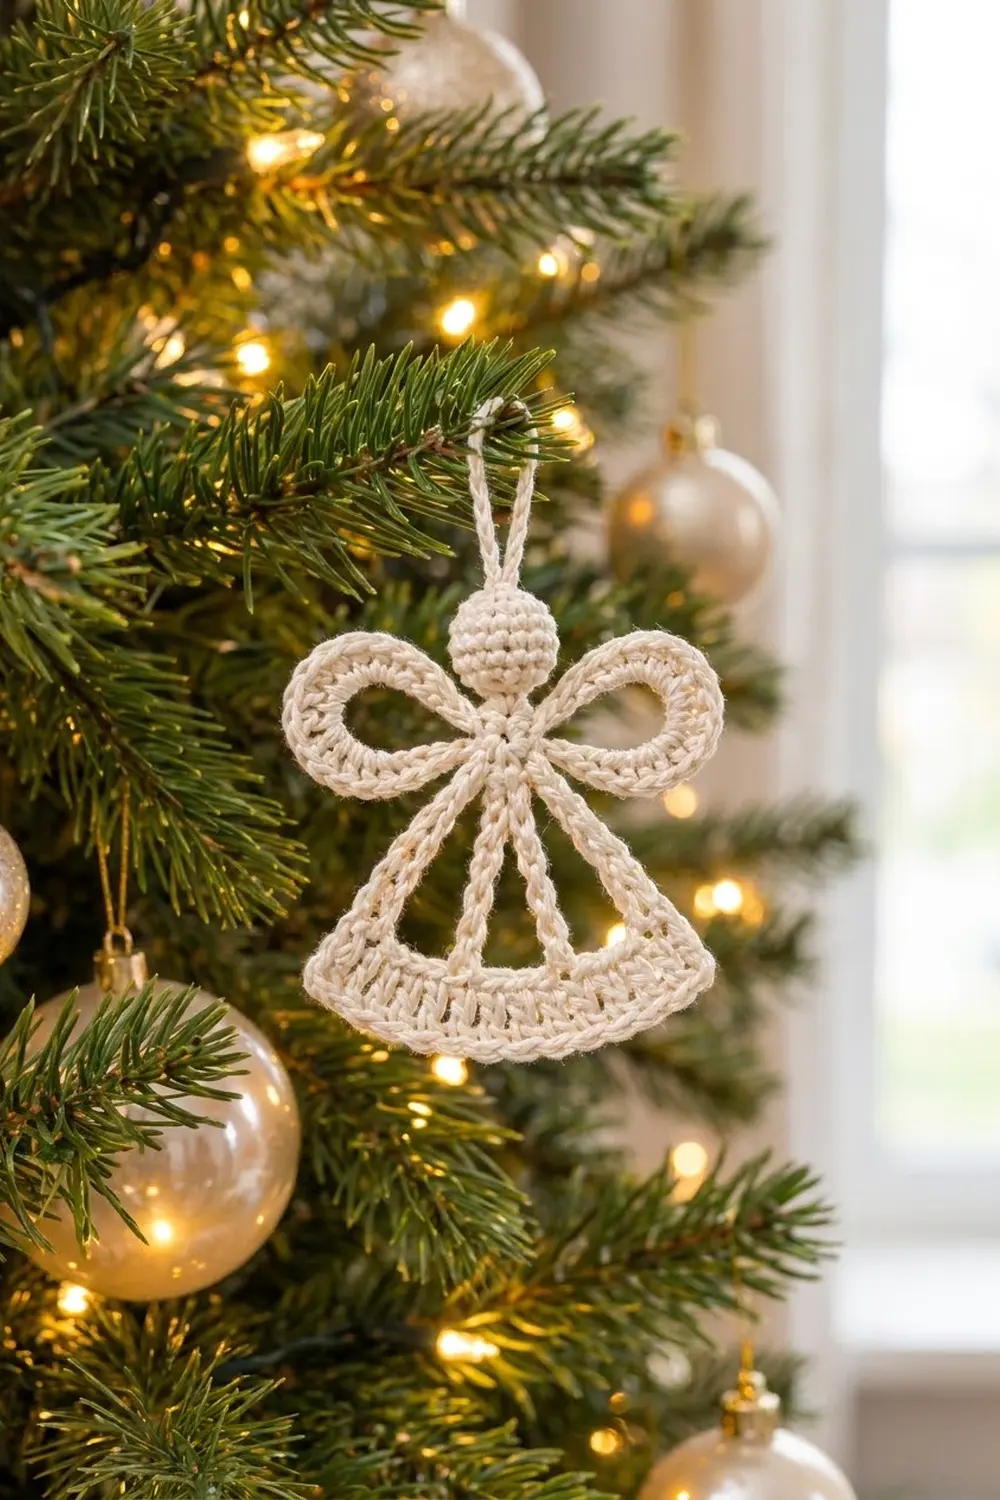
The Lumen Lace Angel is a small, airy Christmas ornament worked in a single cream cotton. It has a round stuffed head, two open loop wings, a skirt made of four slim legs and a solid fanned hem. The open frame lets tree lights shine through, so the angel looks light even though the stitches are firm.
The style is simple and classic: one color, crisp stitch definition and a clear outline. A smooth cotton in ivory, cream or off-white matches the sample best.
This pattern uses US crochet terms. The finished angel measures about 3.75 in (9.5 cm) wide across the wings and 5.25 in (13.3 cm) tall including the hanging loop. Without the loop, the body is 4 in (10.2 cm) tall.
You start with the hem band and work four legs straight off its foundation chain, then gather their tips at the waist. Next come a short neck strip, two ring wings and a stuffed head. A crocheted cord makes the hanging loop, and one border row finishes the hem.
Finished Size and Construction
- Finished size: 3.75 in (9.5 cm) wide x 5.25 in (13.3 cm) tall including loop
- Body height without loop: 4 in (10.2 cm)
- Skill level: Easy / advanced beginner
- Terminology: US crochet terms
- Yarn weight: Sport / fine (#2) cotton
- Hook: 2.5 mm (US B/1 or C/2)
- Number of pieces: One finished ornament. It is built from a hem-and-frame section, 2 wings and 1 head, with the neck strip and loop worked in place.
- Layout: Head on top, wings at the waist, four-leg skirt below, hem band at the bottom
- Piece size: Hem 3 in (7.6 cm) wide at the top edge and 3.5 in (8.9 cm) at the bottom edge
- Hem depth before border: 0.55 in (1.4 cm)
- Border depth: 0.2 in (0.5 cm), for a finished hem depth of 0.75 in (1.9 cm)
Materials
Yarn: Choose a smooth sport-weight cotton with a tight twist. Cotton holds the open frame and wings in shape much better than acrylic or wool. Avoid fuzzy yarns, because they blur the outline.
- Cream (single color): 8 g, about 25 m (27 yd)
This makes one angel. The amount includes a margin of about 25 percent for your gauge swatch, sewing tails and any re-work.
Tools:
- 2.5 mm crochet hook
- Tapestry needle
- A pinch of polyester fiberfill (about 1 g)
- Stitch marker
- Scissors
- Blocking mat and rust-proof pins
- Spray bottle with water
- Optional: liquid fabric stiffener
Abbreviations (US Terms)
- ch – chain
- sl st – slip stitch
- sc – single crochet
- dc – double crochet
- inc – 2 sc in the same stitch
- dec – invisible single crochet decrease
- MR – magic ring
- st(s) – stitch(es)
- rnd – round
- ( ) x N – repeat the steps in brackets N times
Invisible decrease (dec): Insert the hook into the front loop only of the next stitch, then into the front loop only of the stitch after it. Yarn over and pull through both front loops (2 loops on hook). Yarn over and pull through both loops. This decrease almost disappears on a stuffed piece.
Back-bump slip stitch cord: Work slip stitches into the back bump (the small ridge on the back) of each chain. This makes a firm, round cord that won’t curl.
Gauge and Checkpoints
Gauge: 12 sc and 12 sc rows = 2 in (5.1 cm) with a 2.5 mm hook. Chains measure about 7 ch per 1 in (2.5 cm).
Gauge matters because every part has to meet neatly at the waist. Make one wing first as your test piece. It uses only 54 stitches and tells you almost everything you need to know.
Checkpoints:
- Wing, after Rnd 1: The 24-sc ring measures 4 in (10.2 cm) around its outer edge.
- Wing, after Rnd 2: The ring lies flat. Pinched into a teardrop, it measures 1.75 in (4.4 cm) long and 1.25 in (3.2 cm) wide.
- Head, after Rnd 3: The flat disc measures 1 in (2.5 cm) across.
- Hem, after Row 1: The 18-sc row measures 3 in (7.6 cm).
- Hem, after Row 2: The bottom edge measures 3.5 in (8.9 cm), and the band is 0.55 in (1.4 cm) deep.
If your piece is too big: go down 0.25 mm in hook size. If it is too small: go up 0.25 mm. Check the wing again before you continue.
Hem Band
The hem is a short fan-shaped band. Its foundation chain becomes the top edge, where the legs attach later.
Foundation: Ch 19.
Row 1: Sc in 2nd ch from hook and in each ch across. Turn. (18 sc)
Row 1 should measure 3 in (7.6 cm). Leave the free loops of the foundation chain unworked for now.
Row 2 (growth row): Ch 3 (counts as first dc), dc in next 2 sts, (2 dc in next st, dc in next 4 sts) x 3. Fasten off. (21 dc)
Check the count: 3 dc at the start plus 3 repeats of 6 dc gives 3 + 18 = 21 dc. You used 3 + 15 = 18 sc from Row 1, so every stitch has been worked.
The 3 increases spread the band into a gentle fan. The bottom edge now measures 3.5 in (8.9 cm). You’ll add the border at the end.
Skirt Frame (Four Legs)
Each leg is a chain with single crochet worked back along it, which makes a neat, flat strip.
Hold the hem with the foundation chain at the top and the right side facing you. Number the 18 free foundation loops 1 to 18 from right to left.
Setup: Join yarn with a sl st in loop 1.
Outer leg 1: Ch 14, sc in 2nd ch from hook and in each ch back down. Sl st in loop 1 again. (13 sc)
Travel: Sl st in loops 2 through 7. (6 sl st)
Inner leg 1: Ch 12, sc in 2nd ch from hook and in each ch back down. Sl st in loop 7 again. (11 sc)
Travel: Sl st in loops 8 through 12. (5 sl st)
Inner leg 2: Ch 12, sc in 2nd ch from hook and in each ch back down. Sl st in loop 12 again. (11 sc)
Travel: Sl st in loops 13 through 18. (6 sl st)
Outer leg 2: Ch 14, sc in 2nd ch from hook and in each ch back down. Sl st in loop 18 again. (13 sc) Fasten off and weave in the end.
The legs are placed symmetrically: 6 loops across each side opening and 5 loops across the center opening.
Leg checkpoint: The outer legs measure about 2.2 in (5.6 cm) and the inner legs about 1.8 in (4.6 cm). The outer legs are longer because they run diagonally.
Gather the waist: Bring the four leg tips together, with the outer legs on the outside. Overlap the tips by about 1 st and sew through all layers using a 12 in (30.5 cm) tail. Leave the tail attached for the wings.
Frame checkpoint: Laid flat, the skirt forms a trapezoid. The waist sits 1.75 in (4.4 cm) above the hem, with three open spaces between the legs.
Neck Strip
Join yarn at the top center of the gathered waist.
Neck: Ch 4, sc in 2nd ch from hook and in next 2 ch. Sl st into the waist. Fasten off, leaving a 6 in (15.2 cm) tail. (3 sc)
The neck is 0.5 in (1.3 cm) tall.
Wings (Make 2)
Each wing is a flat ring that you pinch into a teardrop.
Foundation: Ch 24 and join with a sl st to the first ch to form a ring, making sure the chain isn’t twisted.
Rnd 1: Ch 1, sc in each ch around. Join with a sl st to the first sc. (24 sc)
Rnd 2 (growth round): Ch 1, (sc in next 3 sts, inc in next st) x 6. Join with a sl st to the first sc. (30 sc)
Fasten off, leaving a 10 in (25.4 cm) tail.
Each sc round is about 0.17 in (0.4 cm) wide, so the outer edge needs about 1 in (2.5 cm) more length to lie flat. At gauge that is 6 stitches, which is why Rnd 2 has 6 increases.
Shape: Flatten the ring with the joining seam at one end and pinch that end into a point. The wing measures 1.75 in (4.4 cm) long and 1.25 in (3.2 cm) wide, with an open center.
Head
Work the head in a continuous spiral and mark the first st of each rnd.
Rnd 1: 6 sc in MR. (6 sc)
Rnd 2: Inc in each st around. (12 sc)
Rnd 3: (Sc in next st, inc in next st) x 6. (18 sc)
Rnds 4–6: Sc in each st around. (18 sc)
Rnd 7: (Sc in next st, dec) x 6. (12 sc)
Stuff firmly with a small pinch of fiberfill.
Rnd 8: Dec x 6. (6 sc)
Fasten off. Thread the tail through the front loops of the last 6 sts and pull closed. Keep the tail for sewing.
Head checkpoint: The ball measures 1 in (2.5 cm) across.
Hanging Loop
Join yarn at the closed top of the head.
Cord: Ch 20, sl st in back bump of 2nd ch from hook and in each ch across. (19 sl st)
Sl st into the top of the head, 2 sts from where you started. Fasten off and hide the tail inside the head.
The cord is about 2.75 in (7.0 cm) long. Folded, it makes a loop 1.25 in (3.2 cm) tall.
Assembly
- Sew the head to the top of the neck strip with the head tail.
- Place one wing on each side of the waist, with the narrow ends pointing to the center just below the neck.
- Sew the narrow end of each wing to the waist using the waist tail.
- Wrap the same tail around the waist 3 times, covering the wing points, and pull it snug to form a small cinch. Secure it on the back.
- Check that the wingspan is 3.75 in (9.5 cm).
Border
The border is one sc row across the bottom of the hem. It firms up the dc edge.
Border gauge: 6 sc = 1 in (2.5 cm), the same as the main gauge.
Border row: With the right side facing, join yarn in the top of the last dc of Row 2 at the right-hand corner. Ch 1, sc in the same st and in each dc across. Fasten off. (21 sc)
The border goes along one edge only, the bottom of the hem, and starts with 21 sts: 1 sc in each of the 21 dc. The two end stitches act as the corners and are already counted in the 21, so there are no extra corner stitches.
Why the math works: 21 sc at 6 sc per 1 in (2.5 cm) equals 3.5 in (8.9 cm). That matches the bottom of Row 2 exactly, so the hem doesn’t flare or pull in. The border adds 0.2 in (0.5 cm), so the hem ends up 0.55 in + 0.2 in = 0.75 in (1.9 cm) deep.
Final Blocking
- Weave in any remaining tails along the leg strips or inside the head.
- Spray the angel lightly with water until it is damp, keeping the head mostly dry.
- Lay it face up on the mat and pin the bottom of the hem straight at 3.5 in (8.9 cm).
- Pin the legs straight so the waist sits 1.75 in (4.4 cm) above the hem.
- Shape each wing into an even teardrop with a pin inside the open center, and set the wingspan at 3.75 in (9.5 cm).
- Shape the hanging loop into a neat oval and let the angel dry fully, at least 6 hours. For a stiffer ornament, brush on fabric stiffener first.
Final Quality-Control Checklist
- Hem: Row 1 has 18 sc, Row 2 has 21 dc and the border has 21 sc.
- Legs: 13 sc on each outer leg, 11 sc on each inner leg.
- Wings: 24 sc in Rnd 1 and 30 sc in Rnd 2, lying flat.
- Head: 18 sts at the widest point, evenly stuffed.
- Neck strip has 3 sc; loop cord has 19 sl st.
- Hem is 3.5 in (8.9 cm) wide and 0.75 in (1.9 cm) deep.
- Body is 4 in (10.2 cm) tall, or 5.25 in (13.3 cm) with the loop; wingspan is 3.75 in (9.5 cm).
- No tails show through the open spaces.
Troubleshooting
The wings ruffle. Rnd 1 is too tight. Redo the ring with a slightly looser chain.
The wings cup. Rnd 2 is too tight. Work the increases more loosely.
The legs twist. Work the sc back along the chain evenly. Blocking will fix a slight twist.
The skirt leans. Recount the travel sl sts. They should be 6, then 5, then 6.
The hem flares. Use a hook 0.25 mm smaller for Row 2.
Stuffing shows through. Use a smaller hook for the head only.
Care
Hand wash in cool water with mild soap, then lay flat to dry and reshape it as you did for blocking. If you used stiffener, spot clean only and store the angel flat.
Final Notes
The measurements build on each other in a short chain:
- Hem Row 1 is 18 sc, or 3 in (7.6 cm).
- Row 2 grows to 21 dc, or 3.5 in (8.9 cm).
- The 21-st border keeps that width and brings the hem to 0.75 in (1.9 cm) deep.
- The legs rise 1.75 in (4.4 cm) to the waist.
- The 0.5 in (1.3 cm) neck and 1 in (2.5 cm) head bring the body to 4 in (10.2 cm).
- The 1.25 in (3.2 cm) loop makes the full height 5.25 in (13.3 cm).
- Two 1.75 in (4.4 cm) wings give a 3.75 in (9.5 cm) span.
Check each number as you go, and your angel will match the sample.
Happy crocheting!