

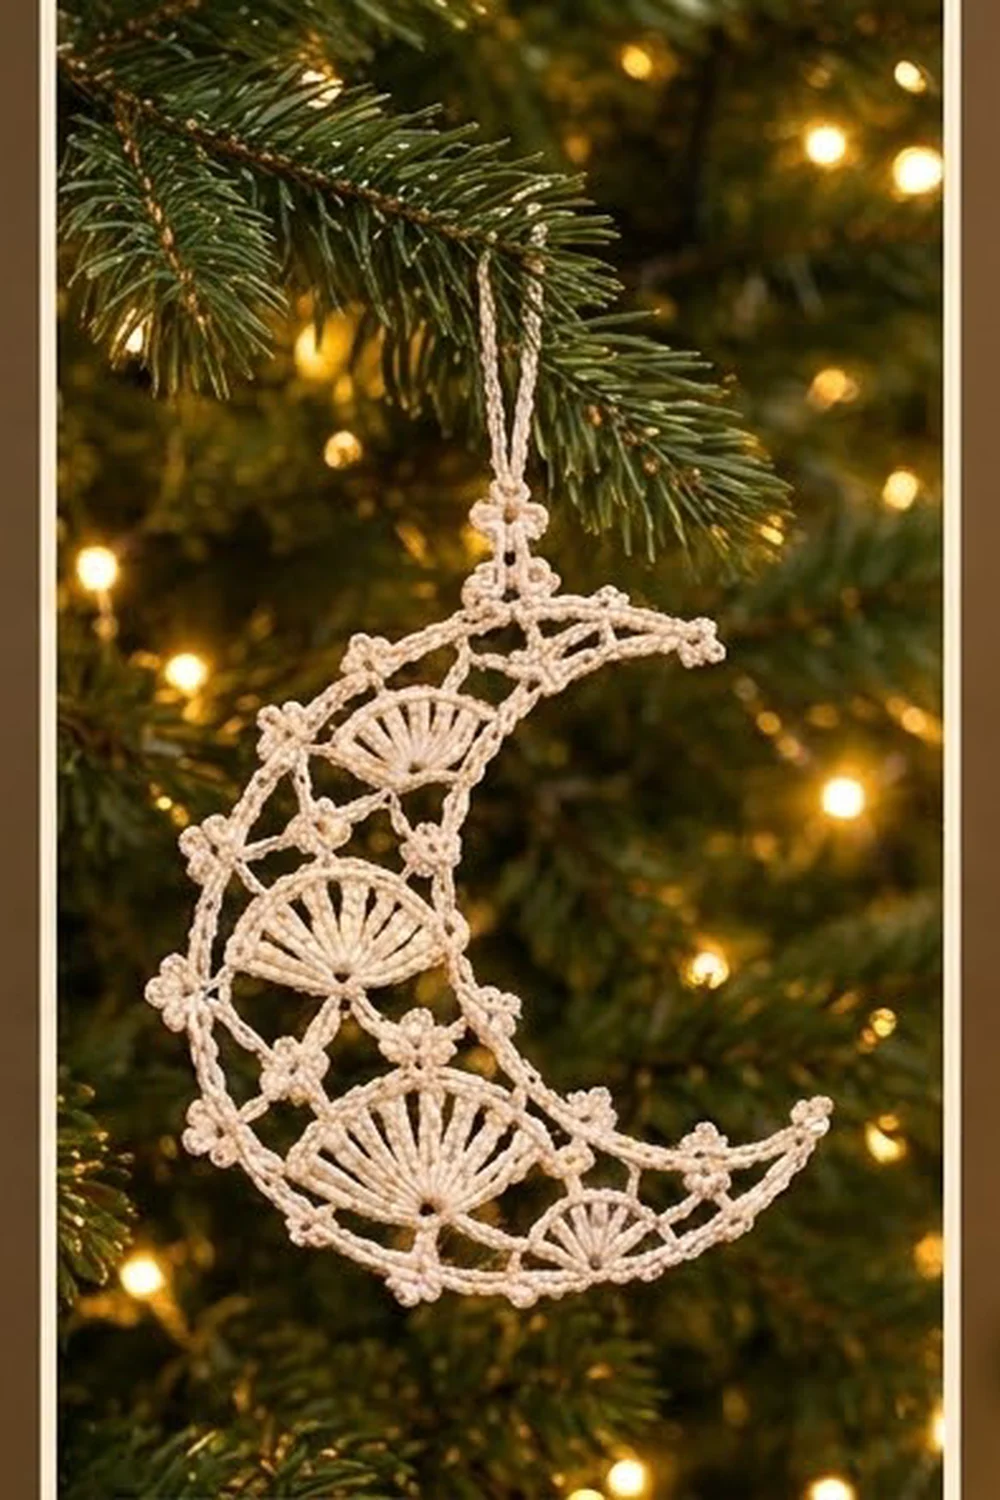
This lacy crescent moon is a quick, elegant thread ornament for the tree, a gift tag or a window charm. It has five graduated fan shells that grow from a small fan at each tip to a large fan in the lower curve of the moon. A light chain lattice with little three-picot trefoils ties the fans together.
The sample is worked in one color, a soft cream cotton thread, which shows off the lace structure and looks lovely against green branches and warm lights. Any pale color works: white, ivory, silver-gray or pale gold.
The pattern uses US crochet terms. The finished ornament measures about 4.5 in (11.4 cm) tall and 3.5 in (8.9 cm) wide, not counting the hanging loop.
The construction is simple and uses one continuous piece. Row 1 makes the inner spine of chain rings with a fan in each. Row 2 caps the fans and links them with trefoil bridges. Row 3 adds the outer lattice of arches and trefoils. One edging round then outlines the whole crescent and adds the hanging loop.
Finished Size and Construction
- Finished size: 4.5 in (11.4 cm) tall × 3.5 in (8.9 cm) wide
- Skill level: Intermediate (comfort with thread and small hooks helps)
- Terminology: US crochet terms
- Yarn weight: Lace (0), size 10 cotton crochet thread
- Hook: 1.5 mm steel hook (US steel 7 or 8, depending on the brand)
- Number of pieces: 1
- Layout: a single crescent with five fans in a row from tip to tip
- Size before edging: 4.1 in (10.4 cm) × 3.1 in (7.9 cm)
- Edging depth: about 0.2 in (0.5 cm) on all sides
- Hanging loop: about 2.75 in (7.0 cm) when hung
Materials
Thread: Choose a mercerized cotton thread in size 10. Mercerized cotton holds crisp picots, blocks sharply and takes stiffener well. Avoid fuzzy or very stretchy threads, because the fans will lose definition.
- Cream (main and only color): 6 g, about 30 m
These quantities include a generous margin for a gauge swatch and the hanging loop. One ornament actually uses a little less.
Tools:
– 1.5 mm steel crochet hook
– Fine tapestry needle or beading-eye needle
– Small sharp scissors
– Rustproof pins and a foam blocking board
– Fabric stiffener, or a starch solution
– Plastic wrap to protect the board
– Optional: a printed crescent template at 4.5 in × 3.5 in (11.4 cm × 8.9 cm) to pin against
Abbreviations (US Terms)
- ch – chain
- sl st – slip stitch
- sc – single crochet
- dc – double crochet
- sp – space
- st(s) – stitch(es)
- RS – right side
Special stitches:
- Picot: ch 3, sl st in the 3rd ch from the hook.
- Trefoil (three-picot cluster): ch 3, sl st in the 3rd ch from the hook 3 times, then sl st in the base of the first picot. The three picots fan out like a tiny clover.
- Ring: ch the stated number, then sl st in the 5th ch from the hook. This makes a 5-ch ring sitting on a short chain bar.
Gauge and Checkpoints
Gauge isn’t critical for an ornament, but it controls whether the crescent lies flat. Make Row 1 up to Fan 3 as a test, check it, then keep going or start over with a different hook.
- Fan gauge: Fan 3 (9 dc) is about 1.2 in (3.0 cm) across its top edge after Row 2 and 0.7 in (1.8 cm) from ring to top.
- Edging gauge: 10 sc = 1 in (2.5 cm) when worked over chain spaces.
Checkpoints:
– After Row 1, the spine measures about 3.5 in (8.9 cm) from Ring 1 to Ring 5 when relaxed into a curve.
– After Row 2, the outer arc across the fan tops measures about 6 in (15.2 cm).
– After Row 3, the piece measures 4.1 in (10.4 cm) × 3.1 in (7.9 cm).
– After the edging, the piece measures 4.5 in (11.4 cm) × 3.5 in (8.9 cm).
If your fans are too big: go down to a 1.25 mm hook, or tighten the ring chains.
If your fans are too small or cupped: go up to a 1.75 mm hook. Also check that your dc are full height, not squashed.
Pattern
Row 1: Spine and Fans
Every fan opens toward the same side, which becomes the outer curve. The rings and chain bars form the inner (concave) curve.
- Ring 1: Ch 5, sl st in the first ch to form a ring.
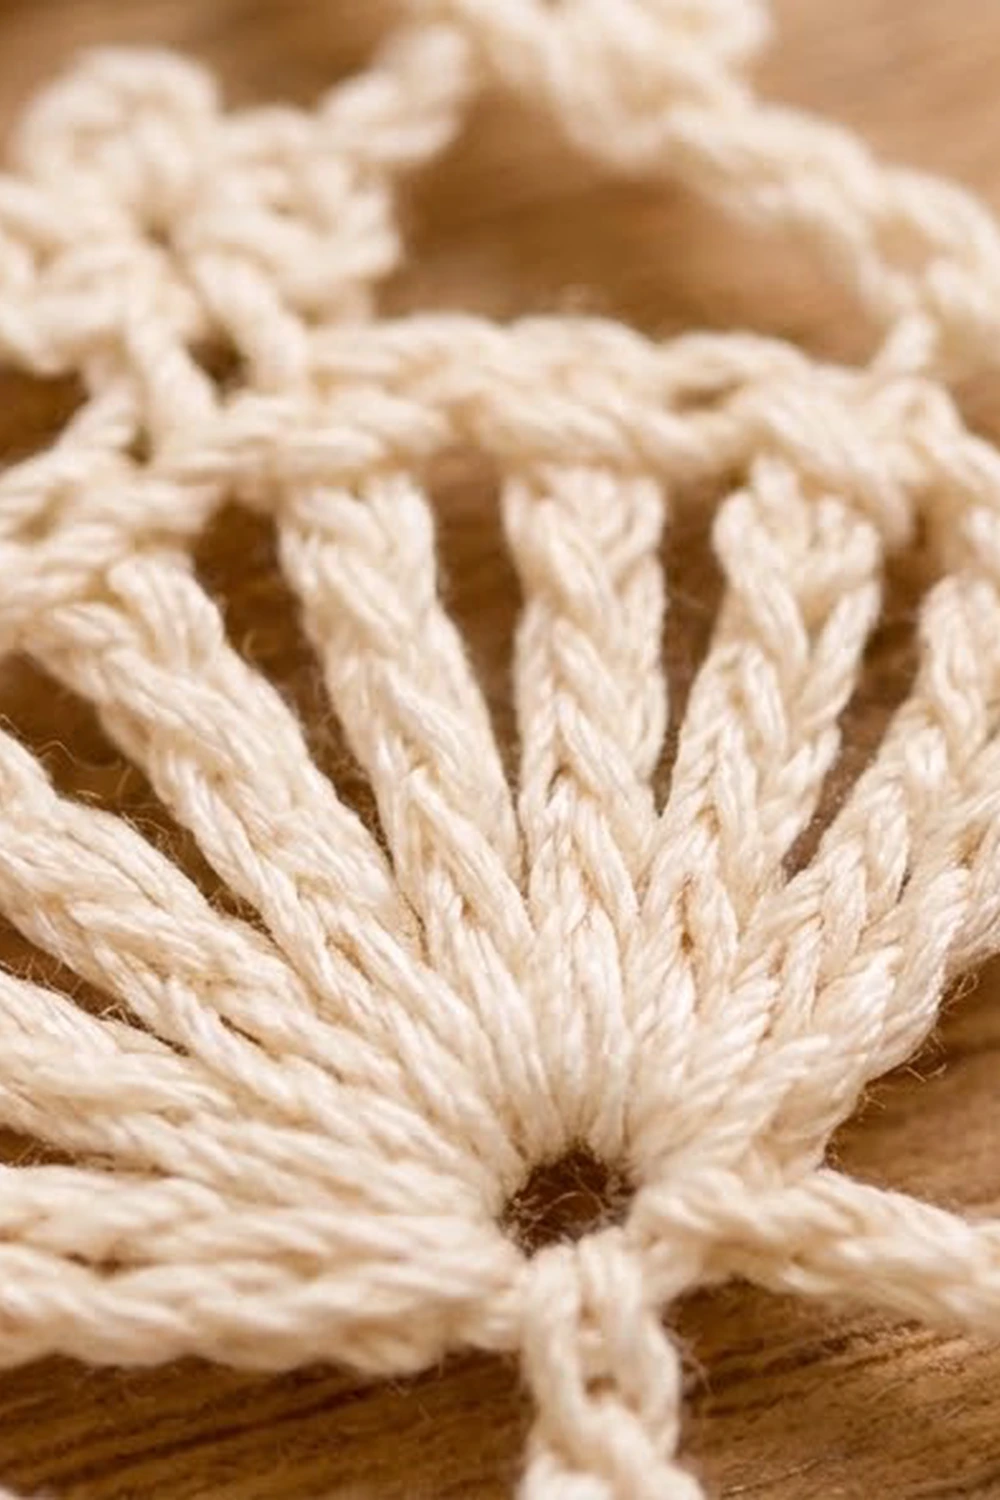
- Fan 1: Ch 3 (counts as dc), 4 dc in Ring 1. (5 dc)
- Bar and Ring 2: Ch 11, sl st in the 5th ch from the hook. (6-ch bar + ring)
- Fan 2: Ch 3 (counts as dc), 6 dc in Ring 2. (7 dc)
- Bar and Ring 3: Ch 12, sl st in the 5th ch from the hook. (7-ch bar + ring)
- Fan 3: Ch 3 (counts as dc), 8 dc in Ring 3. (9 dc)
- Bar and Ring 4: Ch 12, sl st in the 5th ch from the hook. (7-ch bar + ring)
- Fan 4: Ch 3 (counts as dc), 6 dc in Ring 4. (7 dc)
- Bar and Ring 5: Ch 11, sl st in the 5th ch from the hook. (6-ch bar + ring)
- Fan 5: Ch 3 (counts as dc), 4 dc in Ring 5. (5 dc)
Row 1 totals: 5 rings, 4 bars (6, 7, 7 and 6 ch) and 33 dc in fans (5 + 7 + 9 + 7 + 5). Don’t fasten off.
Before moving on, ease the strip into a gentle C shape with the fans on the outside. The checkpoint length is about 3.5 in (8.9 cm).
Row 2: Fan Caps and Trefoil Bridges
Turn so you work across the fan tops from Fan 5 back to Fan 1.
- Ch 1, sc in each dc of Fan 5. (5 sc)
- Bridge: Ch 3, trefoil, ch 3.
- Sc in each dc of Fan 4. (7 sc)
- Work a bridge.
- Sc in each dc of Fan 3. (9 sc)
- Work a bridge.
- Sc in each dc of Fan 2. (7 sc)
- Work a bridge.
- Sc in each dc of Fan 1. (5 sc)
Row 2 totals: 33 sc (one per dc, with nothing added), 4 bridges and 4 trefoils.
The bridges open the gaps between the fans and make the first set of trefoils between them. The outer arc should now be about 6 in (15.2 cm).
Row 3: Outer Lattice
Turn so you work from Fan 1 to Fan 5. Each fan gets 2 arches, with a trefoil at its center stitch.
- Fan 1: Ch 1, sc in the 1st sc, ch 4, (sc, trefoil, sc) in the 3rd sc, ch 4, sc in the 5th sc.
- Bridge: Ch 4, trefoil, ch 4. Skip the Row 2 bridge and sc in the 1st sc of the next fan.
- Fan 2: Ch 4, (sc, trefoil, sc) in the 4th sc, ch 4, sc in the 7th sc.
- Work a bridge.
- Fan 3: Ch 5, (sc, trefoil, sc) in the 5th sc, ch 5, sc in the 9th sc.
- Work a bridge.
- Fan 4: Ch 4, (sc, trefoil, sc) in the 4th sc, ch 4, sc in the 7th sc.
- Work a bridge.
- Fan 5: Ch 4, (sc, trefoil, sc) in the 3rd sc, ch 4, sc in the 5th sc.
Row 3 totals:
– 20 sc (4 per fan)
– 9 trefoils (5 on the fans and 4 on the bridges)
– 18 chain spaces: 16 ch-4 spaces (8 on fans and 8 bridge segments) and 2 ch-5 spaces (both on Fan 3)
The bridge trefoils sit right above the Row 2 trefoils. This creates the diamond-like lattice with clover junctions. The piece should now measure 4.1 in (10.4 cm) × 3.1 in (7.9 cm).
Edging Round (Border)
The edging is the “border” of this ornament. It is one RS round of sc that outlines the moon, puts a trefoil on each point and adds the hanger.
Edging gauge: 10 sc = 1 in (2.5 cm).
Don’t turn. Continue from the last sc of Row 3 at the Fan 5 tip.
- Lower tip (Ring 5): Work (sc, trefoil, sc) into the outer side of Ring 5. (2 sc + 1 trefoil)
- Inner edge:
- 5 sc over the 6-ch bar
- 3 sc over the base of Ring 4
- 6 sc over the 7-ch bar
- 3 sc over the base of Ring 3
- 6 sc over the 7-ch bar
- 3 sc over the base of Ring 2
- 5 sc over the 6-ch bar
(31 sc on the inner edge)
3. Upper tip and hanger (Ring 1):
– Sc in Ring 1, then work a trefoil.
– Ch 60, then sl st in the sl st at the base of the trefoil. This forms the loop.
– Sc in Ring 1.
(2 sc + 1 trefoil + hanging loop)
4. Outer edge: Work along the Row 3 chain spaces from Fan 1 to Fan 5. Put 4 sc in each ch-4 space and 5 sc in each ch-5 space. Leave every trefoil free, standing out past the edge.
(16 × 4 = 64 sc, plus 2 × 5 = 10 sc, for 74 sc on the outer edge)
5. Sl st in the first sc of the round. Fasten off.
Edging total: 2 + 31 + 2 + 74 = 109 sc, plus 2 tip trefoils and 1 hanging loop.
Why the math works:
– Inner edge: The inner edge is concave, so it needs fewer stitches than chains. Each bar gets one sc fewer than its chain count (5 on 6, 6 on 7), so the inner curve stays taut instead of rippling. Its 31 sc measure about 3.1 in (7.9 cm) at edging gauge, which matches the relaxed spine.
– Outer edge: The outer edge is convex. Here one sc per chain gives 74 sc, or about 7.4 in (18.8 cm). That matches the outer arc after Row 3, and the free trefoils add the extra ease the curve needs.
– Final size: The 0.2 in (0.5 cm) edging on each side takes the piece from 4.1 × 3.1 in (10.4 × 7.9 cm) to 4.5 × 3.5 in (11.4 × 8.9 cm).
Final Blocking
- Weave in both thread ends along the inner sc edge, splitting the thread so the ends don’t slide out. Trim close.
- Soak the ornament in stiffener, or in a firm starch solution. Gently squeeze out the excess; don’t wring it.
- Cover the blocking board with plastic wrap and lay the template on it if you’re using one.
- Pin both tips first so the height is 4.5 in (11.4 cm).
- Pin the deepest point of the outer curve so the width is 3.5 in (8.9 cm).
- Pin the center of each fan’s top arc to round the fans evenly.
- Open every trefoil. Put one pin in the center picot, then press the side picots outward with a fingertip.
- Pin the hanging loop straight, or hang it over a pencil so it dries open.
- Let it dry completely, ideally overnight, before unpinning.
Final Quality-Control Checklist
- Fans count 5, 7, 9, 7 and 5 dc, and each one opens evenly.
- Row 2 has 33 sc and 4 trefoil bridges.
- Row 3 has 9 trefoils and 18 chain spaces.
- The edging has 109 sc, with trefoils on both tips.
- The inner curve lies flat, with no ruffles.
- The outer curve lies flat, with no cupping.
- The piece measures 4.5 in (11.4 cm) × 3.5 in (8.9 cm).
- The hanging loop measures about 2.75 in (7.0 cm) and is secure at its base.
- No ends are visible from either side.
Troubleshooting
- The crescent straightens out instead of curving: The bars are too long or too loose. Re-chain them more tightly, or remove 1 ch from each bar.
- The inner edge ripples: Put one fewer sc over each bar.
- The outer edge cups: Add 1 sc to the ch-5 spaces on Fan 3, or block with more tension on the outer pins.
- The fans look flat and squashed: Pull up each dc to full height and don’t tighten the ring too much.
- The trefoils collapse: Make sure you sl st into the base of the first picot. Pin each picot open while it dries.
- The hanger twists: Twist it the other way before blocking and let it dry straight.
Care
Dust gently with a soft brush. If the ornament gets soiled, rinse it in cool water, then re-stiffen and re-block it to the measurements above.
Final Notes
The measurement chain is short and easy to track:
- The Row 1 spine relaxes to 3.5 in (8.9 cm).
- After Row 2, the fan-top arc is 6 in (15.2 cm).
- Row 3 brings the piece to 4.1 × 3.1 in (10.4 × 7.9 cm).
- The 109-sc edging brings it to the finished 4.5 × 3.5 in (11.4 × 8.9 cm).
If each checkpoint matches, the moon will block crisp and flat every time. Make one for every branch, or tuck one into a holiday card.
Happy crocheting!