
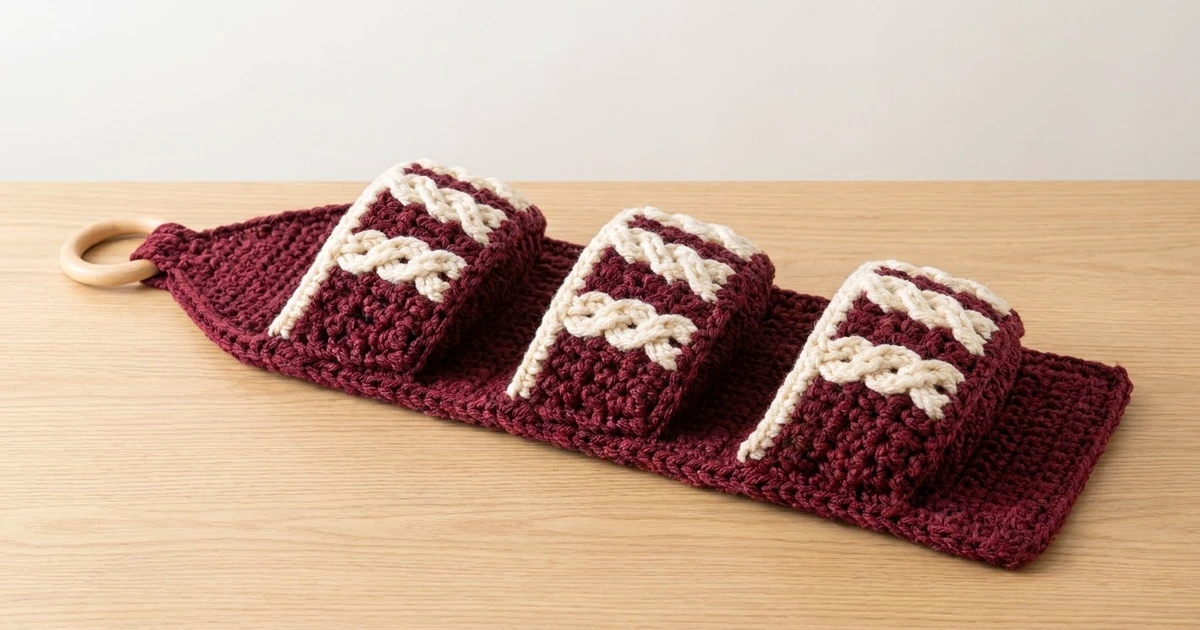
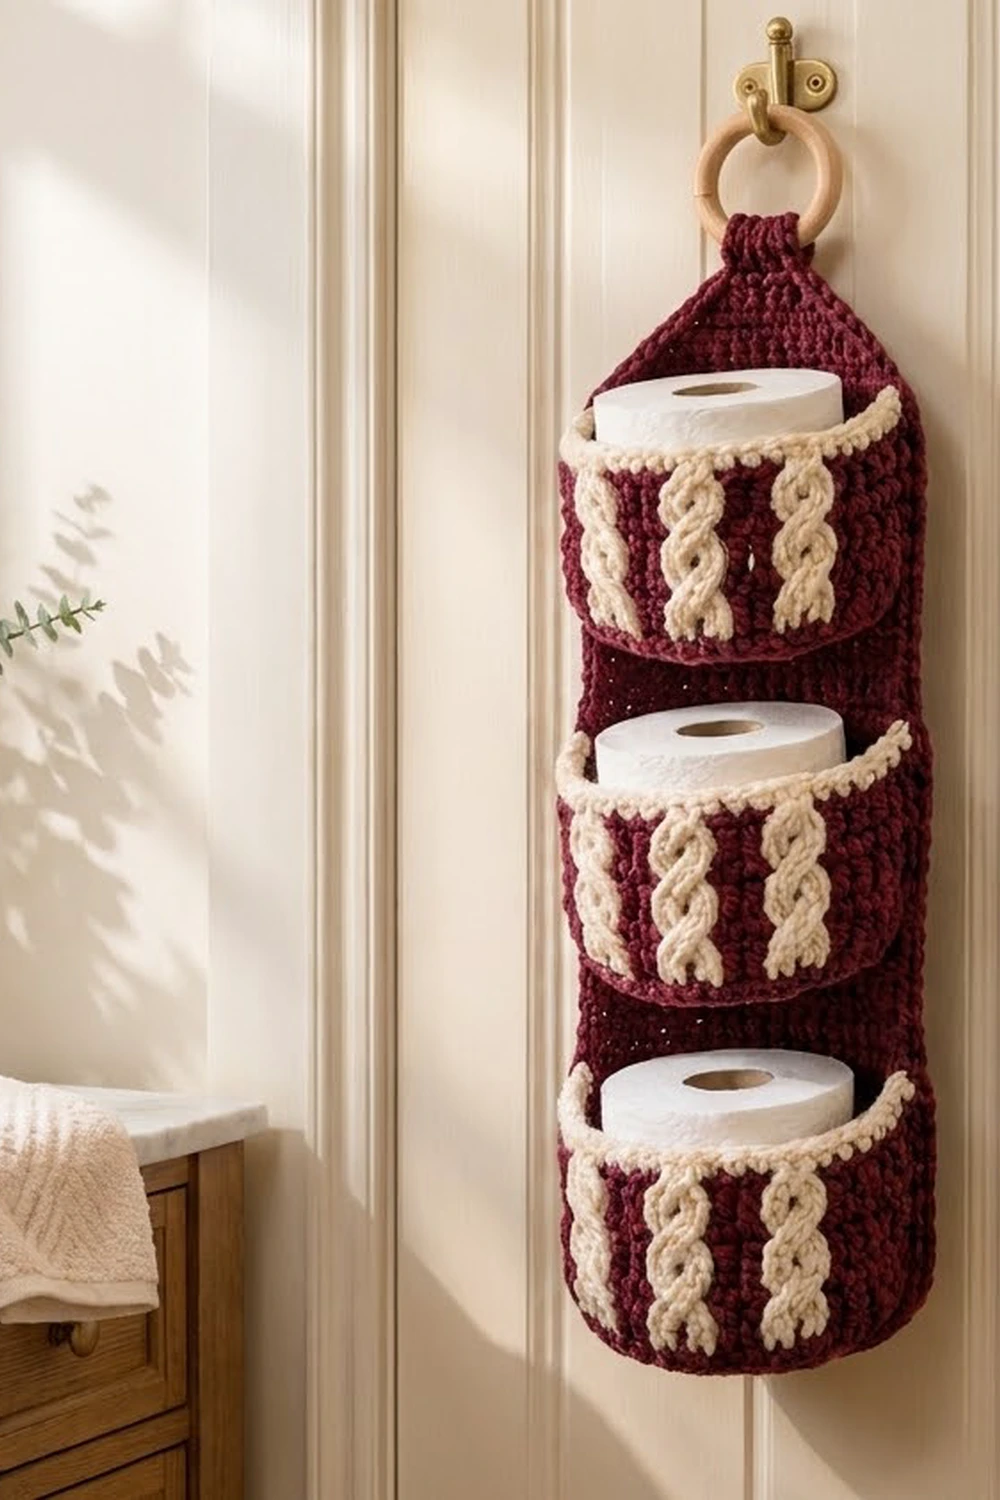
This hanging toilet paper holder keeps three spare rolls tidy and on display. A burgundy back panel hangs from a wooden ring, and three deep pockets hold one roll each. Every pocket has three raised cream rope cables and a cream rope-texture rim.
The palette is deep merlot burgundy with warm cream accents. The cabled pockets give it a cozy, sweater-knit look that suits farmhouse, cottage, or classic bathrooms. The pattern uses US crochet terms throughout.
The finished holder measures about 7.5 in (19.1 cm) wide and about 30 in (76.2 cm) long from the top of the hanging loop to the bottom edge. Each pocket is 8 in (20.3 cm) wide, 4.5 in (11.4 cm) deep, and 4 in (10.2 cm) tall.
You work the back panel flat in half double crochet rows, shape the top, and finish with a two-round border. Each pocket starts with an oval base. You then work the wall in the round, using tapestry color changes and front-post cables. Finally, you sew the pockets to the panel and fold the tab over the ring.
Finished Size and Construction
- Finished size: 7.5 in (19.1 cm) wide × about 30 in (76.2 cm) hanging length
- Skill level: Intermediate (post-stitch cables, tapestry color changes)
- Terminology: US
- Yarn weight: Bulky (#5)
- Hook: 6.0 mm (US J-10)
- Number of pieces: 4 (1 back panel and 3 pockets), plus a wooden ring
- Layout: 1 column of 3 pockets, stacked vertically
- Pocket size: 8 in (20.3 cm) wide × 4.5 in (11.4 cm) deep × 4 in (10.2 cm) tall
- Panel size before border: 6.3 in (16.0 cm) wide × 31.1 in (79.0 cm) long, including the taper and tab
- Border depth: 0.6 in (1.5 cm) on each edge
Materials
Choose a smooth, firm bulky yarn so the cables stand out clearly. An acrylic or acrylic–wool blend holds its shape well in a humid bathroom. The amounts below assume about 130 m per 100 g.
- Burgundy (Color B): 320 g / 416 m (455 yd)
- Cream (Color C): 100 g / 130 m (142 yd)
Tools:
– 6.0 mm (US J-10) hook
– 3 in (7.6 cm) wooden ring
– Tapestry needle
– 12 locking stitch markers
– Rust-proof pins, a measuring tape, and a blocking mat
All quantities include a margin of about 10%.
Abbreviations (US Terms)
- ch: chain
- sl st: slip stitch
- sc: single crochet
- hdc: half double crochet
- inc: 2 sc in the same stitch
- hdc2tog: half double crochet 2 together
- BLO: back loop only
- FPdc: front post double crochet
- FPtr: front post treble crochet
- st(s): stitch(es)
- RS: right side
- WS: wrong side
Special stitches
- C4F (cable 4 front): Skip the next 2 post stitches. FPtr around each of the next 2. Then, working in front of the stitches you just made, FPtr around each of the 2 skipped stitches. This makes 4 stitches.
- Reverse sc (crab stitch): Work sc from left to right (if you crochet right-handed) to make a corded, rope-like edge.
- Tapestry color change: Switch colors on the last yarn-over of the stitch before the new color. Carry the unused color along the top of the previous round and work over it.
With every post stitch, skip the stitch behind it on the current round.
Gauge and Checkpoints
- hdc: 12 sts × 9 rows = 4 in (10.2 cm)
- sc: 12 sts × 13 rows = 4 in (10.2 cm)
Make one pocket first and use it as your test piece. Check these measurements as you go:
- Pocket base after Rnd 7: 8 in × 4.5 in (20.3 × 11.4 cm), with an edge of 60 sts that measures 20 in (50.8 cm) around
- Pocket wall after Rnd 8: 3.4 in (8.6 cm) tall
- Pocket wall after the rim: 4 in (10.2 cm) tall
- Panel after Row 10: 6.3 in (16.0 cm) wide × 4.4 in (11.2 cm) tall
- Panel after Row 54: 24 in (61.0 cm) long
If your piece comes out too big, go down 0.5 mm in hook size. If it comes out too small, go up 0.5 mm. Change the hook rather than the stitch counts, because every count in this pattern is tied to the gauge.
Back Panel
Use Color B. The ch 2 at the start of each row does not count as a stitch.
Row 1 (RS): Ch 21. Hdc in the 3rd ch from the hook and in each ch across. Turn. (19 hdc)
Rows 2–54: Ch 2, hdc in each st across. Turn. (19 hdc)
Checkpoint: the panel is 24 in (61.0 cm) long.
Taper
Row 55: Ch 2, hdc2tog, hdc to the last 2 sts, hdc2tog. Turn. (17)
Rows 56–61: Repeat Row 55. You will have 15, 13, 11, 9, 7, and then 5 sts.
The taper rises 3.1 in (7.9 cm).
Tab
Rows 62–70: Ch 2, hdc in each st across. Turn. (5 hdc)
The tab is 4 in (10.2 cm) long and about 1.7 in (4.3 cm) wide. Do not fasten off. Continue straight to the border.
Pockets (Make 3)
Base
Use Color B. Join each round with a sl st to the first sc and ch 1. The ch 1 does not count as a stitch.
Rnd 1: Ch 12. Sc in the 2nd ch from the hook and in the next 9 ch, then work 3 sc in the last ch. Rotate the work and sc in the next 9 ch along the other side of the chain. Work 2 sc in the same ch as the first sc. (24)
Rnd 2: Inc, sc 9, inc 3 times, sc 9, inc 2 times. (30)
Rnd 3: Sc 1, inc, sc 9, [sc 1, inc] 3 times, sc 9, [sc 1, inc] 2 times. (36)
Rnd 4: Sc 2, inc, sc 9, [sc 2, inc] 3 times, sc 9, [sc 2, inc] 2 times. (42)
Rnd 5: Sc 3, inc, sc 9, [sc 3, inc] 3 times, sc 9, [sc 3, inc] 2 times. (48)
Rnd 6: Sc 4, inc, sc 9, [sc 4, inc] 3 times, sc 9, [sc 4, inc] 2 times. (54)
Rnd 7: Sc 5, inc, sc 9, [sc 5, inc] 3 times, sc 9, [sc 5, inc] 2 times. (60)
Each round adds 3 increases to each curved end, which keeps the oval flat. Fasten off.
Checkpoint: the base is 8 in × 4.5 in (20.3 × 11.4 cm).
Wall
The center of the curved end where you joined each round is st 57, which is the 4th stitch before the join. That stitch becomes wall st 1. Wall sts 1–30 form the front of the pocket and sts 31–60 form the back.
Rnd 1: Join Color B in the BLO of base st 57. Ch 1, then sc in the BLO of each st around and join. (60)
This round forms a crisp ridge that turns the wall upward.
Lay the Color C tail along the top of Rnd 1 so the next stitches cover it. In Rnds 2–8, join each round with a sl st and ch 2. The ch 2 does not count as a stitch.
Rnd 2: Hdc 4 B, hdc 4 C, hdc 5 B, hdc 4 C, hdc 5 B, hdc 4 C, hdc 34 B. (60)
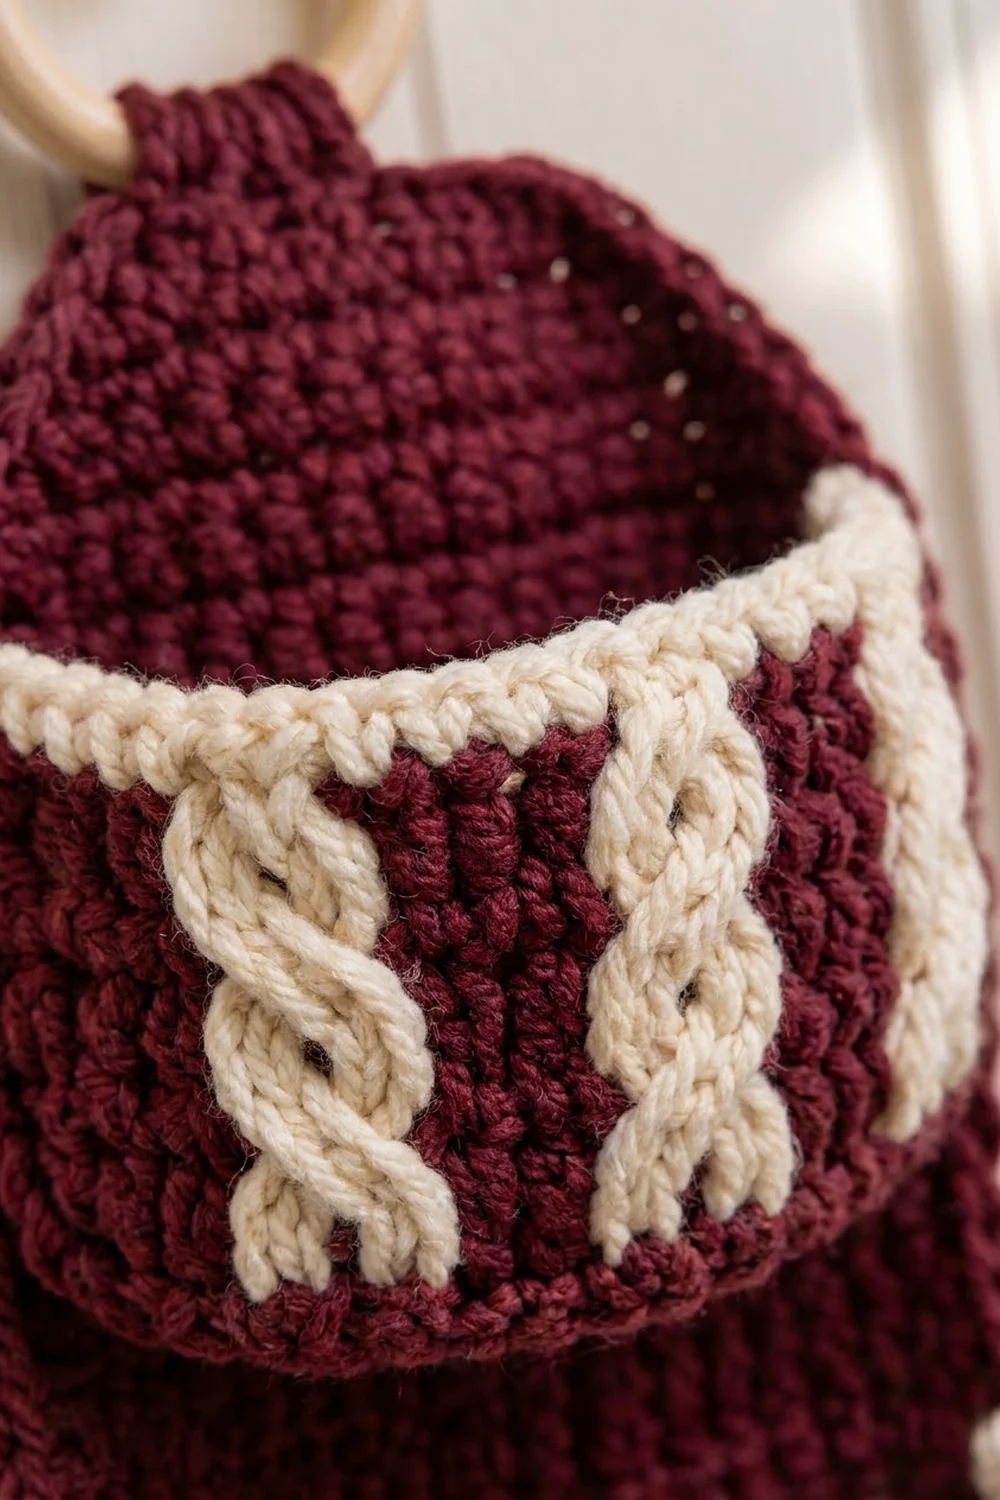
This places the 3 cream cable columns at sts 5–8, 14–17, and 23–26. Carry Color C inside the stitches all the way around the back, where the panel will hide it.
Rnd 3: Hdc 4 B, FPdc 4 C, hdc 5 B, FPdc 4 C, hdc 5 B, FPdc 4 C, hdc 34 B. (60)
Rnd 4: Hdc 4 B, C4F in C, hdc 5 B, C4F in C, hdc 5 B, C4F in C, hdc 34 B. (60)
Rnds 5 and 7: Repeat Rnd 3, working each FPdc around the post stitch below. (60)
Rnds 6 and 8: Repeat Rnd 4. (60)
Crossing the cables every second round makes the tight rope twist. At the end of Rnd 8, change to Color C on the joining sl st. Cut Color B.
Checkpoint: the wall is 3.4 in (8.6 cm) tall.
Rnd 9 (rim): In Color C, ch 1 and sc in each st around. Join. (60)
Rnd 10 (rim): Ch 1 and work reverse sc in each st around. Join and fasten off. (60)
Checkpoint: the wall is 4 in (10.2 cm) tall. Weave in the ends on the inside of the back wall.
Make All Pieces
- Back panel: 1 in Color B
- Pockets: 3, each in Color B with Color C cables and rim
Layout, from the front with the ring at the top:
      ( ring )
       [tab]
     /taper\
  | Pocket 3 |   rows 38–47
  |  panel   |
  | Pocket 2 |   rows 20–29
  |  panel   |
  | Pocket 1 |   rows 2–11
  |__________|
Joining
Sew the pockets on after you finish the border. Use whipstitch and Color B, sewing through the panel and the leftover front loops of wall Rnd 1.
Place markers on the panel at the tops of Rows 2, 20, and 38. These marks sit 0.9 in, 8.9 in, and 16.9 in (2.3, 22.6, and 42.9 cm) above the foundation, and they mark where the bottom of each pocket goes. The pocket tops will reach Rows 11, 29, and 47, at 4.9 in, 12.9 in, and 20.9 in (12.4, 32.8, and 53.1 cm).
Sew each pocket on in three steps:
- Bottom edge: On the pocket, mark wall sts 36–55. These 20 sts form the flat center back. Sew them to the 19 panel sts on the marked row, one pocket st to one panel st. Sew 2 pocket sts into the 10th panel st, the center one.
- Sides: Sew the ends of the 10 wall rounds at st 36 up panel st 1, from Rows 3 to 11. Sew the ends at st 55 up panel st 19 the same way. Use one whipstitch per wall round.
- Rim: Sew rim sts 36–55 to the top of panel Row 11, 20 sts to 19 sts, doubling at the center as before.
Wall sts 56–60 and 31–35 curve forward and become the rounded pocket sides. Sew firmly but not tightly, so the panel stays flat behind each pocket.
Checkpoint: each pocket stands 4 in (10.2 cm) tall and sticks out 0.25 in (0.6 cm) past the panel border on each side.
Border
Border gauge: 3 sc per in (2.5 cm) along every edge, which matches the panel’s stitch gauge. Along the sides, 4 sc for every 3 hdc rows works out to exactly 3 sc per inch.
Rnd 1: With the RS facing, ch 1 and work around the whole panel:
- Top of the tab: 3 sc in the first st (corner), sc 3, 3 sc in the last st (corner).
- Tab side: 12 sc down the side of Rows 70–62.
- Taper: 11 sc down the side of Rows 61–55 (2 sc, then 1 sc, and so on, alternating per row).
- Long side: 72 sc down the side of Rows 54–1.
- Bottom: Working into the foundation chain, 3 sc in the first st (corner), sc 17, 3 sc in the last st (corner).
- Second side: 72 sc up the long side, 11 sc up the taper, and 12 sc up the tab side.
Join to the first sc. (222)
That total is 9 at the tab top, 12 + 11 + 72 on each side, and 23 at the bottom.
Rnd 2: Ch 1, sc in each st, and work 3 sc in the center st of each of the 4 corners. Join and fasten off.
The count is 222 sts worked one per stitch, plus 8 extra at the corners, for 230. Between the corner centers, that is 19 sts on the bottom, 97 on each side, and 5 at the tab top.
Why the math works: Each long side has 72 sc over 24 in, which is exactly 3 sc per inch, so the edges lie flat. The taper has 11 sc over its 3.9 in (9.9 cm) slant, which is slightly fewer than gauge. That keeps the bias edge from stretching. The two rounds add 0.6 in (1.5 cm) to each edge, so the 6.3 in panel becomes 7.5 in (19.1 cm) wide.
After the border, slip the tab through the ring and fold it to the WS. Sew the top edge of the tab across the back of Row 59.
Final Blocking
- Before sewing on the pockets, mist the panel lightly with water.
- Pin it to 7.5 in (19.1 cm) wide with straight sides 24.6 in (62.5 cm) long, measured to the top of Row 54 and including the bottom border.
- Pin the taper so its curve is even on both sides.
- Fill each pocket with a roll or a folded towel, then mist only the rim and cables.
- Let everything dry completely before you sew the pieces together or hang the holder.
Final Quality-Control Checklist
- Every pocket wall has 60 sts and every base has 60 sts.
- Each pocket has 3 cables, and every cable crosses on Rnds 4, 6, and 8.
- No burgundy shows through the cream cables.
- The border counts are 222 and 230.
- The panel is 7.5 in (19.1 cm) wide from top to bottom.
- The pockets are level, centered, and spaced 8 in (20.3 cm) apart.
- The tab is sewn securely and the ring hangs straight.
Troubleshooting
- Cables look flat: Pull up the FPtr loops to their full height, and check that you skip the hdc behind each post stitch.
- Base cups: Your increases may be bunched together. Spread them evenly around the curved ends, or go up a hook size for the base only.
- Base ruffles: Go down 0.5 mm in hook size.
- Cream shows through the burgundy: Hold the carried strand snugly against the top of the round.
- Pocket sags forward: Sew the rim to the panel more firmly across sts 36–55.
- Panel ripples at the taper: Take out Rnd 1 along the taper and work exactly 11 sc.
- Panel curls: Block it pinned flat and let it dry fully.
Care
Hand wash in cool water and press the water out gently without wringing. Reshape the pockets and dry flat.
Final Notes
Everything starts from the gauge of 12 sts × 9 rows = 4 in (10.2 cm). Each pocket base has 60 sts, measures 20 in (50.8 cm) around, and becomes a 60-st wall that is 4 in (10.2 cm) tall. The 19-st panel is 6.3 in (16.0 cm) wide and grows to 7.5 in (19.1 cm) after the 222 + 8 = 230-st border. Three pockets spaced 8 in (20.3 cm) apart complete a holder about 30 in (76.2 cm) long.
Happy crocheting!