

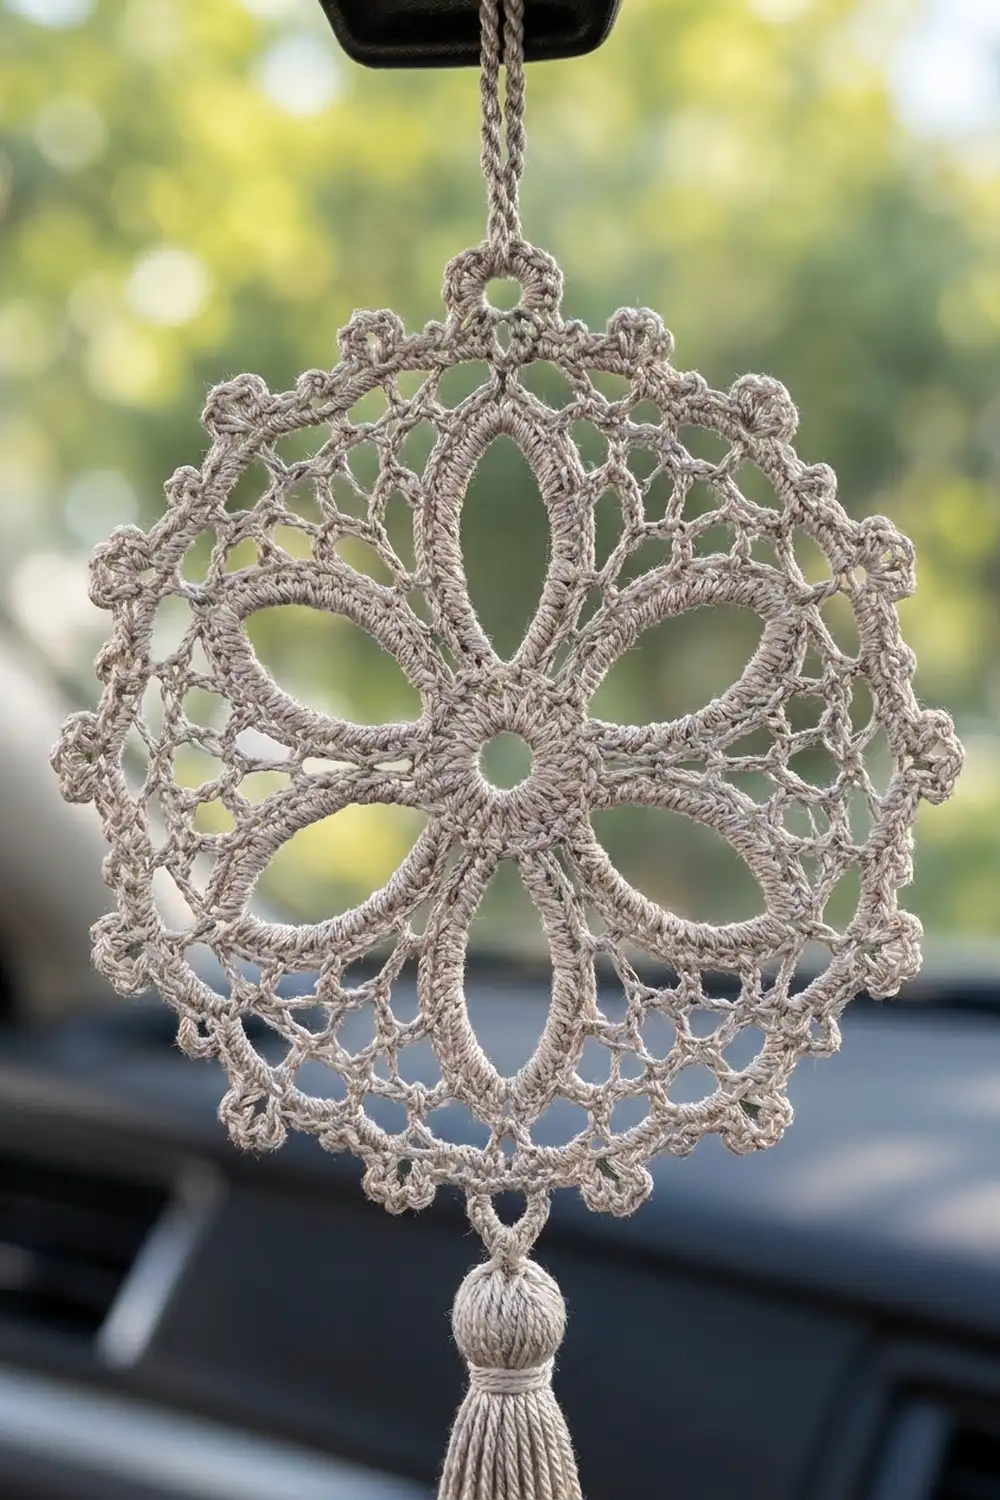
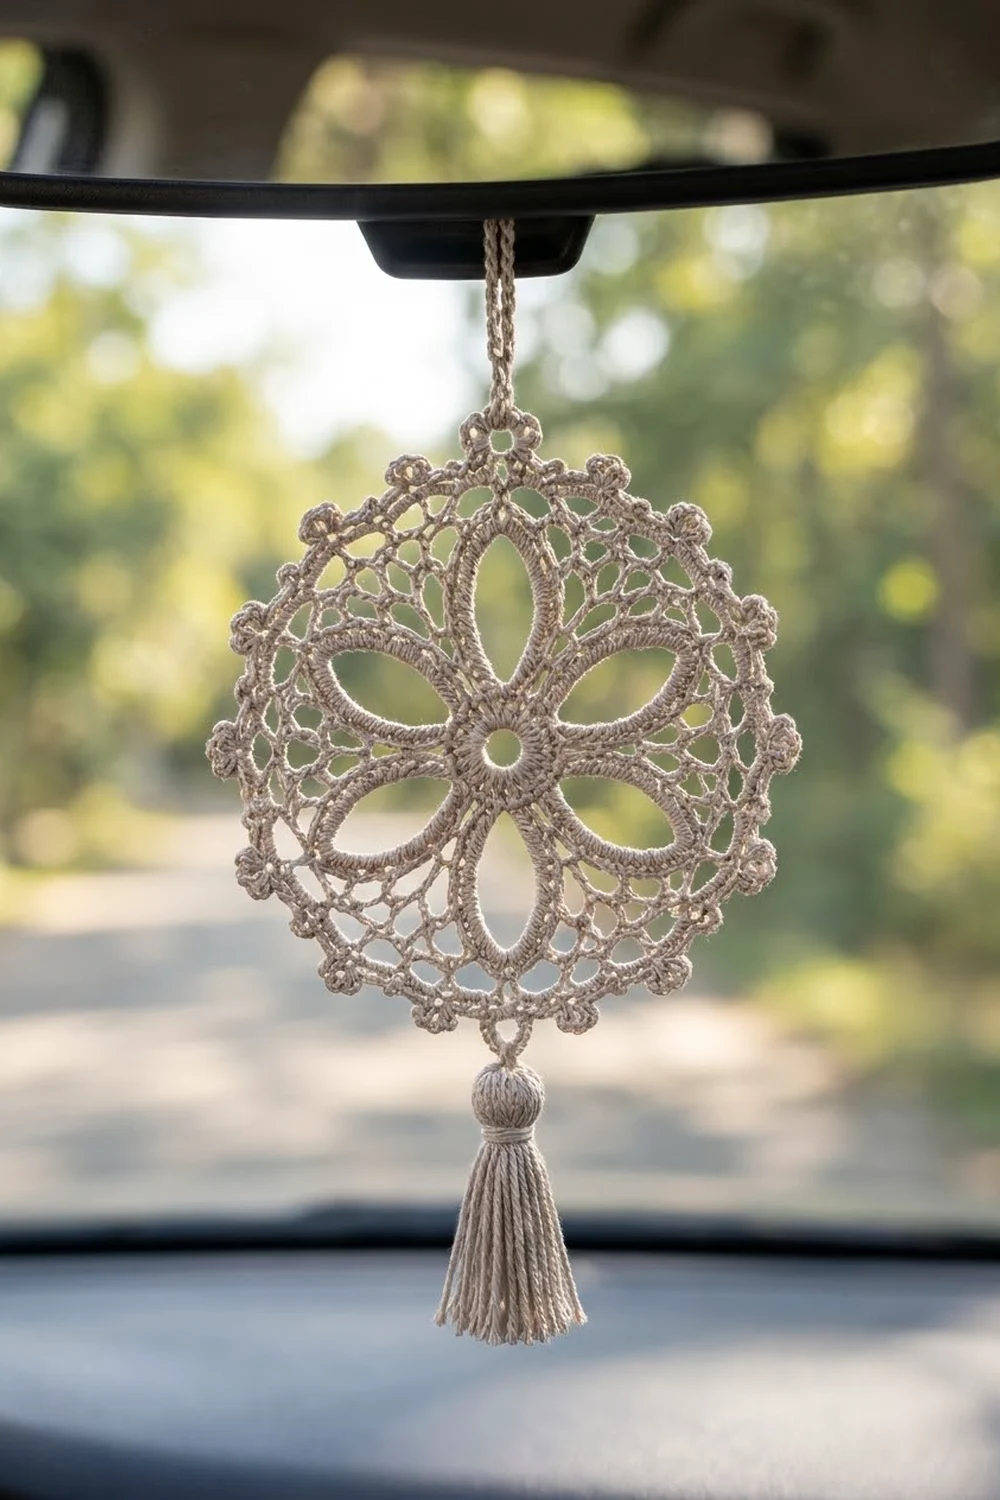
This lace car charm is a single round medallion. It has an eight-petal flower in the middle, an open lattice around it, and a soft scalloped edge with picots. It hangs from a slip-stitch cord, and a small crocheted bead and thread tassel dangle from the bottom. When it hangs from a rearview mirror, the light comes through every opening.
The sample uses light greige-gray cotton thread. That neutral color goes with almost any car interior and shows the texture well. You can also make it in white, ecru, or a soft pastel.
This pattern uses US crochet terms. The finished medallion is 3.5 in (8.9 cm) across. Including the bead and tassel, the charm is about 6 in (15.2 cm) long, not counting the hanging loop.
The medallion is worked in the round as one piece. A center ring of single crochet holds eight chain loops. You cover each loop with single crochet to make a pointed petal. Three lattice rounds come next, then a picot edging that acts as the border. To finish, you add a cord, a bead, and a tassel.
Finished Size and Construction
- Finished size: 3.5 in (8.9 cm) diameter medallion. The total length with bead and tassel is about 6 in (15.2 cm).
- Skill level: Intermediate (you need to be comfortable with fine thread)
- Terminology: US crochet terms
- Yarn weight: Size 10 cotton crochet thread (lace weight, category 0)
- Hook: 1.75 mm steel hook
- Number of pieces: 1 medallion, plus a small bead and a tassel
- Layout: Single round motif, hung vertically
- Piece size: 3.5 in (8.9 cm) diameter
- Size before border: 2.9 in (7.4 cm) diameter after Round 6
- Border depth: about 0.3 in (0.8 cm) all around
Materials
Thread: Use a mercerized size 10 cotton thread. Mercerized cotton holds its shape, takes starch well, and keeps the picots crisp. Avoid fuzzy or very soft threads, because the small openings will blur.
- Light greige-gray, size 10 cotton: 12 g, about 62 m. That covers the medallion (about 5 g), the tassel (about 4 g), and the bead and cord (about 1 g), plus a margin.
These quantities include a safety margin, so a standard 50 g ball is more than enough.
Tools:
– 1.75 mm steel crochet hook
– Fine tapestry needle with a small eye
– Sharp small scissors
– Piece of stiff card 2.25 in (5.7 cm) wide, for the tassel
– A few thread scraps or a pinch of fiberfill to stuff the bead
– Rustproof pins and a foam blocking board
– Fabric stiffener or spray starch
– Stitch marker
Abbreviations (US Terms)
- ch – chain
- sl st – slip stitch
- sc – single crochet
- st(s) – stitch(es)
- sp(s) – space(s)
- sk – skip
- MR – magic ring
- inc – 2 sc in the same st
- sc2tog – single crochet 2 together
- rep – repeat
Special stitches:
- Picot: Ch 3, then sl st into the 3rd ch from the hook.
- Trefoil picot: Ch 3, sl st into the 3rd ch from the hook. Repeat from * two more times, then sl st into the base of the first picot. You end up with three small picots grouped into one clover shape.
Gauge and Checkpoints
With thread, gauge is easiest to check as you go. Work Rounds 1–3 once as a test and measure before continuing.
- After Round 1: The center ring is about 0.25 in (0.6 cm) across.
- After Round 3: The petal flower measures 1.4 in (3.6 cm) from tip to opposite tip.
- After Round 5: The medallion is 2.25 in (5.7 cm) across.
- After Round 6: The medallion is 2.9 in (7.4 cm) across.
- After Round 7 (border): The medallion is 3.5 in (8.9 cm) across after blocking.
If your piece is too big: Change to a 1.5 mm hook, or tighten the chain loops by working them more firmly.
If your piece is too small: Change to a 2.0 mm hook. Also check that you aren’t pulling the chains tight as you make them.
If the work cups or ruffles: See Troubleshooting. Usually the cause is chain tension, not the stitch counts.
Medallion Pattern
Work in joined rounds with the right side facing. Do not turn.
Round 1 – Center Ring
Make a MR. Ch 1 (does not count as a st), then work 16 sc into the ring. Pull the ring tight and sl st to the first sc to join.
Stitch count: 16 sc.
Round 2 – Petal Loops
Ch 1, sc in the same st as the join. Ch 11, sk 1 st, sc in the next st. Rep from * 6 more times. Ch 11, sk the last st, and sl st to the first sc to join.
Stitch count: 8 sc and 8 ch-11 loops.
The loops will flop around at this point. That’s expected, because the next round gives them their shape.
Round 3 – Covered Petals
Sl st into the first ch-11 loop. Work (7 sc, ch 2, 7 sc) into the ch-11 loop, then sl st into the next sc of Round 2. Rep from * around, ending with a sl st into the base of the first petal.
Stitch count: 112 sc (8 petals × 14 sc), 8 ch-2 tips, and 8 sl sts between petals.
Each petal now has a solid edge with a pointed ch-2 tip. The inside of the loop stays open, which gives you the lens-shaped petal opening. Lay the piece flat and pinch each tip into a point.
Checkpoint: 1.4 in (3.6 cm) from tip to tip.
Fasten off and weave in the end, or carry the thread up to the first petal tip with sl sts. In that case, sl st up the first 7 sc of a petal and into its ch-2 tip.
Round 4 – Tip Frame
Join the thread in any ch-2 petal tip, or continue from the tip you reached. Ch 1, sc in the ch-2 tip. Ch 8, sc in the next ch-2 tip. Rep from * 6 more times. Ch 8 and sl st to the first sc to join.
Stitch count: 8 sc (one on each petal tip) and 8 ch-8 sps.
The ch-8 loops form an octagon. Each one curves slightly outward between the petal tips, and that curve leaves the open diagonal spaces between the petals.
Round 5 – Lattice Round One
Ch 1, sc in the same sc. Then work the following repeat. In each repeat, the chain positions of the ch-8 below are numbered 1 to 8:
Ch 4, sk ch 1–2, sc in ch 3. Ch 4, sk ch 4–5, sc in ch 6. Ch 4, sk ch 7–8, sc in the next sc (the one on the petal tip).
Rep from * around. On the last repeat, replace the final sc with a sl st into the first sc.
Stitch count: 24 sc and 24 ch-4 sps (3 of each per petal section).
Checkpoint: 2.25 in (5.7 cm) across.
Round 6 – Lattice Round Two
Sl st into the first 2 ch of the first ch-4 sp so you are at its center. Ch 1, sc in the same sp. Ch 5, sc in the next ch-4 sp. Rep from * 22 more times. Ch 5 and sl st to the first sc to join.
Stitch count: 24 sc and 24 ch-5 sps.
This round shifts the lattice. Each sc now sits at the center of a Round 5 loop. In each group of three ch-5 sps, the third sp spans over a petal tip. That’s where the trefoil picots will go.
Checkpoint (size before border): 2.9 in (7.4 cm) across.
Border
Border Gauge
The border is worked into the 24 ch-5 sps. Each space gets 6 sc and one picot, which adds about 0.3 in (0.8 cm) all around. Because the piece is round, there are no sides. The counts below are given per petal section, one eighth of the circle, and each section has 3 ch-5 sps.
Round 7 – Picot Scallop Edging
Sl st into the first ch-5 sp. Ch 1.
Work (3 sc, picot, 3 sc) into the next ch-5 sp. Work (3 sc, picot, 3 sc) into the next ch-5 sp. Work (3 sc, trefoil picot, 3 sc) into the next ch-5 sp.
Rep from * 7 more times, then sl st to the first sc to join. Fasten off and weave in the end.
Count per petal section: 3 sps × 6 sc = 18 sc, 2 single picots, and 1 trefoil picot.
Total count: 24 sps × 6 sc = 144 sc, plus 16 single picots and 8 trefoil picots (24 picots in all).
This is a conversion round. No stitches are worked into the Round 6 sc; every stitch goes into a space. That gives 24 existing spaces × 6 sc each = 144 sc, plus 24 picots added on top. Nothing is carried over from the previous count.
Why the Math Works
- Round 1 has 16 sts. Round 2 skips every other one, so it makes exactly 8 petal loops.
- Round 4 places one sc on each of the 8 petal tips.
- Round 5 makes 3 loops per ch-8. The sc go into ch 3 and ch 6, with 2 chains skipped before each sc. That spacing is even, so all 24 loops are the same size.
- Round 6 keeps 24 loops and shifts them by half a loop, which centers every third loop over a petal tip.
- Round 7 uses 8 groups of 3 spaces, so each trefoil lines up with a petal. The trefoils at the top and bottom become the attachment points for the cord and the tassel.
With 6 sc per ch-5, each scallop lies flat: there are enough stitches to fill the loop without making it ruffle.
Hanging Cord, Bead, and Tassel
Hanging Cord
Hold the medallion so that one petal points straight up. Join the thread in the center sc of the scallop under the top trefoil (the 3rd sc of the 6 in that space).
Ch 80, then sl st into the back bump of each ch, working back toward the medallion (80 sl sts). Don’t fasten off yet.
The cord should be firm and round and measure about 5.5 in (14.0 cm). Fold it in half and sew the free end securely to the same spot at the top of the medallion. This makes a loop about 2.75 in (7.0 cm) long. Wrap the thread tightly 5 times around both strands just above the medallion to make a neat collar, then knot it and hide the end.
Bead
- R1: MR, 6 sc in the ring, join. (6)
- R2: Inc in each st. (12)
- R3–R4: Sc in each st around. (12)
- R5: Sc2tog 6 times. (6)
Stuff the bead firmly with thread scraps. Thread the tail through the remaining 6 sts and pull it closed, but don’t cut it. The bead is about 0.4 in (1.0 cm) across.
Tassel
- Wrap the thread 30 times around the 2.25 in (5.7 cm) card.
- Slide a 10 in (25.4 cm) tie strand under the wraps at the top of the card and knot it tightly.
- Cut the wraps along the bottom edge. This gives you 60 strands.
- About 0.25 in (0.6 cm) below the top knot, wrap a separate strand tightly 6 times around the bundle to form the tassel neck. Knot it and bury the ends inside the tassel.
- Thread both ends of the tie strand through the center of the bead from the bottom, so the bead sits on top of the tassel.
- Sew the tie ends securely into the center sc under the bottom trefoil, leaving 0.25 in (0.6 cm) of strand visible between the medallion and the bead.
- Trim the tassel ends evenly to 1.75 in (4.4 cm) from the neck.
Final Blocking
- Weave in all ends before you block. Keep the tassel away from the starch.
- Soak the medallion (not the tassel) in a mix of fabric stiffener and water, using the ratio on the bottle. Press out the excess between towels.
- Draw a 3.5 in (8.9 cm) circle on paper. Place it under plastic wrap on the blocking board.
- Pin the center ring flat, then pin each petal tip outward until the flower measures 1.4 in (3.6 cm) across.
- Pin each trefoil onto the circle line, then pin each single picot. Use 24 pins in total around the edge.
- Use a pin tip to open the petal openings and the lattice loops into clean, even shapes.
- Leave it to dry completely, which usually takes 6–12 hours. Remove the pins only when the piece feels stiff.
- Steam the tassel lightly and comb the strands straight with your fingers.
Final Quality-Control Checklist
- The medallion measures 3.5 in (8.9 cm) across and is the same width in every direction.
- There are 8 petals, all the same length, each with a pointed tip.
- Round 7 has 24 scallops, with 8 trefoils lined up over the petal tips.
- One trefoil points straight up to the cord, and the opposite one points straight down to the tassel.
- The cord loop is 2.75 in (7.0 cm) long and the collar wrap is secure.
- The bead is round and firm, and the tassel is trimmed evenly to 1.75 in (4.4 cm).
- No ends are visible, and the piece hangs flat without twisting toward one side.
Troubleshooting
The petals are uneven lengths. Your Round 2 chains vary in tension. Count the chains carefully and keep the loop on the hook loose and even.
The petals look rounded instead of pointed. Make sure the ch-2 is worked exactly at the middle of each loop, then pinch the tips into points when you block.
Round 5 or 6 ruffles. Your chains are too loose. Work them a little tighter, or drop the hook size by 0.25 mm for the lattice rounds only.
Round 5 or 6 cups. Your chains are too tight. Loosen them, or go up 0.25 mm in hook size.
The scallops flare. Make sure you are working exactly 6 sc per ch-5 sp, not 7.
The trefoils don’t line up with the petals. Round 6 may have started in the wrong ch-4 sp. In each group of three ch-5 sps, the third one should sit over a petal tip.
The charm twists while hanging. Re-center the cord on the top trefoil, then re-block the piece flat.
Care
Spot clean only, with cool water and a drop of mild soap. If the piece goes limp, pin it back into shape and re-stiffen. Keep it out of hot, direct sun to protect the fiber.
Final Notes
The size of this medallion comes from a chain of measurements:
- The 0.25 in (0.6 cm) ring holds 8 petals that make a 1.4 in (3.6 cm) flower.
- Round 5 brings the piece to 2.25 in (5.7 cm).
- Round 6 brings it to 2.9 in (7.4 cm).
- The 0.3 in (0.8 cm) picot border finishes it at 3.5 in (8.9 cm).
If you check your size at each of these points, you’ll end up with a flat, even charm that hangs straight.
Happy crocheting!