

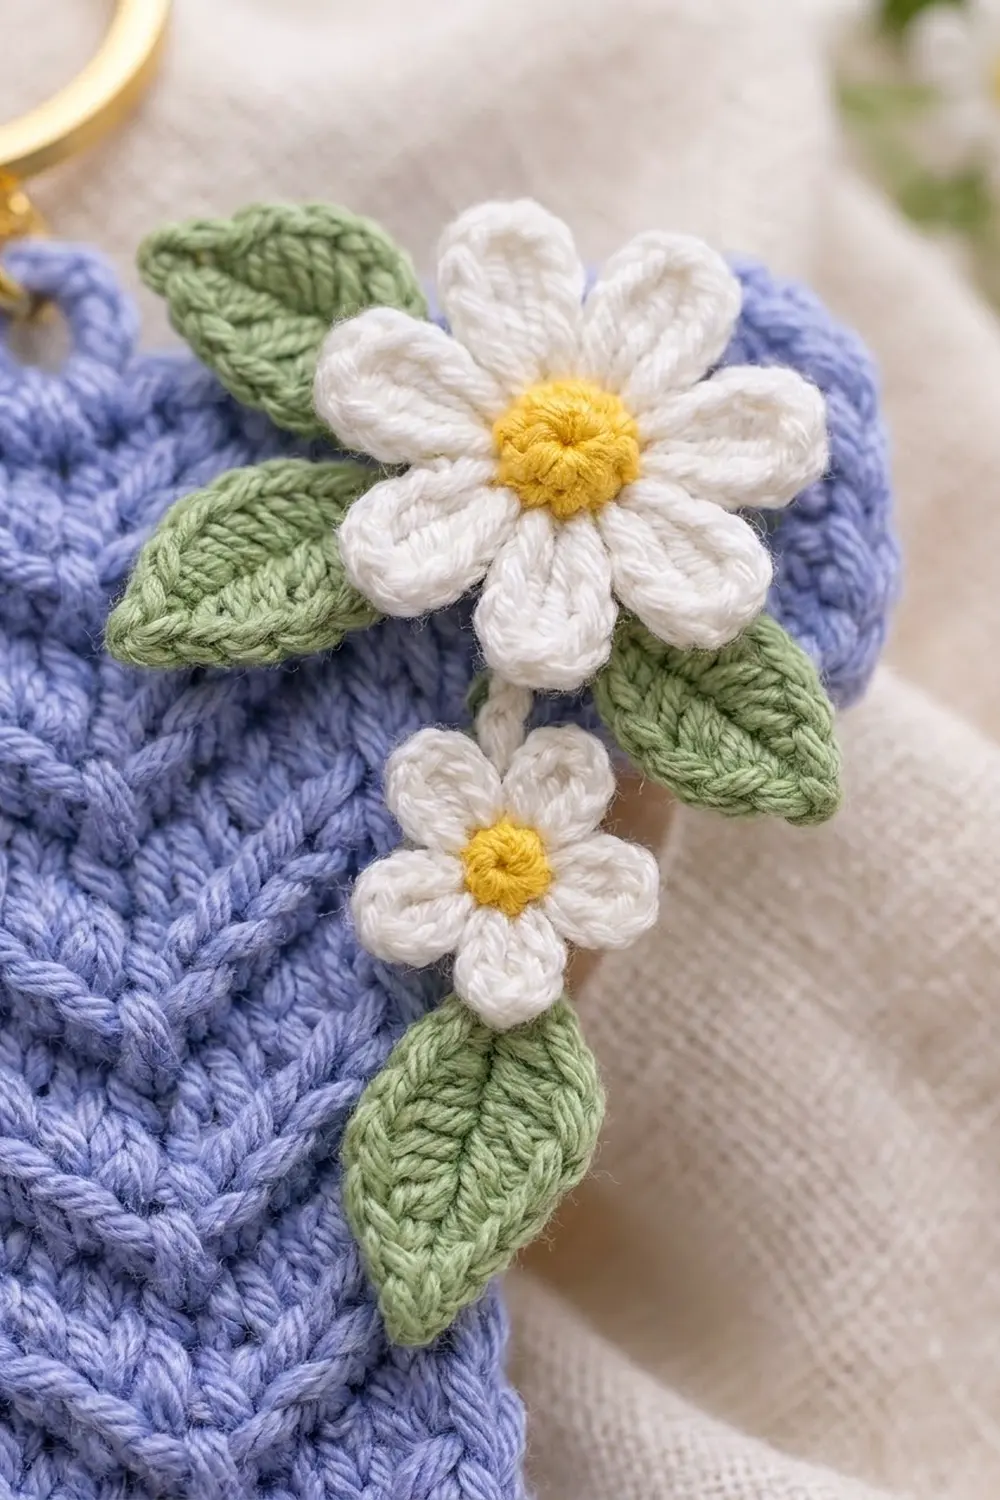
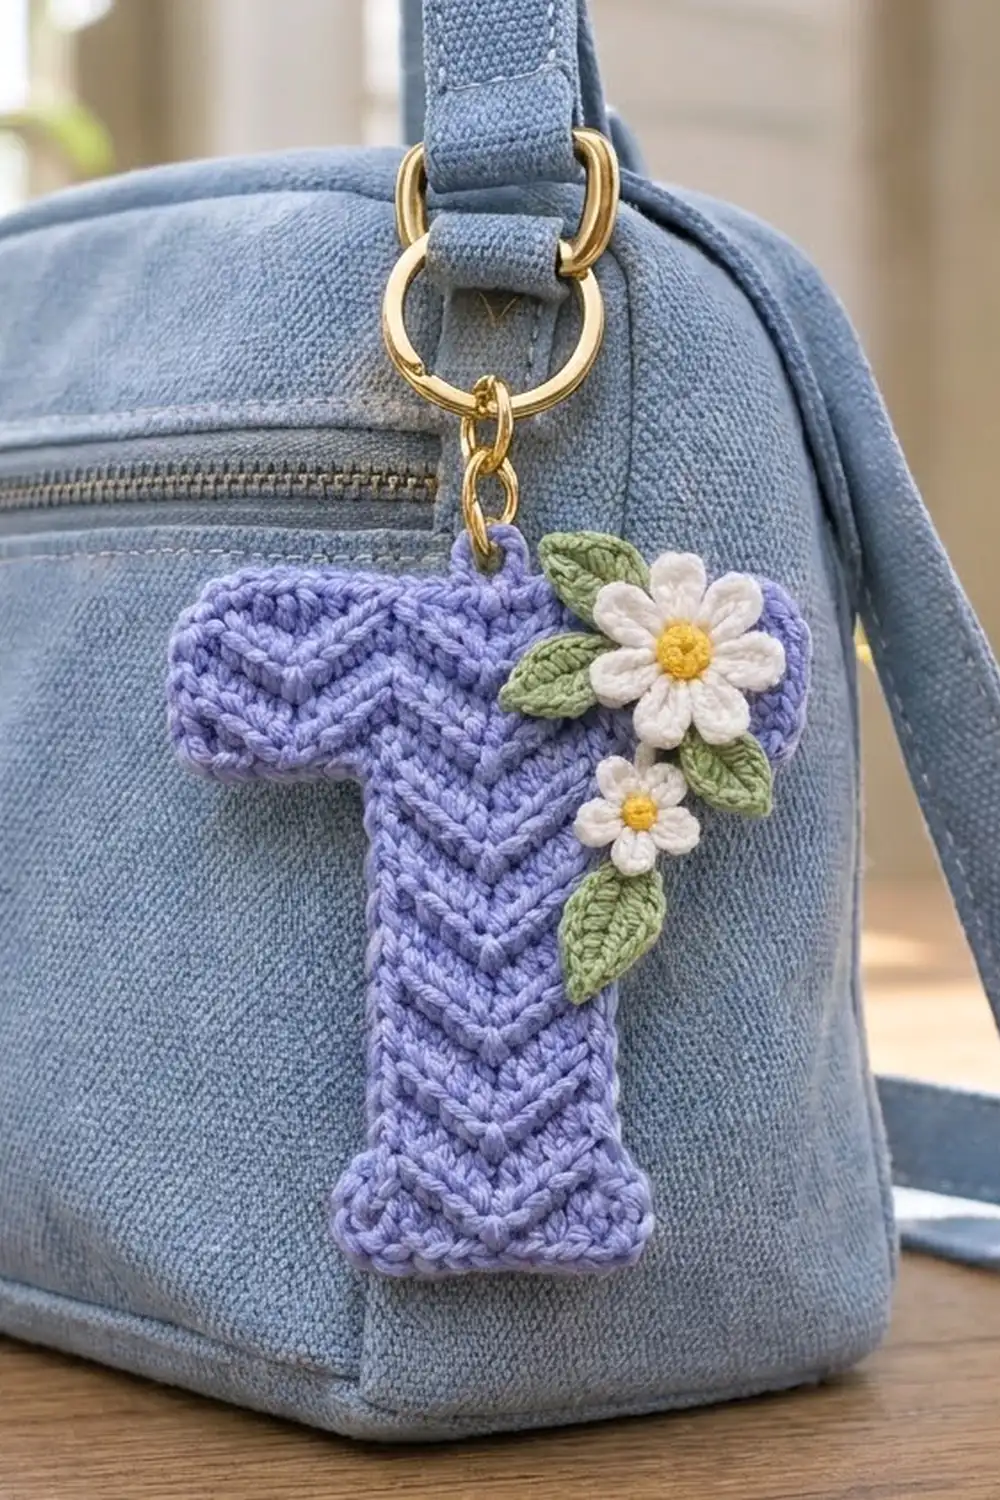
The Periwinkle Daisy Letter T Keychain is a small, sturdy bag charm worked as one flat capital T. Raised chevrons stack up the front so it looks almost knitted. A cluster of white daisies and green leaves sits on the upper right corner.
The colors are soft and fresh: periwinkle blue for the letter, white petals with sunny yellow centers, and leaf green. A gold split ring goes through a small crocheted loop at the top, so you can clip the charm to a bag strap, keys, or a zipper pull.
This pattern uses US crochet terms. The finished letter is 3.8 in (9.7 cm) wide and 4.4 in (11.2 cm) tall, not counting the loop. The stem is 2.2 in (5.6 cm) wide.
You crochet the stem from the bottom up in single crochet rows, adding front post chevrons on right-side rows. Then you widen both sides at once to make the crossbar. A border finishes the edge and forms the hanging loop, and the flowers are sewn on last.
Finished Size and Construction
- Finished size: 3.8 in (9.7 cm) wide x 4.4 in (11.2 cm) tall
- Skill level: Easy-Intermediate
- Terminology: US crochet terms
- Yarn weight: DK (#3) cotton
- Hook: 3.5 mm (E-4)
- Number of pieces: 1 letter body, plus 2 daisies and 4 leaves (appliqué)
- Layout: One single T-shaped piece; no joining
- Size before border: 3.4 in (8.6 cm) x 4.0 in (10.2 cm)
- Stem before border: 1.8 in (4.6 cm) x 2.8 in (7.1 cm)
- Crossbar before border: 3.4 in (8.6 cm) x 1.2 in (3.0 cm)
- Border depth: 0.2 in (0.5 cm) on every edge
Materials
Use a smooth, tightly plied DK cotton. It keeps the chevrons crisp and holds up well on a bag. Fuzzy yarns blur the texture.
- Periwinkle blue (Color A): 12 g, about 27 m
- White (Color B): 3 g, about 7 m
- Yellow (Color C): 1 g, about 2 m
- Leaf green (Color D): 2 g, about 5 m
These amounts include a margin for swatching, tails, and sewing.
Tools:
- 3.5 mm (E-4) hook
- Tapestry needle
- Gold split key ring, 1 in (2.5 cm)
- 2 stitch markers
- Rust-proof pins and a blocking mat
- Spray bottle
- Ruler
Abbreviations (US Terms)
- ch: chain
- sl st: slip stitch
- sc: single crochet
- hdc: half double crochet
- dc: double crochet
- FPdc: front post double crochet
- fsc: foundation single crochet
- sc2tog: single crochet 2 together
- BLO: back loop only
- st(s): stitch(es)
- RS / WS: right side / wrong side
Special stitch – Chevron V (V3): This is worked over the next 3 sts. Work a FPdc around the post of the stitch 2 rows below the middle one of those 3 sts, and skip the st behind it. Sc in the next st. Work a second FPdc around the same post, and skip the st behind it. That makes 3 sts. Both legs start from one post and spread outward, so the V points down.
fsc off a row end: Insert your hook in the base of the last st, yo, pull up a loop, yo, pull through 1 loop (this is the “chain”), yo, pull through 2 loops. Work each fsc after that into the chain of the one before it.
Gauge and Checkpoints
Gauge: 20 sts and 20 rows = 4 in (10.2 cm) in sc. That works out to 5 sts and 5 rows per 1 in (2.5 cm). Stitches and rows need to match, because that is what keeps the sides square and the border flat.
Test piece first: Use Rows 1–6 of the stem as your swatch.
- After Row 6: 1.8 in (4.6 cm) x 1.2 in (3.0 cm)
- After Row 14: 1.8 in (4.6 cm) x 2.8 in (7.1 cm)
- After Row 20: 3.4 in (8.6 cm) x 4.0 in (10.2 cm)
- After border: 3.8 in (9.7 cm) x 4.4 in (11.2 cm)
Too big: Use a 3.25 mm hook. Too small: Use a 3.75 mm hook. If only the height is off, pull every loop up to the same height. Measure across a plain WS row, not across a chevron.
Letter Body
Use Color A. The ch 1 at the start of a row does not count as a stitch. Odd rows are RS and even rows are WS. Chevrons are only made on RS rows.
Stem
Row 1 (RS): Ch 10. Sc in 2nd ch from hook and in each ch across. (9 sc)
Row 2 (WS): Ch 1, turn. Sc in each st across. (9 sc)
Row 3 (RS, chevron row): Ch 1, turn. Sc in first st, [V3 over next 3 sts, sc in next st] twice. (9 sts: 5 sc + 2 V3)
The V3 groups go over sts 2–4 and 6–8. Each one is anchored around the Row 1 sc below sts 3 and 7.
Row 4 (WS): Ch 1, turn. Sc in each st, including the FPdc tops. (9 sc)
Rows 5–13 (odd): Repeat Row 3. Anchor each V3 around the middle sc of the V3 two rows below, so the chevrons stack into columns. (9 sts each)
Rows 6–14 (even): Repeat Row 4. (9 sc each)
The stem now has 2 columns of 6 chevrons. Checkpoint: 1.8 in (4.6 cm) x 2.8 in (7.1 cm). Do not fasten off.
Crossbar
At the end of Row 14, ch 5.
Row 15 (RS): Turn. Sc in 2nd ch from hook and in next 3 ch, then sc in each of the 9 stem sts. Work 4 fsc off the row end. (17 sts: 9 worked 1-per-existing-stitch + 8 added)
Row 15 has no chevrons. It marks where the crossbar starts and gives the next chevrons a base to anchor into.
Row 16 (WS): Ch 1, turn. Sc across. (17 sc)
Row 17 (RS): Ch 1, turn. Sc in first st, [V3, sc in next st] 4 times. (17 sts: 9 sc + 4 V3)
The V3 groups sit over sts 2–4, 6–8, 10–12, and 14–16. The stem is sts 5–13 here, so the two middle columns line up with the stem chevrons.
Row 18: Repeat Row 16. (17 sc)
Row 19: Repeat Row 17. (17 sts)
Row 20: Repeat Row 16. (17 sc)
Checkpoint: 3.4 in (8.6 cm) x 4.0 in (10.2 cm). Each arm sticks out 0.8 in (2.0 cm) past the stem and is 1.2 in (3.0 cm) tall. Do not fasten off.
Border
Border gauge: Work 1 sc per stitch along the top and bottom edges and 1 sc per row end along the sides. Because stitch and row gauge match at 5 per 1 in (2.5 cm), every edge stays flat.
Each outer corner gets 3 sc in the corner st. The corner row’s row end is already covered by that group, so skip it. Each inner corner gets one sc2tog. Mark both inner corners before you start.
Rnd 1 (RS): Ch 1, turn so the RS faces you. Work around the T:
- Top edge: 3 sc in first st, sc in next 15, 3 sc in last st. (21 sc)
- First arm, outer side: sc in row ends of Rows 19–16. (4 sc)
- First arm, underside: 3 sc in outer underside st, sc in next 2, sc2tog over last underside st and the Row 14 row end. (6 sts)
- Stem side: sc in row ends of Rows 13–2. (12 sc)
- Stem bottom: 3 sc in first foundation st, sc in next 7, 3 sc in last. (13 sc)
- Second stem side: sc in row ends of Rows 2–13. (12 sc)
- Second arm, underside: sc2tog over the Row 14 row end and first underside st, sc in next 2, 3 sc in outer st. (6 sts)
- Second arm, outer side: sc in row ends of Rows 16–19. (4 sc)
Sl st to first sc to join. (78 sts)
Why the math works: You worked once into each of 68 edge positions: 17 top + 4 + 4 arm sides + 4 + 4 undersides + 13 + 13 stem row ends + 9 bottom. The six outer corners add 2 sc each (+12), and the two sc2tog each turn 2 positions into 1 (−2). 68 + 12 − 2 = 78. Adding up the edges gives the same total: 21 + 4 + 6 + 12 + 13 + 12 + 6 + 4 = 78.
Rnd 2 (edge and loop): Ch 1, sl st in BLO of each st around. At the center top st (the 11th of the 21, directly above the stem), work sl st, ch 10, sl st in the same st. Join at the end of the round. (78 sl st + 1 ch-10 loop)
Fasten off and weave in ends along the border on the WS. The slip stitches add almost no depth. Checkpoint: 3.8 in (9.7 cm) x 4.4 in (11.2 cm), with the loop standing about 0.5 in (1.3 cm) high.
Daisy and Leaf Appliqués
Large Daisy (make 1)
Rnd 1: With Color C, make a magic ring, ch 1, 8 sc in ring, pull closed, join. (8 sc) Fasten off.
Rnd 2: Join Color B. (Sl st, ch 2, 2 dc, ch 2, sl st) in same st, move to next st; repeat from * 7 more times. (8 petals)* Leave a 10 in (25.4 cm) tail for sewing. The daisy measures about 1.2 in (3.0 cm) across.
Small Daisy (make 1)
Rnd 1: With Color C, make a magic ring, ch 1, 6 sc in ring, join. (6 sc) Fasten off.
Rnd 2: Join Color B. (Sl st, ch 2, dc, ch 2, sl st) in same st, move to next st; repeat from * 5 more times. (6 petals)* The daisy measures about 0.8 in (2.0 cm) across.
Leaf (make 4)
With Color D, ch 7. Sl st in 2nd ch from hook, then sc, hdc, dc, hdc in the next 4 ch, and (sc, ch 2, sc) in the last ch. Working along the other side of the chain: hdc, dc, hdc, sc, sl st. (12 sts + ch-2 tip) Each leaf is about 0.9 in (2.3 cm) long.
Placement
- Put the large daisy on the right arm, next to the stem, with its petals just over the top border.
- Put the small daisy below it and a little to the left, on the upper stem.
- Tuck two leaves under the large daisy’s left petals, one pointing up-left and one pointing left. Add one leaf to the right of the small daisy and one below it, both pointing down.
- Sew the leaves first, then sew the daisies through their centers. Leave the petal tips free and sew through the front layer only.
Final Blocking
- Pin the letter RS up at all six outer corners and both inner corners.
- Check the size: 3.8 in (9.7 cm) x 4.4 in (11.2 cm), with a 2.2 in (5.6 cm) stem.
- Use a ruler to straighten the stem sides and the top edge.
- Mist until damp, without soaking.
- Pat the chevrons flat, but don’t press the flowers.
- Leave it pinned until completely dry.
- Put the split ring through the loop.
Final Quality-Control Checklist
- The stem has 14 rows of 9 sts, and the crossbar has 6 rows of 17 sts.
- There are 2 chevron columns of 6 on the stem and 4 columns of 2 on the crossbar, all pointing down.
- Border Rnd 1 has 78 sts, and Rnd 2 has 78 sl sts plus the loop.
- Both arms are 0.8 in (2.0 cm) wide before the border.
- The inner corners are tight, with no holes.
- The finished size is 3.8 in (9.7 cm) x 4.4 in (11.2 cm).
- The flowers and leaves are secure, no tails show on the front, and the ring is fully closed.
Troubleshooting
Chevrons look like slanted bars: Make sure both FPdc in each V3 go around the same post.
Fabric puckers: Pull each FPdc up to the height of the current row.
WS row is short a stitch: FPdc tops are easy to miss. Mark them until you’re used to the stitch.
Arms are uneven: Count 4 sts on each arm, then ease the tighter one into shape while blocking.
Sides ruffle: Your rows are shorter than your stitches are wide. Skip one row end every 7 rows.
Inner corners have holes: Work the sc2tog firmly and close any gap with a yarn tail.
Daisy cups: Steam-block the daisy on its own before you sew it on.
Care
Remove the metal ring first. Hand wash in cool water with mild soap, press the water out in a towel, reshape, and dry flat.
Final Notes
Every measurement comes from one gauge: 5 sts and 5 rows per 1 in (2.5 cm). That makes the 9-st, 14-row stem 1.8 in x 2.8 in (4.6 cm x 7.1 cm). Adding 4 sts on each side gives a 17-st crossbar and a body of 3.4 in x 4.0 in (8.6 cm x 10.2 cm). The 78-st border adds 0.2 in (0.5 cm) on every edge, for a finished size of 3.8 in x 4.4 in (9.7 cm x 11.2 cm). If you check each stage as you go, the letter comes out square and flat, ready for its daisies.
Happy crocheting!