

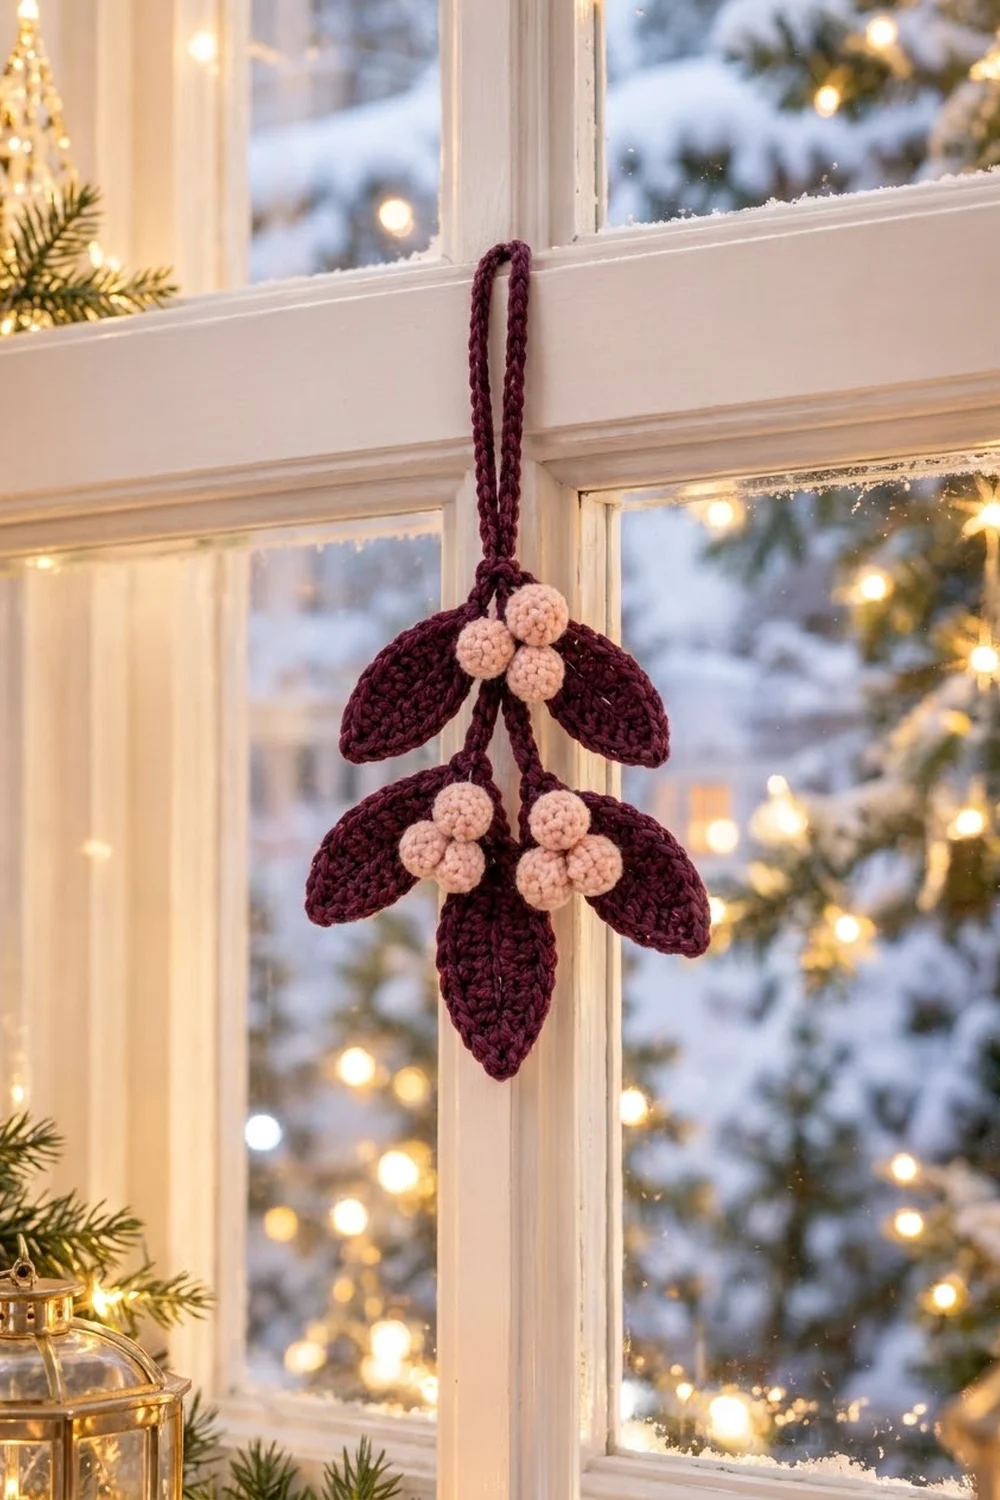
The Plum Kiss Mistletoe Ornament is a small hanging sprig. It has five deep plum leaves, nine blush-pink berries in three clusters and a long cord loop for hanging. It works on a tree branch, in a window, from a doorway or tied onto a gift.
The colors are soft and wintry. Dark plum replaces the usual bright green, and the berries are a dusty blush instead of white. The style is clean and slightly modern, with smooth leaves, sharp tips and firm, rounded berries.
This pattern uses US crochet terms. The finished ornament is about 4.5 in (11.4 cm) wide and 5 in (12.7 cm) tall without the loop. With the hanging loop it is 8 in (20.3 cm) tall.
You make each part separately. Each leaf is one round worked around a foundation chain, then a single crochet edging. The berries are tiny stuffed balls, and the stems and hanging loop are slip-stitch cords. At the end you sew everything into one ornament.
Finished Size and Construction
- Finished size: 4.5 in (11.4 cm) wide x 5 in (12.7 cm) tall; 8 in (20.3 cm) tall with loop
- Skill level: Easy to intermediate
- Terminology: US crochet terms
- Yarn weight: Sport weight (#2), cotton or cotton blend
- Hook: 2.75 mm (US C-2)
- Number of pieces: 18 parts sewn into 1 ornament (5 leaves, 9 berries, 1 main stem, 2 branch stems, 1 hanging loop)
- Layout: A top pair of leaves, a middle pair on short branches and one bottom leaf. Berry clusters sit at the top junction and at each middle branch.
- Leaf size: 2.5 in (6.4 cm) long x 1.1 in (2.8 cm) wide
- Leaf size before border: 2.3 in (5.8 cm) long x 0.7 in (1.8 cm) wide
- Border depth: about 0.2 in (0.5 cm) on each long edge
- Berry size: about 0.7 in (1.8 cm) across
Materials
Use a smooth, mercerized sport-weight cotton or cotton blend. Cotton keeps the leaf points crisp and the berries firm. A fuzzy or very soft acrylic blurs the edges and center vein.
If plum is not your style, try forest green leaves with ivory berries for a traditional look. Keep both yarns the same weight and fiber so the berries and leaves stay in proportion.
The quantities below assume a yarn with about 155 m per 50 g.
- Plum (leaves, stems, loop): 15 g, about 47 m
- Blush pink (berries): 8 g, about 25 m
Both quantities include extra for a test leaf, a test berry and sewing tails.
Tools:
- 2.75 mm (US C-2) crochet hook
- Tapestry needle
- A small pinch of polyester fiberfill
- 2 to 3 locking stitch markers
- Scissors
- Pins and a small foam board for blocking
- Optional: fabric glue that dries clear, for securing knots
Abbreviations (US Terms)
- ch: chain
- sl st: slip stitch
- sc: single crochet
- hdc: half double crochet
- dc: double crochet
- sc2tog: single crochet 2 together
- st(s): stitch(es)
- sp: space
- Rnd: round
Special stitch: slip-stitch cord. Chain the number given. Sl st into the back bump of the 2nd ch from the hook, then into the back bump of each ch across. This makes a firm cord that doesn’t stretch and barely twists.
Gauge and Checkpoints
- Fabric gauge: 22 sc x 24 rows = 4 in (10.2 cm) in sc
- Chain gauge: 7 ch = 1 in (2.5 cm), measured on a relaxed chain
The ornament is small, but gauge still matters because the leaf proportions depend on it. Make one complete leaf, including its edging, before you make anything else.
Checkpoints:
- After leaf Rnd 1: 2.3 in (5.8 cm) long x 0.7 in (1.8 cm) wide
- After leaf Rnd 2 (border): 2.5 in (6.4 cm) long x 1.1 in (2.8 cm) wide
- Finished berry: 0.7 in (1.8 cm) across
- Main stem: 2.25 in (5.7 cm) long
If your leaf is too big, use a 2.5 mm hook. If it is too small, use a 3.0 mm hook. If only the length is off, check your chain gauge: a tight foundation chain makes the leaf shorter and makes it cup.
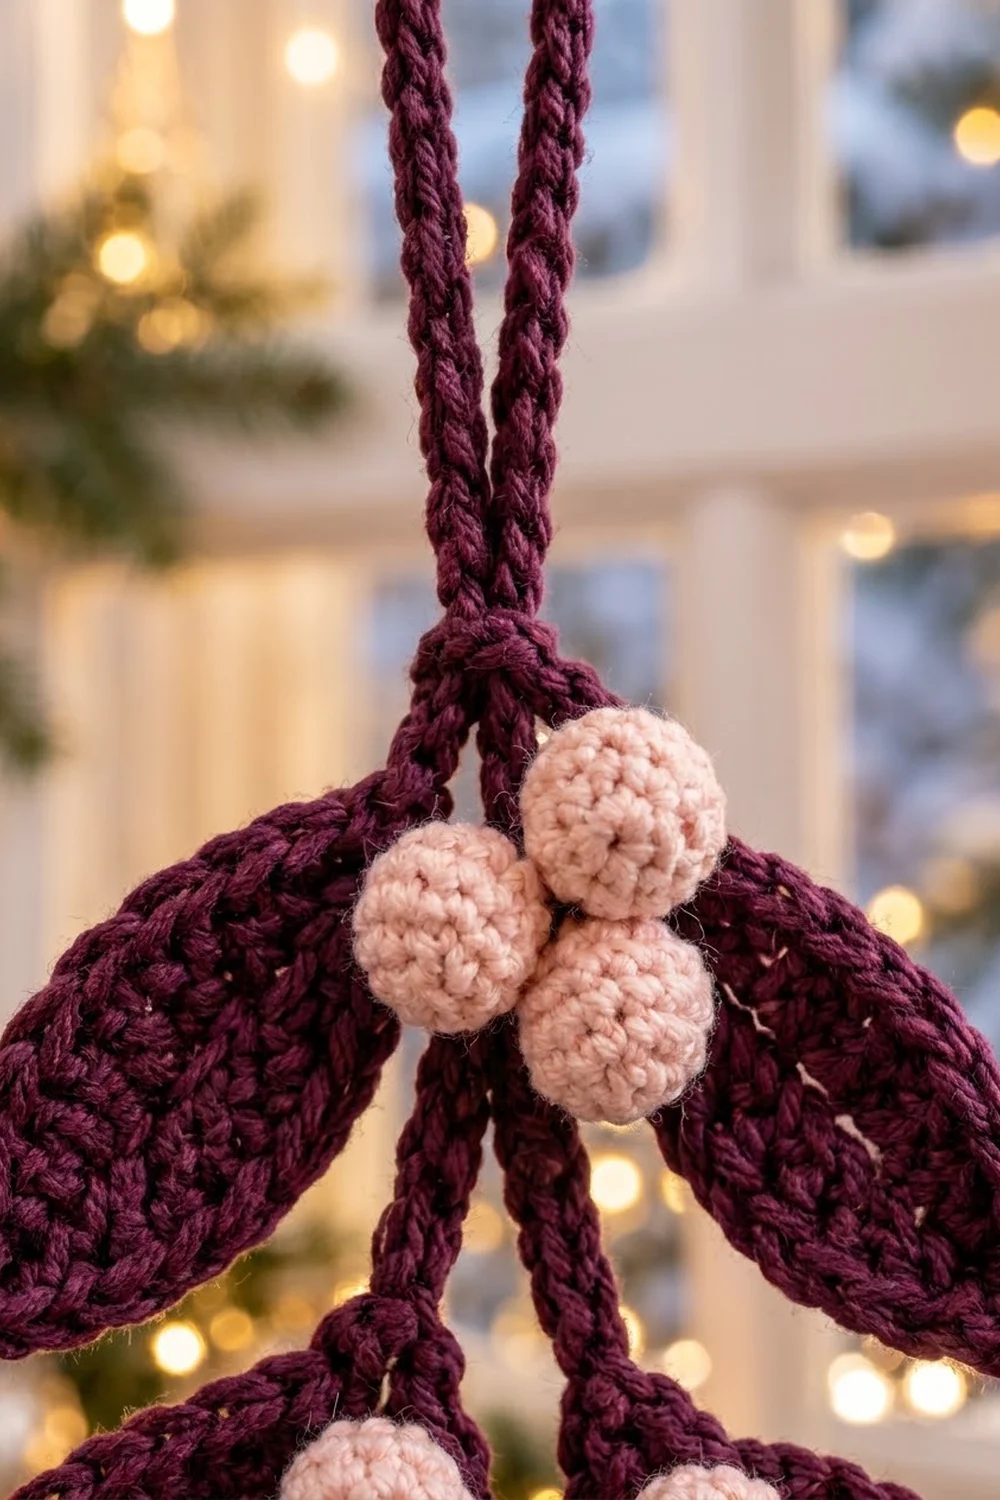
Leaves (Make 5 in Plum)
You work the leaf around both sides of a foundation chain, and the chain shows as the center vein. The stitches get taller from the stem end to the middle and shorter again toward the tip, which makes the pointed oval shape.
Foundation: Ch 14.
Rnd 1:
- Side A: Sl st in 2nd ch from hook, sc in next ch, hdc in next 2 ch, dc in next 5 ch, hdc in next 2 ch, sc in next ch. (12 sts)
- Tip: (sc, ch 2, sc) in last ch.
- Side B: Turn the work to crochet along the other side of the foundation chain, into the same 12 ch used for Side A. Sc in next ch, hdc in next 2 ch, dc in next 5 ch, hdc in next 2 ch, sc in next ch, sl st in next ch. (12 sts)
- Sl st into the skipped first ch at the stem end to close the round.
Rnd 1 count: 26 sts (12 on Side A + 2 tip sc + 12 on Side B) and 1 ch-2 tip space.
The stem end now tapers to a soft point, and the ch-2 gives the tip a sharp point. When you work Side B, keep your stitches in line with the Side A stitches so the vein stays straight.
Checkpoint: 2.3 in (5.8 cm) long x 0.7 in (1.8 cm) wide. Don’t fasten off. Go straight to the Border section (the leaf edging) below.
Berries (Make 9 in Blush Pink)
Each berry is a tiny closed ball. Crochet in a continuous spiral without joining rounds, and mark the first stitch of each round.
Rnd 1: 6 sc in a magic ring. (6 sts)
Rnd 2: 2 sc in each st around. (12 sts)
Rnd 3: Sc in each st around. (12 sts)
Stuff firmly with a small pinch of fiberfill. Use the back of the hook to push the stuffing in so the berry stays round.
Rnd 4: Sc2tog 6 times. (6 sts)
Fasten off and leave an 8 in (20.3 cm) tail. Thread the tail through the front loops of the last 6 sts and pull tight to close the hole. Keep the tail for sewing.
Checkpoint: 0.7 in (1.8 cm) across. If the berry feels soft or stuffing shows between stitches, go down one hook size for the berries only. Pull the magic ring closed tightly so there’s no hole at the base.
Stems and Hanging Loop (Plum)
All the cords are made with the slip-stitch cord.
Main stem (make 1): Ch 17, sl st in back bump of 2nd ch from hook and each ch across. (16 sl sts) Fasten off, leaving 8 in (20.3 cm) tails at both ends. Length: 2.25 in (5.7 cm).
Branch stems (make 2): Ch 7, sl st in back bump of 2nd ch from hook and each ch across. (6 sl sts) Fasten off, leaving 8 in (20.3 cm) tails. Length: about 0.9 in (2.3 cm).
Hanging loop (make 1): Ch 42, sl st in back bump of 2nd ch from hook and each ch across. (41 sl sts) Fasten off, leaving an 8 in (20.3 cm) tail at each end. Length: about 6 in (15.2 cm). Folded in half, it makes a 3 in (7.6 cm) loop.
Make All Pieces
Before you start sewing, check that you have every part:
- Plum: 5 leaves, 1 main stem, 2 branch stems, 1 hanging loop
- Blush pink: 9 berries
Layout (front view, top to bottom):
               (hanging loop)
                     ||
   [Leaf 1]       (B B B)       [Leaf 2]   <- top junction
                     |
                     |  main stem
   [Leaf 3]--B B B---+---B B B--[Leaf 4]   <- branch point, 1.25 in down
                     |
                     |
                 [Leaf 5]                  <- bottom of main stem
B = berry. Each group of three berries is sewn into a small triangle.
Joining (Assembly)
Sew the parts together with their yarn tails. Use small whipstitches through the back of each part so nothing shows on the front.
Stitch-to-stitch logic:
- Bottom leaf: Sew the stem-end point of Leaf 5 to the bottom end of the main stem. Overlap them by about 1 sl st to hide the join.
- Branch points: Count 9 sl sts down from the top of the main stem and place a marker, 1.25 in (3.2 cm) below the top. Sew one end of each branch stem to the back of the main stem at the marker. Angle one branch left and one right.
- Middle leaves: Sew the stem-end point of Leaf 3 to the outer end of the left branch, and Leaf 4 to the outer end of the right branch. Angle both down and out.
- Top leaves: Sew Leaf 1 and Leaf 2 to the top of the main stem in a wide V, pointing up and out.
- Berry clusters: Use the berry tails to sew three berries together into a triangle. Make three clusters. Sew one over the top junction and one at the base of each middle leaf, just outside the main stem.
- Hanging loop: Fold the loop in half. Lay both ends behind the top berry cluster and sew them to the top of the main stem. Just above the leaves, wrap a plum tail tightly 4 to 5 times around the two loop strands and secure it.
Tension advice: Pull each sewing stitch snug but not tight. If you pull too hard, the leaf bases pucker and the berries sink into the leaves.
Size checkpoint: The finished ornament should measure 4.5 in (11.4 cm) across the middle leaves and 5 in (12.7 cm) from the top leaf tips to the bottom leaf tip.
Border (Leaf Edging)
The border is one round of sc on each leaf, worked right after Rnd 1. It neatens the edge and sharpens the tip.
Border gauge: 5.5 sc per 1 in (2.5 cm) along the edge, the same as the fabric gauge.
Rnd 2: Ch 1. Along Side A, sc in each of the 12 sts. Sc in the first tip sc, (sc, ch 1, sc) in the ch-2 tip space, then sc in the second tip sc. Along Side B, sc in each of the 12 sts. Sl st into the closing sl st at the stem point.
Count per side: 14 sc on each side (12 sts from Rnd 1 + 1 tip sc + 1 sc worked into the tip space).
Rnd 2 total: 28 sc and 1 ch-1 tip space.
Fasten off and leave an 8 in (20.3 cm) tail for sewing.
Why the math works: The taller and shorter stitches in Rnd 1 already shape the curve. One sc in each stitch follows that curve without adding extra fabric, so the edge lies flat. The only extra stitches go at the tip, where (sc, ch 1, sc) gives the point room to stay sharp. The stem end gets no increase, so it stays tapered. Each side measures about 2.5 in (6.4 cm) along the curve, and 14 sc at 5.5 sc per inch fits that length.
Checkpoint: 2.5 in (6.4 cm) long x 1.1 in (2.8 cm) wide.
Final Blocking
- Before assembly, lightly mist the leaves with water.
- Pin each leaf flat on a foam board, with one pin at the tip and one at the stem point.
- Gently ease the long edges into a smooth curve. Check that each leaf measures 2.5 in (6.4 cm) x 1.1 in (2.8 cm).
- Pinch each tip into a sharp point with your fingers.
- Don’t wet the berries. Roll them between your palms to round them out.
- Lay the cords straight and pin the ends down.
- Let everything dry completely before you sew or hang it.
Final Quality-Control Checklist
- All 5 leaves measure 2.5 in (6.4 cm) x 1.1 in (2.8 cm).
- Each leaf border has 14 sc per side and a clean ch-1 tip.
- The center vein runs straight down every leaf.
- All 9 berries are firm, round and about 0.7 in (1.8 cm) across.
- The branch stems are 1.25 in (3.2 cm) below the top junction.
- The ornament measures 4.5 in (11.4 cm) x 5 in (12.7 cm), or 8 in (20.3 cm) tall with the loop.
- No sewing stitches or knots show on the front.
- All tails are woven in and trimmed.
- The ornament hangs straight without tipping forward.
Troubleshooting
Leaf curls lengthwise. The foundation chain is too tight. Make the chain with a hook one size larger, then switch back for Rnd 1.
Leaf ruffles at the edge. The border has extra stitches. Recount to 14 sc per side.
Tip is blunt. Check that you worked (sc, ch 1, sc) into the ch-2 space, not into a stitch. Pinch and pin the tip during blocking.
Center vein is crooked. You skipped or doubled a chain on Side B. Count 12 stitches on each side before closing the round.
Berries look lumpy. Use less stuffing and spread it evenly before Rnd 4.
Ornament tips forward when hung. The berries are heavy compared with the leaves. Sew the loop ends lower on the back of the main stem, behind the top cluster.
Stems are floppy. Make sure your sl sts went into the back bumps of the chain, not the top loops.
Care
Spot clean with cool water and mild soap, then reshape and lay flat to dry. Between seasons, store the ornament flat in a box so the leaves keep their shape.
Final Notes
Every measurement in this ornament comes from your gauge. At 22 sc x 24 rows = 4 in (10.2 cm) and 7 ch = 1 in (2.5 cm), a leaf measures 2.3 in (5.8 cm) x 0.7 in (1.8 cm) after Rnd 1. The border, with 14 sc per side, brings it to 2.5 in (6.4 cm) x 1.1 in (2.8 cm). The 16-sl-st main stem is 2.25 in (5.7 cm) long, with the branches 1.25 in (3.2 cm) below the top. Together these give an ornament 4.5 in (11.4 cm) x 5 in (12.7 cm), or 8 in (20.3 cm) tall with its 3 in (7.6 cm) loop.
Check your first leaf against the measurements and stick to the counts, and the rest of the ornament will go together easily.
Happy crocheting!