

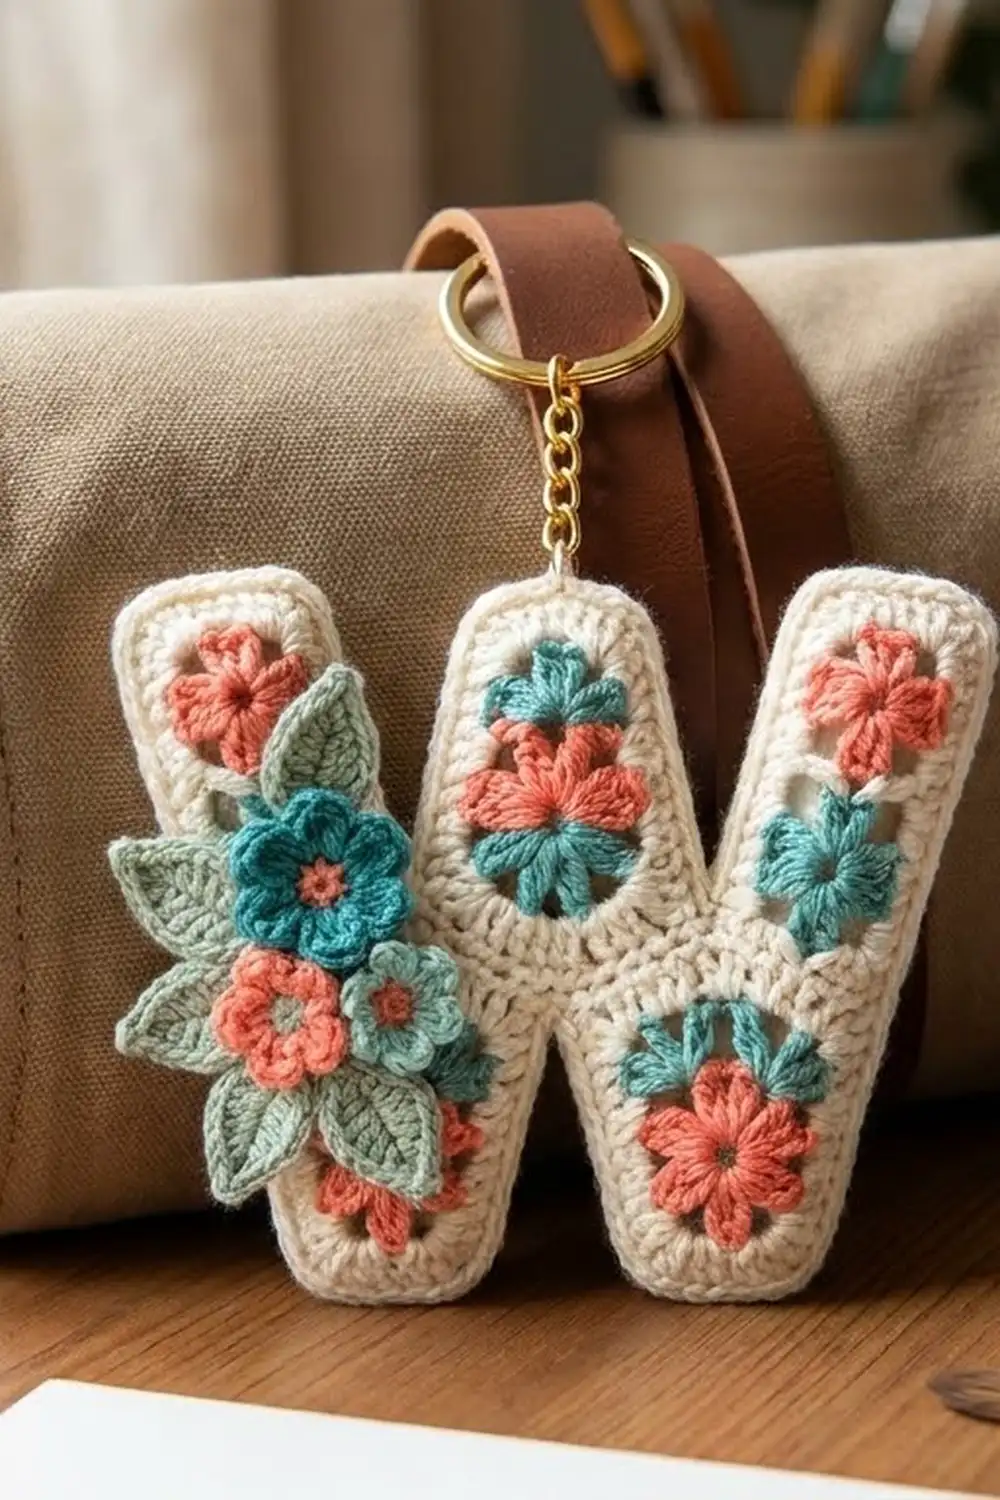
This initial keychain is a bold letter W in cream cotton. Each stroke has a line of small windows up its center, and each window is ringed with a tiny five-petal blossom in coral or teal.
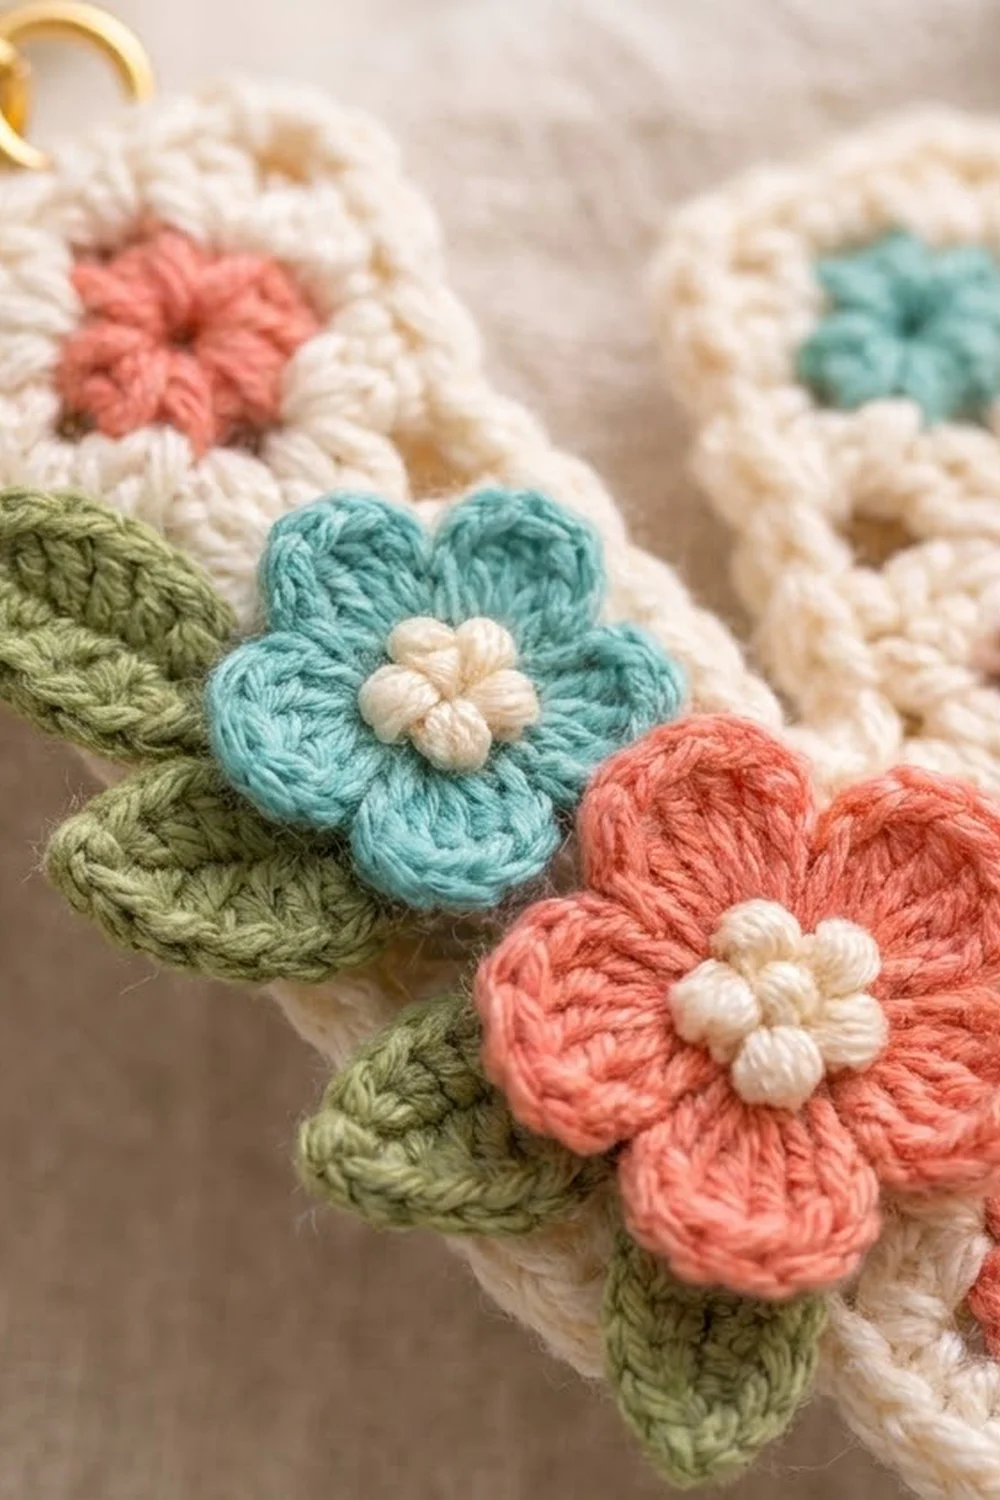
A small posy sits on the left stroke: one teal flower and one larger coral flower, both with cream centers, plus three sage-green leaves. A gold split ring and a short chain hang from the top-left corner. The look is fresh and cottage-floral.
This pattern uses US crochet terms. The finished keychain is 4.1 in (10.4 cm) wide x 3.5 in (8.9 cm) tall, not counting the hardware.
You work the letter flat, in rows from the bottom up, as one continuous piece. You make the two feet first, then the left arm, the middle peak (which joins the two feet) and the right arm. After that you crochet the blossoms into the windows and work a two-round border. The flowers, leaves and hardware go on last.
Finished Size and Construction
- Finished size: 4.1 in (10.4 cm) x 3.5 in (8.9 cm)
- Skill level: Intermediate
- Terminology: US
- Yarn weight: Sport (#2) cotton
- Hook: 2.75 mm (US C-2)
- Number of pieces: 1 letter body, plus 2 flowers and 3 leaves sewn on
- Layout: W shape with 2 feet at the bottom and 3 prongs at the top
- Stroke width: 5 sts, 0.7 in (1.8 cm)
- Size before border: 3.6 in (9.1 cm) x 3.0 in (7.6 cm)
- Border depth: 2 rounds, 0.25 in (0.6 cm) per side
Materials
Use a smooth, mercerized sport-weight cotton. It keeps the windows crisp and stands up to everyday handling.
- Cream: 10 g, about 30 m (body, border, flower centers)
- Coral: 5 g, about 15 m (9 blossoms, 1 flower)
- Teal: 5 g, about 15 m (9 blossoms, 1 flower)
- Sage green: 2 g, about 6 m (3 leaves)
These amounts include a margin for swatching and weaving in ends.
Tools: 2.75 mm (US C-2) hook, tapestry needle, scissors, stitch markers, 1 gold split ring 1 in (2.5 cm), gold chain 0.75 in (1.9 cm), 2 gold jump rings (6 mm), 2 pairs of flat-nose pliers, blocking mat, rustproof pins, spray bottle.
Abbreviations (US Terms)
- ch: chain
- sl st: slip stitch
- sc: single crochet
- hdc: half double crochet
- dc: double crochet
- sc2tog: single crochet 2 together
- st(s): stitch(es)
- sp: space
- RS / WS: right side / wrong side
- rnd: round
sc3tog: (Insert hook in next st or row-end, yo, pull up a loop) 3 times, yo, pull through all 4 loops.
Reverse sc (rev sc): Work sc in the opposite direction to normal. This makes a rolled, rope-like edge.
Window: Ch 3, sk 3 sts. On the next row, work 3 sc into the ch-3 sp. The opening stays underneath.
The turning ch 1 and ch 2 never count as stitches.
Gauge and Checkpoints
Gauge: 7 sc = 1 in (2.5 cm). In the body pattern, 8 sc rows = 1 in (2.5 cm) and 4 dc rows = 1 in (2.5 cm).
Swatch: Ch 15 and work 14 sc. Then work 5 more rows in this order: dc, sc, sc, dc, sc. With the first row, that is 6 rows. The swatch should measure 2 in (5.1 cm) x 1 in (2.5 cm).
Test piece: Treat Foot A as your test. Measure it before going on.
- After Row 3: 0.7 in (1.8 cm) wide x 0.5 in (1.3 cm) tall
- After Row 9: 1.3 in (3.3 cm) wide x 1.5 in (3.8 cm) tall
- After Middle Peak Row 10: 2.7 in (6.9 cm) from the outer edge of Foot A to the outer edge of Foot B
- After Row 18: 3.6 in (9.1 cm) x 3.0 in (7.6 cm)
- After the border: 4.1 in (10.4 cm) x 3.5 in (8.9 cm)
If your piece is too big, use a 2.5 mm hook. If it is too small, use a 3.0 mm hook. The shape stays the same at any gauge, but the size changes.
Feet (Make 2)
The feet are the two bottom points of the W. Make both the same way and fasten off each one.
With cream, ch 6.
Row 1 (RS): Sc in 2nd ch from hook and in each ch across, turn. (5 sts)
Row 2: Ch 2, dc in first st, ch 3, sk 3, dc in last st, turn. (2 dc + 3 ch = 5 sts, 1 window)
Row 3: Ch 1, sc in first dc, 3 sc in ch-3 sp, sc in last dc, turn. (5 sc)
Row 4: Ch 1, 2 sc in first st, sc in next 3 sts, 2 sc in last st, turn. (7 sc)
Row 5: Ch 2, dc in first 2 sts, ch 3, sk 3, dc in last 2 sts, turn. (4 dc + 3 ch = 7 sts)
Row 6: Ch 1, sc in next 2 dc, 3 sc in ch-3 sp, sc in last 2 dc, turn. (7 sc)
Row 7: Ch 1, 2 sc in first st, sc in next 5 sts, 2 sc in last st, turn. (9 sc)
Row 8: Ch 2, dc in first st, ch 3, sk 3, dc in next st, ch 3, sk 3, dc in last st, turn. (3 dc + 6 ch = 9 sts, 2 windows)
Row 9: Ch 1, sc in first dc, 3 sc in ch-3 sp, sc in next dc, 3 sc in ch-3 sp, sc in last dc. (9 sc) Fasten off.
Lay the feet RS up, 1 st apart, with their outer edges pointing away from each other. Number the Row 9 sts of each foot 1 to 9, starting from its outer edge.
Left Arm (Rows 10–18)
The Left Arm is worked on sts 1–4 of Foot A. Leave st 5 unworked; it becomes the bottom of the left notch.
Row 10 (WS): Join cream in st 1 of Foot A. Ch 1, 2 sc in same st, sc in sts 2–4, turn. (5 sc)
Row 11: Ch 2, dc in first st, ch 3, sk 3, dc in last st, turn. (5 sts)
Row 12: Ch 1, sc in first dc, 3 sc in ch-3 sp, sc in last dc, turn. (5 sc)
Row 13 (starts at the inner edge): Ch 1, sc2tog, sc in next 2 sts, 2 sc in last st, turn. (5 sc) This shifts the arm 1 st outward.
Rows 14–15: Repeat Rows 11–12.
Row 16: Repeat Row 13.
Rows 17–18: Repeat Rows 11–12. Fasten off. (5 sts)
Middle Peak (Rows 10–18)
Row 10 (WS): Join cream in st 6 of Foot A. Ch 1, sc in same st and in sts 7–9 (4 sc). Ch 1 across the gap. Sc in sts 9, 8, 7 and 6 of Foot B (4 sc), turn. (9 sts) Leave st 5 of Foot B unworked.
Row 11: Ch 2, dc in first st, ch 3, sk 3, dc in next st (the ch-1), ch 3, sk 3, dc in last st, turn. (3 dc + 6 ch = 9 sts)
Row 12: Ch 1, sc in first dc, 3 sc in ch-3 sp, sc in next dc, 3 sc in ch-3 sp, sc in last dc, turn. (9 sc)
Row 13: Ch 1, sc2tog, sc in next 5 sts, sc2tog, turn. (7 sc)
Row 14: Ch 2, dc in first 2 sts, ch 3, sk 3, dc in last 2 sts, turn. (7 sts)
Row 15: Ch 1, sc in next 2 dc, 3 sc in ch-3 sp, sc in last 2 dc, turn. (7 sc)
Row 16: Ch 1, sc2tog, sc in next 3 sts, sc2tog, turn. (5 sc)
Rows 17–18: Work as Left Arm Rows 11–12. Fasten off. (5 sts)
Right Arm (Rows 10–18)
Row 10 (WS): Join cream in st 4 of Foot B. Ch 1, sc in same st, sc in sts 3 and 2, 2 sc in st 1, turn. (5 sc)
Rows 11–12: Work as Left Arm Rows 11–12.
Row 13 (starts at the outer edge): Ch 1, 2 sc in first st, sc in next 2 sts, sc2tog, turn. (5 sc)
Rows 14–15: Repeat Rows 11–12.
Row 16: Repeat Row 13.
Rows 17–18: Repeat Rows 11–12. Fasten off.
Check: The top row is now 25 sts wide (three 5-st prongs with two 5-st gaps), and the body measures 3.6 in (9.1 cm) x 3.0 in (7.6 cm). You should have 18 windows: 4 in each foot, 3 in each arm and 4 in the peak. Weave in the ends.
Window Blossoms (Make 18)
Work each blossom with the RS facing you.
Rnd 1: Join color with sl st in the first of the 3 skipped sts at the bottom of a window. Ch 1. Sc in same st and in next 2 skipped sts. Work 2 sc around the dc post at the side, then 3 sc around the ch-3 at the top, then 2 sc around the other dc post. Join. (10 sc)
Rnd 2: *Ch 2, sk 1 sc, sl st in next sc; repeat from * 4 more times. (5 petals) Fasten off.
Color map (two-window rows listed outer to inner):
- Foot A: Row 2 coral, Row 5 teal, Row 8 coral and teal
- Foot B: Row 2 teal, Row 5 coral, Row 8 teal and coral
- Left Arm: Row 11 teal, Row 14 coral, Row 17 teal
- Middle Peak: Row 11 coral and teal, Row 14 coral, Row 17 teal
- Right Arm: Row 11 coral, Row 14 teal, Row 17 coral
Total: 9 coral and 9 teal.
Flowers and Leaves
Teal flower:
- Rnd 1: With cream, make a magic ring, ch 1, work 5 sc in the ring and join. Fasten off. (5 sc)
- Rnd 2: Join teal in any sc, ch 1, work 2 sc in each sc and join. (10 sc)
- Rnd 3: *(Hdc, dc, hdc) in next st, sl st in next st; repeat from * 4 more times. (5 petals)
Leave a 6 in (15.2 cm) tail. The flower is 0.9 in (2.3 cm) across.
Coral flower: Work as for the teal flower, but in Rnd 3 make each petal (hdc, 2 dc, hdc). The flower is 1.1 in (2.8 cm) across.
Leaf (make 3): With green, ch 6. Sc in 2nd ch from hook, hdc, dc, hdc, sc in last ch, ch 2 for the tip. Working along the other side of the foundation ch: sc, hdc, dc, hdc, sc. Join. Each leaf is 0.6 in (1.5 cm) long.
Border
Border gauge: Work 1 sc in each sc row-end and 2 sc in each dc row-end.
Each 8-row edge has 3 dc rows and 5 sc rows, so it takes 11 sc. Each notch wall gives its last row-end to the sc3tog at the bottom of the notch, so it takes 10 sc.
Rnd 1: With RS facing, join cream in the outer corner st of the Left Arm top. Ch 1, then work around the letter:
- Prong tops (3): 3 sc in corner st, sc in next 3, 3 sc in corner st. (9 each, 27 total)
- Foot bottoms (2): Work in the foundation ch loops: 3 sc in corner ch, sc in next 3, 3 sc in corner ch. (9 each, 18 total)
- Outer left and outer right edges: 11 sc along arm Rows 17–10, then 11 sc along foot Rows 9–2. (22 each, 44 total)
- Upper notches (2): 10 sc along Rows 17–11. Then sc3tog over the Row 10 end, the unworked st and the opposite Row 10 end. Then 10 sc along Rows 11–17. (21 each, 42 total)
- Lower notch: 10 sc along Rows 2–8. Then sc3tog over the Row 9 end, the ch-1 loop and the opposite Row 9 end. Then 10 sc along Rows 8–2. (21)
Join. (152 sts: 27 + 18 + 44 + 42 + 21)
Rnd 2: Ch 1, rev sc in each st around. Join and fasten off. (152 sts)
Why the math works: The sc rows are 0.125 in (0.3 cm) tall and the dc rows are 0.25 in (0.6 cm) tall. With 1 sc per sc row and 2 per dc row, the side edges get an even 8 sc per 1 in (2.5 cm), which covers the 1-st steps smoothly. Each 5-st top and bottom edge gets 4 extra corner sts so it turns cleanly. Each sc3tog removes 2 sts at an inside corner, so the notches stay sharp. The two rounds add 0.25 in (0.6 cm) on every side, bringing the body from 3.6 x 3.0 in (9.1 x 7.6 cm) to 4.1 x 3.5 in (10.4 x 8.9 cm).
Final Blocking
- Draw a W template 4.1 in (10.4 cm) x 3.5 in (8.9 cm) on paper.
- Put the template under the letter on your blocking mat.
- Spray until the letter is evenly damp.
- Pin the prong tops and foot bottoms square.
- Pin each notch into a clean V.
- Round out each blossom with a fingertip.
- Let it dry completely.
- Sew on the teal flower over Left Arm Rows 11–13, overlapping the outer edge by 0.25 in (0.6 cm).
- Sew the coral flower below it and to the right, over Rows 7–9, so it slightly overlaps the teal flower.
- Tuck the leaves behind the flowers at the upper left, middle left and lower left, and stitch them from the back.
- Attach the chain to the outer corner of the Left Arm top with a jump ring. Attach the split ring to the other end with the second jump ring.
Final Quality-Control Checklist
- Body measures 3.6 x 3.0 in (9.1 x 7.6 cm) before the border
- Prongs and feet are each 5 sts wide
- All 18 windows are open, with 9 coral and 9 teal blossoms
- Every blossom has 5 even petals
- Both border rounds have 152 sts
- Finished size is 4.1 x 3.5 in (10.4 x 8.9 cm)
- Appliqués are secure, with no stitching showing on the RS
- Jump rings are fully closed
Troubleshooting
- Windows closed up: You worked into the skipped sts. Skip exactly 3 under each ch-3.
- Arm leans the wrong way: The increase always goes on the outer edge.
- Middle Peak twisted: Check that both feet are RS up with their outer edges pointing away from each other.
- Border ruffles: Use a 2.5 mm hook for Rnd 1.
- Notches pucker: Make sure each sc3tog uses exactly 3 spots.
- Flat blossoms: Work Rnd 1 more tightly.
Care
Hand wash in cool water with mild soap, reshape and dry flat. Keep the gold hardware out of the dryer.
Final Notes
Here is the measurement chain. A gauge of 7 sc per 1 in (2.5 cm) gives feet that measure 1.3 x 1.5 in (3.3 x 3.8 cm). The finished body is 3.6 x 3.0 in (9.1 x 7.6 cm), and the 152-st border brings it to 4.1 x 3.5 in (10.4 x 8.9 cm). Check each stage and your W will come out even, ready for its little posy.
Happy crocheting!