

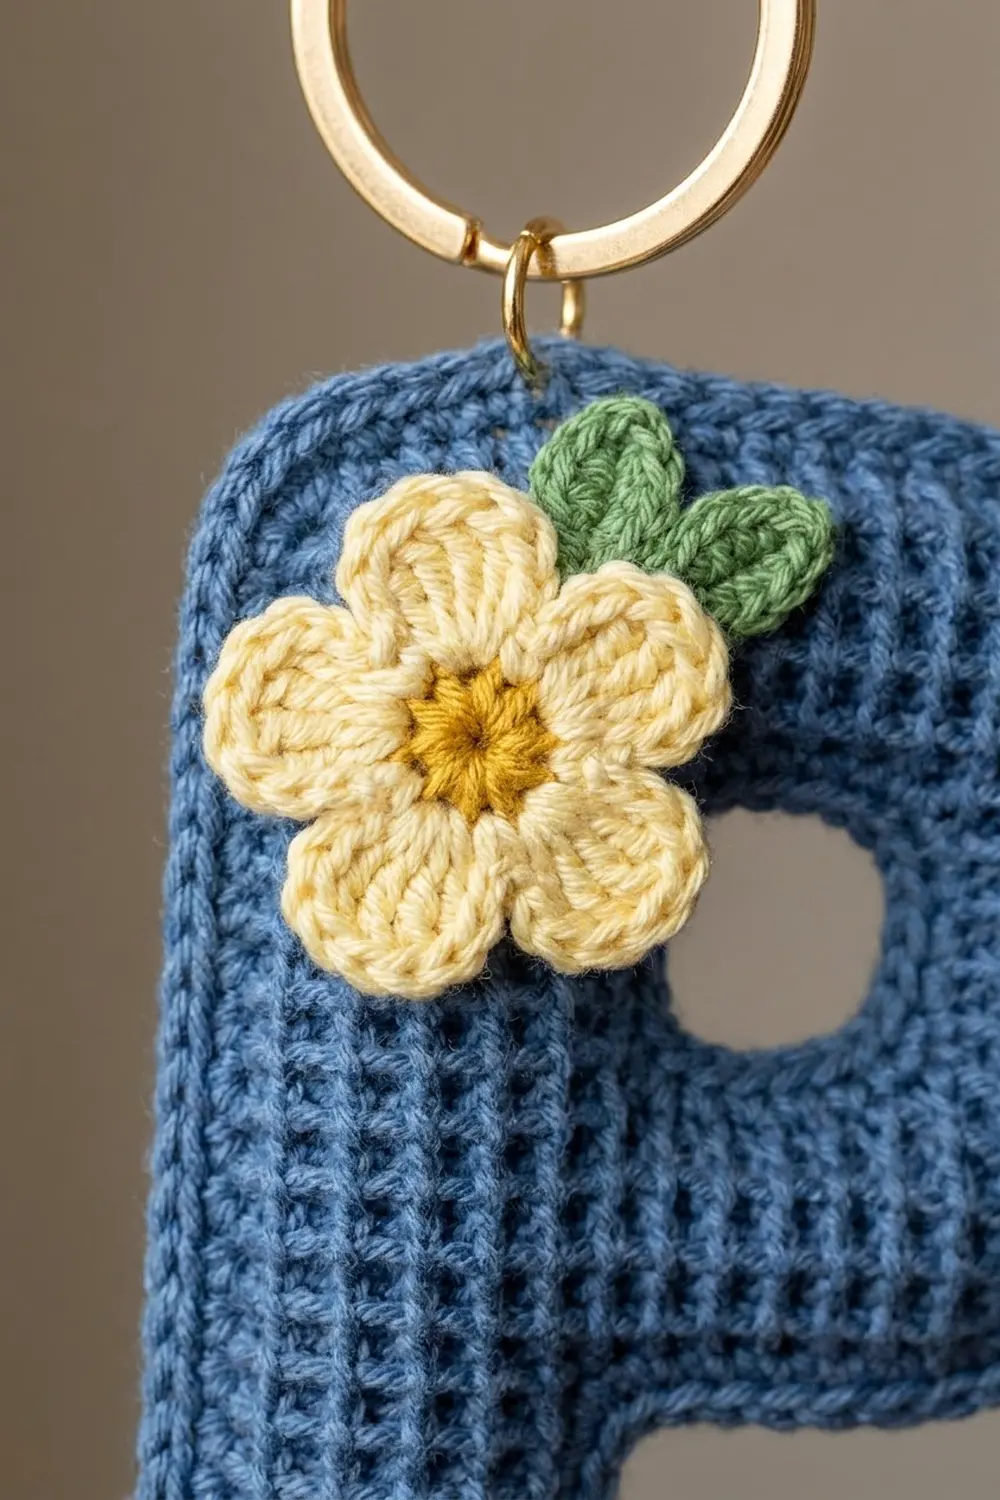
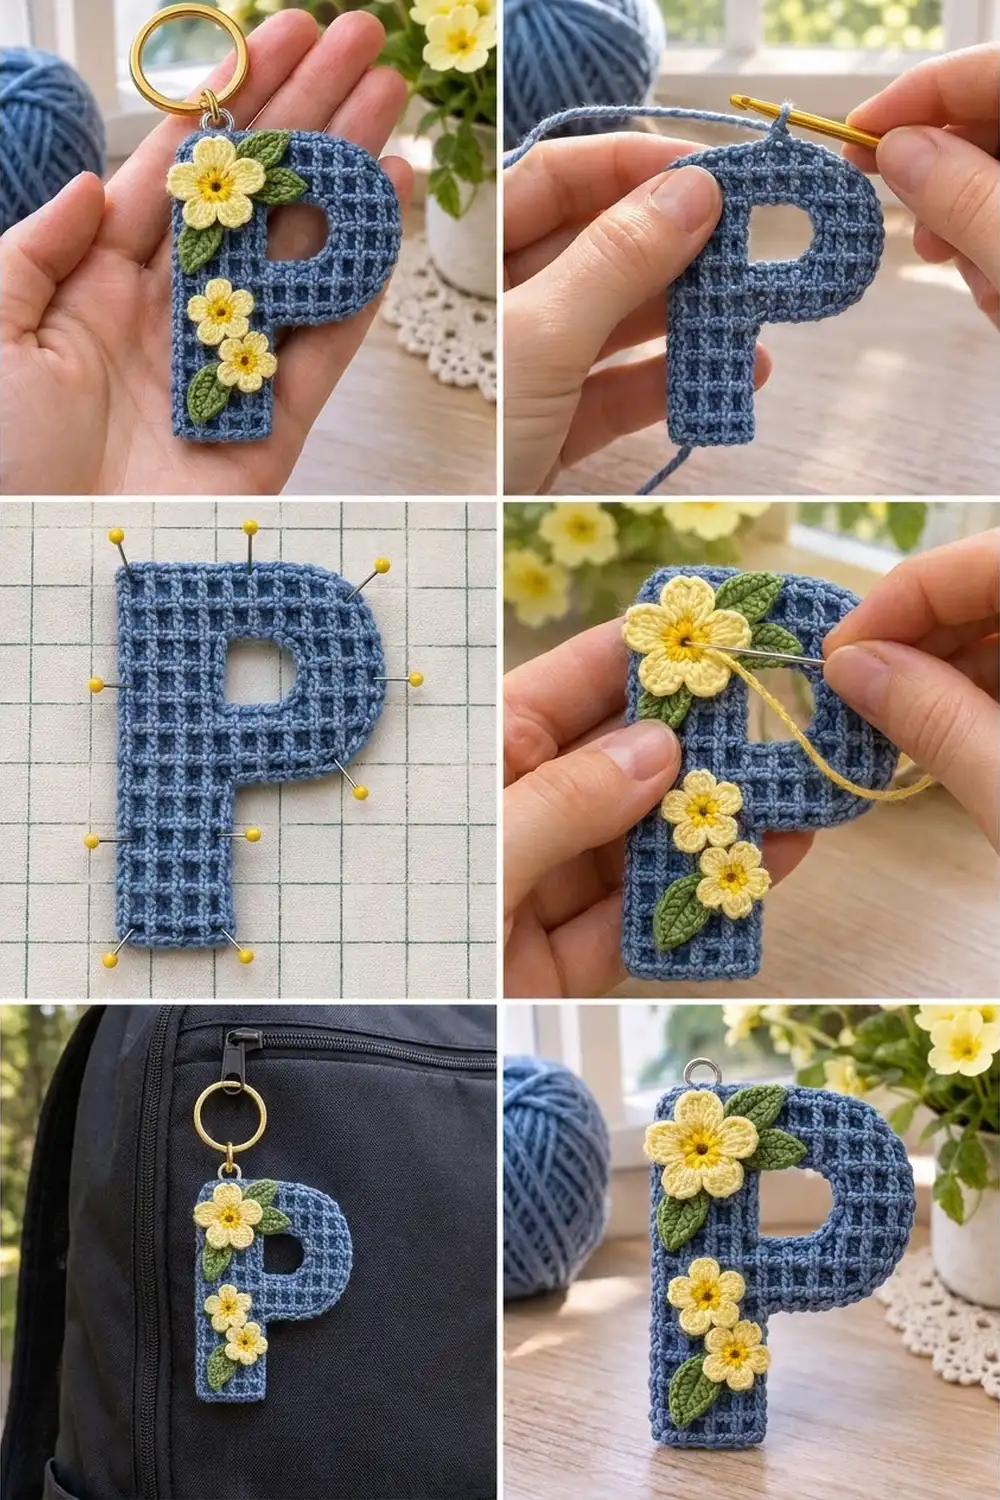
This little letter P keychain has a deep waffle-grid texture in denim blue, with soft yellow primroses and green leaves sewn across the front. It feels sturdy in the hand, holds its shape on a bag zipper, and makes a quick personalized gift.
The palette is simple: denim blue for the letter, pale yellow petals, golden-yellow flower centers and leaf green. The waffle texture gives the letter a woven look, and the flowers add a cottage-garden feel.
This pattern uses US crochet terms. The finished keychain measures 3.25 in (8.3 cm) wide by 4.25 in (10.8 cm) tall, not counting the ring.
You work the letter flat in rows from the bottom of the stem up. You add a chain extension for the bowl, work the two sides of the hole separately, and then join them with a chain bridge across the top. One round of single crochet outlines the whole letter. Finally, you sew on three flowers and three leaves and attach the ring.
Finished Size and Construction
- Finished size: 3.25 in x 4.25 in (8.3 cm x 10.8 cm)
- Skill level: Intermediate (post stitches and simple shaping)
- Terminology: US
- Yarn weight: DK (#3), cotton or cotton blend
- Hooks: 3.5 mm (E-4) for the letter; 2.75 mm (C-2) for the appliqués
- Number of pieces: 1 letter body plus 6 small appliqués (3 flowers, 3 leaves)
- Layout: single letter; nothing to join
- Body size before border: 3.0 in x 4.0 in (7.6 cm x 10.2 cm)
- Stem width: 1.8 in (4.6 cm)
- Hole: 0.6 in x 0.67 in (1.5 cm x 1.7 cm)
- Border depth: 0.125 in (0.3 cm) on every edge
Materials
Choose a smooth DK cotton. Its firm texture shows the waffle cells clearly, and it doesn’t stretch out on a keyring. Avoid fuzzy or very splitty yarns, because post stitches need clean, visible posts.
- Denim blue: 12 g (about 28 m)
- Pale yellow: 3 g (about 7 m)
- Golden yellow: 2 g (about 5 m)
- Leaf green: 2 g (about 5 m)
These quantities include a margin for a gauge test and weaving in ends.
Tools:
– 3.5 mm (E-4) and 2.75 mm (C-2) crochet hooks
– Tapestry needle
– 1 in (2.5 cm) gold-tone split ring
– One 0.25 in (0.6 cm) jump ring
– 2 pairs of flat-nose pliers
– Stitch marker
– Rust-proof pins and a blocking board
Abbreviations (US Terms)
- ch – chain
- sl st – slip stitch
- sc – single crochet
- hdc – half double crochet
- dc – double crochet
- FPdc – front post double crochet
- BPdc – back post double crochet
- st(s) – stitch(es)
- RS / WS – right side / wrong side
Special stitch – standing dc: With a slipknot on the hook, yarn over, insert the hook in the stitch, and complete a dc as usual.
Waffle-grid logic: The letter uses two alternating row types.
- Bar rows (RS rows, odd numbers): every interior st is a FPdc, which makes a raised horizontal band.
- Cell rows (WS rows, even numbers): ridge sts are BPdc, which makes them raised on the RS. The 2 cell sts between ridges are FPdc, which makes them sink on the RS.
The ridge columns sit at the 2nd st from each edge and every 3rd st in between. Every row begins and ends with a plain dc (or an hdc where shaping calls for it).
Turning chain: The ch 2 at the start of a row never counts as a stitch.
Gauge and Checkpoints
Gauge: In waffle grid with the 3.5 mm hook, 20 sts and 12 rows = 4 in (10.2 cm). That works out to 5 sts and 3 rows per inch.
Since this is a single piece, the stem works as your gauge test. Measure flat at each stage without stretching:
- After Row 6: stem 1.8 in wide x 2.0 in tall (4.6 cm x 5.1 cm)
- After Row 8: 3.0 in wide (7.6 cm); 2.67 in tall (6.8 cm)
- After Row 12: 3.0 in x 4.0 in (7.6 cm x 10.2 cm)
- After border: 3.25 in x 4.25 in (8.3 cm x 10.8 cm)
If the stem is wider than 1.9 in (4.8 cm), start again with a 3.25 mm hook. If it is narrower than 1.7 in (4.3 cm), try a 3.75 mm hook. If only the height is off, adjust your yarn-over tension on the post stitches rather than changing the hook.
The Letter Body
Stem (Rows 1–6)
With denim blue and the 3.5 mm hook, ch 11.
Row 1 (RS): Dc in 3rd ch from hook and in each ch across. Turn. (9 sts)
Row 2 (WS, cell): Ch 2, dc in first st, BPdc around next st, FPdc around next 2 sts, BPdc around next st; repeat from * once more, dc in last st. Turn. (9 sts)
Row 3 (RS, bar): Ch 2, dc in first st, FPdc around each of next 7 sts, dc in last st. Turn. (9 sts)
Rows 4–6: Repeat Row 2, Row 3, then Row 2. (9 sts each)
Row 6 ends at the right edge of the stem, as seen from the RS. Don’t turn yet.
Checkpoint: 1.8 in x 2.0 in (4.6 cm x 5.1 cm).
Bowl Base (Rows 7–8)
At the end of Row 6, ch 8 for the bowl extension, then turn.
Row 7 (RS, bar): Hdc in 3rd ch from hook (this rounds the bottom-right corner). Dc in each of next 5 ch (6 new sts). FPdc around each of next 8 stem sts, dc in last st. Turn. (6 + 8 + 1 = 15 sts)
Row 8 (WS, cell): Ch 2, dc in first st, BPdc around next st, FPdc around next 2 sts, BPdc around next st; repeat from * 3 more times, dc in last st. Turn. (1 + 1 + 12 + 1 = 15 sts)
Checkpoint: 3.0 in (7.6 cm) wide. The ridge columns of the stem should line up with the ridges in Row 8.
Hole Sides (Rows 9–10, worked separately)
Number the Row 8 sts from the right edge, as seen from the RS: positions 1–3 are the right column, 4–6 are the hole, and 7–15 are the stem side.
Right column, Row 9 (RS): Ch 2, dc in first st, FPdc around next st, dc in next st. Turn. (3 sts)
Right column, Row 10 (WS): Ch 2, dc in first st, BPdc around next st, dc in last st. (3 sts)
Pull up a long loop and put it on a stitch marker. Don’t cut the yarn. Leave positions 4–6 unworked.
Stem side, Row 9 (RS): Join a separate strand of denim blue with a standing dc in position 7. FPdc around each of next 7 sts, dc in last st. Turn. (9 sts)
Stem side, Row 10 (WS): Ch 2, dc in first st, BPdc around next st, FPdc around next 2 sts, BPdc around next st; repeat from * once more, dc in last st. (9 sts)
Fasten off the separate strand and leave a 4 in (10.2 cm) tail.
Top Bar (Rows 11–12)
Put the live loop back on the hook and turn so the RS is facing.
Row 11 (RS, bar): Ch 2, dc in first st, FPdc around next 2 sts (right column done). Ch 3 for the bridge over the hole. FPdc around first stem st (position 7) and around each of next 7 sts, dc in last st. Turn. (1 + 2 + 3 ch + 8 + 1 = 15 sts)
Row 12 (WS, cell): Ch 2, dc in first st, BPdc around next st, [FPdc around next 2 sts, BPdc around next st] twice, FPdc around next st, dc in each of next 3 ch, FPdc around next st, BPdc around next st, hdc in last st (this rounds the top-right corner). (15 sts)
Don’t fasten off.
Checkpoint: 3.0 in x 4.0 in (7.6 cm x 10.2 cm). The hole should measure 0.6 in x 0.67 in (1.5 cm x 1.7 cm).
Flowers and Leaves
Use the 2.75 mm hook for all appliqués.
Large Flower (make 1)
With golden yellow, make a magic ring.
Rnd 1: Ch 1, 10 sc in ring, sl st to first sc. (10 sts) Fasten off.
Rnd 2: Join pale yellow in any st. (Hdc, 2 dc, hdc) in next st, sl st in next st; repeat from * 4 more times. (5 petals, 25 sts) Fasten off, leaving a 10 in (25.4 cm) tail.
The flower measures about 1.1 in (2.8 cm) across.
Small Flower (make 2)
With golden yellow, make a magic ring.
Rnd 1: Ch 1, 5 sc in ring, sl st to first sc. (5 sts) Fasten off.
Rnd 2: Join pale yellow. (Sc, hdc, dc, hdc, sc) in next st; repeat from * 4 more times, sl st to first sc. (5 petals, 25 sts) Fasten off, leaving a 10 in (25.4 cm) tail.
Each small flower measures about 0.8 in (2.0 cm) across.
Leaf (make 3)
With green, ch 7.
- Sc in 2nd ch from hook, hdc in next ch, dc in next 2 ch, hdc in next ch, sc in last ch. (6 sts)
- Ch 2 for the tip.
- Working along the opposite side of the chain: sc in first ch, hdc in next ch, dc in next 2 ch, hdc in next ch, sc in last ch. (6 sts)
- Sl st to first sc. (12 sts plus ch-2 tip)
Fasten off, leaving a 10 in (25.4 cm) tail. Each leaf is about 1 in (2.5 cm) long. If you like, backstitch a center vein with a split strand of green.
Border
Border gauge:
– Along stitch tops and chain loops: 1 sc per st, which matches 5 sts per inch.
– Along row ends: 5 sc per 3 dc rows. Three rows measure 1 in, so this also gives exactly 5 sc per inch.
Because both directions match, the edge lies flat with no ruffling or cupping.
Rnd 1: With denim blue still on the hook from Row 12 and the RS facing, ch 1. Work around the outline in this order:
- Top edge (Row 12 sts): 2 sc in the hdc (rounded corner), sc in each of next 13 sts, 3 sc in last st (sharp corner). (18 sc)
- Left side (12 row ends): 2 sc in next row end, 2 sc in next row end, 1 sc in next row end; repeat from * 3 more times. (20 sc)
- Bottom of stem (9 foundation ch): 3 sc in first ch, sc in each of next 7 ch, 3 sc in last ch. (13 sc)
- Stem right side (6 row ends): Work the same row-end repeat twice. (10 sc)
- Bowl base (6 free loops of the extension chain): sc in each of next 5 loops, 2 sc in last loop below the hdc (rounded corner). (7 sc)
- Bowl right side (6 row ends): Work the same row-end repeat twice. (10 sc)
Sl st to first sc. (18 + 20 + 13 + 10 + 7 + 10 = 78 sc) Fasten off.
Why the math works:
– Every straight edge gets 1 sc for each existing stitch or chain loop.
– Every row-end edge gets 5 sc per 3 rows.
– The sharp outer corners get 2 extra sc each.
– The rounded corners get 1 extra sc each, so they curve instead of squaring off.
– The inner corner gets no extra stitches, so it stays crisp.
Hole edging (optional): Join denim blue inside the hole and work loose sl sts around it: 3 along the bottom, 3 up each side and 3 along the bridge. (12 sl st) This tidies the edge without shrinking the opening.
Final Blocking
- Weave in all body ends along the WS posts.
- Mist the letter lightly with water until it is damp, not soaked.
- Pin it RS up on a gridded board to 3.25 in x 4.25 in (8.3 cm x 10.8 cm).
- Pin the stem edges straight and the sharp corners square. Ease the two right-hand bowl corners into smooth curves.
- Push the waffle cells gently into a square grid with your fingertips.
- Let it dry completely, then unpin.
- Steam the flowers and leaves flat separately, shaping the petals with your fingers.
- Sew on the appliqués:
- Tuck one leaf behind the upper right of the large flower and one behind its lower left.
- Sew the large flower at the top-left corner, over Rows 10–12.
- Sew the small flowers diagonally on the stem: one over Rows 5–6 toward the left, the other over Rows 3–4 toward the right.
- Tuck the last leaf below them on the left, over Rows 1–3.
- Open the jump ring with the pliers. Pass it through the center sc of the top-left 3-sc corner, add the split ring, and close the jump ring fully.
Final Quality-Control Checklist
- Rows 1–6 have 9 sts; Rows 7–12 have 15 sts across the full width.
- Ridge columns line up vertically from Row 1 to Row 12.
- The hole is clean, with no stray chain across its middle.
- The border has 78 sc, and the hole edging (if used) has 12 sl st.
- The finished letter measures 3.25 in x 4.25 in (8.3 cm x 10.8 cm).
- The appliqués are stitched through their centers and petal tips and don’t lift when flicked.
- The jump ring is fully closed, with no gap.
Troubleshooting
- Fabric is curling: Your post stitches are too tight. Loosen your yarn-overs or go up 0.25 mm in hook size.
- Ridges drift sideways: You worked a FPdc where a BPdc belongs. Count from the edge dc: the ridges are at positions 2, 5, 8, 11 and 14.
- Hole is too short: Make sure you worked both Rows 9 and 10 separately before the bridge.
- Border ruffles: Use only 5 sc per 3 row ends, not 2 sc per row end all the way.
- Rounded corners look square: Check that you used hdc (not dc) at the end of Rows 7 and 12, and re-block those corners.
- Flowers cup: Steam them flat before sewing.
Care
Hand wash in cool water, press out the water in a towel, and dry flat. Keep the keychain away from heat to protect the ring finish.
Final Notes
The measurement chain is short and easy to check:
- A 9-stitch stem measures 1.8 in x 2.0 in (4.6 cm x 5.1 cm).
- The 15-stitch bowl brings the body to 3.0 in x 4.0 in (7.6 cm x 10.2 cm).
- A 78-stitch border adds 0.125 in (0.3 cm) on every edge, for 3.25 in x 4.25 in (8.3 cm x 10.8 cm).
If each checkpoint matches, the letter and its primroses will come out as planned. Happy crocheting!