

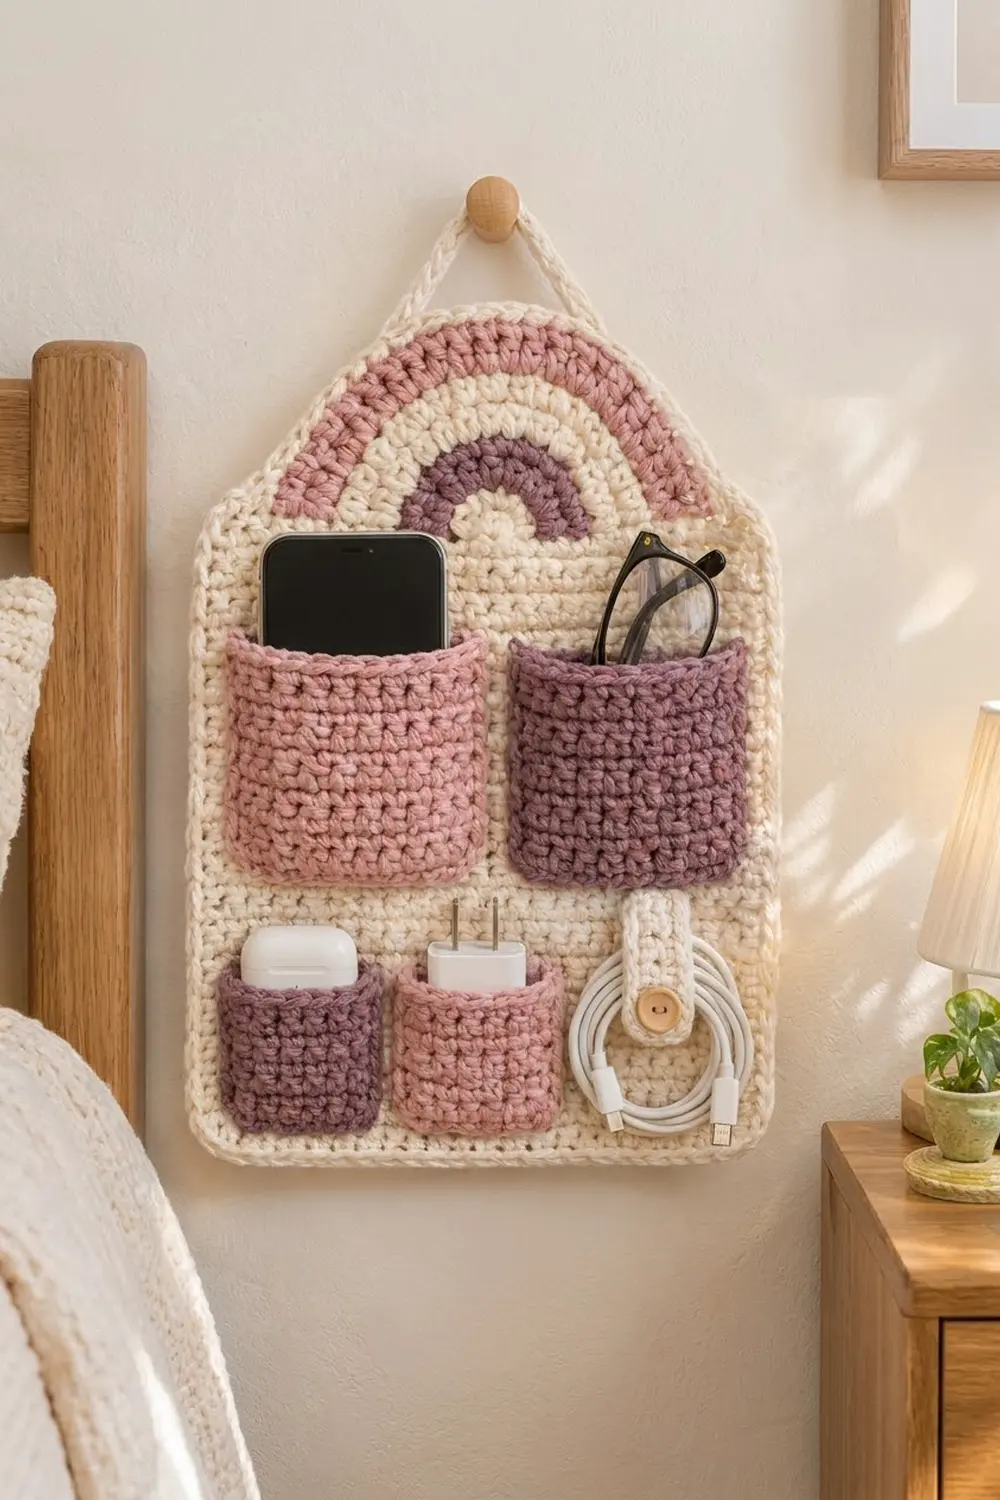
The Rainbow Nook Bedside Wall Organizer gives the small things that collect on your nightstand one tidy home: phone, glasses, earbuds, charger, and cable. It hangs from a single peg or hook and lies flat against the wall.
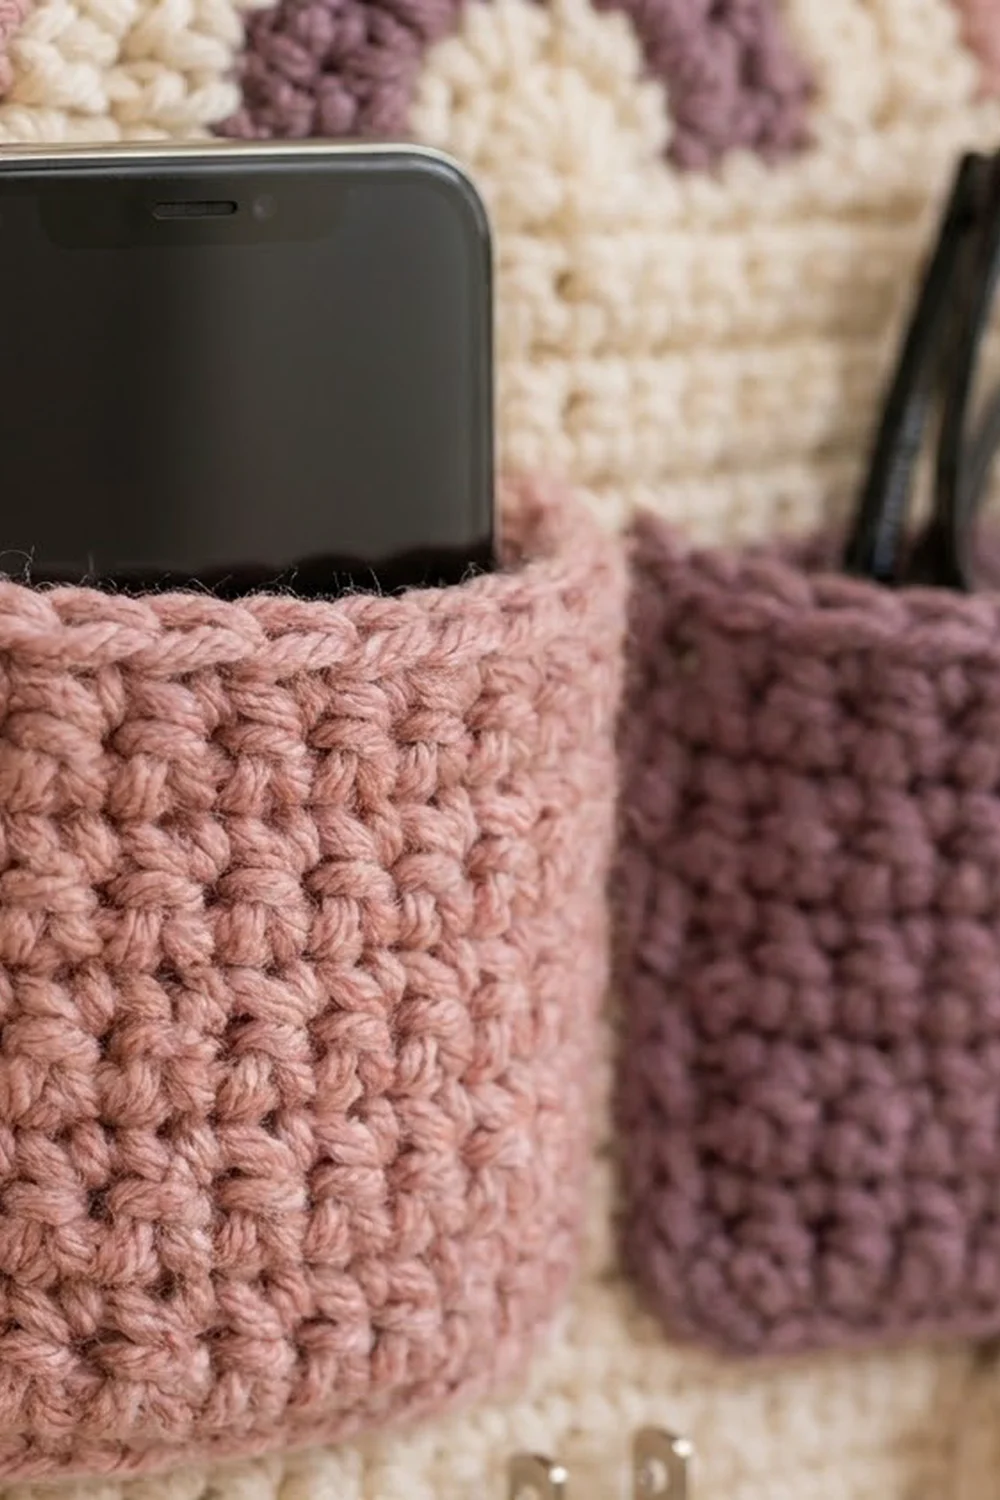
The colors are soft and warm. A cream backing frames a half-circle rainbow in mauve, cream, and dusty pink. Below it are two large pockets, two small pockets, and a cream cable strap with a wooden button. The style is cozy Scandinavian boho. Dense stitches give the pockets enough structure to hold a phone upright.
This pattern uses US crochet terms. The finished organizer measures 11 in (27.9 cm) wide by 15 in (38.1 cm) tall, not counting the hanging cord.
First you work the backing flat in rows and shape the angled shoulders with decreases. Then you make the rainbow as a striped half circle, followed by the four pockets and the strap. You sew everything onto the backing, add a two-round border, and finish with a slip-stitch cord for hanging.
Finished Size and Construction
- Finished size: 11 in (27.9 cm) wide x 15 in (38.1 cm) tall
- Skill level: Easy+ (simple stitches, careful sewing)
- Terminology: US crochet terms
- Yarn weight: worsted (#4)
- Hook: 5.0 mm (H-8)
- Number of pieces: 8 (backing, rainbow, 2 large pockets, 2 small pockets, strap, hanging cord)
- Layout: rainbow on top; 2 large pockets in the middle row; 2 small pockets and the strap in the bottom row
- Backing size before border: 10 in (25.4 cm) x 14 in (35.6 cm)
- Large pocket: 4.25 in (10.8 cm) x 4.5 in (11.4 cm)
- Small pocket: 2.75 in (7.0 cm) x 3 in (7.6 cm)
- Rainbow: 8 in (20.3 cm) wide x 4 in (10.2 cm) tall
- Border depth: 0.5 in (1.3 cm) per side
Materials
Choose a smooth worsted cotton or cotton blend. Cotton shows the stitches clearly and makes firm pockets that won’t sag under a phone. Acrylic also works, but the pockets will be a little softer. The amounts below assume about 200 m per 100 g.
- Cream: 120 g / 240 m (backing, rainbow bands, strap, cord, border)
- Dusty pink: 30 g / 60 m (large pocket, small pocket, outer rainbow band)
- Mauve: 25 g / 50 m (large pocket, small pocket, inner rainbow band)
Tools:
– 5.0 mm (H-8) crochet hook
– Tapestry needle
– Stitch markers
– Rustproof pins or clips
– One wooden button, 0.875 in (2.2 cm)
– Measuring tape
– Blocking mat and spray bottle or steamer
– Optional: piece of felt, 10 in (25.4 cm) x 14 in (35.6 cm), for a stiffer back
All quantities include about 15 percent extra for swatching and sewing tails.
Abbreviations (US Terms)
- ch: chain
- sc: single crochet
- sl st: slip stitch
- sc2tog: single crochet 2 together
- rev sc: reverse single crochet
- st(s): stitch(es)
- RS / WS: right side / wrong side
sc2tog: Insert hook in next st, yarn over, pull up a loop; insert hook in following st, yarn over, pull up a loop; yarn over, pull through all 3 loops.
rev sc (crab stitch): Working from left to right (right-handed), insert hook in the next st to the right, pull up a loop, yarn over, pull through both loops. This makes the rounded, corded edge.
Gauge and Checkpoints
Gauge: 16 sc and 18 rows = 4 in (10.2 cm) in sc worked in rows. That is 4 sts and 4.5 rows per inch.
Make one large pocket first to test your gauge. It is a real piece of the organizer and a good-size swatch. Before the edging, it should measure 3.75 in (9.5 cm) wide by 4 in (10.2 cm) tall.
Checkpoints:
– Large pocket before edging: 3.75 in (9.5 cm) x 4 in (10.2 cm)
– Backing after Row 51: 10 in (25.4 cm) x 11.33 in (28.8 cm)
– Backing after Row 63: 10 in (25.4 cm) x 14 in (35.6 cm), top edge 7 in (17.8 cm)
– Rainbow after Row 18: 8 in (20.3 cm) across the flat edge
If your piece is too big, go down a hook size. If it is too small, go up a hook size. Keep your tension firm, because loose stitches make pockets gape and stretch.
Backing Panel
With cream, ch 41.
Row 1 (RS): Sc in 2nd ch from hook and in each ch across. (40 sc)
Rows 2–51: Ch 1, turn, sc in each st across. (40 sc)
Checkpoint: 10 in (25.4 cm) wide x 11.33 in (28.8 cm) tall.
Shoulder Shaping
Row 52: Ch 1, turn, sc2tog, sc in each st to last 2 sts, sc2tog. (38 sc)
Row 53: Ch 1, turn, sc in each st across. (38 sc)
Rows 54–63: Repeat Rows 52–53 five more times. (28 sc after Row 63)
That makes 6 decreases on each side over 12 rows. Each shoulder slants in 1.5 in (3.8 cm) over about 2.67 in (6.8 cm) of height. Fasten off.
Checkpoint: 14 in (35.6 cm) tall, 10 in (25.4 cm) wide at the base, 7 in (17.8 cm) across the top.
Rainbow Appliqué
The rainbow is one half circle worked in turning rows. You change color for each band. Every row adds 3 sts.
With cream, make a magic ring.
Row 1: Ch 1, 3 sc in ring. Pull ring closed. (3 sc)
Row 2: Ch 1, turn, 2 sc in each st. (6 sc)
Row 3: Ch 1, turn, sc in next st, 2 sc in next st 3 times. (9 sc)
Row 4: Ch 1, turn, sc in next 2 sts, 2 sc in next st 3 times. (12 sc)
Change to mauve.
Rows 5–8: Continue the pattern, working 1 more sc before each increase in every row. Row 5: 15 sc. Row 6: 18 sc. Row 7: 21 sc. Row 8: 24 sc.
Change to cream.
Rows 9–12: Continue the same way. Row 9: 27 sc. Row 10: 30 sc. Row 11: 33 sc. Row 12: 36 sc.
Change to dusty pink.
Rows 13–18: Continue the same way. Row 13: 39 sc. Row 14: 42 sc. Row 15: 45 sc. Row 16: 48 sc. Row 17: 51 sc. Row 18: 54 sc.
General rule: in Row n, work sc in next (n − 2) sts, 2 sc in next st 3 times, for 3n sc.
Fasten off and leave a long pink tail. The flat edge has 18 row ends on each side of the ring, so 36 rows = 8 in (20.3 cm). Checkpoints: about 3.5 in (8.9 cm) across after Row 8, about 5.25 in (13.3 cm) after Row 12, and 8 in (20.3 cm) after Row 18.
Pockets
All four pockets are flat rectangles in sc with one round of edging in the same color.
Large Pocket (make 2: 1 pink, 1 mauve)
Ch 16.
Row 1: Sc in 2nd ch from hook and in each ch across. (15 sc)
Rows 2–18: Ch 1, turn, sc in each st. (15 sc)
Checkpoint: 3.75 in (9.5 cm) x 4 in (10.2 cm).
Edging round: Ch 1, do not turn.
– Top: 3 sc in first st, sc in next 13 sts, 3 sc in last st. (19 sc)
– First side: Work 16 sc evenly down the side, skipping the row ends of Rows 6 and 12. (16 sc)
– Bottom: Working along the foundation chain, 3 sc in first ch, sc in next 13 ch, 3 sc in last ch. (19 sc)
– Second side: Work 16 sc up the side the same way. (16 sc)
Sl st to first sc. (70 sc)
Finished: 4.25 in (10.8 cm) x 4.5 in (11.4 cm). Fasten off and leave a 24 in (61.0 cm) tail for sewing.
Small Pocket (make 2: 1 pink, 1 mauve)
Ch 10.
Row 1: Sc in 2nd ch from hook and in each ch across. (9 sc)
Rows 2–11: Ch 1, turn, sc in each st. (9 sc)
Checkpoint: 2.25 in (5.7 cm) x about 2.5 in (6.4 cm).
Edging round: Ch 1.
– Top: 3 sc in first st, sc in next 7, 3 sc in last. (13 sc)
– First side: 10 sc, skipping the row end of Row 6. (10 sc)
– Bottom: 3 sc in first ch, sc in next 7 ch, 3 sc in last ch. (13 sc)
– Second side: 10 sc. (10 sc)
Sl st to first sc. (46 sc)
Finished: 2.75 in (7.0 cm) x 3 in (7.6 cm). Leave a 16 in (40.6 cm) tail.
Cable Strap
With cream, ch 6.
Row 1: Sc in 2nd ch from hook and in each ch across. (5 sc)
Rows 2–24: Ch 1, turn, sc in each st. (5 sc)
Row 25 (buttonhole): Ch 1, turn, sc in next 2 sts, ch 1, skip 1 st, sc in next 2 sts. (4 sc, 1 ch-sp)
Row 26: Ch 1, turn, sc in next 2 sts, sc in ch-sp, sc in next 2 sts. (5 sc)
Row 27: Ch 1, turn, sc in each st. (5 sc) Fasten off.
The strap measures 1.25 in (3.2 cm) x 6 in (15.2 cm). Sew the wooden button to the RS, centered, 2.5 in (6.4 cm) up from the foundation edge.
Hanging Cord
With cream, ch 41. Sl st in the back bump of the 2nd ch from hook and in each ch across. (40 sl st) The cord measures about 10 in (25.4 cm). Fasten off and leave tails at both ends.
Make All Pieces
Cream: 1 backing, 1 strap, 1 cord, plus rainbow Rows 1–4 and 9–12
Dusty pink: 1 large pocket, 1 small pocket, plus rainbow Rows 13–18
Mauve: 1 large pocket, 1 small pocket, plus rainbow Rows 5–8
Layout on the backing (RS facing, measured before the border):
+-----------[ RAINBOW 8 in ]-----------+
|                                      |
| [ LARGE PINK ]     [ LARGE MAUVE ]   |
|                                      |
| [SM MAUVE] [SM PINK]    [STRAP]      |
+--------------------------------------+
Joining
Lay the backing RS up and pin each piece in place. All distances are measured on the backing before the border:
- Small pockets: Bottom edges sit 0.75 in (1.9 cm) up from the bottom. The mauve pocket starts 0.5 in (1.3 cm) from the left edge. Leave a 0.5 in (1.3 cm) gap, then place the pink pocket.
- Strap: Center it 2 in (5.1 cm) from the right edge, foundation edge at the top and button facing out. The top of the strap sits 4 in (10.2 cm) up from the bottom.
- Large pockets: Bottom edges sit 4.5 in (11.4 cm) up. Place each one 0.5 in (1.3 cm) from its side edge, with a 0.5 in (1.3 cm) gap between them. The tops land at 9 in (22.9 cm).
- Rainbow: The flat edge sits 9.5 in (24.1 cm) up, centered with 1 in (2.5 cm) of backing on each side. The top of the arch is 0.5 in (1.3 cm) below the top edge.
Method: Whipstitch each pocket along its sides and bottom. Go through the outer loop of the edging round and the backing stitch directly under it. Work stitch to stitch: one edging stitch, then one backing stitch. Leave the pocket tops open, and add 2 extra stitches at each top corner to secure it.
Whipstitch all the way around the rainbow’s curved edge and flat edge. Sew only the top 1 in (2.5 cm) of the strap to the backing. The free end folds up behind and around the coiled cable, then buttons onto the strap’s own button. When it’s unbuttoned, the strap hangs a little below the bottom edge. That’s expected.
Tension: Pull the yarn snug enough to lie flat, but not tight. Tight sewing puckers the backing.
Size checkpoint: The backing should still measure 10 in (25.4 cm) x 14 in (35.6 cm) and lie flat.
Border
The border goes around the backing only. Border gauge: 4 sc per inch along every edge, the same as the stitch gauge.
With RS facing, join cream at the top right corner.
Round 1: Ch 1.
– Top edge: 2 sc in first st, sc in next 26 sts, 2 sc in last st. (30 sc)
– Left diagonal: 1 sc in each of the 12 row ends of Rows 63–52. (12 sc)
– Left side: Working in the row ends of Rows 51–1, sc in next 8 row ends, skip 1 5 times, then sc in last 6 row ends. (46 sc)
– Bottom: 3 sc in first ch, sc in next 38 ch, 3 sc in last ch. (44 sc)
– Right side: Work as the left side. (46 sc)
– Right diagonal: 12 sc in row ends. (12 sc)
Sl st to first sc. (190 sc)
Round 2: Ch 1, rev sc in each st around. (190 rev sc) Sl st to the first st and fasten off.
Why the math works:
– Top: 28 sts plus 1 extra at each of the 2 corners gives 30.
– Diagonals: Each is about 3 in (7.6 cm) long, and 12 sc at 4 per inch fills that exactly.
– Long sides: Each is 11.33 in (28.8 cm). 46 sc works out to just over 4 per inch, which is within gauge.
– Bottom: 40 sts plus 2 extras at each corner gives 44.
Because every edge matches gauge, the border lies flat without ruffling or cupping. The two rounds add 0.5 in (1.3 cm) per side, so 10 x 14 in becomes 11 in (27.9 cm) x 15 in (38.1 cm).
Cord: Sew one cord end to the WS of each top corner. The cord makes a peak about 3.25 in (8.3 cm) above the top edge.
Final Blocking
- Lightly mist the organizer with water, or hold a steamer just above it without touching.
- Lay it RS up on a blocking mat.
- Pin it to 11 in (27.9 cm) x 15 in (38.1 cm), keeping the shoulders straight and even.
- Smooth the rainbow into an even curve.
- Square the pocket corners with your fingers. Tuck a folded cloth into each pocket to hold the openings open.
- Let it dry completely.
- Optional: whipstitch the felt to the WS, inside the border.
Final Quality-Control Checklist
- Finished size is 11 in (27.9 cm) x 15 in (38.1 cm)
- Both shoulders slant the same amount
- Border Round 1 has 190 sc and the crab edge is even
- Rainbow is centered and the bands are even
- Pocket tops are level and open
- Pocket corners are secure
- Button passes through the buttonhole easily
- Cord is centered and the organizer hangs straight
- All tails are woven in on the WS
Troubleshooting
- Backing curls: Your tension is too tight. Block firmly or go up a hook size.
- Rainbow ruffles: Go down a hook size for the rainbow only, or steam it flat.
- Rainbow cups: Check that each row has 3n stitches.
- Pockets gape: Sew the sides closer together, or go down a hook size for the pockets.
- Border waves: Recount each side against the counts above.
- Organizer tilts: Re-sew the cord ends so they sit at the same depth.
Care
Spot clean, or hand wash in cool water and lay flat to dry. Remove any electronics and the felt backing before washing.
Final Notes
Here is how the measurements connect. Gauge is 4 sts and 4.5 rows per inch. The backing is 40 sts x 63 rows, which gives 10 in (25.4 cm) x 14 in (35.6 cm). The pockets and rainbow fit inside that with 0.5 in (1.3 cm) margins. The 190-stitch border brings the finished organizer to 11 in (27.9 cm) x 15 in (38.1 cm). If you check each stage as you go, the finished piece will match.
Happy crocheting!