

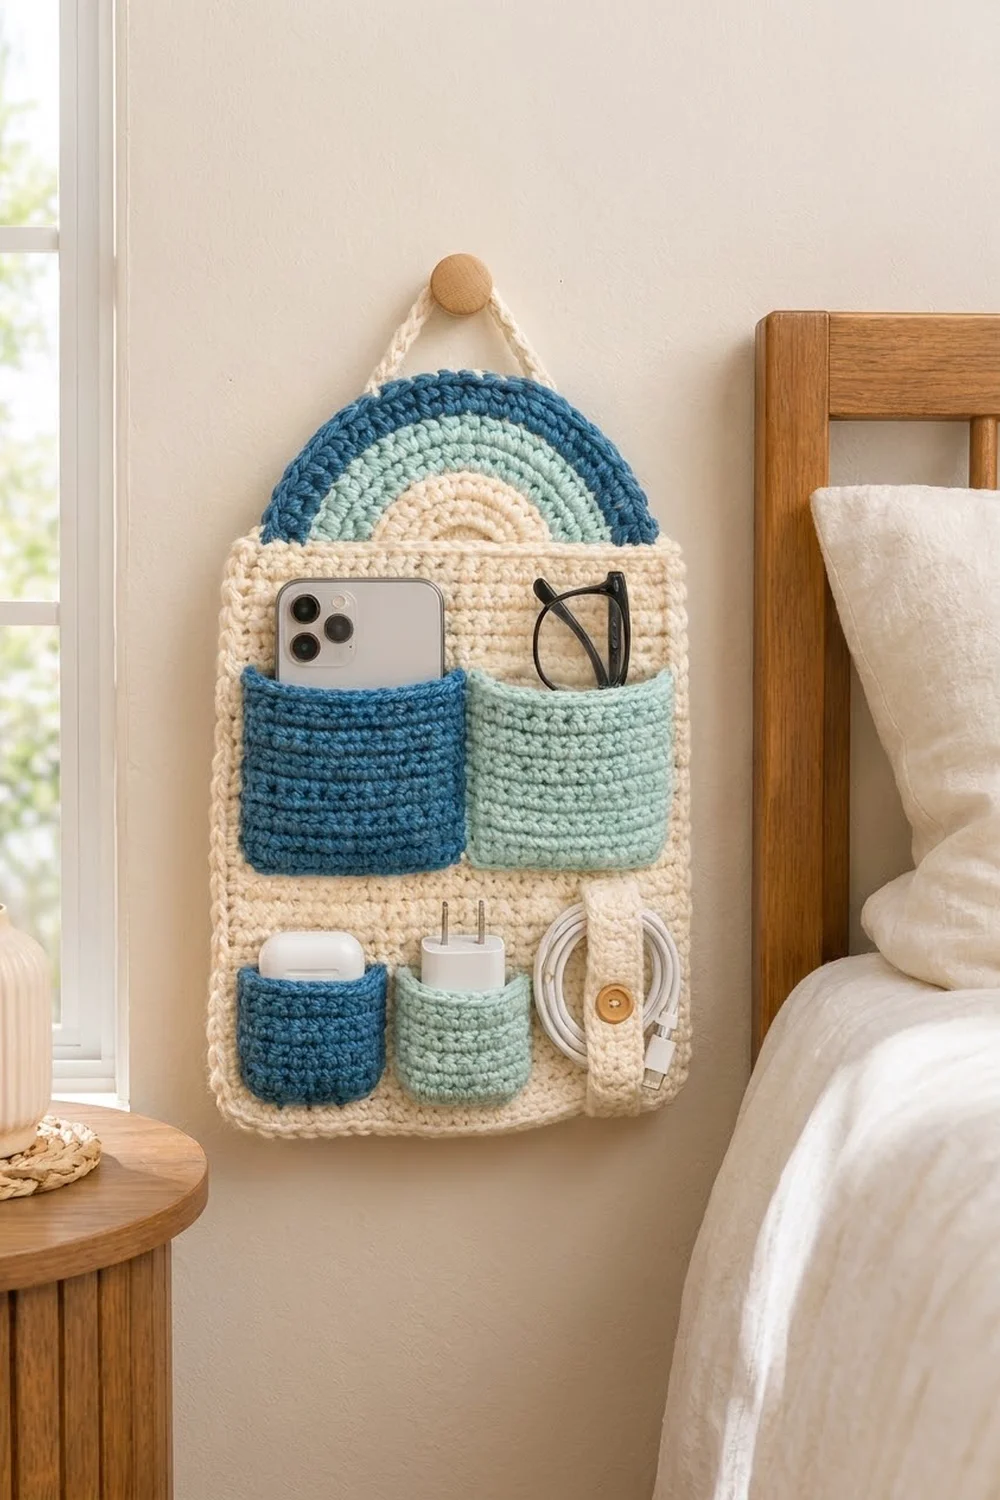
The Rainbow Nook is a wall-hanging pocket organizer for the space beside your bed. It holds your phone, glasses, earbuds, charger cube and cable in one place. The rainbow arch at the top also makes it a small piece of wall decor.
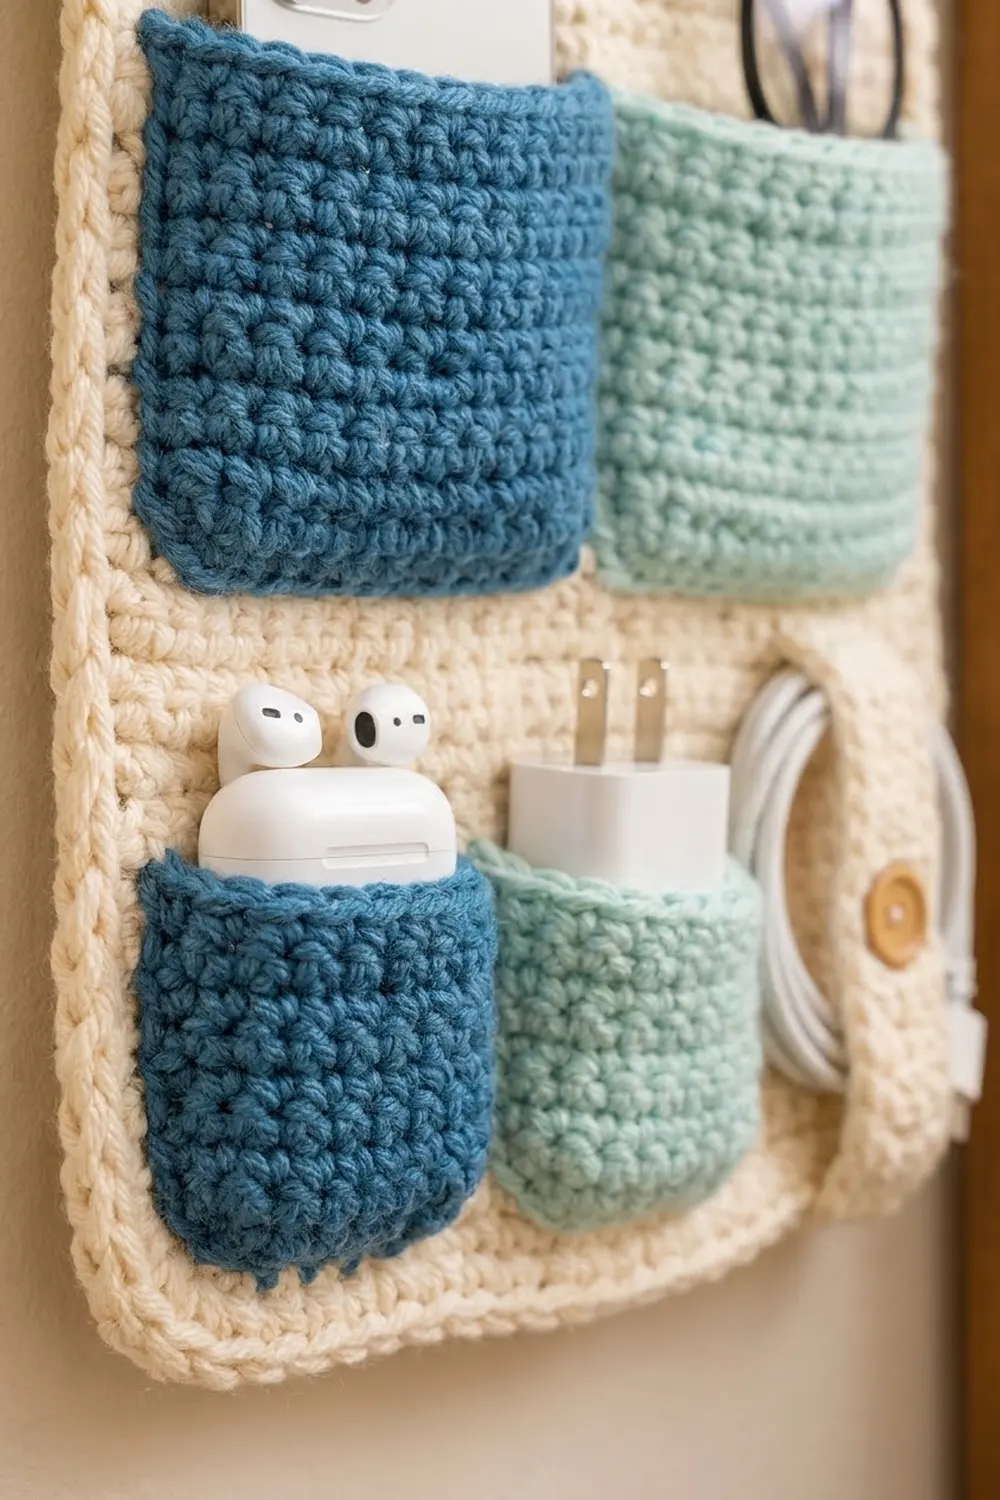
The palette is soft and calm: a cream background, a mint accent and a deep denim blue. The large pockets alternate blue and mint, the small cup pockets repeat the same order, and a cream cable strap with a wooden button finishes the lower right corner.
This pattern uses US crochet terms. With the border, the finished panel is 10 in wide x 13 in tall (25.4 cm x 33.0 cm). Including the arch, the total height is about 16.33 in (41.5 cm).
You’ll make eight separate pieces: a backing panel, a half-circle rainbow, two large pockets, two small pockets, a cable strap and a hanging cord. You add a two-round border to the panel, then sew the other pieces onto it in a planned layout.
Finished Size and Construction
- Finished panel size: 10 in x 13 in (25.4 cm x 33.0 cm)
- Total height with arch: about 16.33 in (41.5 cm)
- Skill level: Easy+
- Terminology: US
- Yarn weight: Aran / heavy worsted (#4)
- Hook: 5 mm (H-8)
- Number of pieces: 8 (1 panel, 1 arch, 2 large pockets, 2 small pockets, 1 strap, 1 cord)
- Layout: arch at the top, 2 large pockets side by side, then 2 small pockets plus a cable strap
- Panel size before border: 9 in x 12 in (22.9 cm x 30.5 cm)
- Border depth: 0.5 in (1.3 cm), in 2 rounds
- Arch size: 8.67 in (22.0 cm) wide x 4.33 in (11.0 cm) tall
Materials
Pick a smooth cotton or cotton-blend Aran yarn. It holds its shape under the weight of a phone and doesn’t pill much. The quantities below assume about 170 m per 100 g.
- Cream: 120 g (about 204 m), for the panel, border, arch center, strap, cord and sewing
- Deep blue: 40 g (about 68 m), for the large pocket, small pocket and outer arch band
- Mint: 35 g (about 60 m), for the large pocket, small pocket and middle arch band
All quantities include a margin of roughly 15%.
Tools:
– 5 mm (H-8) crochet hook
– Tapestry needle
– 12 locking stitch markers
– One wooden button, 0.75 in (1.9 cm)
– Sewing thread or cream yarn for the button
– Blocking mat and rustproof pins
– Measuring tape
– A small wall peg or hook
Abbreviations (US Terms)
- ch – chain
- sl st – slip stitch
- sc – single crochet
- hdc – half double crochet
- sk – skip
- st(s) – stitch(es)
- inc – 2 sts in the same st
- RS – right side
- rev sc – reverse single crochet (crab stitch)
Special stitch: reverse sc. Work from left to right (right-handed). Insert the hook into the next st to the right, yarn over, pull up a loop, then yarn over and pull through both loops. It makes the twisted, rope-like edge seen on the panel.
Gauge and Checkpoints
- Single crochet: 16 sts x 16 rows = 4 in (10.2 cm)
- Half double crochet: 16 sts x 12 rows = 4 in (10.2 cm)
Before starting the panel, make one large pocket as your test piece. It should measure 4 in x 4 in (10.2 cm x 10.2 cm). If it does, your gauge is correct and the pocket is finished.
Checkpoints:
– Large pocket: 4 in x 4 in (10.2 cm x 10.2 cm)
– Panel after Row 4: 9 in (22.9 cm) wide
– Panel after Row 48: 9 in x 12 in (22.9 cm x 30.5 cm)
– Arch after Row 9: 6 in (15.2 cm) across
– Arch after Row 13: 8.67 in (22.0 cm) across
– Panel after border: 10 in x 13 in (25.4 cm x 33.0 cm)
If the test pocket is bigger than 4 in (10.2 cm), go down half a hook size. If it is smaller, go up half a size. Change the hook, not the stitch counts, so every placement below still lines up.
Backing Panel (Cream)
You work the panel from the bottom up. Increases in Rows 2–4 shape the rounded bottom corners. Ch 1 at the start of a row never counts as a stitch.
Foundation: Ch 31.
Row 1: Sc in 2nd ch from hook and in each ch across, turn. (30 sts)
Row 2: Ch 1, inc in first st, sc in next 28 sts, inc in last st, turn. (32 sts)
Row 3: Ch 1, inc in first st, sc in next 30 sts, inc in last st, turn. (34 sts)
Row 4: Ch 1, inc in first st, sc in next 32 sts, inc in last st, turn. (36 sts)
Checkpoint: the panel measures 9 in (22.9 cm) across.
Rows 5–48: Ch 1, sc in each st across, turn. (36 sts)
Don’t fasten off. Go straight on to the border.
Checkpoint: 9 in x 12 in (22.9 cm x 30.5 cm). Each row is 0.25 in (0.6 cm) tall, so 48 rows = 12 in.
Panel Border
The border has the same gauge as the panel: 1 sc per stitch or per row-end, which works because the panel’s stitches and rows are both 4 per inch.
Round 1 (RS, cream): Ch 1. Work along the top edge (Row 48): 3 sc in the first st, sc in the next 34 sts, 3 sc in the last st. Top: 40 sts, including the 3-sc group at each top corner.
- Left side: sc in each row-end from Row 47 down to Row 1. 47 sts
- Bottom: working into the foundation chain, inc in the first ch, sc in the next 28 ch, inc in the last ch. 32 sts
- Right side: sc in each row-end from Row 1 up to Row 47. 47 sts
- Sl st to the first sc. (166 sts total: 40 + 47 + 32 + 47)
Round 2: Ch 1, rev sc in each st around, then sl st to the first st. (166 sts) Fasten off.
Why the math works:
– The top edge has 36 stitches of panel width. The 2 extra stitches in each corner group turn the corner without pulling it in.
– Each side has exactly 1 sc per row, which matches 4 rows per inch to 4 sts per inch, so the sides lie flat.
– The bottom gets just 2 small increases because the corners are already rounded.
– Each round adds 0.25 in (0.6 cm) per side: 9 in + 0.5 in + 0.5 in = 10 in (25.4 cm), and 12 in + 0.5 in + 0.5 in = 13 in (33.0 cm).
Rainbow Arch
You work the arch flat in turned rows of hdc. Row n always has 4 × n sts. Ch 2 at the start of a row never counts as a stitch. Change colors on the last yarn-over of the row before.
Row 1 (cream): Make a magic ring. Ch 2, then 4 hdc into the ring. Pull the ring closed and turn. (4 sts)
Row 2: Ch 2, inc in each st, turn. (8 sts)
Row 3: Ch 2, hdc in next st, inc in next st 4 times, turn. (12 sts)
Rows 4–13: Ch 2, hdc in the next (row number minus 2) sts, inc in next st 4 times, turn. On Row 4, for example, that is hdc in next 2, inc. On Row 13 it is hdc in next 11, inc.
| Row | Color | Stitch count |
|---|---|---|
| 4 | cream | 16 |
| 5 | cream | 20 |
| 6 | mint | 24 |
| 7 | mint | 28 |
| 8 | mint | 32 |
| 9 | mint | 36 |
| 10 | deep blue | 40 |
| 11 | deep blue | 44 |
| 12 | deep blue | 48 |
| 13 | deep blue | 52 |
Checkpoints:
– After Row 5, the cream center is 1.67 in (4.2 cm) in radius.
– After Row 9, the arch is 6 in (15.2 cm) across, so the radius is 3 in (7.6 cm).
– After Row 13, the arch is 8.67 in (22.0 cm) across and 4.33 in (11.0 cm) tall.
On Rows 8 and 12, you can stagger the increases to keep the curve round: start each repeat with a single increase and then the hdcs. Fasten off and leave a 12 in (30.5 cm) tail.
Large Pockets (Make 2: 1 Deep Blue, 1 Mint)
Foundation: Ch 17.
Row 1: Sc in 2nd ch from hook and in each ch across, turn. (16 sts)
Rows 2–16: Ch 1, sc in each st across, turn. (16 sts)
Fasten off and leave a 24 in (61.0 cm) tail. Checkpoint: 4 in x 4 in (10.2 cm x 10.2 cm).
Small Pockets (Make 2: 1 Deep Blue, 1 Mint)
Foundation: Ch 11.
Row 1: Sc in 2nd ch from hook and in each ch across, turn. (10 sts)
Row 2: Ch 1, inc in first st, sc in next 8 sts, inc in last st, turn. (12 sts)
Rows 3–12: Ch 1, sc in each st across, turn. (12 sts)
Fasten off and leave a 20 in (50.8 cm) tail. Checkpoint: 3 in (7.6 cm) wide x 3 in (7.6 cm) tall, with rounded lower corners.
Cable Strap (Cream)
Foundation: Ch 5.
Row 1: Sc in 2nd ch from hook and in each ch across, turn. (4 sts)
Rows 2–16: Ch 1, sc in each st, turn. (4 sts)
Row 17 (buttonhole): Ch 1, sc in first st, ch 2, sk 2 sts, sc in last st, turn. (2 sc + 1 ch-2 space)
Row 18: Ch 1, sc in first st, 2 sc in the ch-2 space, sc in last st, turn. (4 sts)
Rows 19–20: Ch 1, sc in each st, turn. (4 sts)
Fasten off. Checkpoint: 1 in (2.5 cm) x 5 in (12.7 cm).
Hanging Cord (Cream)
Foundation: Ch 61.
Row 1: Sc in the back bump of the 2nd ch from hook and of each ch across. (60 sts)
Fasten off. Checkpoint: 15 in (38.1 cm).
Make All Pieces
| Color | Pieces |
|---|---|
| Cream | 1 panel with border, 1 strap, 1 cord (plus the arch center) |
| Deep blue | 1 large pocket, 1 small pocket (plus the outer arch band) |
| Mint | 1 large pocket, 1 small pocket (plus the middle arch band) |
Placement grid. With the RS facing, number the panel stitches 1–36 from left to right and the panel rows 1–48 from the bottom up. “L” means large pocket, “S” means small pocket.
Rows 47–48+ : [      RAINBOW ARCH (sts 1–36, centered)      ]
Rows 39–46  : [            open cream (phone/glasses)       ]
Rows 23–38  : [m][ L blue 2–17 ][gap 18–19][ L mint 20–35 ][m]
Rows 17–22  : [                 open cream                  ]
Rows 5–16   : [m][S blue 2–11][12–13][S mint 14–23][..][strap 31–34][35–36]
Rows 1–4    : [          margin (strap base at rows 2–3)    ]
Joining (Sewing On the Pieces)
Before sewing, pin every piece in place and check the layout against the grid. Use the long tails and whip-stitch through both loops of the edge stitch on the pocket and one full stitch of the panel. Never sew through to the back of the panel.
Large pockets:
– Stitch-to-stitch: each pocket’s 16 foundation sts sit on 16 panel sts in Row 23.
– Each pocket’s 16 row-ends sit on panel Rows 23–38.
– Sew the sides and bottom, and leave the top open.
– Blue goes on sts 2–17 and mint on sts 20–35. That gives a 1-st (0.25 in / 0.6 cm) margin at each side and a 2-st (0.5 in / 1.3 cm) gap in the middle.
Small pockets:
– Each pocket is 12 sts wide but sits on a footprint of only 10 panel sts: 2.5 in (6.4 cm).
– Ease the extra 2 sts in evenly as you sew. That extra fabric is what makes the cup shape that holds the earbud case.
– Blue goes on sts 2–11 and mint on sts 14–23.
– The pockets cover Rows 5–16, with the rounded bottoms starting at Row 5.
Strap:
– Sew strap Rows 1–2 flat onto panel Rows 2–3 over sts 31–34. The rest stays free.
– Sew the button onto the panel at Row 18, centered between sts 32 and 33.
– Loop the coiled cable over the button area, bring the strap up over it, and button the strap closed.
Arch:
– Center the arch across the top so it sits about 0.17 in (0.4 cm) in from each side of the panel body.
– Line up its straight edge along the boundary between Rows 46 and 47, so it overlaps the top 0.5 in (1.3 cm) of the panel body.
– Sew along the straight edge, then along the curve wherever it crosses the panel.
– The arch rises 3.33 in (8.5 cm) above the bordered top edge.
Cord:
– On the back, sew 1 in (2.5 cm) of each cord end to the panel just inside the top corners, behind the arch.
Tension advice: Keep your sewing stitches snug but not tight. If the panel puckers, take the stitches out and sew them again more loosely.
Size checkpoint: the panel still measures 10 in x 13 in (25.4 cm x 33.0 cm), with all pockets flat except the two small cups.
Final Blocking
- Weave in all ends along same-color stitches.
- Mist the organizer lightly with water on both sides.
- Pin the panel to 10 in x 13 in (25.4 cm x 33.0 cm) on the blocking mat.
- Pin the arch curve smooth so it stays 8.67 in (22.0 cm) wide.
- Pat the large pockets flat. Stuff the small pockets with a folded cloth so they keep their cup shape.
- Let it dry completely, at least 24 hours.
- Take out the pins and hang it from the peg.
Final Quality-Control Checklist
- Panel is 10 in x 13 in (25.4 cm x 33.0 cm), and the edges are straight
- Border Round 2 has 166 rev sc, with no gaps at the corners
- Arch Row 13 has 52 sts, and the bands go cream, mint, deep blue
- Large pockets are each 16 sts x 16 rows, with level tops
- Small pockets bulge evenly and their bottoms sit on Row 5
- Button passes through the buttonhole easily but stays closed
- Cord hangs evenly, so the organizer hangs level
- No sewing stitches show on the back of the panel
Troubleshooting
- The panel’s sides ripple: you added extra sc in the row-ends. Rework Round 1 with exactly 47 sts per side.
- The arch cups: your hdc is shorter than gauge. Go up half a hook size for the arch only.
- The arch ruffles: you have too many increases. Count every row against the table.
- The phone won’t fit: you sewed the large pocket inside the stitch edge. Sew through the outermost loops.
- The organizer tilts on the wall: move one cord end until the panel hangs level.
- The button slips out: sew a smaller button, or tighten Row 18.
Care
Hand wash in cool water with mild soap, press out the water in a towel, and dry flat, reshaping to the blocked size. Take out the wooden button before washing if you can.
Final Notes
Every measurement in the pattern follows from the stitch gauge. In single crochet, 16 sts x 16 rows equals 4 in (10.2 cm), so the test pocket is 4 in x 4 in (10.2 cm x 10.2 cm). The panel body is 36 sts x 48 rows, or 9 in x 12 in (22.9 cm x 30.5 cm). The 166-st border adds 0.5 in (1.3 cm) on every side, for a finished panel of 10 in x 13 in (25.4 cm x 33.0 cm). In hdc, the 13-row arch ends at 52 sts and 8.67 in (22.0 cm) wide. If you check each measurement as you go, the pockets, strap and arch will land in the right places.
Happy crocheting!