

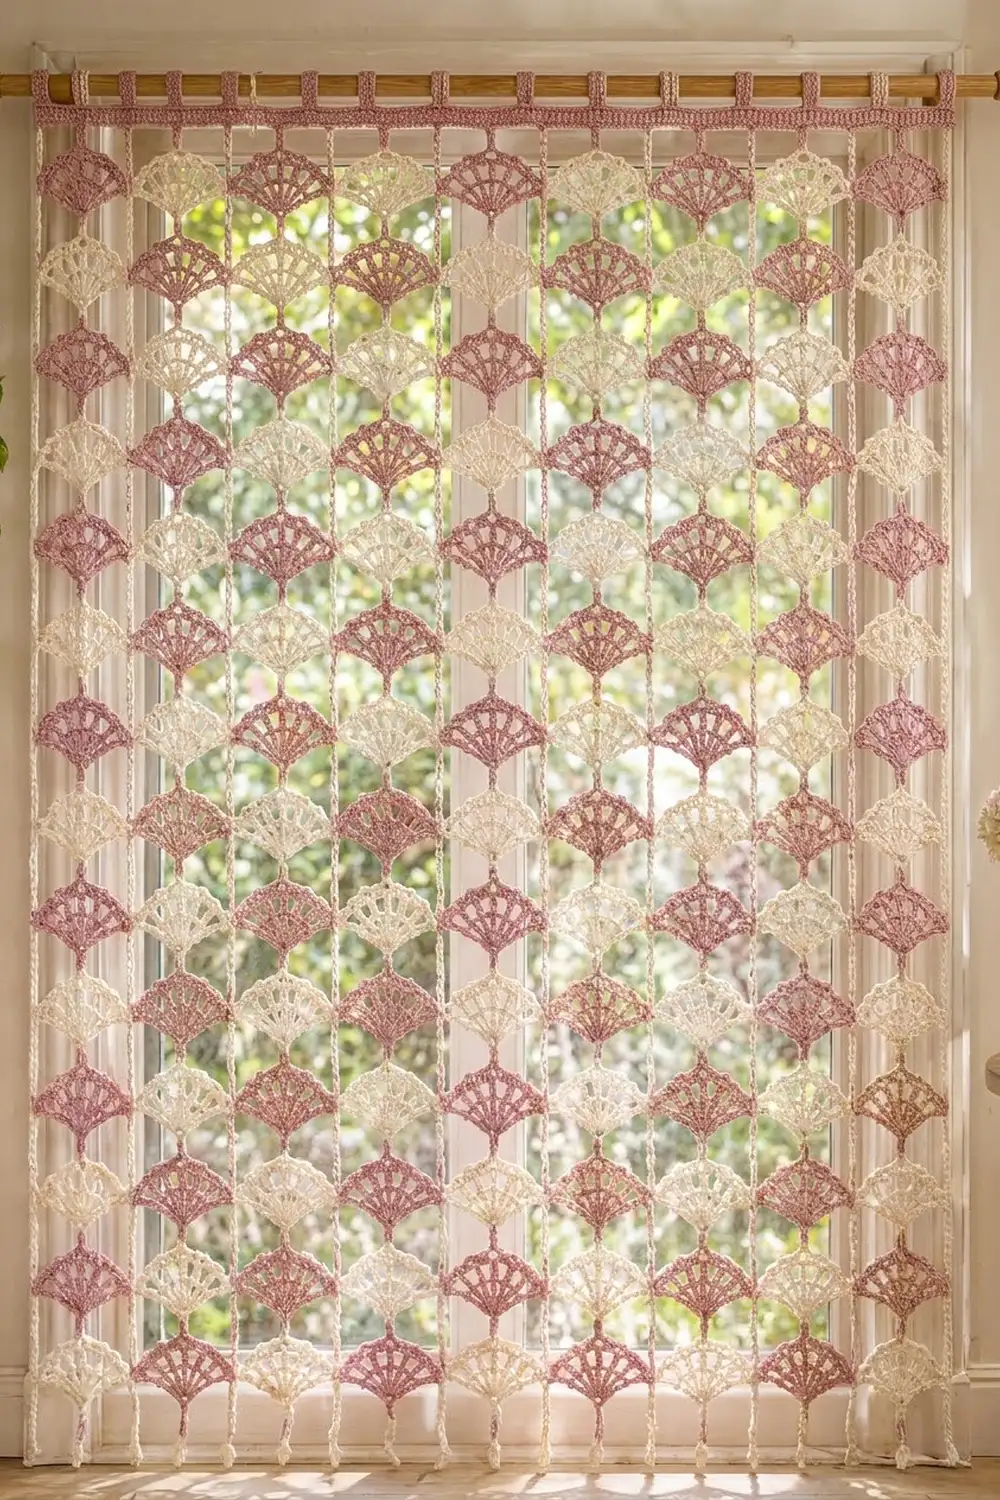
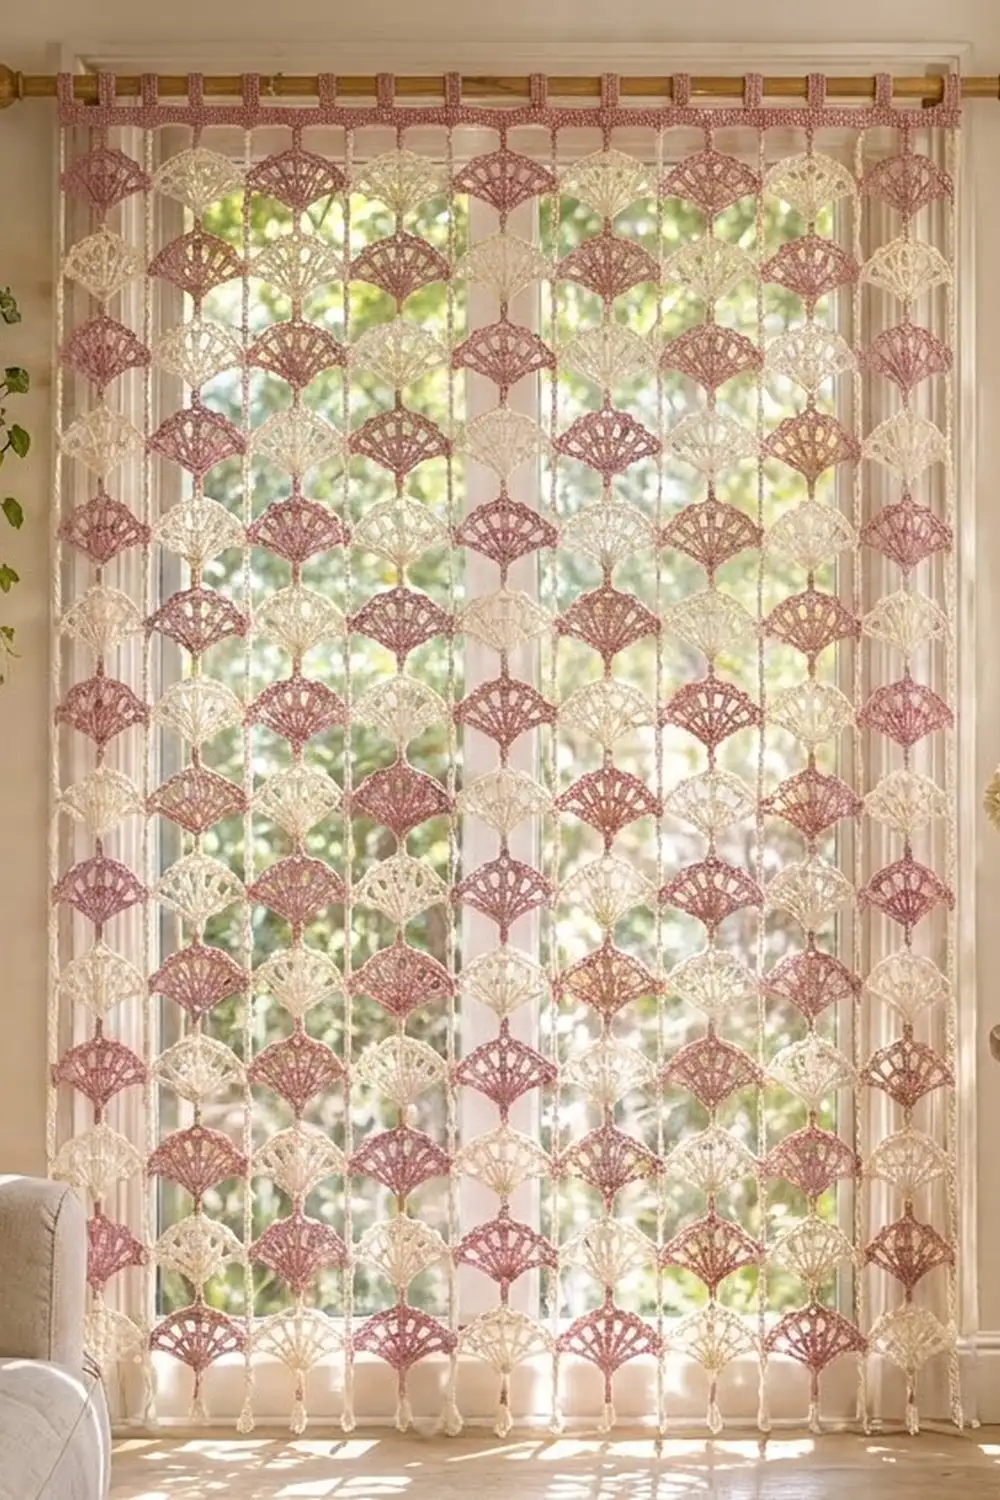
This lace curtain is made of small half-circle fans hanging on light chain strands. Each fan has a solid center, open rays, and a picot scallop edge, so light shows through every motif. Dusty rose and warm cream alternate down each strand, and neighboring strands sit half a step lower or higher, so the fans form a soft staggered pattern.
The style is cottage-romantic. It works well in a sunny window, a doorway, or as a room divider. All instructions use US crochet terms.
The finished curtain measures 54 in (137.2 cm) wide and 76 in (193.0 cm) long from the top of the header band to the end of the longest strand. The rod loops add height above that.
Construction is modular. You crochet 186 small fans, each with a short built-in chain stem. Then you sew each stem to the fan below it to build 12 strands. Finally, you make a pink half double crochet header band, sew the strands to it, and add 12 hanging loops.
Finished Size and Construction
- Finished size: 54 in (137.2 cm) wide × 76 in (193.0 cm) long
- Skill level: Intermediate
- Terminology: US
- Yarn weight: DK / light (#3) cotton
- Hook: 4.0 mm (G-6)
- Number of pieces: 186 fans + 1 header band
- Layout: 12 strands. Odd strands have 16 fans; even strands have 15 fans and are offset by half a step.
- Piece size: one fan is 4.5 in (11.4 cm) wide × 2.5 in (6.4 cm) tall, plus a 2 in (5.1 cm) stem
- Size before border: the strand field is 54 in (137.2 cm) wide × 74 in (188.0 cm) long
- Border (header) depth: 2 in (5.1 cm), plus loops
Materials
Use a smooth mercerized or combed cotton in DK weight, about 115 m per 50 g. Cotton keeps the fans crisp and doesn’t sag much in the sun. Avoid fuzzy blends, because fuzz hides the picots.
- Dusty rose (Color A): 300 g / 690 m. This covers 90 fans, the header band, and the loops.
- Cream (Color B): 300 g / 690 m. This covers 96 fans.
Both quantities include a margin of about 15% for gauge differences and joining tails.
Tools:
– 4.0 mm (G-6) crochet hook
– Tapestry needle
– Stitch markers
– Rustproof pins and a blocking board
– Measuring tape
– Spray bottle
– Small zip bags for sorting finished fans
Abbreviations (US Terms)
- ch – chain
- sl st – slip stitch
- sc – single crochet
- hdc – half double crochet
- dc – double crochet
- tr – treble crochet
- sk – skip
- sp – space
- st(s) – stitch(es)
Special stitch – picot group: (sc, ch 3, sc) all in the same stitch.
Gauge and Checkpoints
Chain gauge: 4 ch = 1 in (2.5 cm). The 8-chain stem must measure 2 in (5.1 cm).
Header gauge: 16 hdc × 12 rows = 4 in (10.2 cm) square.
Make one complete fan before anything else, then check it at each stage:
- After Row 1: about 2 in (5.1 cm) wide across the base
- After Row 2: about 3.25 in (8.3 cm) wide and 1.5 in (3.8 cm) tall
- After Row 3: about 4 in (10.2 cm) wide and 2 in (5.1 cm) tall
- After Row 4: 4.5 in (11.4 cm) wide and 2.5 in (6.4 cm) tall
If your fan is too big, go down to a 3.75 mm hook. If it’s too small, go up to a 4.5 mm hook. A fan that is off by only 0.25 in (0.6 cm) still matters: 16 fans per strand would add or lose 4 in (10.2 cm) of length. Check the stem separately. If the 8 chains measure less than 2 in (5.1 cm), loosen your chains or chain with a hook one size larger.
Fan Motif
Make 90 fans in Color A and 96 fans in Color B. Every fan is worked the same way.
Foundation: Leave an 8 in (20.3 cm) tail. Ch 12, then sl st in the 4th ch from the hook to form a small ring. The first 8 ch now hang from the ring as the stem.
Row 1: Ch 4 (counts as tr). Work 8 tr into the half of the ring opposite the stem, then turn. (9 tr)
The stitches cover only half the ring. This creates the half-circle base and points the stem straight down, away from the fan.
Row 2: Ch 5 (counts as dc + ch 2). Dc in the next tr. Then [ch 2, dc in the next tr] 7 times; the last dc goes into the top of the turning ch-4. Turn. (9 dc, 8 ch-2 sps)
These are the open rays.
Row 3: Ch 1. Sc in the first dc. Then [3 dc in the next ch-2 sp, sc in the next dc] 8 times; the last sc goes into the 3rd ch of the turning ch-5. Turn. (24 dc + 9 sc = 33 sts)
This makes the outer arc of small three-stitch groups.
Row 4 (picot edge): Ch 1. Sc in the first sc. Then [ch 2, picot group in the center dc of the next 3-dc group, ch 2, sc in the next sc] 8 times. (9 sc, 8 picot groups)
Fasten off, leaving a 4 in (10.2 cm) tail, and weave it in.
The 5th sc of Row 4 is the exact center top of the fan. Place a marker there, because the stem from the fan above will be joined to that stitch.
Make All Pieces
Totals:
– Odd strands 1, 3, 5, 7, 9, 11: 16 fans each, starting with Color A at the top. That is 8 A + 8 B per strand.
– Even strands 2, 4, 6, 8, 10, 12: 15 fans each, starting with Color B at the top. That is 8 B + 7 A per strand.
– Color A: 6 × 8 + 6 × 7 = 90 fans
– Color B: 6 × 8 + 6 × 8 = 96 fans
– Total: 186 fans
Sort the fans into 12 bags, one per strand, before joining.
Layout grid. The grid shows the top of the curtain. Each line is one half-step of 2.25 in (5.7 cm), and “|” marks bare chain.
Strand:  1  2  3  4  5  6  7  8  9 10 11 12
step 1:  A  |  A  |  A  |  A  |  A  |  A  |
step 2:  |  B  |  B  |  B  |  B  |  B  |  B
step 3:  B  |  B  |  B  |  B  |  B  |  B  |
step 4:  |  A  |  A  |  A  |  A  |  A  |  A
step 5:  A  |  A  |  A  |  A  |  A  |  A  |
step 6:  |  B  |  B  |  B  |  B  |  B  |  B
... continue alternating down each strand
Joining
Method: Each fan’s stem is sewn to the center top of the fan below it.
- Lay the strand’s fans in order with the points facing down.
- Thread the 8 in (20.3 cm) starting tail of the upper fan’s stem onto a tapestry needle. This tail is at the free end of the stem.
- Pass the tail through both loops of the marked 5th sc on Row 4 of the next fan down. Go through it twice, then weave the tail back up inside the stem chain.
Stitch-to-stitch logic: Always join one stem to one center sc. Don’t join to a picot or a ch-2 space. Joining to the 5th sc keeps each fan perfectly centered under the one above.
Tension: Pull the tail until the last chain of the stem sits flat against the sc, but don’t pull further. Overtightening shortens the 2 in (5.1 cm) stem and makes the strands uneven.
Bottom fans: The stem of the bottom fan on each strand hangs free. Knot the tail at the last chain and weave it into the stem.
Hangers: Join the top fan’s color in the 5th sc of Row 4 of the top fan.
– Odd strands: ch 8, for 2 in (5.1 cm).
– Even strands: ch 17, for 4.25 in (10.8 cm). The extra 9 ch are 2.25 in (5.7 cm), which is exactly half a fan repeat.
Fasten off each hanger, leaving an 8 in (20.3 cm) tail.
That makes 174 stem joins in total: 186 fans minus the 12 bottom fans.
Size checkpoint: Each repeat is 2.5 in (6.4 cm) of fan plus 2 in (5.1 cm) of stem, for 4.5 in (11.4 cm).
– Odd strand: 2 in + 16 × 4.5 in = 74 in (188.0 cm)
– Even strand: 4.25 in + 15 × 4.5 in = 71.75 in (182.2 cm)
Even strands should end 2.25 in (5.7 cm) higher than odd strands. Hang each strand and measure it before attaching it to the header.
Header Band (Border)
Border gauge: 16 hdc = 4 in (10.2 cm), which is 4 hdc per 1 in (2.5 cm). Each strand gets an 18-stitch section, and 18 sts = 4.5 in (11.4 cm), which matches the fan width and the strand spacing.
Use Color A.
Foundation: Ch 218.
Row 1: Hdc in the 3rd ch from the hook and in each ch across. Turn. (216 hdc)
The skipped ch-2 does not count as a stitch.
Rows 2–6: Ch 2 (does not count). Hdc in each st across. Turn. (216 hdc in every row)
Fasten off after Row 6. The band should measure 54 in (137.2 cm) × 2 in (5.1 cm).
Counts per side:
– Bottom edge (foundation): 216 sts = 12 strands × 18 sts
– Top edge (Row 6): 216 sts
– Short ends: 6 rows each
Attaching the strands: Count along the foundation edge and mark these stitches: 9, 27, 45, 63, 81, 99, 117, 135, 153, 171, 189, and 207. Each mark falls on stitch 9 of its 18-st section, so the margins are 8 sts at the left end and 9 sts at the right. Sew each hanger tail through its marked stitch twice and weave it in. Attach the strands in order, 1 through 12.
Hanging loops (Row 6 edge): Make one loop over each strand, 12 in total.
- Join Color A in stitch 8 of a section.
- Ch 18, sk 2 hdc, and sl st in the next hdc (stitch 11). Turn.
- Work 26 sc into the ch-18 loop.
- Sl st in stitch 8 and fasten off.
Each loop is about 5 in (12.7 cm) around. It fits a rod up to 1.25 in (3.2 cm) in diameter.
Why the math works: There are 12 strands, each 18 sts wide, so 12 × 18 = 216 sts. At 4 sts per in, 216 ÷ 4 = 54 in (137.2 cm). No extra stitches are added between strands, so the header is exactly as wide as the strand field.
Final Blocking
- Before joining, mist the fans in batches and pin each one to 4.5 in (11.4 cm) wide. Open each ch-2 ray and pin every picot point. Let them dry completely.
- Block the header band flat to 54 in × 2 in (137.2 cm × 5.1 cm). Pin the edges straight.
- After assembly, hang the curtain on its rod.
- Mist the strands lightly from top to bottom and let gravity straighten the stems.
- Once it’s dry, check that every odd strand reaches 74 in (188.0 cm) below the header. Adjust any short strand by re-tensioning its joins.
Final Quality-Control Checklist
- [ ] All 186 fans measure 4.5 in (11.4 cm) wide and 2.5 in (6.4 cm) tall.
- [ ] Every stem measures 2 in (5.1 cm), which is 8 ch.
- [ ] Every stem is joined to the 5th sc of Row 4 of the fan below.
- [ ] Colors alternate down each strand.
- [ ] Odd strands start with Color A and have 16 fans; even strands start with Color B and have 15 fans.
- [ ] Even-strand hangers are 17 ch and odd-strand hangers are 8 ch.
- [ ] The header has 216 sts in every row and measures 54 in (137.2 cm).
- [ ] The strands are attached at stitches 9, 27, 45 and so on, every 18 sts.
- [ ] There are 12 loops, each with 26 sc.
- [ ] All tails are woven in and secure.
Troubleshooting
- Fan cups instead of lying flat: Your Row 1 tr are too tight. Loosen them or use a larger hook for Row 1 only.
- Fan ruffles: Your Row 3 groups are crowding. Check that you worked exactly 3 dc per ch-2 space.
- Fan leans to one side: You joined the stem off-center. Recount Row 4 and use the 5th sc.
- Strands are different lengths: Your chain tension varies. Measure every stem before joining and remake any that are short.
- Header is narrower than the strand field: Your hdc gauge is too tight. Redo the header with a larger hook; don’t add stitches.
- Picots lose shape: Re-block with firmer pinning, and wet each picot point before pinning it.
- Strands twist: Mist the curtain while it hangs and gently untwist each strand by hand.
Care
Hand wash in cool water with mild soap, roll the curtain in a towel to remove water, and dry it flat or hanging. Don’t wring it or tumble dry it, because that stretches the stems.
Final Notes
Everything in this curtain depends on one measurement chain. A fan 4.5 in (11.4 cm) wide sets the 18-stitch header section. An 8-chain stem of 2 in (5.1 cm) plus a 2.5 in (6.4 cm) fan makes each 4.5 in (11.4 cm) repeat. The 9-chain offset on the even strands creates the brick stagger. Twelve sections of 18 sts give the 216-stitch, 54 in (137.2 cm) header. If you check your fan, your stem, and your header gauge before production, the finished curtain will hang straight and even.
Happy crocheting!