
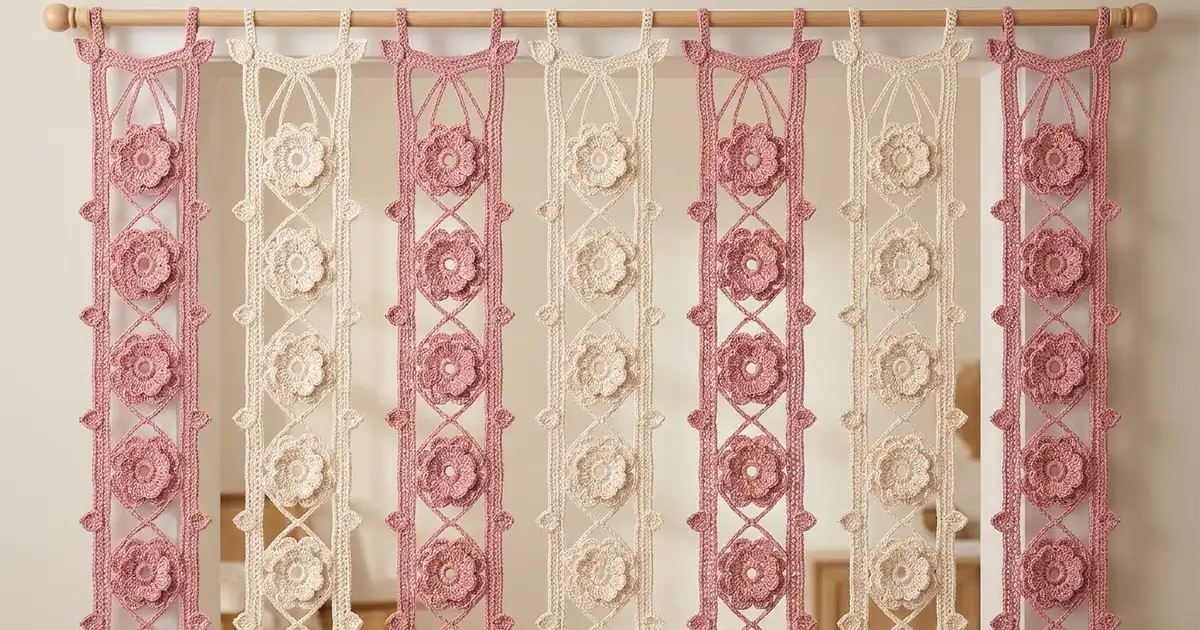
This door curtain is made of seven long lace strips that hang side by side from a rod. Each strip is a column of twelve layered flowers. Slim chain cords link the flowers, lattice lines cross between them, and a frame with a small leaf in every gap runs down both edges.
The colors alternate: four strips are dusty rose pink and three are soft cream, with pink at both ends. Each flower has an open center ring, eight front petals, and eight larger petals behind them. The curtain is light and romantic, and you can see through it and walk through it.
The pattern uses US crochet terms. One finished strip is 3.75 in (9.5 cm) wide and 76.25 in (193.7 cm) long, measured from the top of the hanging loop to the bottom edge. Hung with 1.25 in (3.2 cm) gaps, the seven strips span 33.75 in (85.7 cm).
Each flower takes five rounds. In the last round you join it to the flower above with a slip-stitch cord. Two border rounds then add the lattice, the outer frame and the leaves. The strips stay separate, and each one hangs from its own loop.
Finished Size and Construction
- Finished strip size: 3.75 in (9.5 cm) x 76.25 in (193.7 cm)
- Full curtain: 7 strips, 33.75 in (85.7 cm) wide with 1.25 in (3.2 cm) gaps
- Skill level: Intermediate
- Terminology: US
- Yarn weight: DK / light worsted (#3) cotton
- Hook: 3.5 mm (E-4)
- Number of pieces: 84 flowers (48 pink, 36 cream) forming 7 separate strips
- Layout: 7 vertical strips of 12 flowers each, alternating pink and cream
- Piece size: one flower is 3.25 in (8.3 cm) across
- Size before border: 3.25 in (8.3 cm) x 76 in (193.0 cm) per strip
- Border depth: 0.25 in (0.6 cm) on each side and at the bottom
Materials
Use a smooth mercerized cotton or cotton blend in DK weight, about 113 m per 50 g. Cotton gives crisp petals and hangs straight. Avoid stretchy acrylics, because a long strip can grow under its own weight.
- Color A, dusty rose pink: 350 g (791 m) for 4 strips
- Color B, cream: 250 g (565 m) for 3 strips
These quantities include a margin of about 15 percent for your test piece and tension differences.
Tools: 3.5 mm (E-4) hook, tapestry needle, scissors, stitch markers, measuring tape, rust-proof pins, blocking mats, spray bottle, and a curtain rod or tension rod.
Abbreviations (US Terms)
- ch: chain
- sl st: slip stitch
- sc: single crochet
- hdc: half double crochet
- dc: double crochet
- tr: treble crochet
- sp: space
- st(s): stitch(es)
- RS / WS: right side / wrong side
Special stitch: Leaf
- Ch 7. Starting in the 2nd ch from hook and working toward the base, work sc, hdc, dc, dc, hdc, sc (6 sts).
- Rotate. Working in the free loops on the other side of the same chain, work sc, hdc, dc, dc, hdc, sc (6 sts).
- Sl st in the skipped tip ch.
- Sl st 6 down the center of the leaf, between the two sides, back to the base. These slip stitches form the vein and bring you back to the frame.
A finished leaf is about 1.25 in (3.2 cm) long.
Gauge and Checkpoints
Before starting a full strip, make two flowers and join them with a cord (see Joining). This test piece checks every measurement the pattern relies on.
- Chain gauge: 5 ch = 1 in (2.5 cm)
- After Rnd 1: the ring is 1.5 in (3.8 cm) across
- After Rnd 3: the inner petal layer is 2.25 in (5.7 cm) across
- After Rnd 5: the flower is 3.25 in (8.3 cm) across, petal tip to petal tip
- Joining cord: 15 ch = 3 in (7.6 cm) between petal tips
- Hanging loop: 20 ch = 4 in (10.2 cm) around, giving a 2 in (5.1 cm) drop
If your flower is too big, change to a 3.25 mm hook. If it is too small, change to a 3.75 mm hook. If only the chains are off, keep your hook and adjust your chain tension. Loose chains make the strip longer and let the frame sag.
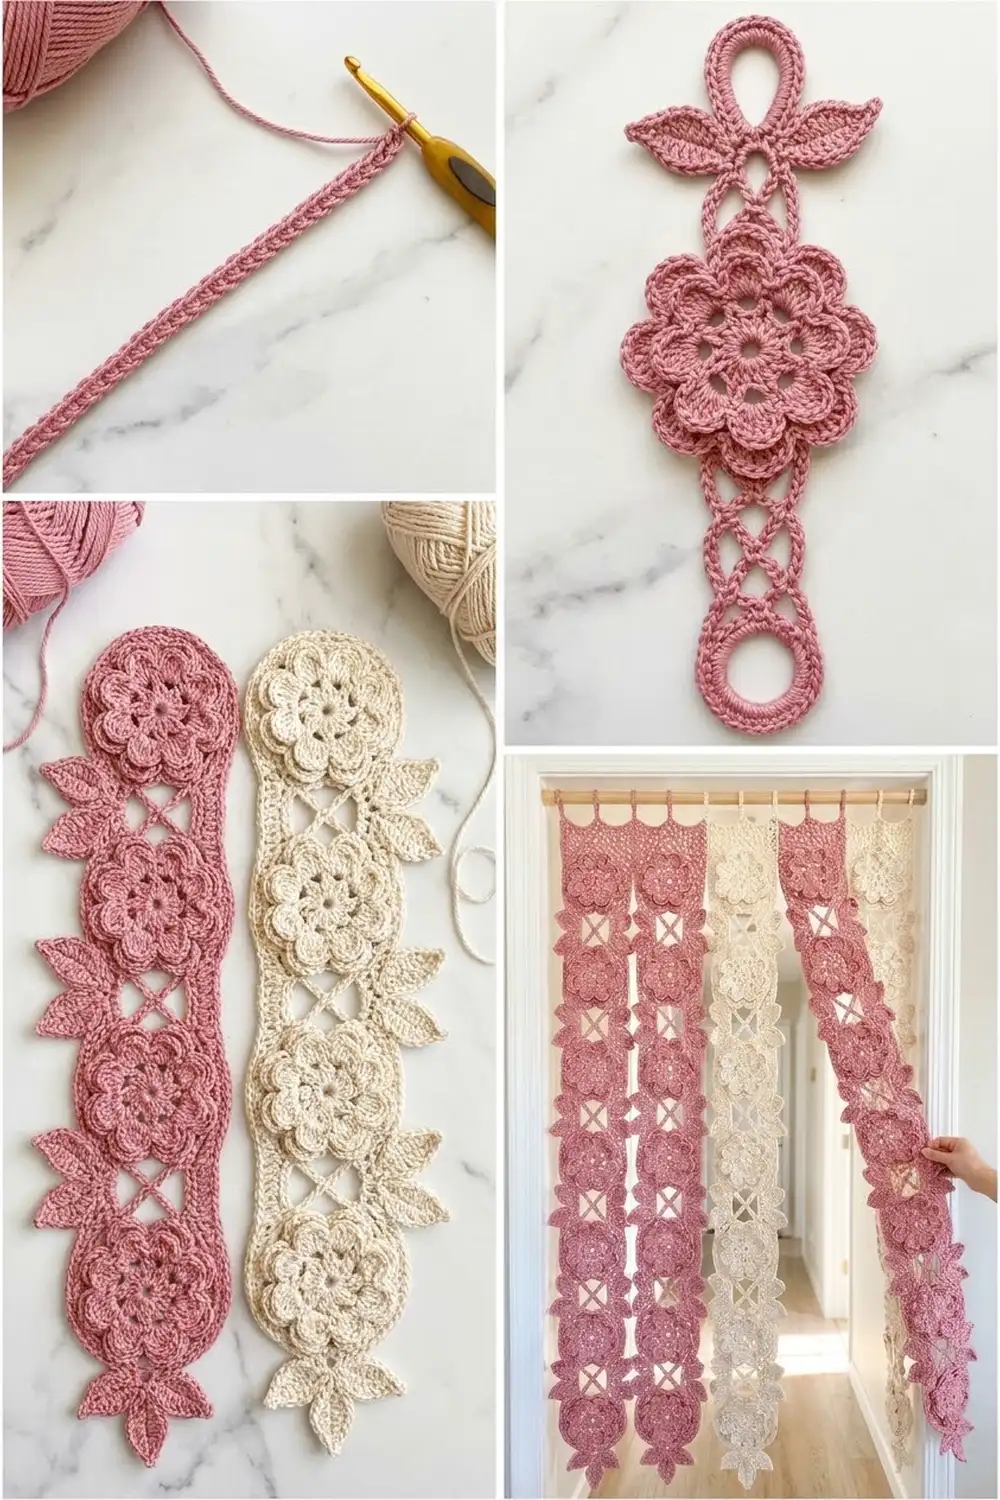
Flower (Make 84)
The petals of Rnd 5 are numbered 1 to 8 in the order you work them. Petal 1 points up and petal 5 points down. With the RS facing, petals 2, 3 and 4 run down the left side, and petals 6, 7 and 8 run up the right side.
Rnd 1: Ch 6 and sl st in the first ch to form a ring. Ch 3 (counts as dc), work 15 dc in the ring, and sl st to the top of the ch-3. (16 dc)
Rnd 2: Ch 1, sc in the same st as the join, ch 3, skip next dc. Sc in next dc, ch 3, skip next dc; repeat from * 6 more times. Sl st to the first sc. (8 sc and 8 ch-3 sps: 32 sts)*
Rnd 3 (inner petals): Sl st in the first ch-3 sp, ch 1. Work (sc, hdc, 3 dc, hdc, sc) in each ch-3 sp around, then sl st to the first sc. (8 petals: 56 sts)
Rnd 4 (back loops): Ch 1. Working behind the Rnd 3 petals, sc around the back post of the first Rnd 2 sc. Ch 5, sc around the back post of the next Rnd 2 sc; repeat from * 6 more times. Ch 5 and sl st to the first sc. (8 sc and 8 ch-5 loops: 48 sts)*
Rnd 5 (outer petals): Sl st in the first ch-5 loop, ch 1. Work (sc, hdc, 2 dc, 3 tr, 2 dc, hdc, sc) in each ch-5 loop around, then sl st to the first sc. Fasten off. (8 petals of 11 sts: 88 sts)
The petal tip is the 2nd of the 3 tr. Every join and every border anchor goes into that tip stitch.
Make All Pieces
Every strip has 12 flowers, all in one color.
- Color A (pink): 48 flowers for strips 1, 3, 5 and 7
- Color B (cream): 36 flowers for strips 2, 4 and 6
Start each strip with Flower 1. For every later flower, work Rnds 1–4 first, then join it to the flower above during Rnd 5.
The layout below is shown from left to right as hung (P = pink, C = cream):
Strip:   1   2   3   4   5   6   7
Row 1:   P   C   P   C   P   C   P
Row 2:   P   C   P   C   P   C   P
 ...     (rows 3-11 repeat)
Row 12:  P   C   P   C   P   C   P
Joining
Flowers are joined top to bottom with a slip-stitch cord made during Rnd 5. Keep every flower RS up.
Flower 1 (with hanging loop):
- Work Rnd 5 up to and including the 2nd tr of petal 1.
- Ch 30.
- Sl st in the 10th ch counted from the tr. This closes a 20-ch hanging loop. The closing sl st is the loop base.
- Sl st back down the cord in each of the remaining 9 cord chains.
- Finish petal 1 and the rest of the round as written.
(Top cord: 10 ch, 2 in / 5.1 cm)
Flowers 2–12:
- Work Rnds 1–4.
- In Rnd 5, work petal 1 up to and including its 2nd tr.
- Ch 15, then sl st in the tip tr of petal 5 on the flower above.
- Sl st in each of the 15 ch, working back toward the new flower.
- Finish petal 1 and the rest of the round as written.
(Cord: 15 ch, 3 in / 7.6 cm)
Stitch logic: Each cord connects one bottom tip (petal 5) to one top tip (petal 1), which keeps the flowers centered in a straight line. The 8th ch is the center of each cord, and border Rnd 1 anchors there.
Tension: Keep the slip stitches on the cord as loose as your chains. Tight slip stitches shorten the cords and make the strip curve.
Size checkpoint: Before the border, the strip is 3.25 in (8.3 cm) wide. Its length adds up as follows:
- Loop drop: 2 in (5.1 cm)
- Top cord: 2 in (5.1 cm)
- 12 flowers: 39 in (99.1 cm)
- 11 cords: 33 in (83.8 cm)
- Total: 76 in (193.0 cm)
Border
Border gauge: 5 sc = 1 in (2.5 cm) over chain lines, the same as the chain gauge. Each chain space gets 1 sc per chain, so the covered lines keep their exact length.
Rnd 1 (lattice): With the RS facing, join the yarn with a sc in the tip of petal 8 on Flower 1.
- Right side, each flower: sc in the tip of petal 8 (the joining sc counts for Flower 1), ch 5, sc in the tip of petal 7, ch 5, sc in the tip of petal 6. (13 sts)
- Right side, each gap: ch 6, sl st in the 8th ch of the cord, ch 6. (13 sts)
- Right side total: 12 x 13 + 11 x 13 = 299 sts
- Bottom of Flower 12: ch 5, sc in the tip of petal 5, ch 5. (11 sts)
- Left side, each flower (Flower 12 up to Flower 1): sc in the tip of petal 4, ch 5, sc in the tip of petal 3, ch 5, sc in the tip of petal 2. (13 sts)
- Left side, each gap: ch 6, sl st in the same center ch of the cord, ch 6. (13 sts)
- Left side total: 299 sts
- Top: ch 14, sl st in the loop base, ch 14, sl st to the first sc. (29 sts)
Rnd 1 total: 299 + 11 + 299 + 29 = 638 sts
The diagonals from both sides meet at each cord center and form the X-shaped lattice. At the top, the two ch-14 lines form the teardrop shape above Flower 1.
Rnd 2 (frame with leaves): Leaves are not included in the stitch totals.
- Start: ch 1, sc in the same petal-8 sc, then work 1 Leaf pointing up and out.
- Right side, each flower: sc in the petal-8 sc (already made for Flower 1), 5 sc in the ch-5 sp, sc in the petal-7 sc, 5 sc in the ch-5 sp, sc in the petal-6 sc. (13 sc)
- Right side, each gap: ch 10, Leaf, ch 10, leaving the lattice lines unworked. (20 ch)
- Right side total: 12 x 13 + 11 x 20 = 376 sts and 11 leaves
- Bottom: 5 sc in the ch-5 sp, sc in the petal-5 sc, 5 sc in the ch-5 sp. (11 sc)
- Left side: mirror the right side. (376 sts and 11 leaves) After the petal-2 sc of Flower 1, work 1 Leaf.
- Top: 14 sc in the ch-14 sp, 1 sc in each of the 20 loop chains, 14 sc in the next ch-14 sp, then sl st to the first sc. (48 sc)
Fasten off.
Rnd 2 total: 376 + 11 + 376 + 48 = 811 sts and 24 leaves
Why the math works: The side petal tips sit 0.475 in (1.2 cm) above the bottom tip and below the top tip. That puts petal 6 of one flower 3.95 in (10.0 cm) from petal 8 of the next (3 + 0.475 + 0.475). The 20-ch span measures 4 in (10.2 cm), so it lies straight without pulling. Working 1 sc per chain adds depth without adding length. The frame adds 0.25 in (0.6 cm) to each side and the bottom. That makes the finished strip 3.75 in (9.5 cm) by 76.25 in (193.7 cm).
Final Blocking
- Weave in all ends along the cords or behind the petals.
- Soak the strip in cool water for 10 minutes. Press out the water in a towel without wringing.
- Pin the strip flat in sections, setting each cord to 3 in (7.6 cm).
- Pin each flower to 3.25 in (8.3 cm). Lift the inner petals forward.
- Pin the frame straight at 3.75 in (9.5 cm) wide. Angle each leaf outward and slightly up.
- Let each section dry completely before moving to the next.
- Hang the dry strip for 24 hours before setting the final rod spacing.
Final Quality-Control Checklist
- [ ] Every flower measures 3.25 in (8.3 cm) across
- [ ] Every flower has 8 inner and 8 outer petals
- [ ] All 11 cords measure 3 in (7.6 cm)
- [ ] Rnd 1 has 638 sts, with 299 on each side
- [ ] Rnd 2 has 811 sts and 24 leaves
- [ ] Each strip measures 3.75 in (9.5 cm) x 76.25 in (193.7 cm)
- [ ] All strips are within 0.5 in (1.3 cm) of each other in length
- [ ] The strips alternate P, C, P, C, P, C, P
Troubleshooting
- Flowers cup: The Rnd 4 loops are too tight. Keep each ch-5 relaxed.
- Inner petals lie flat: Work the Rnd 4 sc around the posts from behind, not through the petals.
- Strip twists: A flower was joined WS up. Undo that cord and join it again.
- Frame ripples: The span chains are too loose. Rework the spans with firmer chains.
- Frame pulls inward: The span chains are too tight. Rework them more loosely and keep the count at 20.
- Strips differ in length: Measure every cord and redo any that are off.
Care
Hand wash in cool water with mild soap, roll the strip in a towel, and dry it flat. Don’t hang the strips while wet, because the weight can stretch the cords.
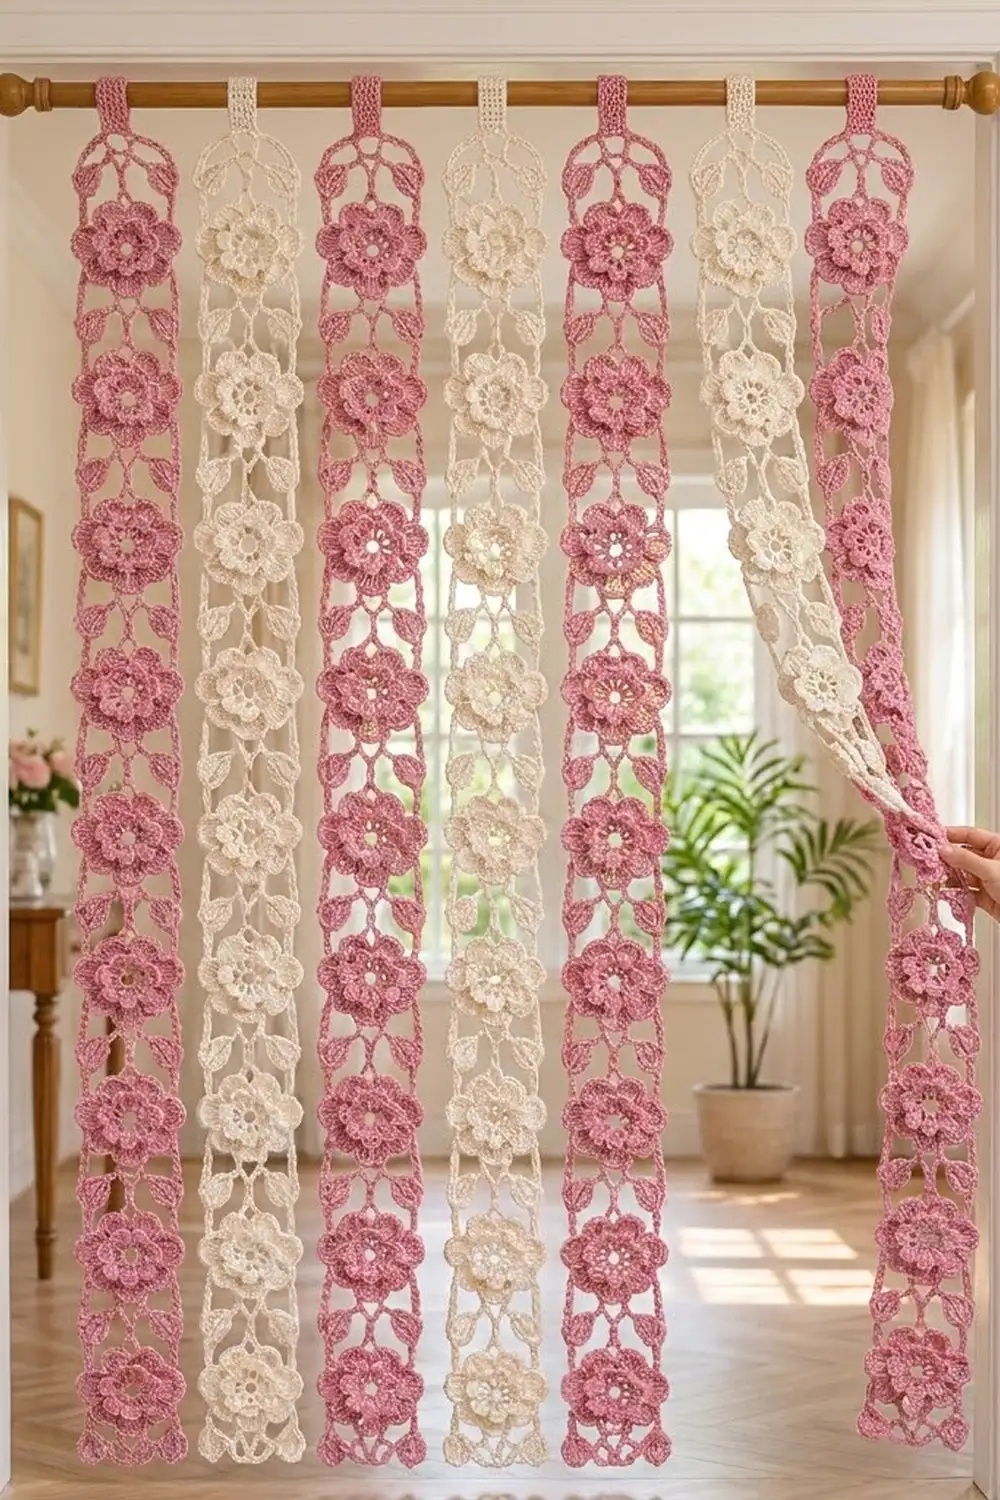
Final Notes
All the curtain measurements build on the flower and the cord:
- One flower is 3.25 in (8.3 cm) and one cord is 3 in (7.6 cm).
- Adding the 2 in (5.1 cm) loop drop and the 2 in (5.1 cm) top cord gives 76 in (193.0 cm) before the border.
- The 0.25 in (0.6 cm) border brings each strip to 76.25 in (193.7 cm) by 3.75 in (9.5 cm).
- Seven strips with 1.25 in (3.2 cm) gaps span 33.75 in (85.7 cm).
If your test flower and cord match the gauge, every later measurement will match too.
Happy crocheting!