

This hanging toilet paper holder is a soft, airy way to store spare rolls. The body is a tall tube of open filet mesh with a wide opening low on the front, so the rolls stay visible and are easy to pull out. Small picots trim the top rim, the opening, and both side folds. A row of fringe finishes the bottom.
The sample uses a single dusty-rose cotton, which suits a light bathroom with marble and brass. Any solid color works. Pale colors show the mesh grid most clearly, and cotton gives a crisp, structured result.
The pattern uses US crochet terms. Flattened, the body measures 8 in (20.3 cm) wide and 20.5 in (52.1 cm) tall. From the top of the ring to the tips of the fringe, the holder measures about 33 in (83.8 cm). The tube holds two standard rolls in the lower section, with extra room above.
How it’s made: you crochet the tube in joined rounds from the bottom up. Part way, you switch to turned rows for 12 rows to form the front opening, then bridge across the top of the opening and go back to rounds. After that you add picot edgings, seam the bottom, knot the fringe, and attach eight cords and a covered ring.
Finished Size and Construction
- Finished size (flattened body): 8 in × 20.5 in (20.3 cm × 52.1 cm)
- Total hanging length: about 33 in (83.8 cm), including ring and fringe
- Skill level: Easy-Intermediate
- Terminology: US crochet terms
- Yarn weight: Worsted (#4), cotton
- Hook: 5 mm (H-8)
- Number of pieces: 1 body tube, plus 8 cords and 1 covered ring attached to it
- Layout: Single vertical tube with the front opening centered on the lower front
- Tube circumference: 16 in (40.6 cm), which is 32 mesh
- Size before border: 8 in × 20 in (20.3 cm × 50.8 cm) flattened
- Border depth: 0.5 in (1.3 cm) at the top rim
- Front opening: 4 in wide × 7.5 in tall (10.2 cm × 19.1 cm)
Materials
Yarn: Use a worsted-weight cotton or cotton blend. Cotton keeps the mesh square and holds up to the weight of the rolls without stretching. Avoid acrylic, which sags over time when it hangs.
- Dusty rose: 200 g, about 380 m (415 yd)
This amount covers the body, the edgings, the ring cover, the cords, and 48 fringe strands. It includes a margin of about 15 percent.
Tools:
– 5 mm (H-8) crochet hook
– 1 plastic or metal ring, 2.5 in (6.4 cm) outer diameter
– 4 locking stitch markers
– Tapestry needle
– Scissors
– Measuring tape
– Rust-proof pins and a blocking mat
– A piece of card about 5 in (12.7 cm) wide, for cutting fringe
Abbreviations (US Terms)
- ch = chain
- sl st = slip stitch
- sc = single crochet
- dc = double crochet
- sp = space
- st(s) = stitch(es)
- RS / WS = right side / wrong side
Mesh: 1 dc plus 1 ch-1 space. Each mesh counts as 2 stitches.
Picot: Ch 3, then sl st into the 3rd ch from the hook.
Beginning ch-4: Counts as 1 dc plus ch 1.
Gauge and Checkpoints
Gauge: 4 mesh = 2 in (5.1 cm), and 8 rows of mesh = 5 in (12.7 cm). Each mesh is 0.5 in (1.3 cm) wide, and each row is 0.625 in (1.6 cm) tall. In single crochet, 4 sc = 1 in (2.5 cm).
Test swatch: Ch 24. For Row 1, dc in the 6th ch from the hook, then ch 1, skip the next ch, dc in the next ch to the end. That gives 10 mesh. For Rows 2–8, ch 4 and turn, dc in the next dc, ch 1 to the last space, then dc in the 3rd ch of the turning ch. The swatch should measure 5 in × 5 in (12.7 cm × 12.7 cm).
- Too big: Go down a hook size, to 4.5 mm.
- Too small: Go up a hook size, to 5.5 mm.
Checkpoints:
– After Rnd 2: The circumference measures 16 in (40.6 cm), or 8 in (20.3 cm) flattened.
– After Row 14: The opening is 7.5 in (19.1 cm) tall, and the work measures 8.75 in (22.2 cm) from the bottom edge.
– After Rnd 32: The flattened body measures 8 in × 20 in (20.3 cm × 50.8 cm).
– After the top border: The body measures 20.5 in (52.1 cm) tall.
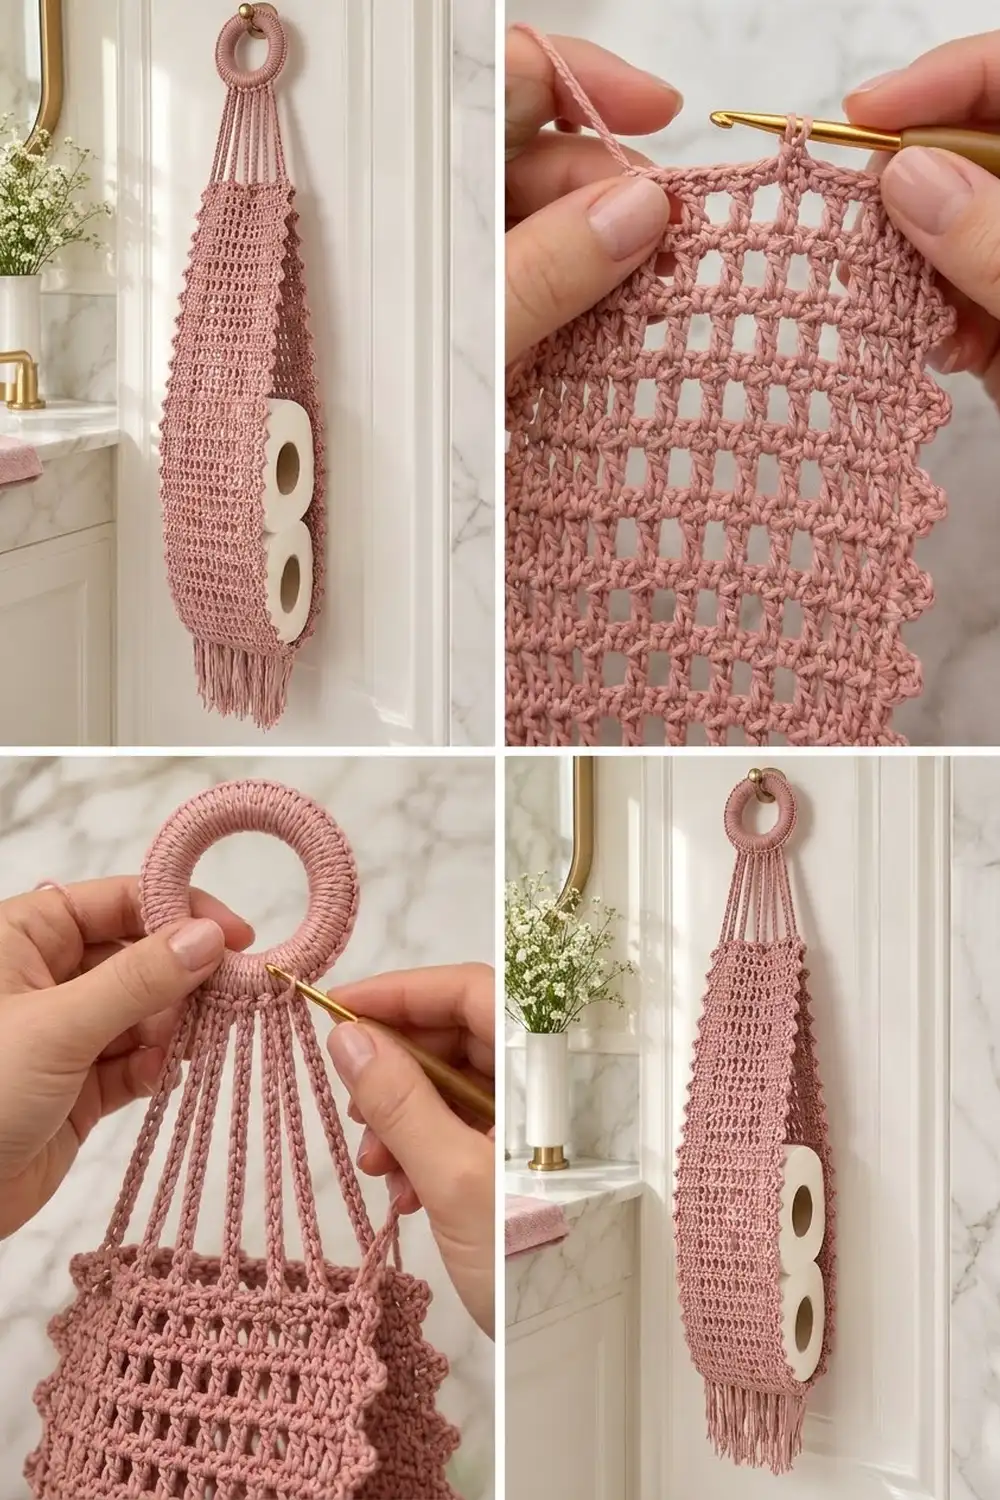
Body
Foundation: Ch 64 and sl st into the first ch to make a ring. Check that the chain isn’t twisted.
Rnd 1: Ch 4 (counts as dc + ch 1), skip the next ch. Dc in the next ch, ch 1, skip the next ch. Work from * 31 times. Sl st into the 3rd ch of the beginning ch-4. (32 dc, 32 ch-1 sps = 64 sts, 32 mesh)
Rnd 2: Ch 4. Dc in the next dc, ch 1. Work from * 31 times. Sl st into the 3rd ch of the beginning ch-4. (32 mesh, 64 sts)
Count the dc in Rnd 2 as dc 1 to dc 32, starting with the beginning ch. Place markers on dc 1, dc 5, dc 21, and dc 25:
– Dc 5 and dc 21 are the side folds.
– Dc 25 and dc 1 are the edges of the front opening.
– The 8 mesh between dc 25 and dc 1 (spaces 25–32) form the bottom of the opening.
Front Opening (worked in turned rows)
Row 3 (RS): Ch 4 (this is dc 1). Dc in the next dc, ch 1. Work from * 23 times. Dc in the next dc (dc 25). Turn. (25 dc, 24 mesh)
Leave dc 26 to dc 32 of Rnd 2 unworked.
Row 4 (WS): Ch 4. Dc in the next dc, ch 1. Work from * 23 times. Dc in the 3rd ch of the turning ch-4. Turn. (25 dc, 24 mesh)
Rows 5–14: Repeat Row 4. You now have 12 rows of opening, and Row 14 ends at the dc 1 edge.
Bridge and Return to Rounds
Rnd 15 (RS): Ch 4. Dc in the next dc, ch 1. Work from * 23 times. Dc in the 3rd ch of the turning ch. You now have 25 dc. Ch 15 across the opening, then sl st into the 3rd ch of the beginning ch-4.
The 15 chains have room for 7 dc with 8 spaces between them, which are exactly the 8 mesh you left open.
Rnd 16: Ch 4. Dc in the next dc, ch 1. Work from * 24 times (up to dc 25). Then work skip the next bridge ch, dc in the next ch, ch 1 7 times. Skip the last bridge ch, then sl st into the 3rd ch of the beginning ch-4. (1 + 24 + 7 = 32 dc, 32 mesh, 64 sts)
Rnds 17–32: Repeat Rnd 2. Do not turn. (32 mesh, 64 sts each round)
The body now has 32 rounds, which at 0.625 in (1.6 cm) each comes to 20 in (50.8 cm). Fasten off.
Border
Border gauge: 4 sc = 1 in (2.5 cm). Every picot edging works in repeats of 4 sc, so each section below holds a count divisible by 4.
Top Rim
Rnd 1: Join the yarn in any dc of Rnd 32 and ch 1. Sc in each dc and in each ch-1 sp around, then sl st into the first sc. (32 dc + 32 sps = 64 sc)
Flattened, that’s 32 sc on the front and 32 on the back.
Rnd 2: Ch 1. Sc in each of the next 3 sc, picot, sc in the next sc. Work from * 16 times, then sl st into the first sc. (64 sc, 16 picots: 8 on the front, 8 on the back)
Fasten off. The two rounds add 0.5 in (1.3 cm).
Front Opening Edging
Rnd 1: With the RS facing, join the yarn at the lower right corner of the opening and ch 1. Work around the opening as follows:
– Bottom edge: 2 sc in each of the 8 ch-1 sps of Rnd 2. (16 sc)
– Each side: 2 sc into each of the 12 row ends. (24 sc per side)
– Top edge: 2 sc around the bridge chain under each of the 8 mesh of Rnd 16. (16 sc)
Sl st into the first sc. (16 + 24 + 16 + 24 = 80 sc)
Rnd 2: Ch 1. Sc in each of the next 3 sc, picot, sc in the next sc. Work from * 20 times, then sl st into the first sc. (80 sc, 20 picots)
That places 4 picots on the bottom, 6 on each side, and 4 on the top.
Why the math works: Each section is a multiple of 4 (16, 24, 16, and 24), so the picot repeat fits every side evenly, with no leftover stitches at the corners.
Side Fold Ridges
Flatten the tube so that dc 5 and dc 21 sit on the fold lines. The opening should be centered on the front, with 4 mesh, or 2 in (5.1 cm), on each side of it.
Starting at the bottom of the dc 5 column, join the yarn around the post of the Rnd 1 dc. Then work (sc, picot, sc) around the post of the dc in this column in each round, moving up one round at a time. For Rnds 3–14, the dc 5 column is part of the turned rows, so work around that dc in the same way. For the ridge’s last stitch, sc into the matching rim sc. Fasten off.
Each ridge has 32 rounds × 2 = 64 sc and 32 picots. Repeat on the dc 21 column.
Bottom Seam and Fringe
Flatten the tube with the folds at dc 5 and dc 21. Working through both layers of the foundation chain together, sc across. (32 sc) The seam measures 8 in (20.3 cm). Fasten off.
Fringe: Wind the yarn around a 5 in (12.7 cm) card and cut along one edge to make 10 in (25.4 cm) strands. You need 48 strands. Fold 3 strands together in half and attach them with a lark’s head knot. Place a bundle in every other seam sc (sc 1, 3, 5, and so on up to 31), for 16 bundles. Trim the fringe to 4 in (10.2 cm).
Ring and Cords
Ring cover: Join the yarn over the ring. Work 48 sc tightly over the ring, then sl st into the first sc. Fasten off and weave in the end.
Cords (make 8): Leaving an 8 in (20.3 cm) tail, ch 29. Sc in the 2nd ch from the hook and in each ch across. (28 sc) Fasten off with an 8 in (20.3 cm) tail. Each cord measures about 7 in (17.8 cm).
Attach: Count the 64 rim sc, then place the cords on rim sc 1, 9, 17, 25, 33, 41, 49, and 57. That puts 4 cords on the front and 4 on the back, 2 in (5.1 cm) apart. Sew one end of each cord to its rim sc.
Gather the other ends and wrap each one around the bottom 2 in (5.1 cm) of the ring, fitting the cords between the ring’s sc. Sew each one firmly in place. Hang the holder and check that all 8 cords are equally taut before you weave in the ends.
Final Blocking
- Soak the holder in cool water for 15 minutes.
- Press the water out gently, then roll the holder in a towel. Don’t wring it.
- Lay it flat with the folds on dc 5 and dc 21.
- Pin it to 8 in × 20.5 in (20.3 cm × 52.1 cm).
- Pin each mesh column straight, using a ruler as a guide.
- Open each picot with a pin tip.
- Comb the fringe straight.
- Let it dry completely, which takes 24 hours.
- Slip in a roll while it’s still slightly damp to shape the curve of the tube.
Final Quality-Control Checklist
- [ ] Every round of the body has 32 mesh.
- [ ] The opening is 8 mesh wide and 12 rows tall.
- [ ] The top rim has 64 sc and 16 picots.
- [ ] The opening edging has 80 sc and 20 picots.
- [ ] Each side ridge has 32 picots.
- [ ] The bottom seam has 32 sc and 16 fringe bundles.
- [ ] All 8 cords are the same length and evenly spaced.
- [ ] The ring cover has no gaps.
- [ ] The flattened body measures 8 in × 20.5 in (20.3 cm × 52.1 cm).
Troubleshooting
Tube is twisted: The foundation chain was twisted when you joined it. Start again and lay the chain flat before you join.
Opening slants: You worked too many or too few dc in Rows 3–14. Each row must have 25 dc.
Bridge round is short: You need exactly 15 bridge chains. Count again before you join.
Rim ruffles: Your border is too loose. Use a 4.5 mm hook for the border rounds.
Holder tilts: The cords are uneven. Re-sew them so each one has the same drop.
Fringe is uneven: Hang the holder and trim the fringe while it hangs.
Care
Hand wash in cool water and lay flat to dry. Reshape the mesh while it’s still damp.
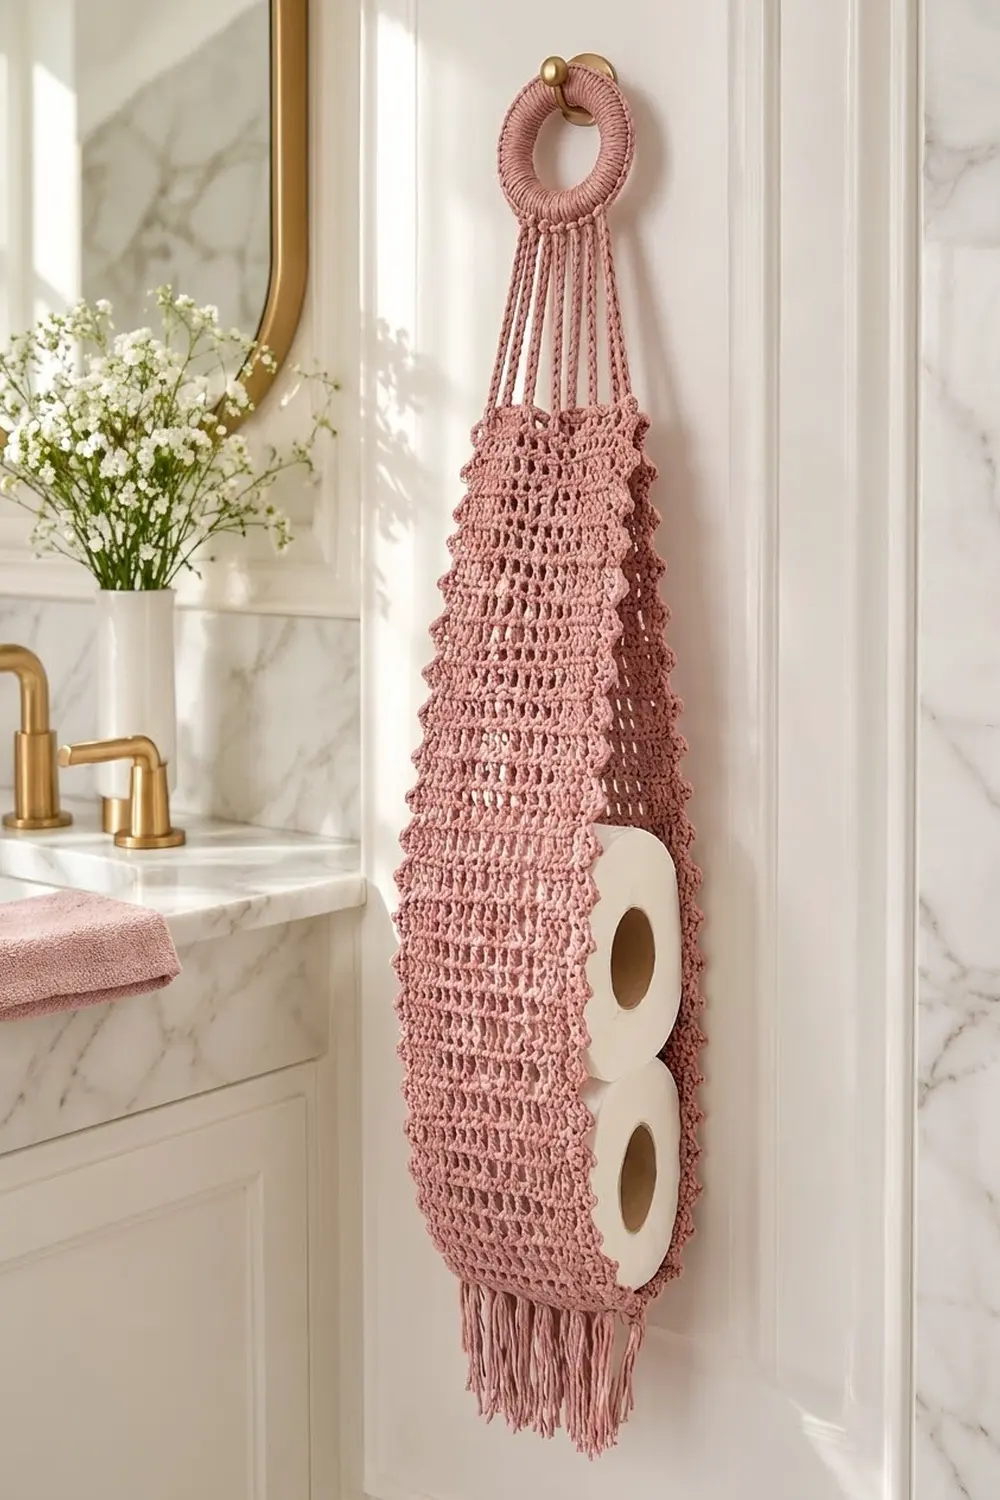
Final Notes
The measurements build on each other, so check them in order:
1. A 5 in (12.7 cm) swatch confirms that each mesh is 0.5 in (1.3 cm).
2. 32 mesh gives a 16 in (40.6 cm) tube.
3. 12 turned rows make a 7.5 in (19.1 cm) opening.
4. 32 rounds bring the body to 20 in (50.8 cm).
5. The top border adds 0.5 in (1.3 cm), for 20.5 in (52.1 cm).
6. Cords, ring, and fringe bring the total hanging length to about 33 in (83.8 cm).
If each checkpoint matches, the finished holder will too.
Happy crocheting!