

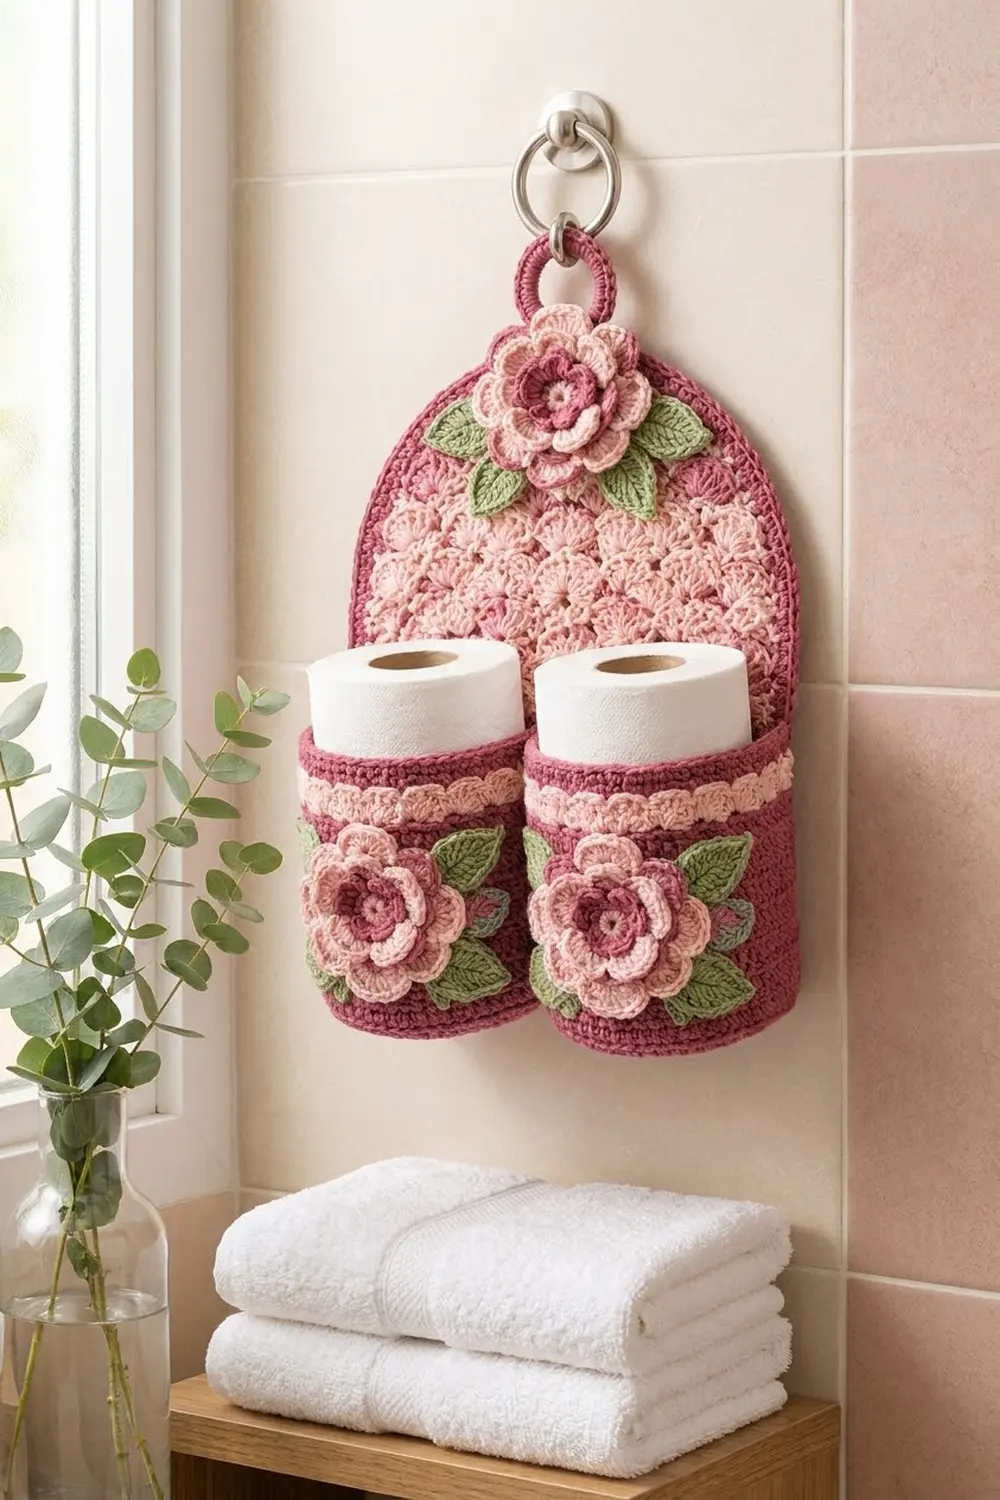
This hanging toilet paper holder pairs an arched shell-stitch back panel with two round cups, each holding one standard roll. A layered rose with sage leaves crowns the arch, and matching roses decorate the cups.
The colors are blush pink shells, a deep raspberry border and raspberry cup walls, and sage green leaves. Each cup has a blush scallop band under a narrow raspberry rim, which repeats the shell texture of the panel.
All instructions use US crochet terms. The finished panel measures about 10.5 in (26.7 cm) wide and 12.8 in (32.5 cm) tall, plus a covered hanging ring. Each cup is about 5.25 in (13.3 cm) across and 4.25 in (10.8 cm) tall.
You work the panel bottom-up in shell rows, shape the arch with stepped decrease rows, and finish it with a 3-round sc border. The cups are worked in the round from a flat base. The roses, leaves, and ring are made separately and sewn on.
Finished Size and Construction
- Finished size: panel 10.5 in x 12.8 in (26.7 x 32.5 cm); the ring adds about 1.75 in (4.4 cm)
- Skill level: Intermediate
- Terminology: US
- Yarn weight: worsted (#4) cotton
- Hook: 4.5 mm (US 7)
- Number of pieces: 1 panel, 2 cups, 3 roses, 12 leaves, 1 covered ring
- Layout: two cups side by side across the bottom of the panel
- Panel body before border: 9.25 in x 11.5 in (23.5 x 29.2 cm)
- Cup size: 5.25 in (13.3 cm) diameter, 4.25 in (10.8 cm) tall
- Border depth: about 0.65 in (1.7 cm), 3 rounds of sc
Materials
Choose a smooth, firm worsted cotton or cotton blend. Cotton holds the cups upright and handles bathroom humidity well.
- Raspberry: 130 g, about 221 m (cups, panel border, ring, rose centers, middle petals)
- Blush pink: 110 g, about 187 m (panel body, scallop bands, inner and outer petals)
- Sage green: 25 g, about 43 m (leaves)
These amounts assume yarn of about 170 m per 100 g and include a margin of roughly 15 percent.
Tools:
- 4.5 mm (US 7) hook
- 1.5 in (3.8 cm) metal or plastic ring
- Tapestry needle
- Locking stitch markers
- Rust-proof pins and a blocking mat
- Wall hook for hanging
Abbreviations (US Terms)
- ch – chain
- sl st – slip stitch
- sc – single crochet
- hdc – half double crochet
- dc – double crochet
- inc – 2 sc in the same stitch
- BLO – back loop only
- MR – magic ring
- st(s) – stitch(es)
- sp – space
- rep – repeat
Shell: 5 dc in the same stitch.
Back-post anchor sc: insert the hook from back to front to back around the post of the stated stitch, then complete an sc. Use it to build each petal layer behind the one before.
Gauge and Checkpoints
- Sc gauge: 16 sc x 18 rounds = 4 in (10.2 cm)
- Shell gauge: 4 shells (24 sts) = 6 in (15.2 cm); 4 rows = 2 in (5.1 cm)
Make one cup first. It makes the best gauge test, because a toilet roll shows you right away whether the fit is right.
Checkpoints:
- Cup base after Round 11: 5.25 in (13.3 cm) across
- Cup wall after Round 24: about 2.9 in (7.4 cm) above the base ridge
- Panel after Row 19: 9.25 in x 9.5 in (23.5 x 24.1 cm)
- Panel after Row 23: 9.25 in x 11.5 in (23.5 x 29.2 cm)
- Bordered panel: 10.5 in x 12.8 in (26.7 x 32.5 cm)
If a piece is too big, go down half a hook size. If it is too small, go up half a size. A roll should drop into the cup with a little ease all around.
Cups (make 2)
Use raspberry. Work the base in continuous rounds. Join each wall round so the color changes stay neat.
Base
- Rnd 1: 6 sc in MR. (6)
- Rnd 2: inc in each st. (12)
- Rnd 3: (sc, inc) x 6. (18)
- Rnd 4: (sc in next 2, inc) x 6. (24)
- Rnd 5: (sc in next 3, inc) x 6. (30)
- Rnd 6: (sc in next 4, inc) x 6. (36)
- Rnd 7: (sc in next 5, inc) x 6. (42)
- Rnd 8: (sc in next 6, inc) x 6. (48)
- Rnd 9: (sc in next 7, inc) x 6. (54)
- Rnd 10: (sc in next 8, inc) x 6. (60)
- Rnd 11: (sc in next 9, inc) x 6. (66)
Sl st to the first sc. Check: the base measures 5.25 in (13.3 cm) across.
Walls
- Rnd 12: ch 1, sc in BLO of each st, join. (66) This round forms the base ridge.
- Rnds 13–24: ch 1, sc in each st, join. (66) Change to blush in the last join.
Check: the wall is about 2.9 in (7.4 cm) tall.
Scallop band and rim
- Rnd 25 (blush): ch 1, sc in each st, join. (66)
- Rnd 26 (blush): ch 1, sc in first st, skip 2, shell in next, skip 2, sc in next, skip 2, shell in next, skip 2 x 10, join to first sc. (66 = 11 sc + 55 dc, worked over 66 existing sts, 0 added) Fasten off.
- Rnd 27 (raspberry): join in first sc, ch 3 (counts as dc), sc in next 5 dc, dc in next sc, sc in next 5 dc x 10, join. (66 = 11 dc + 55 sc, 1 per existing st, 0 added)
- Rnd 28: ch 1, sc in each st, join. (66) Fasten off.
The dc in Round 27 fills each dip between shells, so the rim comes out level. Check: the cup is 4.25 in (10.8 cm) tall and 5.25 in (13.3 cm) across.
Back Panel
Use blush. The pattern uses a multiple of 6 sts plus 1.
Foundation: ch 38.
- Row 1 (RS): sc in 2nd ch from hook, skip 2 ch, shell in next ch, skip 2 ch, sc in next ch x 6, turn. (37 = 7 sc + 30 dc)
- Row 2: ch 3 (counts as dc), 2 dc in first sc, skip 2 dc, sc in center dc, skip 2 dc, shell in next sc, skip 2 dc, sc in center dc x 5, skip 2 dc, 3 dc in last sc, turn. (37 = 31 dc + 6 sc)
- Row 3: ch 1, sc in first dc, skip 2 dc, shell in next sc, skip 2 dc, sc in center dc x 5, skip 2 dc, shell in last sc, skip 2 dc, sc in top of ch-3, turn. (6 shells; 37)
- Rows 4–19: rep Rows 2–3 eight more times. (37)
Check: 9.25 in x 9.5 in (23.5 x 24.1 cm).
Arch shaping
Each of these rows drops half a shell (3 sts) at each end, so the top edge steps inward.
- Row 20: sl st in first sc and next 2 dc, ch 1, sc in next dc (center of first shell), shell in next sc, sc in center dc of next shell x 5, turn. Leave the last 3 sts unworked. (5 shells; 31)
- Row 21: work as Row 20 with the repeat x 4. (4 shells; 25)
- Row 22: work as Row 20 with the repeat x 3. (3 shells; 19)
- Row 23: work as Row 20 with the repeat x 2. (2 shells; 13) Fasten off.
Check: the panel is 11.5 in (29.2 cm) tall at the center.
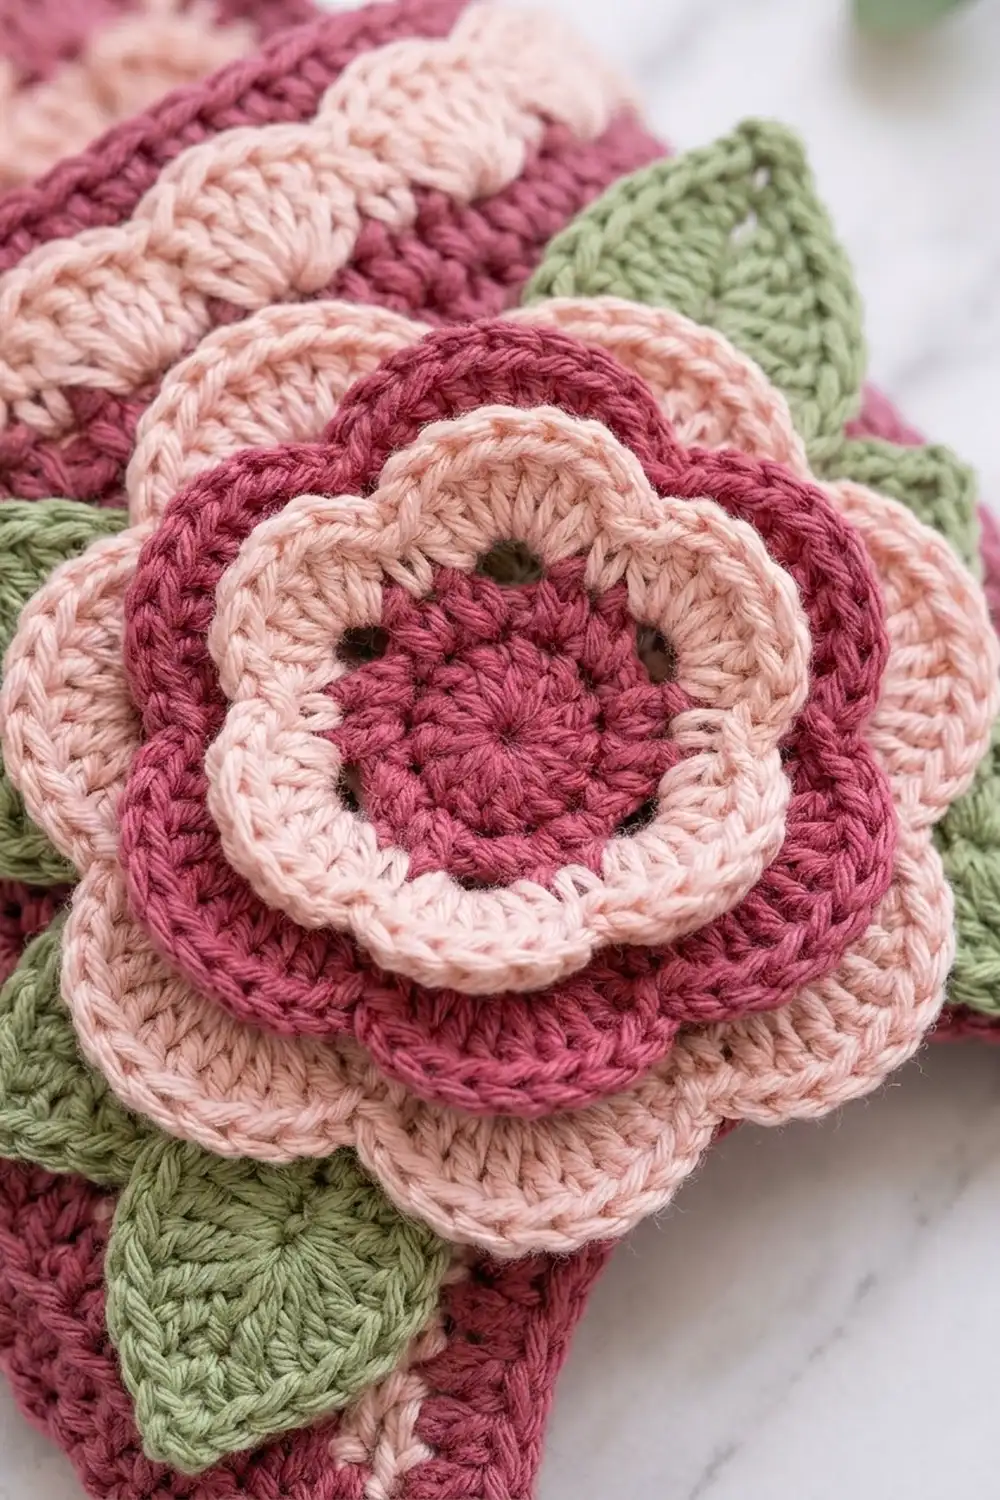
Roses (make 3)
- Rnd 1 (raspberry): 10 sc in MR, join. (10) Fasten off.
- Rnd 2 (blush): join in any st, sc in next st, ch 3, skip next st x 5, join. (5 ch-3 sps)
- Rnd 3: in each ch-3 sp work (sc, hdc, 3 dc, hdc, sc). (5 petals; 35) Fasten off.
- Rnd 4 (raspberry): working behind the petals, make a back-post anchor sc around any Rnd 2 sc, ch 5, back-post anchor sc around next Rnd 2 sc x 4, ch 5, join. (5 loops)
- Rnd 5: in each ch-5 loop work (sc, hdc, 5 dc, hdc, sc). (5 petals; 45) Fasten off.
- Rnd 6 (blush): working behind, make a back-post anchor sc around any Rnd 4 sc, ch 7, back-post anchor sc around next Rnd 4 sc x 4, ch 7, join. (5 loops)
- Rnd 7: in each ch-7 loop work (sc, hdc, 7 dc, hdc, sc). (5 petals; 55) Fasten off.
Check: about 3.5 in (8.9 cm) across, with three stacked layers of petals.
Leaves (make 12)
Use sage. Ch 9. Starting in the 2nd ch from hook: sl st, sc, hdc, dc, dc, hdc, sc. Work (sc, ch 2, sc) in the last ch for the tip. Then, along the other side of the chain: sc, hdc, dc, dc, hdc, sc, sl st. Fasten off. Each leaf is about 2 in (5.1 cm) long.
Hanging Ring
Use raspberry. Work 30 sc tightly around the 1.5 in (3.8 cm) ring so no ring shows through. Join and leave a 12 in (30.5 cm) tail.
Make All Pieces
- Raspberry: 2 cup bodies, the panel border, 1 ring cover, and Rounds 1, 4, and 5 of all 3 roses
- Blush: 1 panel body, 2 scallop bands, and Rounds 2, 3, 6, and 7 of all 3 roses
- Sage: 12 leaves (4 per rose)
Layout:
            [ RING ]
      [ ROSE + 4 LEAVES ]
     /                   \
    |  blush shell arch   |
    |                     |
    | [CUP+ROSE][CUP+ROSE]|
    |_____________________|
Joining
Finish the panel border first (see Border), then join the pieces.
Cups to panel. Mark the 11 sts of Round 28 directly opposite where each cup’s rose will go; these are the back sts. Place the cups on the RS of the panel with the base ridge (Round 12) level with the bottom edge of the border. Center each cup 2.625 in (6.7 cm) in from its side edge, so the two cups touch in the middle.
With raspberry, whipstitch two vertical seams on each cup, one at each edge of the 11 marked sts. Work one stitch per cup round from Round 12 to Round 28 (17 stitches per seam), catching the panel fabric directly behind. Then whipstitch the 11 marked rim sts to the panel. Finally, sew together the 4 rim sts where the two cups touch.
Keep your tension snug but relaxed. Pulling too hard puckers the shells and tips the cups forward.
Roses. Sew one rose to the front of each cup, centered between Rounds 14 and 24. Tuck 2 leaves under the outer petals on each side. Sew the third rose at the top center of the arch, about 1.75 in (4.4 cm) below the edge, with 2 leaves on each side.
Ring. Use the tail to sew 5 sc of the ring cover to sts 6–10 of the 15-st top section of Border Round 3.
Size checkpoint: the assembled width is 10.5 in (26.7 cm), and about 8.5 in (21.6 cm) of panel shows above the cups.
Border
The border is 3 rounds of raspberry sc, worked at 16 sc = 4 in (10.2 cm). The bottom corner stitches are counted in the bottom section only.
Rnd 1: with RS facing, join in the first foundation ch.
- Bottom: 3 sc in first ch, sc in next 35 ch, 3 sc in last ch. (41)
- Left side: 2 sc in each row end of Rows 1–19. (38)
- Left arch: sc in each of the 3 ledge sts, 2 sc in next row end x 4. (20)
- Top: sc in each st of Row 23. (13)
- Right arch: 2 sc in next row end, sc in each of the 3 ledge sts x 4. (20)
- Right side: 2 sc in each row end of Rows 19–1. (38)
- Join. Total: 170
Rnd 2: ch 1, sc in each st, except: work 3 sc in the center st of each bottom corner, 2 sc in the 10th st of each arch section, and 2 sc in the 7th st of the top section. Join.
- Bottom 45, sides 38 each, arches 21 each, top 14. Total: 177
Rnd 3: work as Rnd 2, with 3 sc in each corner center, 2 sc in the 11th st of each arch section, and 2 sc in the 8th st of the top section. Fasten off.
- Bottom 49, sides 38 each, arches 22 each, top 15. Total: 184
Why the math works: 37 foundation sts at 4 sts per in give 9.25 in (23.5 cm). Each shell row is 0.5 in (1.3 cm) tall, so 2 sc per row end matches the sc gauge and the sides lie flat. The straight sides need no increases. Each bottom corner gains 2 sts per round to turn 90 degrees. The arch gains 3 sts per round because each outer round of a curve is longer than the one inside it.
Final Blocking
- Weave in all ends.
- Soak the panel in cool water for 10 minutes, then roll it in a towel to press out the water.
- Pin the panel RS up to 10.5 in x 12.8 in (26.7 x 32.5 cm). Ease the stepped top into a smooth half-circle and open the shells evenly.
- Mist the cups and slip a jar wrapped in plastic into each one so they dry round.
- Mist the roses, cup the petals upward, and dry them face up.
- Let everything dry completely before you assemble the holder.
Final Quality-Control Checklist
- The panel measures 10.5 in x 12.8 in (26.7 x 32.5 cm) and the arch is smooth
- Border rounds counted 170, 177, and 184
- The cups have 66 sts per round and level rims
- The rolls drop in easily and sit slightly above the rims
- The cups sit level with the bottom edge and touch in the center
- The roses are centered and the leaves are symmetrical
- The ring is secure and the panel hangs straight
Troubleshooting
- Cup flares at the top: work Round 26 with a hook half a size smaller.
- Base ruffles: go down half a hook size, or stagger the increases.
- Panel sides wave: check that you worked exactly 2 sc per row end.
- Arch looks pointed: check the arch increases, then block the top into a firmer curve.
- Panel tilts on the wall: re-center the ring over sts 6–10 of the top section.
- Roll doesn’t fit: add a base round of (sc in next 10, inc) x 6 for 72 sts and keep 72 sts in the walls. The shell band then divides into 12 repeats.
Care
Hand wash in cool water with mild soap. Reshape and lay flat to dry, and don’t tumble dry.
Final Notes
Here is the full measurement chain. Each cup base reaches 66 sts and 5.25 in (13.3 cm), and the walls rise to 4.25 in (10.8 cm). The panel body is 37 sts, or 9.25 in (23.5 cm), wide and 23 rows, or 11.5 in (29.2 cm), tall. The border rounds of 170, 177, and 184 sts bring the panel to 10.5 in x 12.8 in (26.7 x 32.5 cm), which is exactly the width of two cups side by side. If every checkpoint matches, the holder will hang straight and hold both rolls securely.
Happy crocheting!